When you write a blog, you must ensure you use keywords to help others (who don’t know about your blog) find you in search engines. Most of my crafts fit neatly into a keyword; todays craft is a little different however. Todays craft contains just about every last crafting medium in my studio, so the question became, which keyword should I give it? After much deliberation, I went with a keyword chain – more than one key word, it’s ok, I’ve got this – so what did I choose? Fabric collage. Yes, a beautiful fabric collage best describes todays craft. A fabric collage including craft wire… and stickers of course… and paper too… oh and there might be paint, yes a little watercolour paint as well. Do come and see what I have been up to…
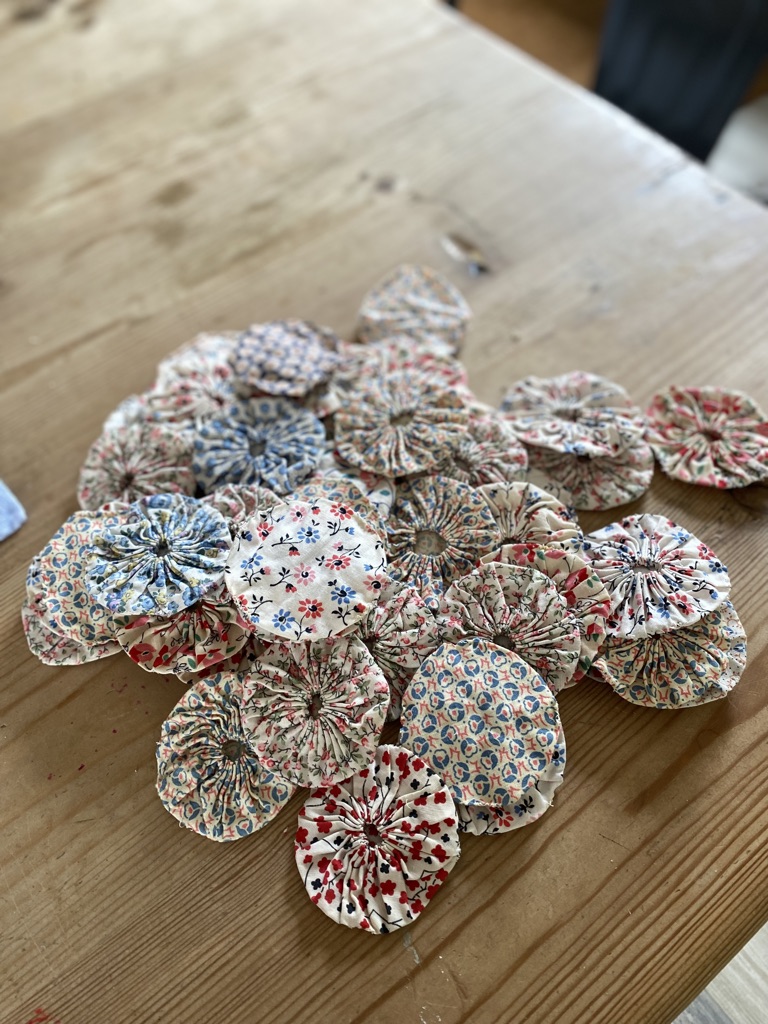
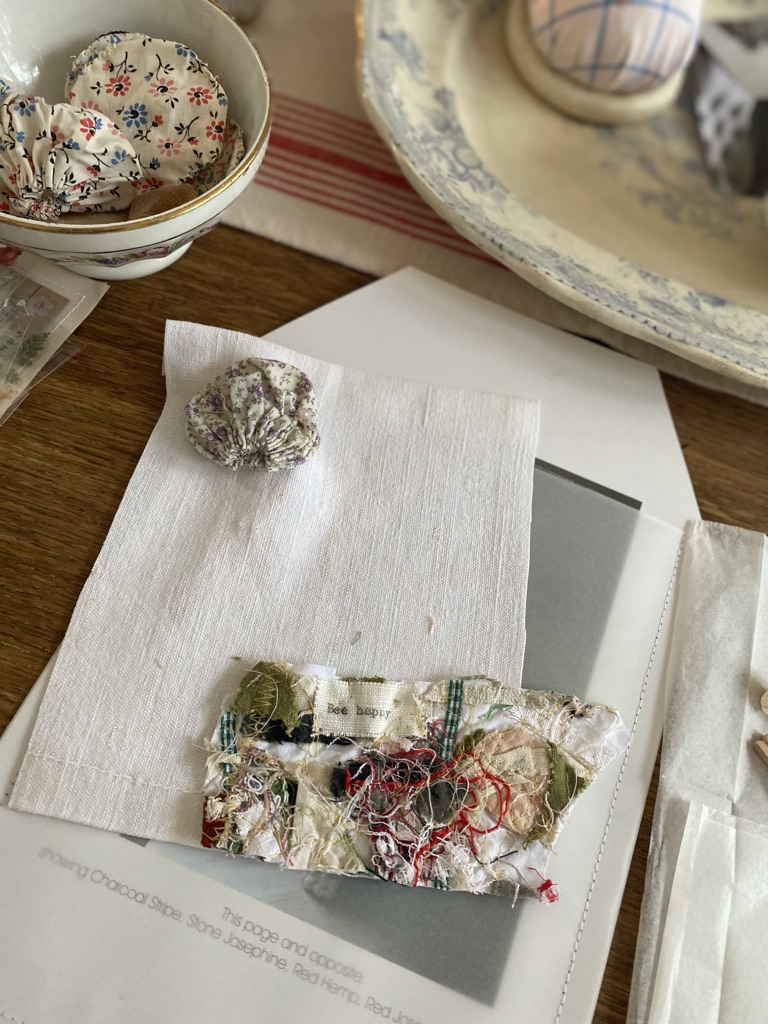
I called this project Up Up and Away when I dreamed it way back last year. I had just bought myself a beautiful batch of vintage Suffolk Puffs or fabric yo-yo’s as you might know them from lovely Lisa @lovely_hudson_sale – say that really slowly – and what to do with them all, was my wonderful dilemma.
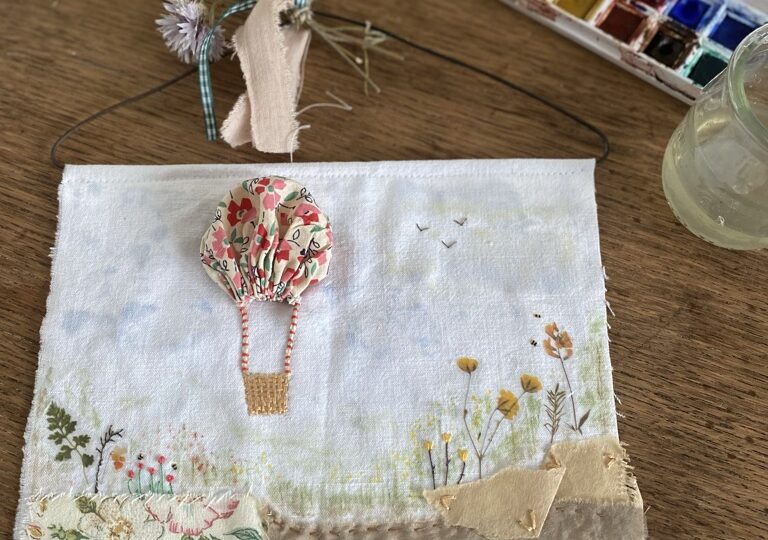
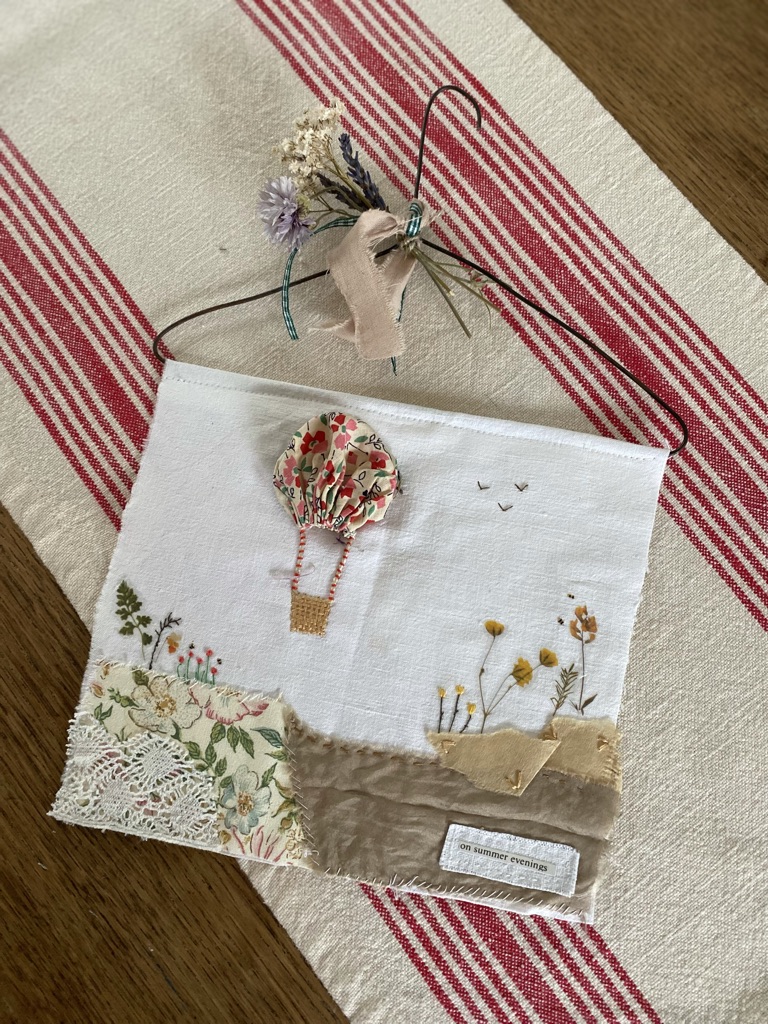
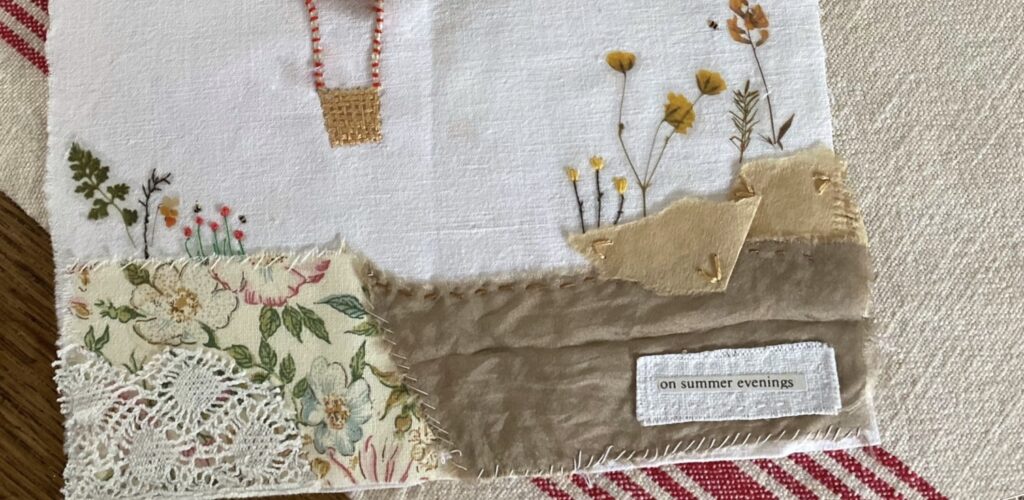
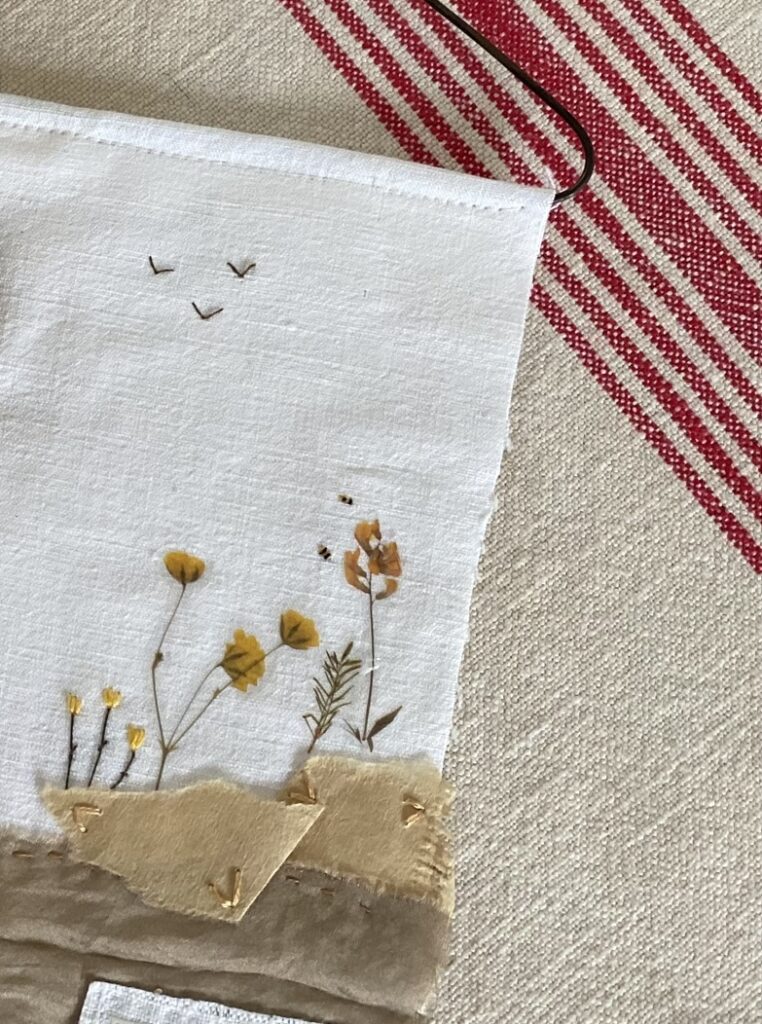
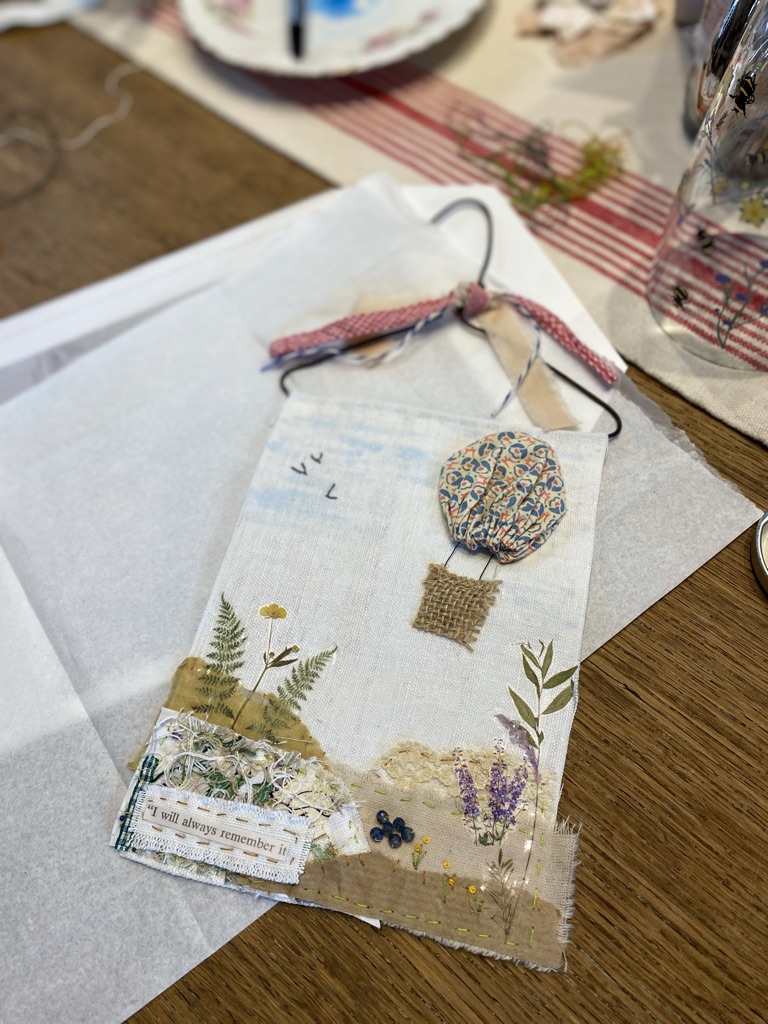
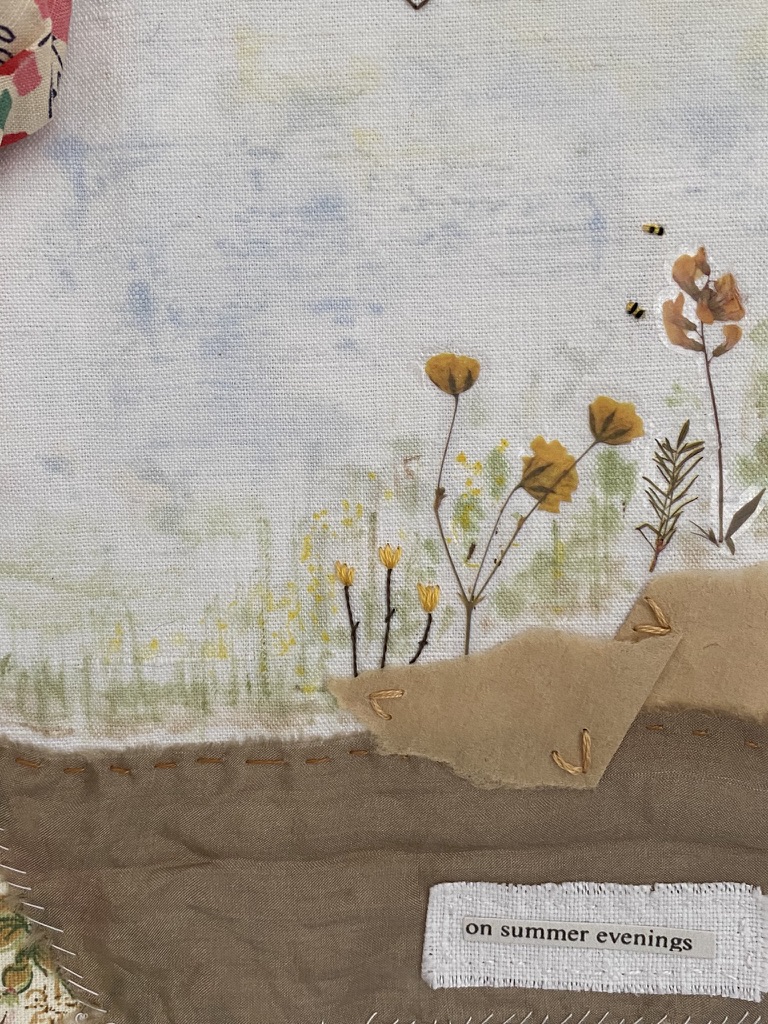
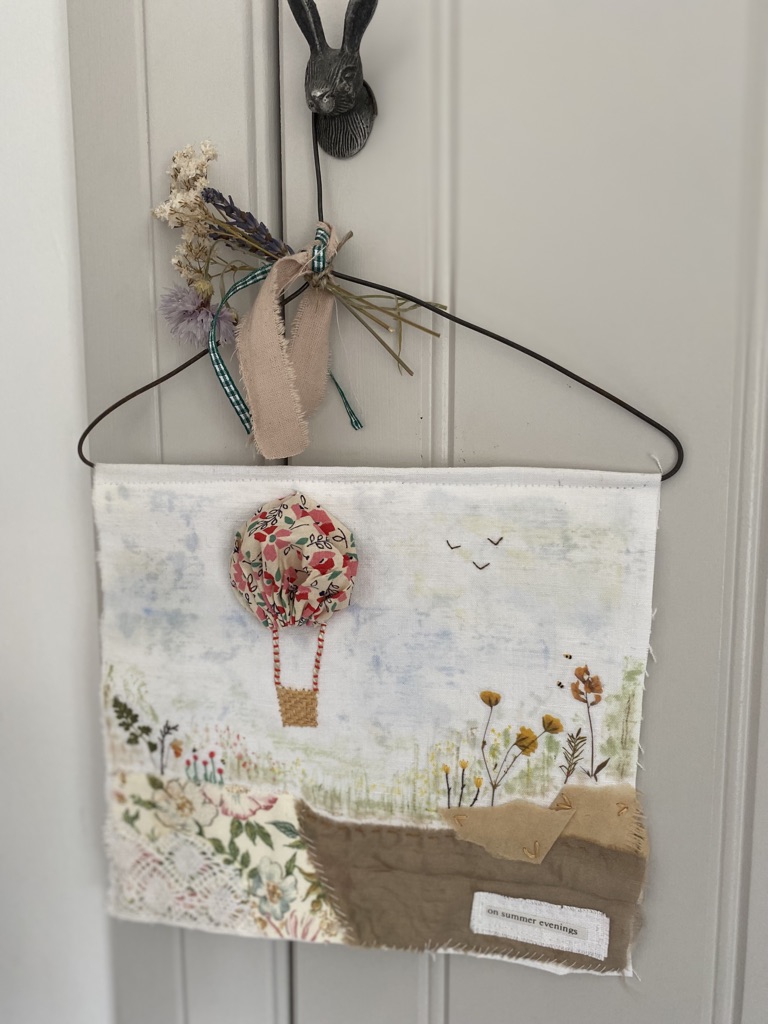
You’ll recall this project here was my first foray of experimentation with my Suffolk Puffs and then when I looked a little closer, I of course could see the makings of a sweet little hot air balloon flying high through the English countryside. In my imagination this hot air balloon was floating softly through the late summer evening complete with charming woven basket, over the green, green grass of home. And the tiny world beneath was oh so quiet and still, save for the buzz of a few tiny bumble bees and the gentle swaying of the late summer wildflowers. All I had to do now of course, was recreate my imagination onto that blank piece of linen sitting before me. This became my finished piece, or so I thought at the time…
Today’s tutorial is less directional and prescriptive than usual. I’ll show you how I carried out a few of the processes to get me to this stage however the success of your fabric collage will be in your own minds eye. Your piece is in your imagination, not mine. So, just a little bit of process from me for today and a lot of imagination and creativity from you.
Creating your basket and ropes
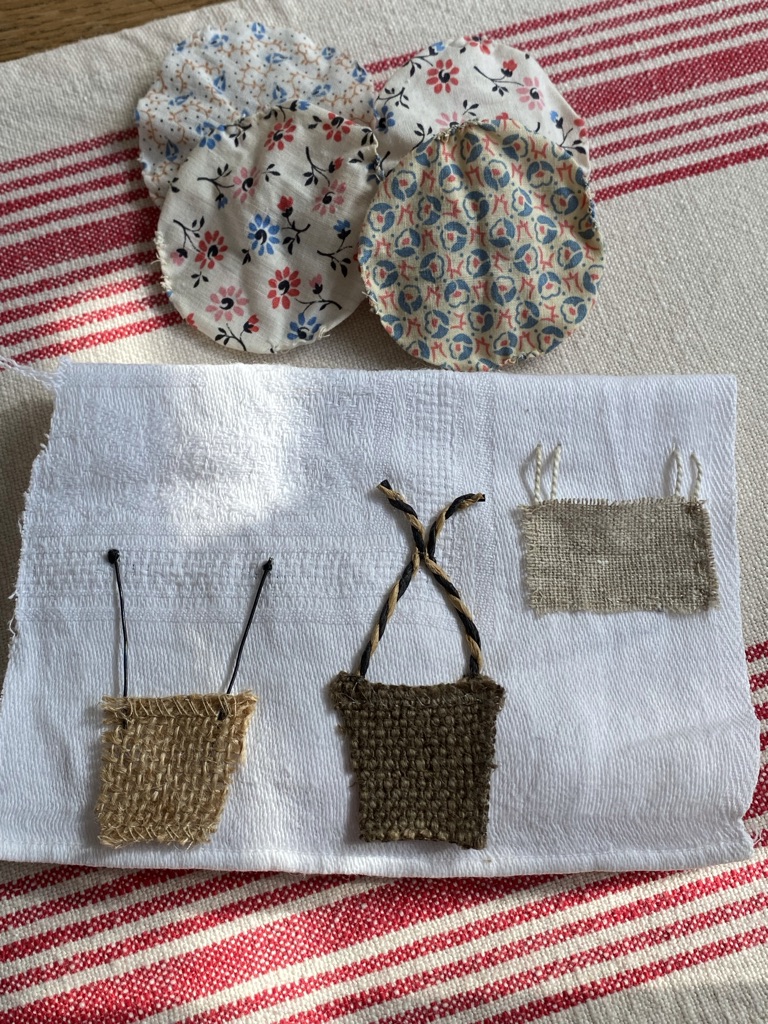
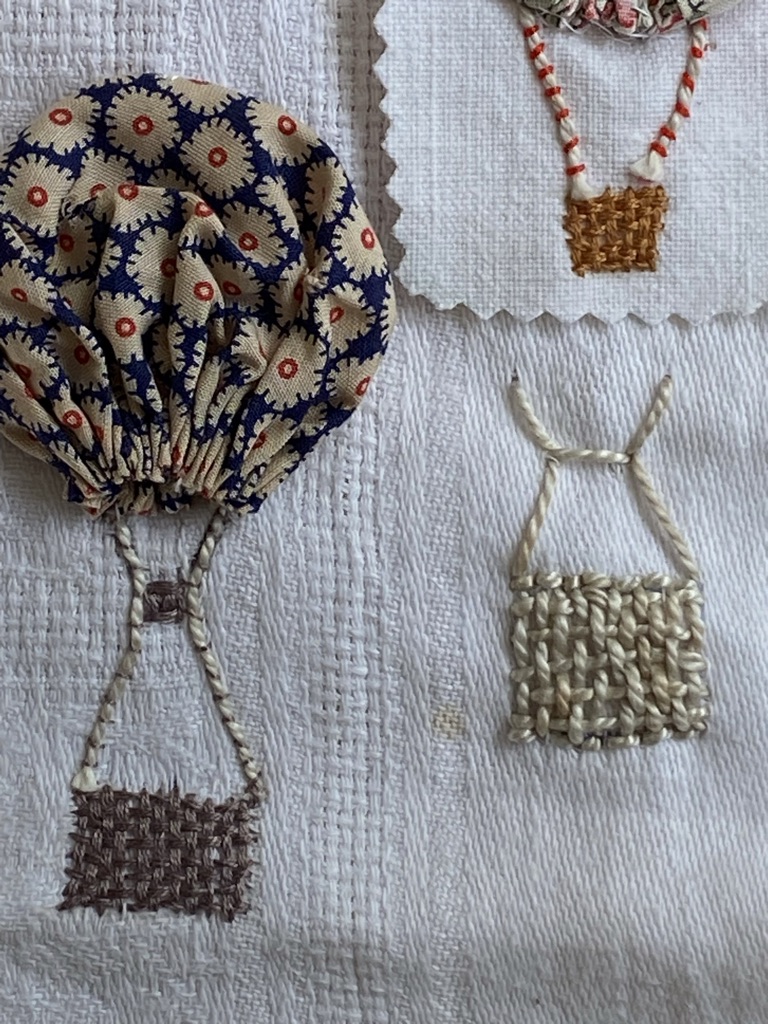
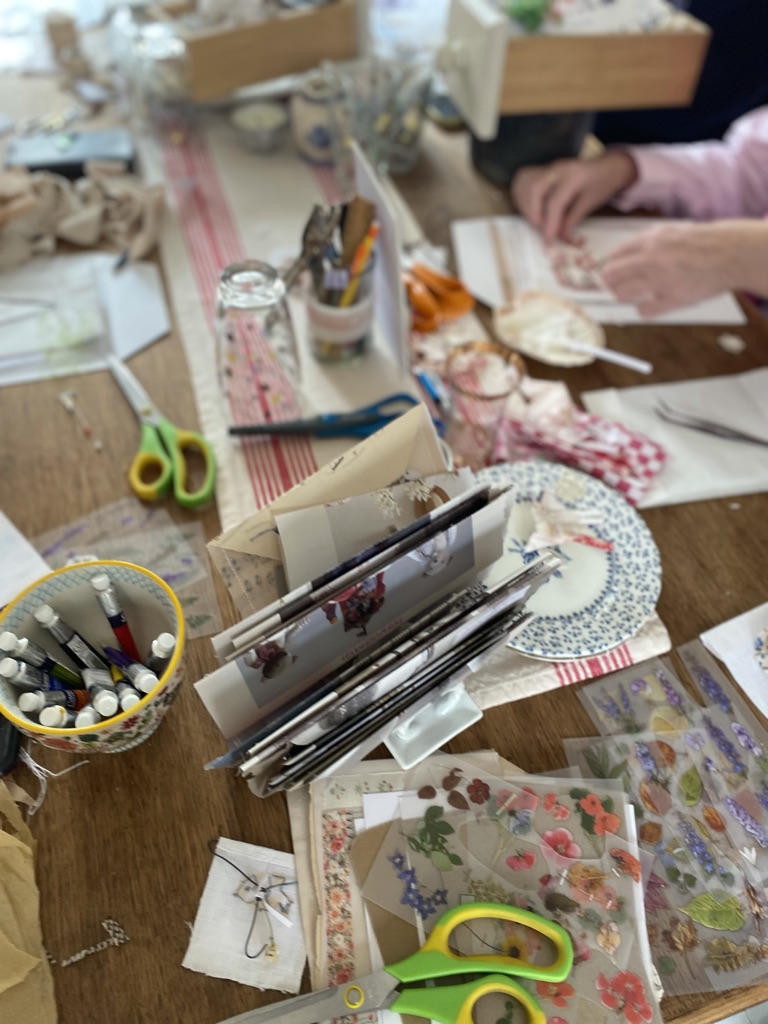
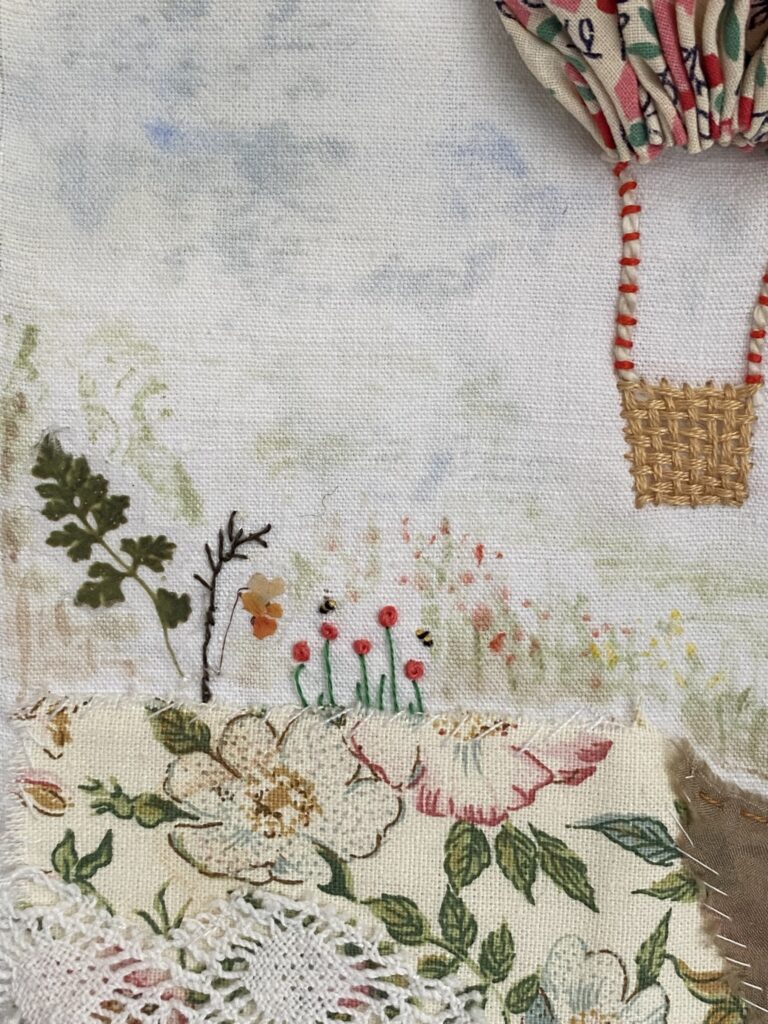
I experimented with lots of ideas for baskets, using the pages of Pinterest to help me. I was reluctant to spend lots of time embroidering this piece, it was for me to be a mix of mediums. Mostly I found embroidered representations for the basket in my research though. A variety of basket weave type stitches were of course favoured and since I am not the expert here, I would encourage you to reach out to other fabulous creatives on Instagram and Pinterest for your preferred style of teaching this stitch. Hessian ribbon worked well as did, scrap felt and linen and other snippets of fabric from the scrap box. I noticed altering the shape of the basket had an interesting outcome too.
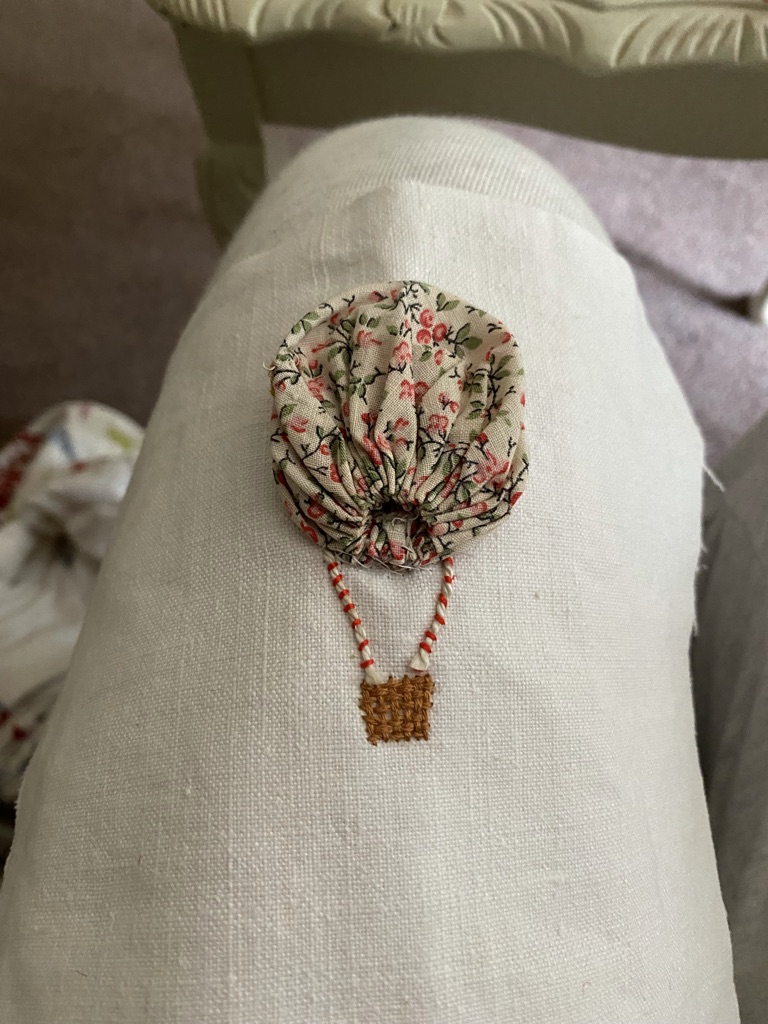
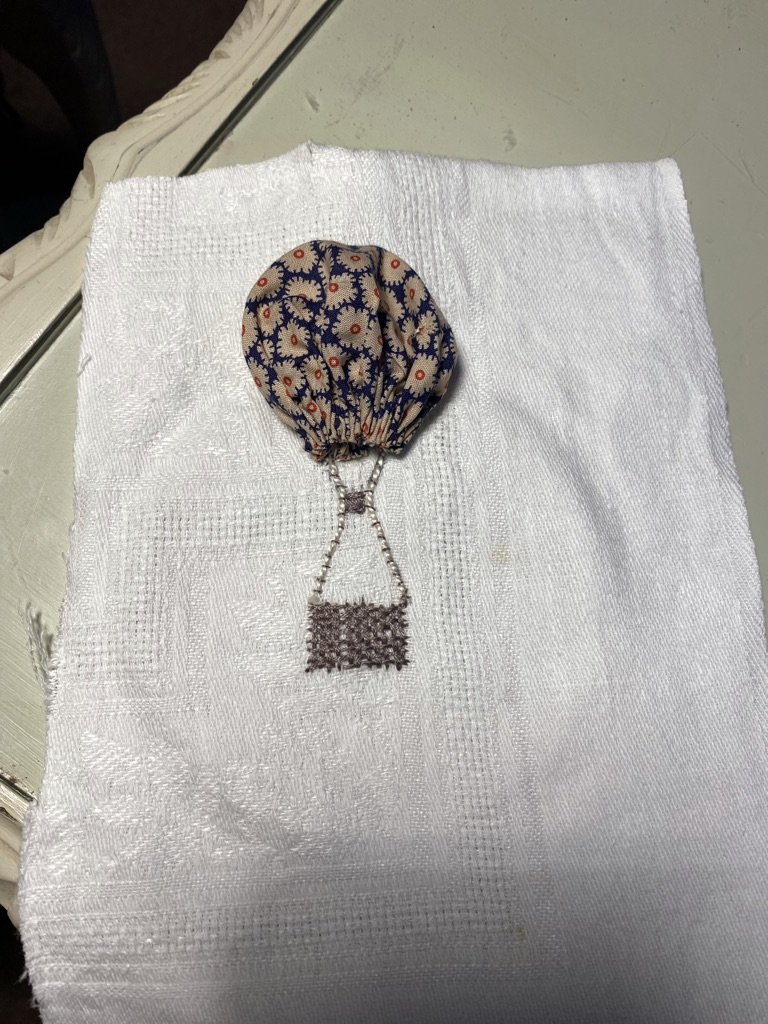
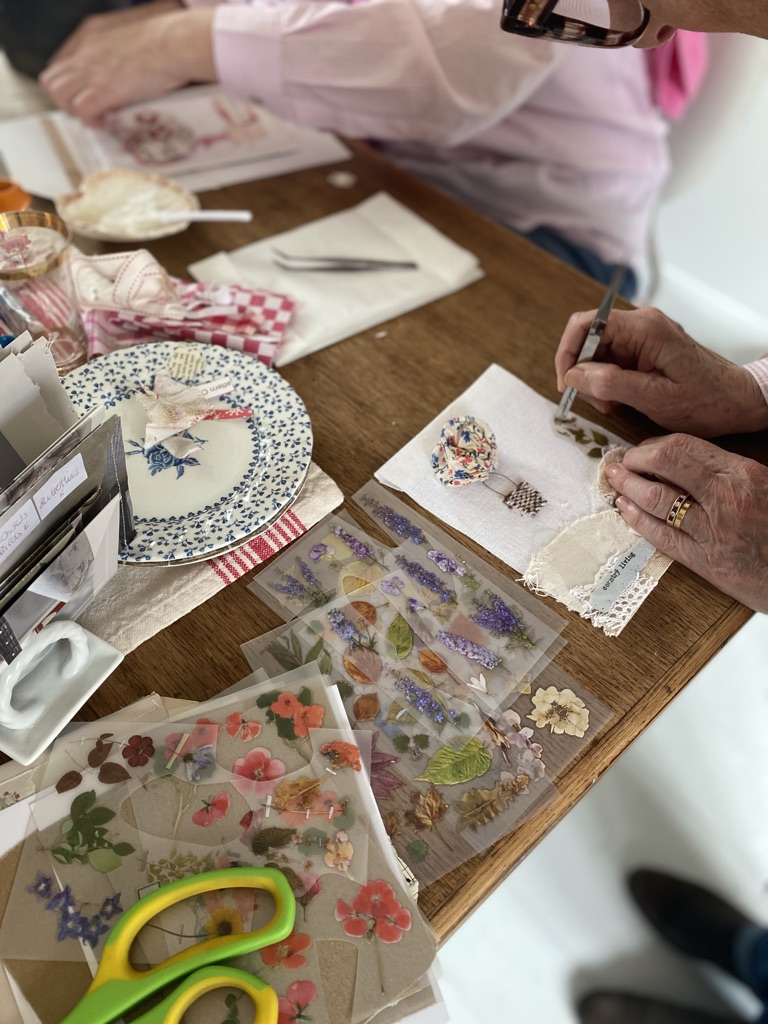
I also played around with ideas for the ropes using different strings and embroidery thread. Couching stitch which is extremely easy and effective gave the look of twisted bakers twine and crafting wire worked well too. For the craft wire – shown below in photo three – I bent all four ends over ever-so slightly and hooked them into the fabric hiding and securing with a black thread.
Paper and Fabric for your collage
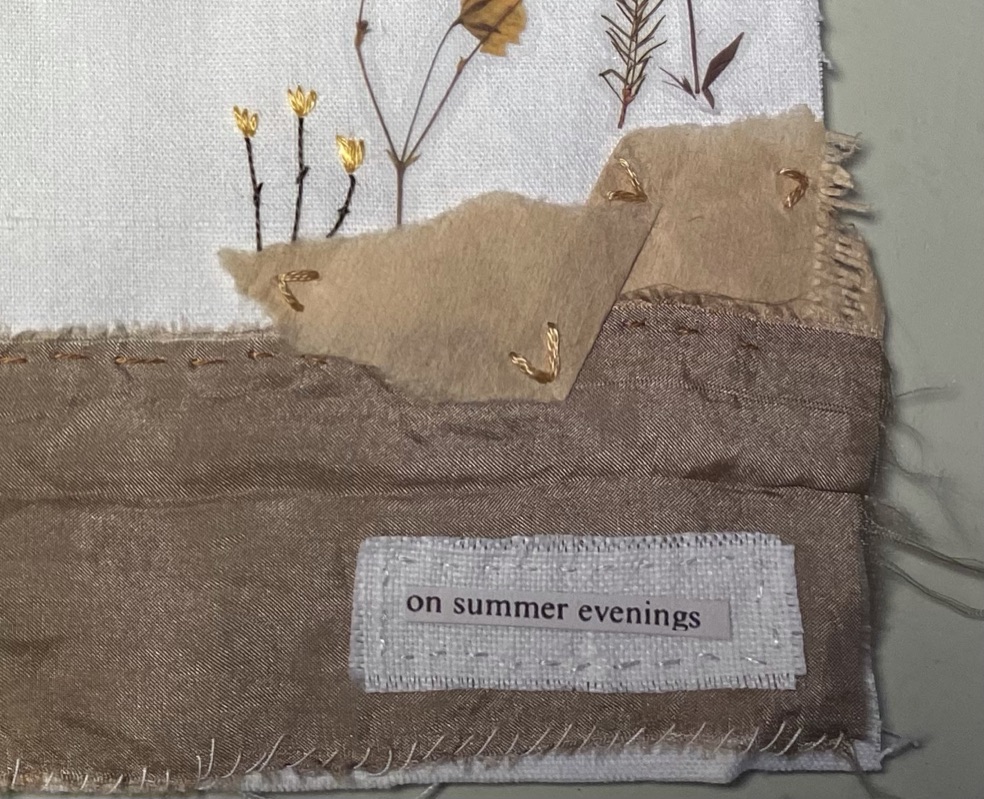
The countryside was delightful to recreate. Let’s address what you can do with paper and fabric here for example. Paper first and scraps of saved tissue paper and napkins are excellent choices as are old envelopes, anything which catches your eye really. I used a coffee filter paper for my earth. I’ve seen washed and dried tea bags used in a similar way. Remember you won’t be using an entire sheet of anything, so torn off scraps are extremely useful. And tearing is good. Particularly for undulation of hills and scenery. Scissors will give a perfectly straight vibe, the rolling hills of our countryside are not straight so tearing instead of cutting works well.
Fabric next. Frayed edges work really well on a piece like this. And again, use bits and scraps. I’ve used the tiniest scrap of lace left over from something grand. Let your mind think thick and thin with your fabric too and consider textures as well as colours. Smooth and bumpy for example. And try using a variety of stitches which might also add to the interest of your final piece.
How to decorate and layer your collage
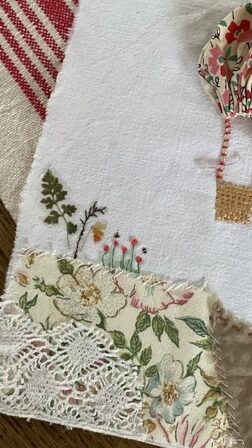
“So what do you have planned for tonight Mum?” asked Little Miss recently during one of our phone calls. “I’m going over to The Little House to play with my new stickers” I replied smiling. “Of course you are” she said stifling a giggle. Perhaps you will embroider your flowers, treat yourself to some stickers like mine or maybe you’ll raid your button box and improvise. Tearing or perhaps neatly cutting – on this occassion -individual flora from a magazine or discarded book would work beautifully too. However you choose to decorate your fabric collage one thing is certain, it will be a wonderfully unique piece.
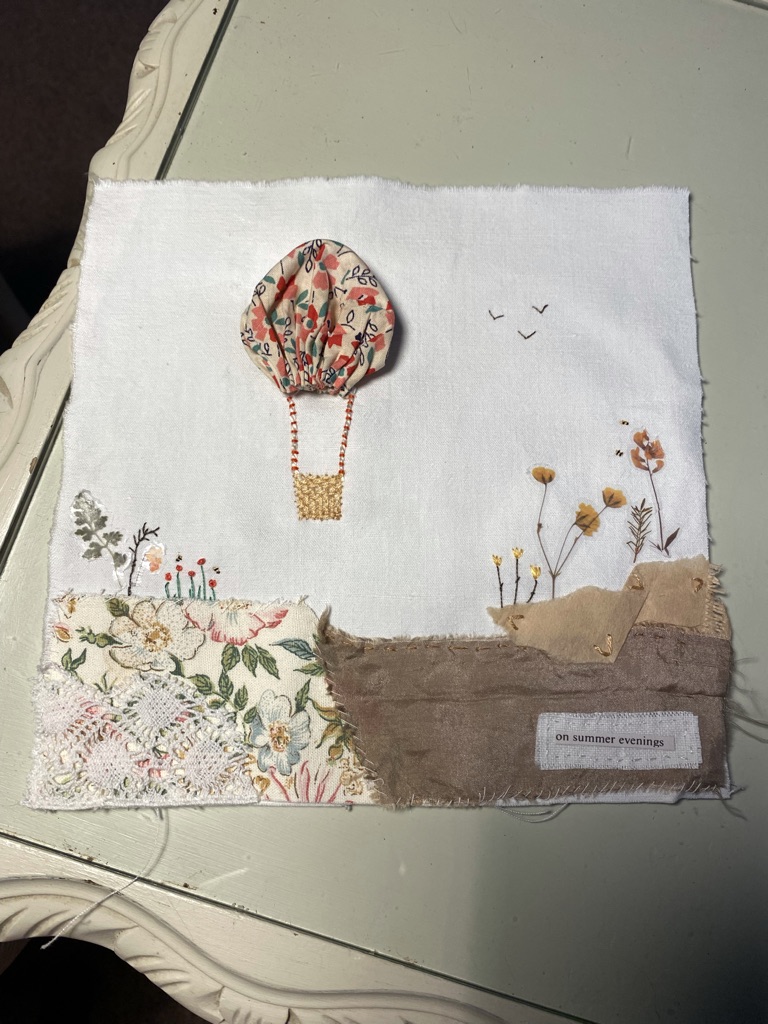
And when you get to finally assemble your fabric collage and that picture in your minds eye is recreated onto your fabric, you might like to think in layers. Don’t stick or stitch until you have played around with your bits and pieces and you are quite sure you are happy with their positions. Remember this is your piece, your imagination, recreate your minds eye sticking and stitching as you go. I liked my finished piece; I knew I didn’t love it though, something was missing. I hadn’t realised until later, the sides of my fabric collage needed building up and the middle was too empty. It needed to be a little more dense. You’ll see soon what I did to fix that.
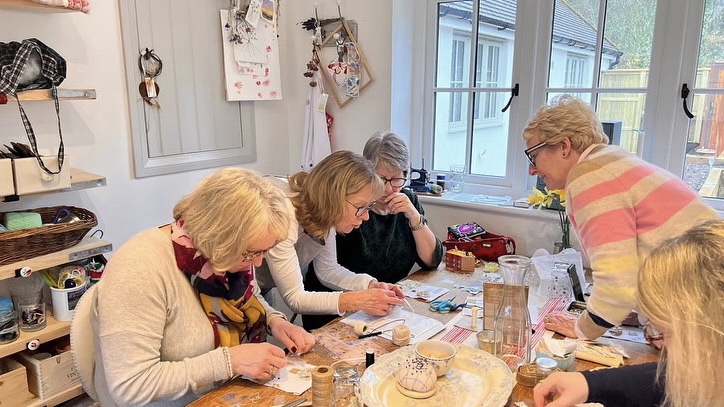
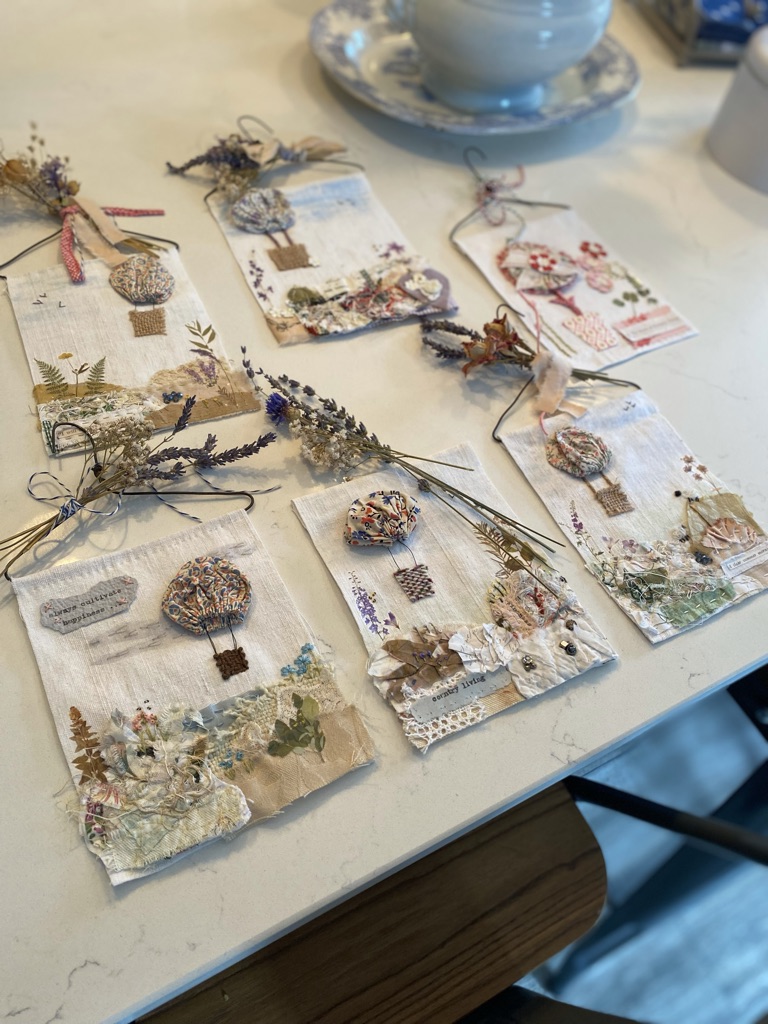
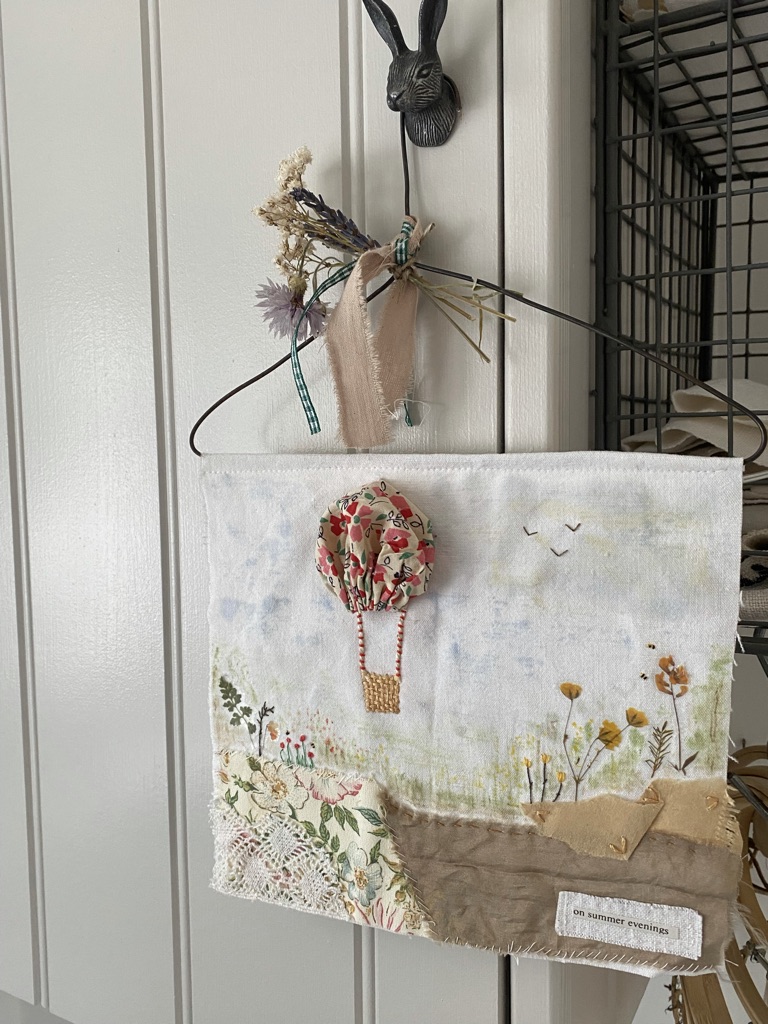
I was suitably charged at this point however and as I sewed my fabric collage to its handmade rusty wire hanger, the idea of a Mixed Media Craft workshop was born. A day when crafty souls would gather here at my home in my craft space, The Little House and recreate Up up and Away themselves. And so they came and each created their own minds eye.
I don’t think there was a crating medium we didn’t use. Including my newly made fabric shown in photo two below, which turned out to be quite the perfect fit for the countryside. Everyone tried their hand at every opportunity on offer, it was the best day…
When the watercolour paints came out, I was suitably inspired by the ladies ideas that the very next day I added to my own piece, popping in a scattering of watercolour blooms to mimic my floral stickers and embroidered flowers, adding blue sky and a variety of grasses.
So tell me, what’s in your imagination? Do you have a Suffolk Puff sitting around you can start with? Your finished piece could be anything, it doesn’t have to be a wall decoration. If you consider your crafting mediums wisely you might try a cushion? Or a book cover? Or maybe a new project bag?
I’m dreaming of warm, sunny evenings when real hot air balloons float on by our garden again. The M’s would tell you it’s one of my favourite summer sights. Happy crafting to you, until next time x
If you enjoyed this mixed media piece you might enjoy this one or this one too!


What a lovely, thoughtful message to read Claire, I always hope for a little escapism for my reader, to know I might get close to that is wonderful feedback for me, thank you for taking the time to write and tell me. And enjoy creating beautiful art with your Suffolk Puffs!x
Your posts are so beautiful Helen , they are gentle and allow your reader to be transported into a vintage era of friendship and warmth . Having just acquired a batch of Suffolk puffs I was delighted to see this post . Thank you for sharing your lovely ideas 💗
Oh you are so lovely darling and so supportive, thank you! I really did enjoy this, very much. I know, I know, I enjoy them all and I say it about every craft, I truly enjoyed road-testing this one and then watching everyone create their own on their special day, quite magical!x
Absolutely GORGEOUS! I know how much you love hot air balloons so I just smiled the whole way through reading this, amazed as always, by your creativity and knowing how much joy you’ll have got from making this!
I love your blogs so so much xxxxxx
My pleasure Syd, I’m so pleased you enjoyed the craft and yes just have a go. My advice would be start off small and use Pinterest to help you. I think there’s a tendancy to think MM has to be extrememly arty when in fact its simply a term for mixing up those crafts in a great many ways! I hope you’ll enjoy your time experimenting and singing that fabulous tune too!! I got the stickers in this blog post from Amazon and I have recently added to my collection from Taperlogy. If you are on Instagram or Facebook, yesterday’s post featured a reel with me using the stickers in another way which you might find useful too, good luck and most of all, enjoy!x
Thank you Helen for another wonderful blog. I’ve never been one for mixed media crafting, but perhaps I should let go of my inhibitions and have a go!
Could you please let me know where you got the floral stickers from?
Like Helen, I too have “up up and away” as an ear worm in my head!
Have a lovely weekend, I look forward to reading your next crafty blog.
I’m so happy you enjoyed the read and craft and yes Helen for sure I shall be running this one again. It really was a fabuloous day and it occurred to me after we didn’t get the stamps out! Imagine stamping inks on this piece as well!!! Roll on next year!x
Oh how I wish I’d attended that workshop, I hope you do another one of them recreating the same idea as I fear I may need a bit more guidance than just having a go at home.I shall be singing ‘ up up and away in my my beautiful balloon ‘ all day now in my head. It’s one of my favourite summertime sights too. What a wonderful selection of pieces were made, I think that has to be the best workshop to date. X