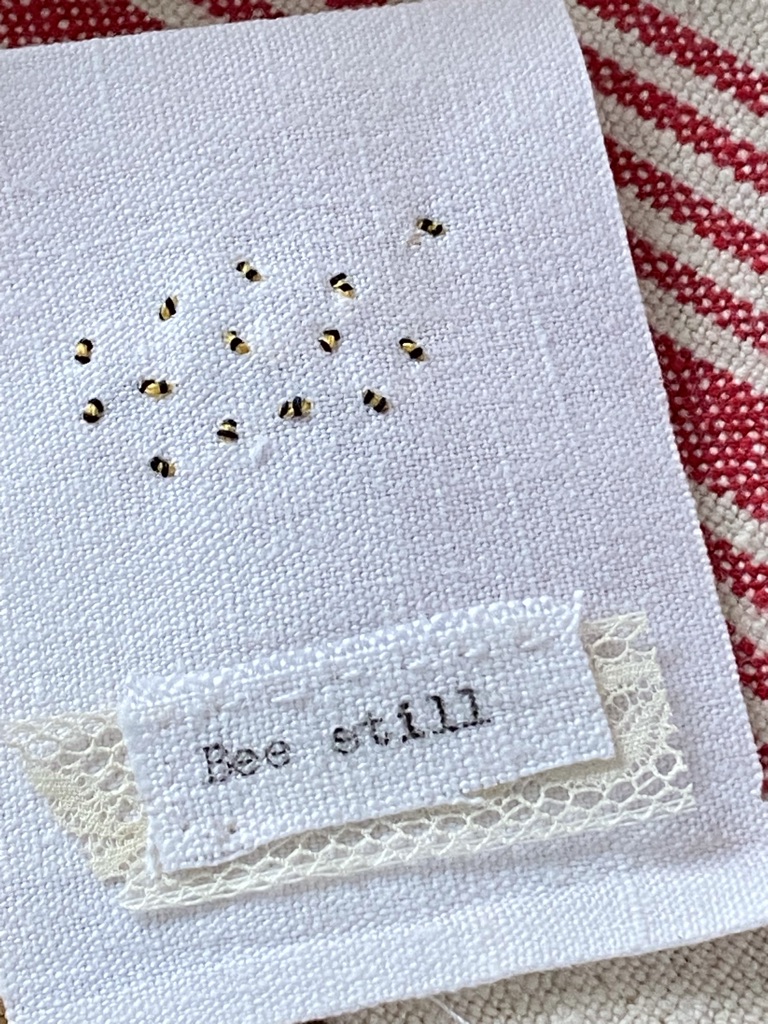
Back in September last year I was busy embroidering lavender bags to fill with delicious homegrown lavender. I noticed my floral decoration lacked a little movement and later, whilst browsing Instagram as is my want, I stumbled across a favourite of my creative accounts stitching fat little bumble bees onto her own beautiful spring and summer designs. And today I shall share with you the same simple process which I promise is achievable even if you have never embroidered a stitch in your life. Join me as I show you the piece I created by adding a simple bumble bee embroidery to a scrap of vintage linen. A scrap of linen just like that little snippet you’ve been saving for a very special project you didn’t know was just around the corner…
Despite being on the other side of the world, the delightful and always encouraging Liz @pinsandneedlesstitchery took just a few short minutes to teach me via our direct messages on Instagram, how to stitch a simple bumble bee embroidery atop my lavender stalks, lending them the gentle breeze-like quality they had until that moment been lacking. Turns out Liz herself was taught to stitch a bee once-upon-a-time by the extremely talented Nicki @nickifranklinneedlework
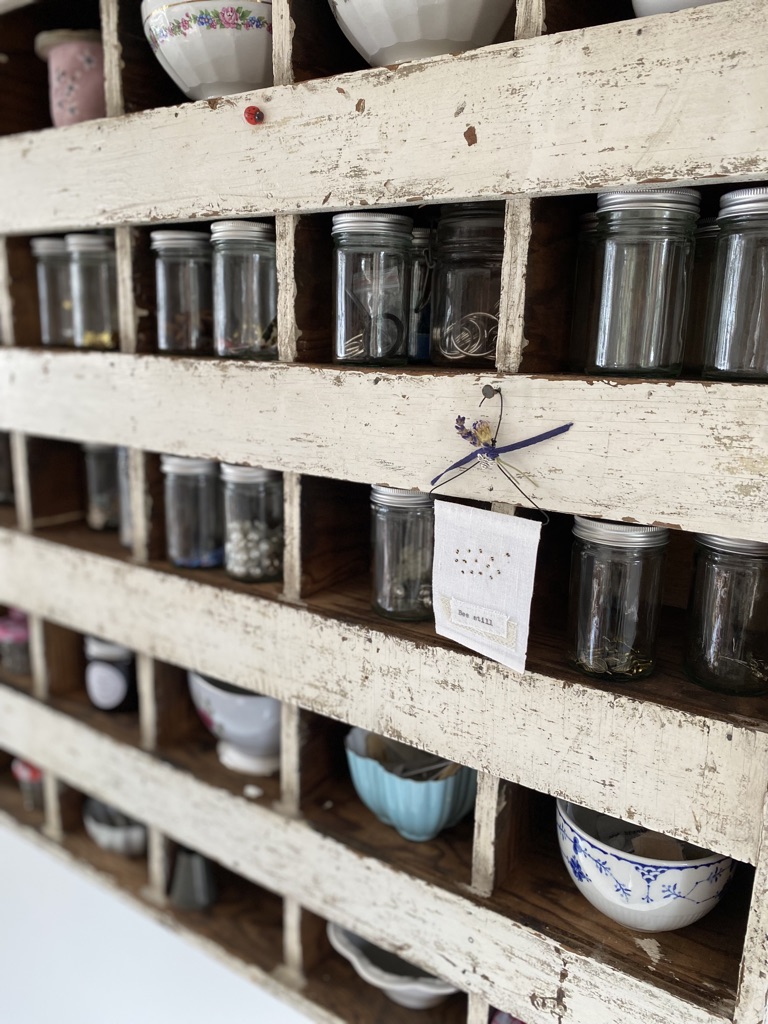
My pretty spring design today is a simple wall hanging decoration although you’ll quickly see the design lends itself to so many more ideas. Begin by gathering together all you will need.
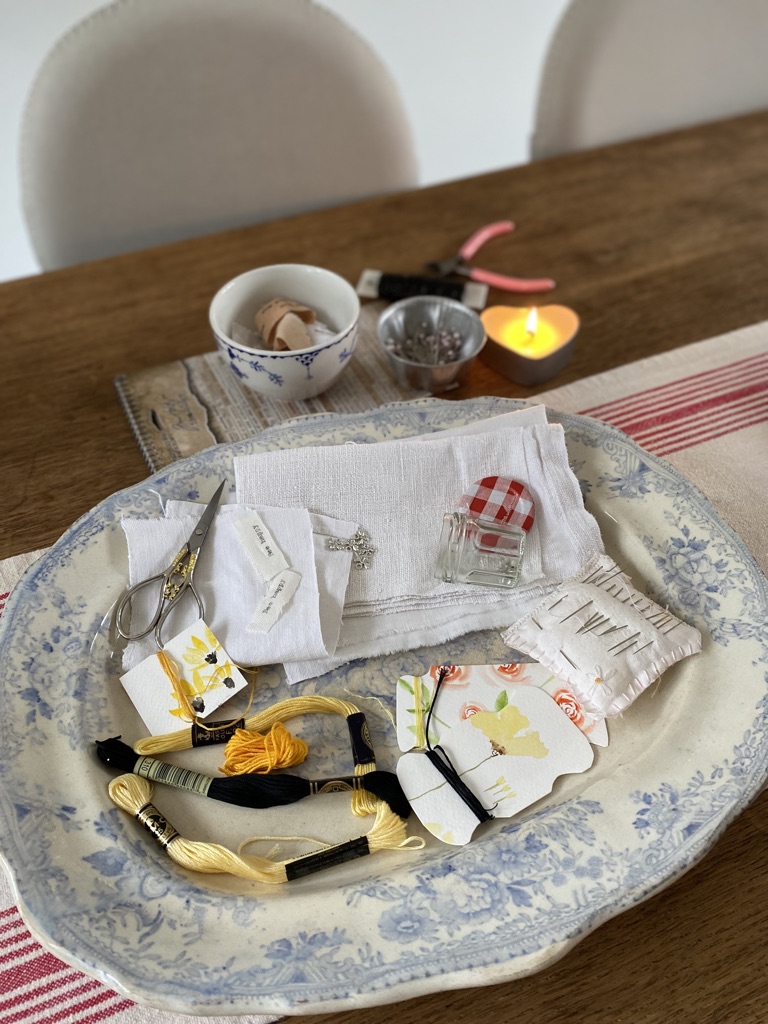
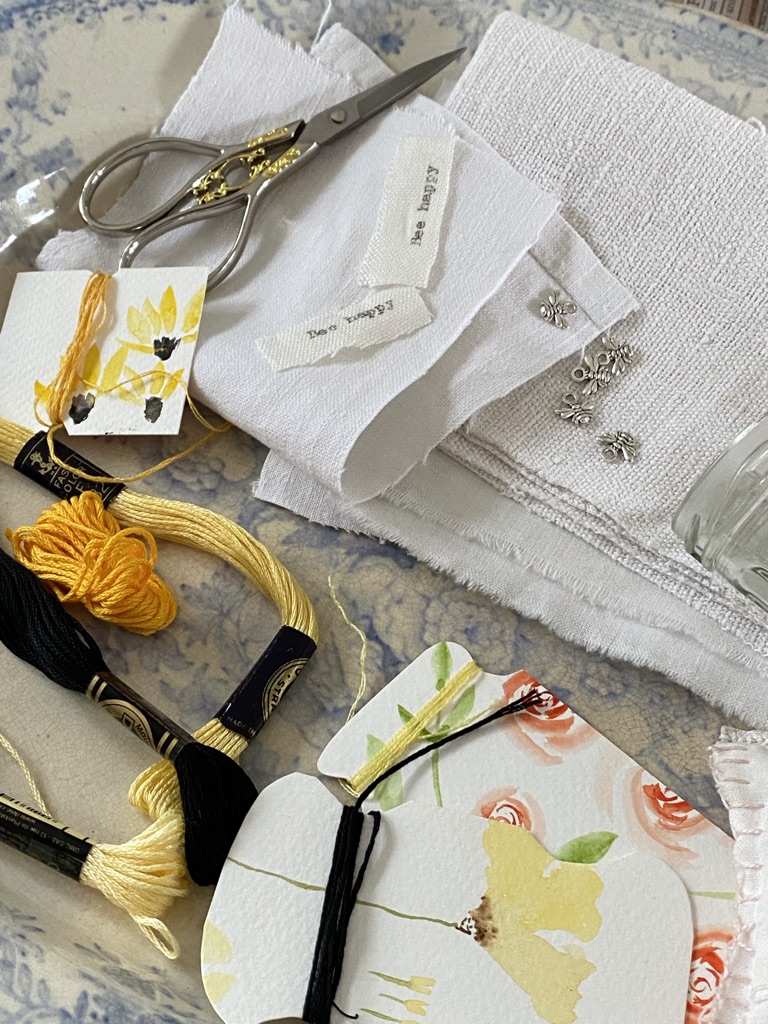
For just the simple bumble bee embroidery, you will need:
- Scrap of linen
- Yellow and black embroidery floss
- Needles
- Scissors
To turn your simple bumble bee embroidery into a hanging decoration, you will need:
- Appropriate words or a simple quote
- Scrap of lace or ribbon
- White sewing thread
- Craft wire – I used 22 gauge floristry wire
- Wire snips
- Fusible interfacing – optional
- Ribbons, trinkets, teeny dried flowers – optional although a must in my world
This tutorial is for the entire hanging decoration, if you wish to learn just the simple bumble bee embroidery, you might want to skip a few paragraphs.
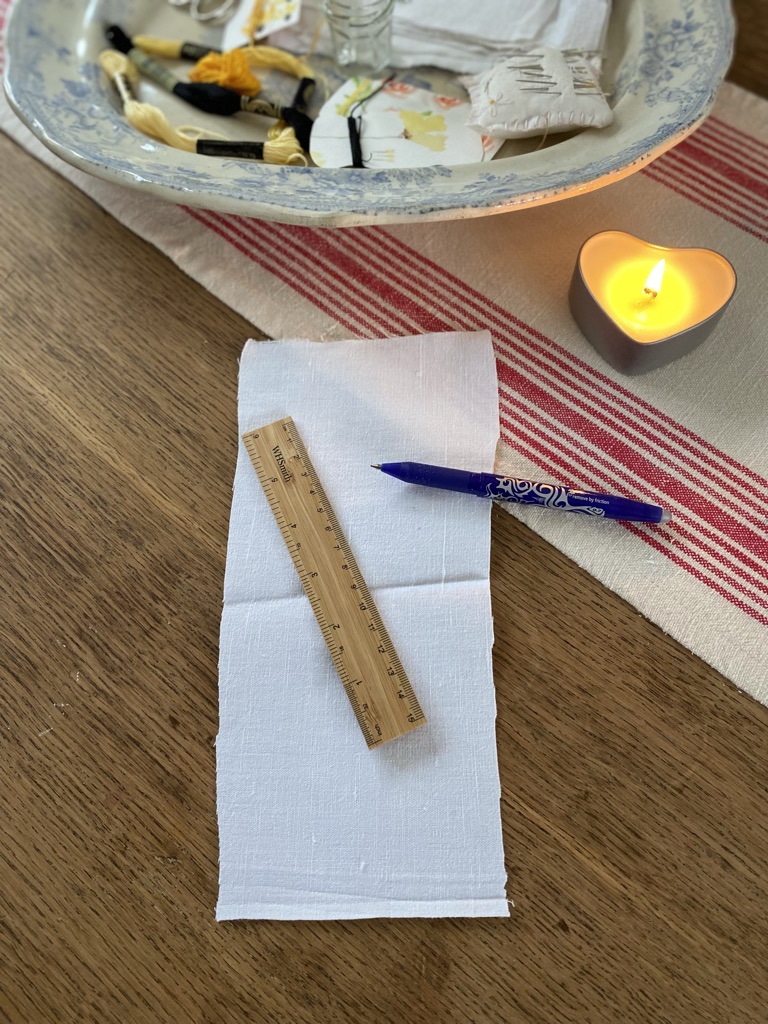
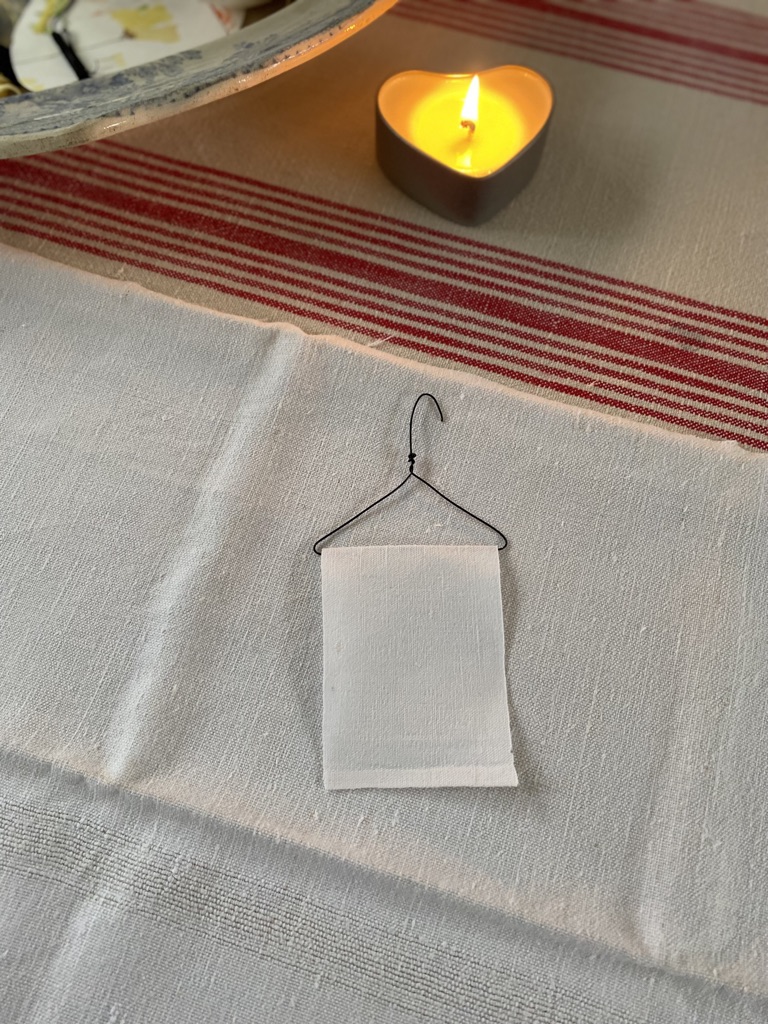
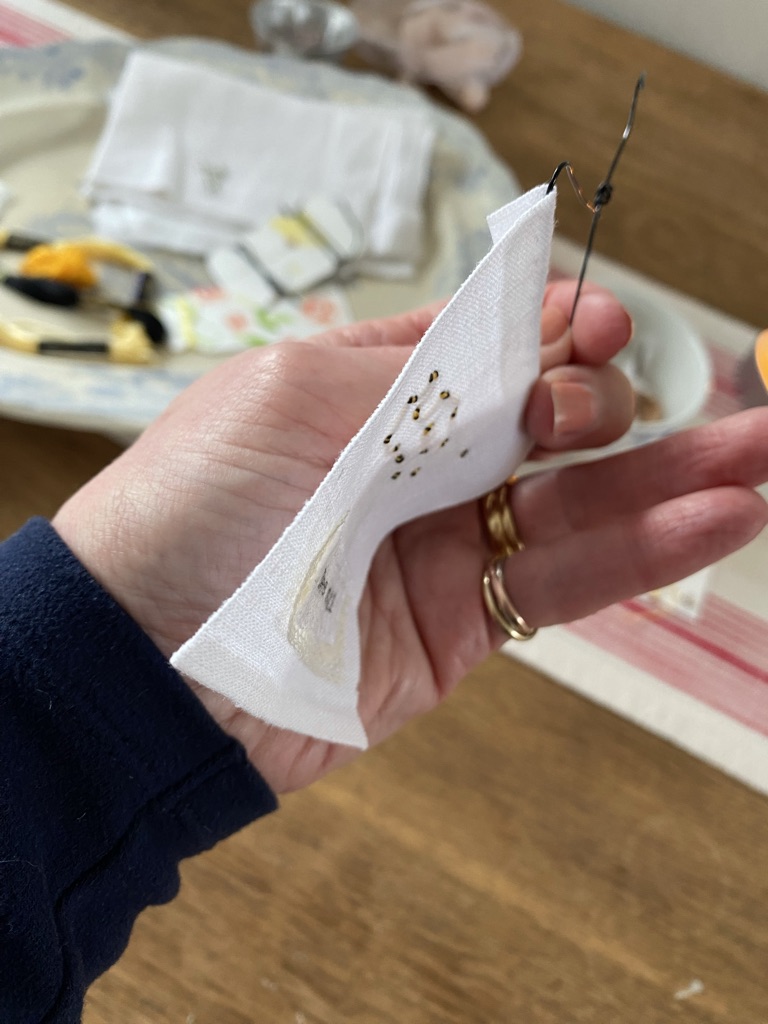
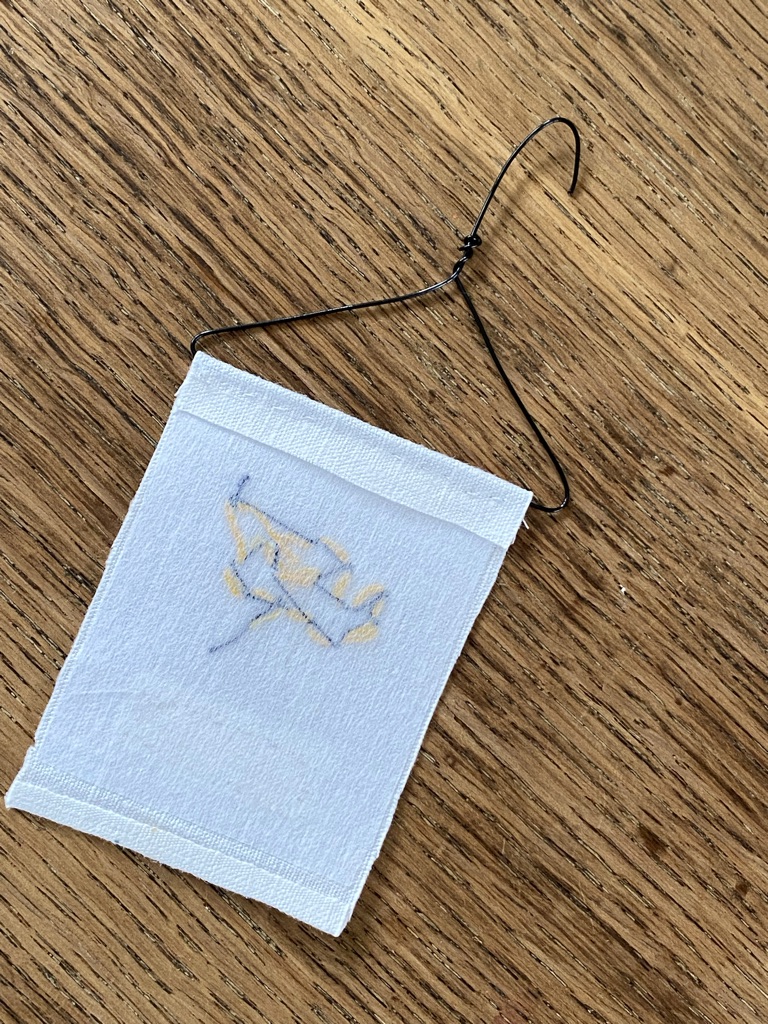
My linen scrap measures about nine centimetres long by six centimetres wide and I have folded over just a centimetre at the top of the fabric which will eventually sit over the wire hanger. By chance there was a small hem on my piece; not necessary although keep in mind some linens will fray over time. I like fraying.

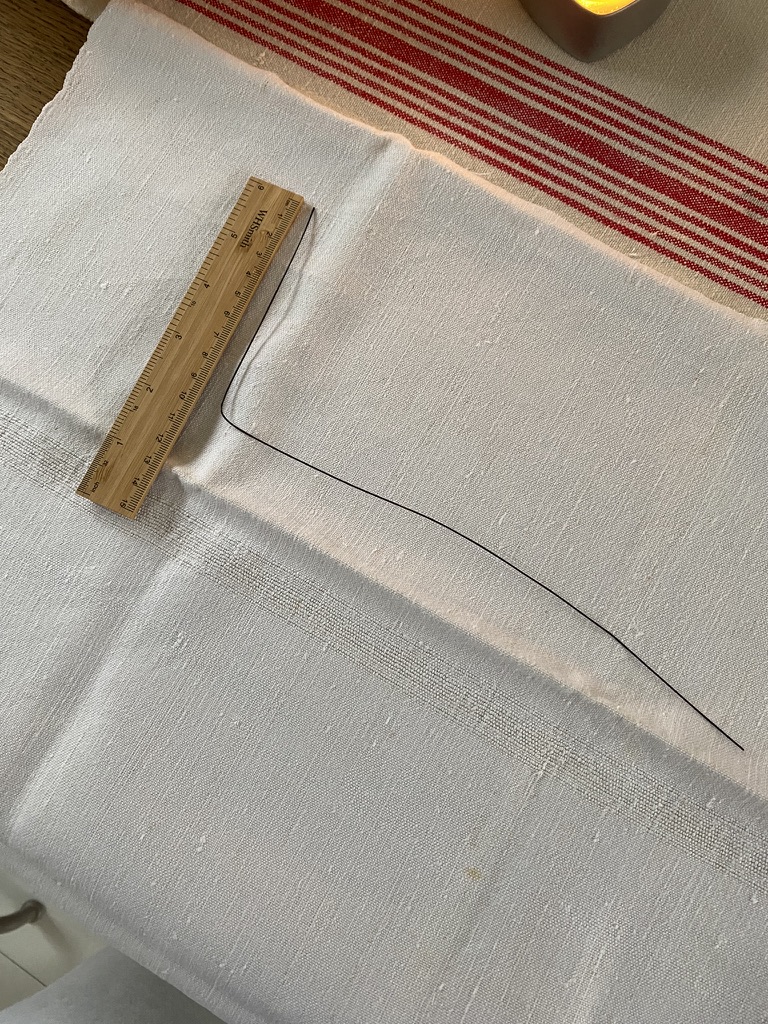
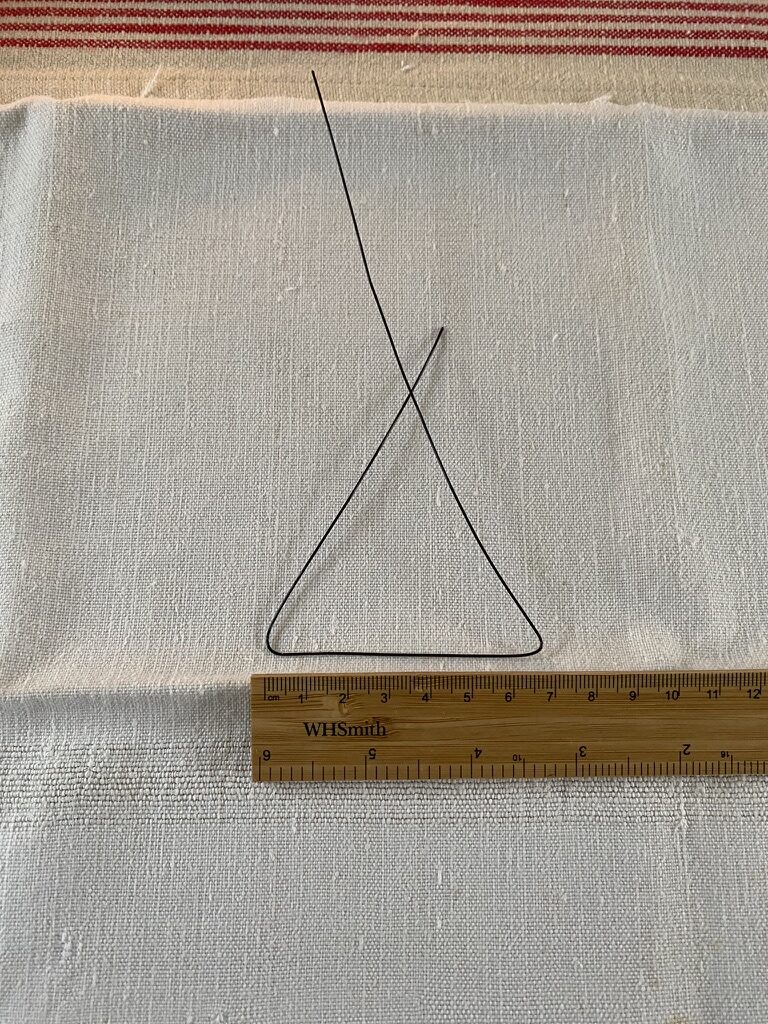
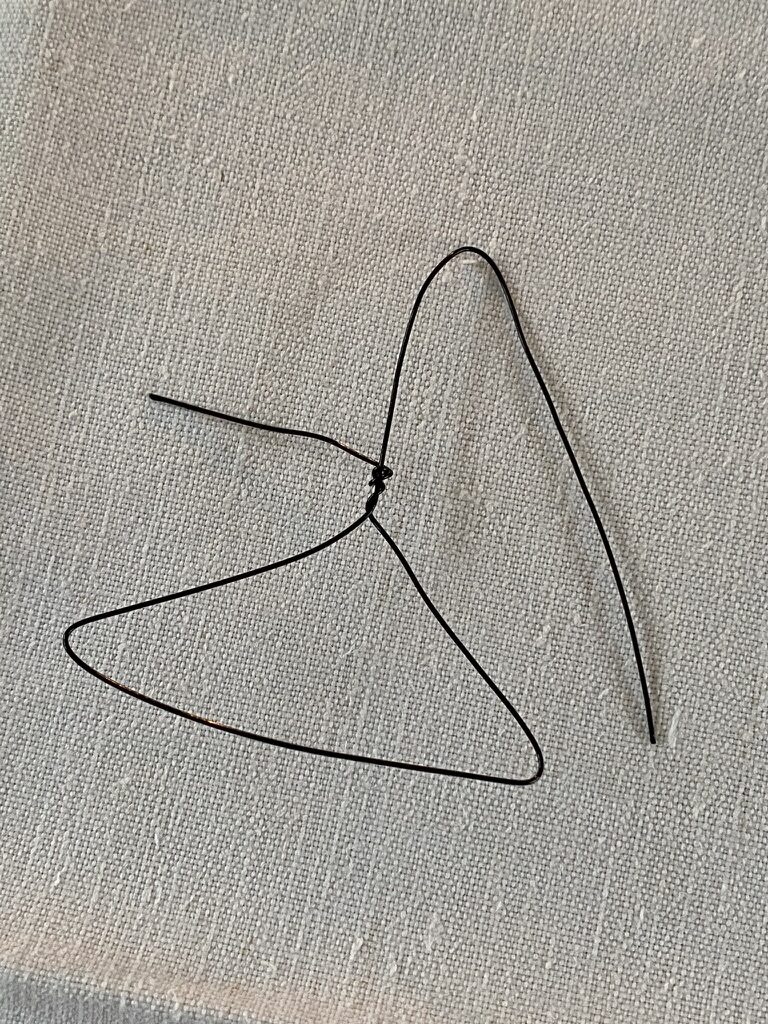
Wire hanger first. For a piece of linen my size, your wire will need to be approximately thirty centimetres long and you should make your first bend along ten centimetres or so as shown in the first photo below. Make your next bend a further seven centimetres along from the first bend, photo two and just before you bend the wire a second time, check your linen will hang nicely over this seven centimetre portion of the wire and adjust this measurement slightly if necessary. Keep the longer length of wire on top of the shorter length, as shown in photo three.
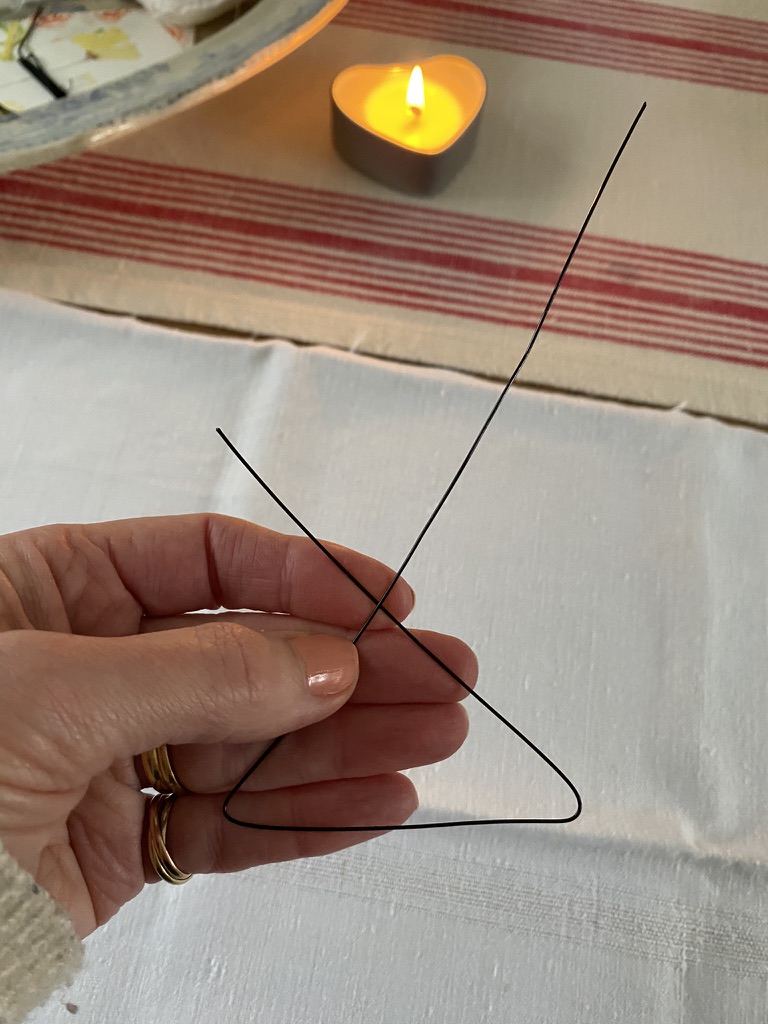
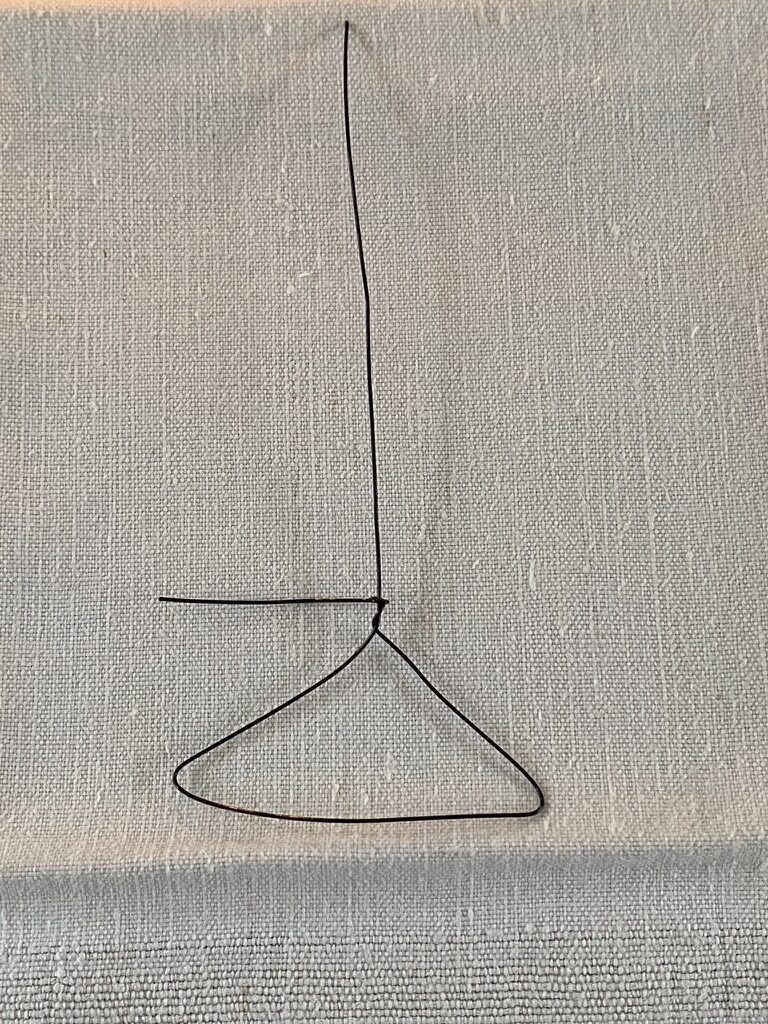
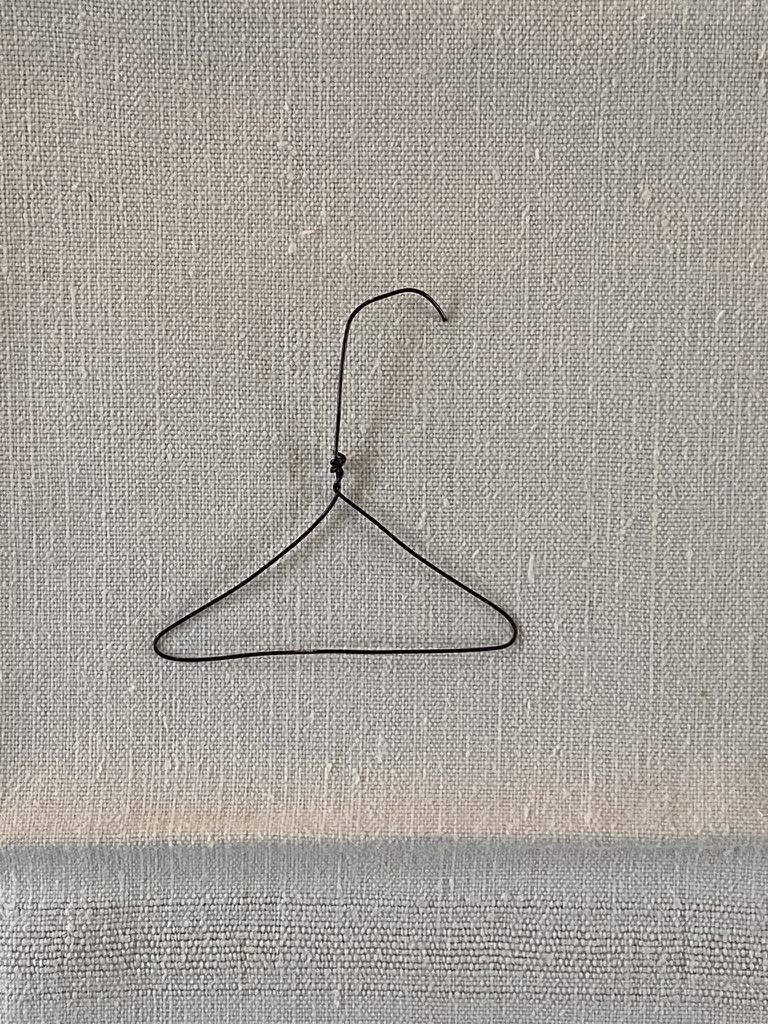
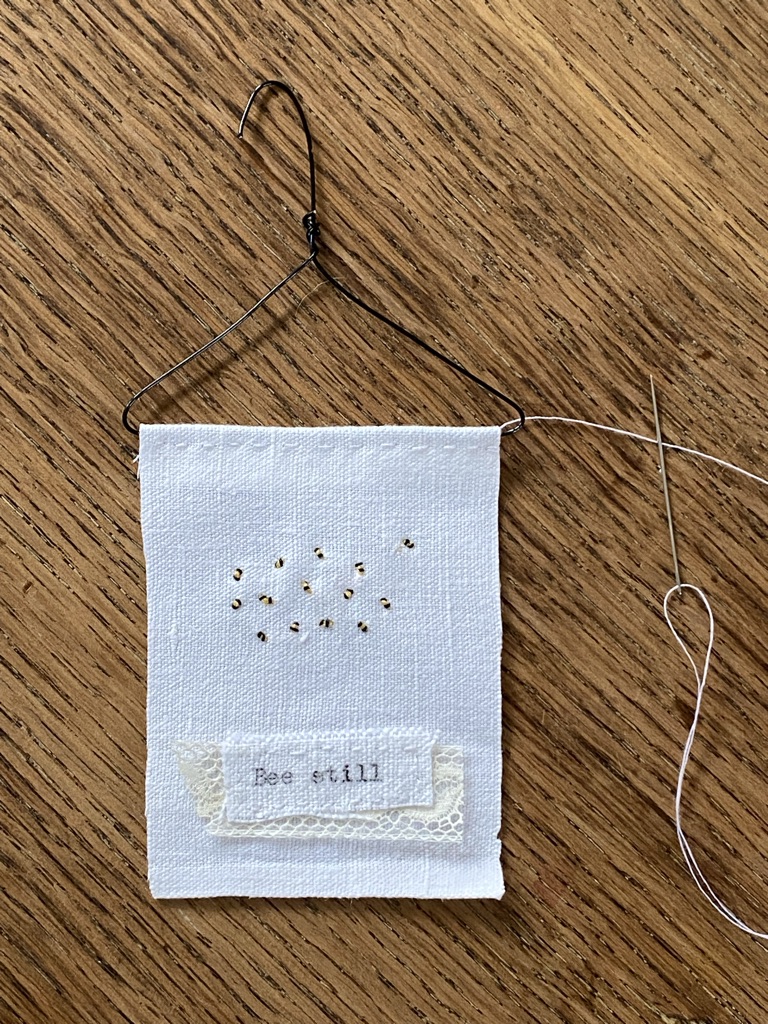
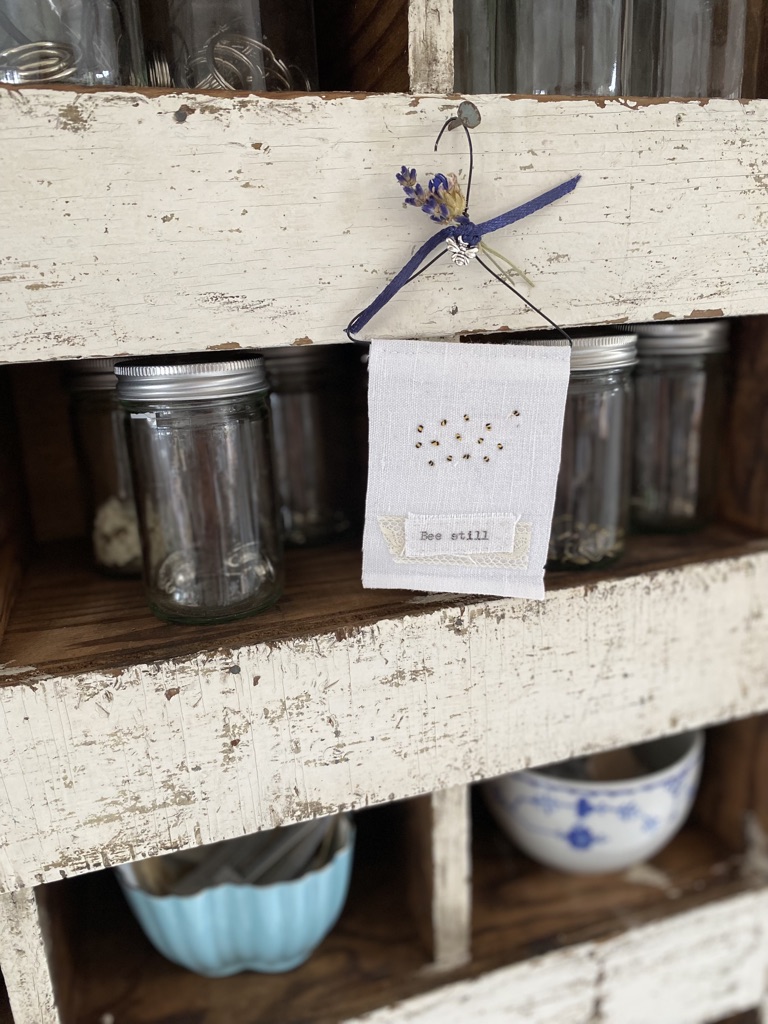
Now, you should wrap the smaller length of wire around the longer length two or three times, photo one below and curve the longer length over at the point you would like your ‘hook’ to form on your hanger, photo two. When you are happy snip away excess wire carefully and put your wire hanger to one side for later. Photo four shows how your linen will sit once finished.
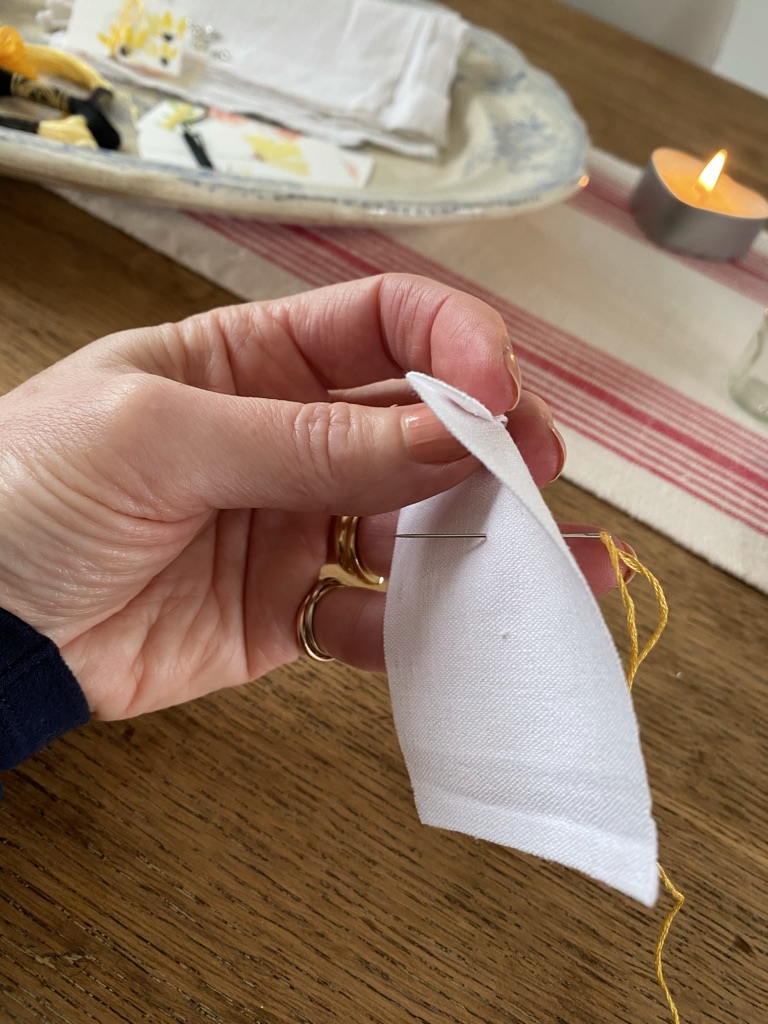
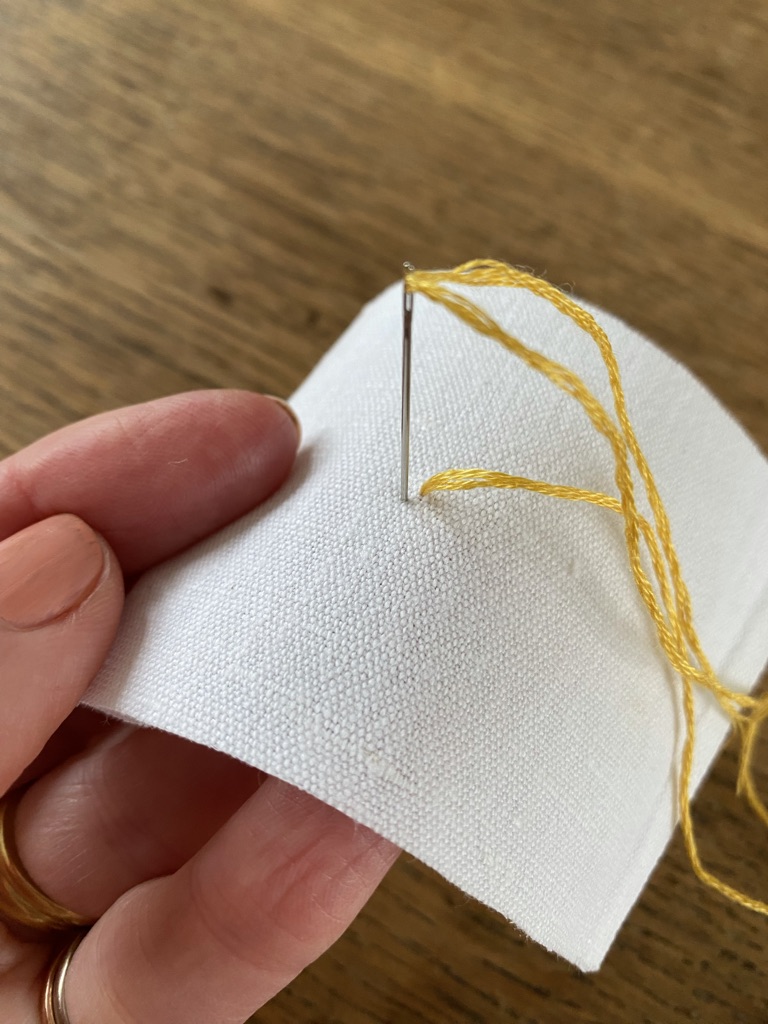
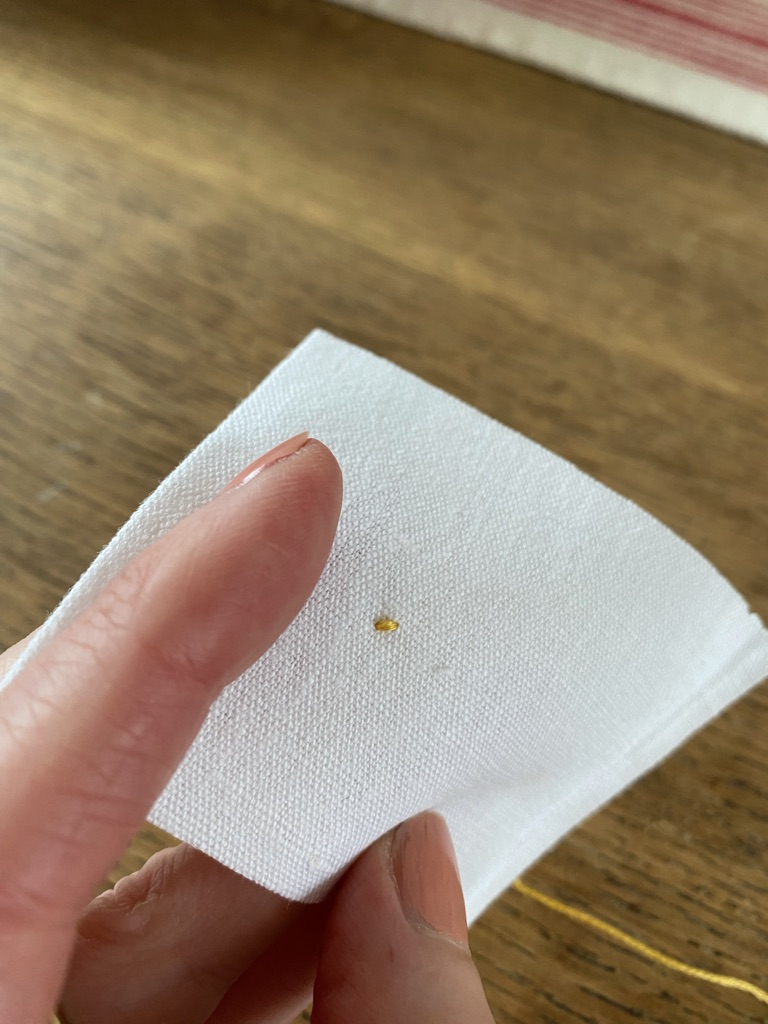
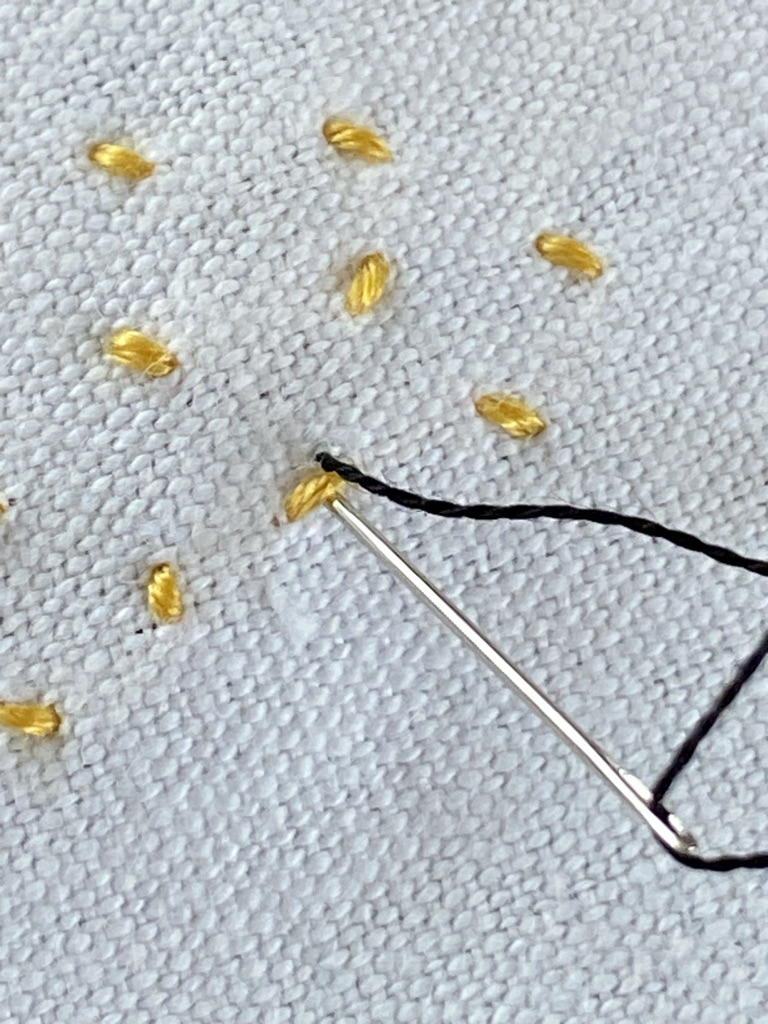
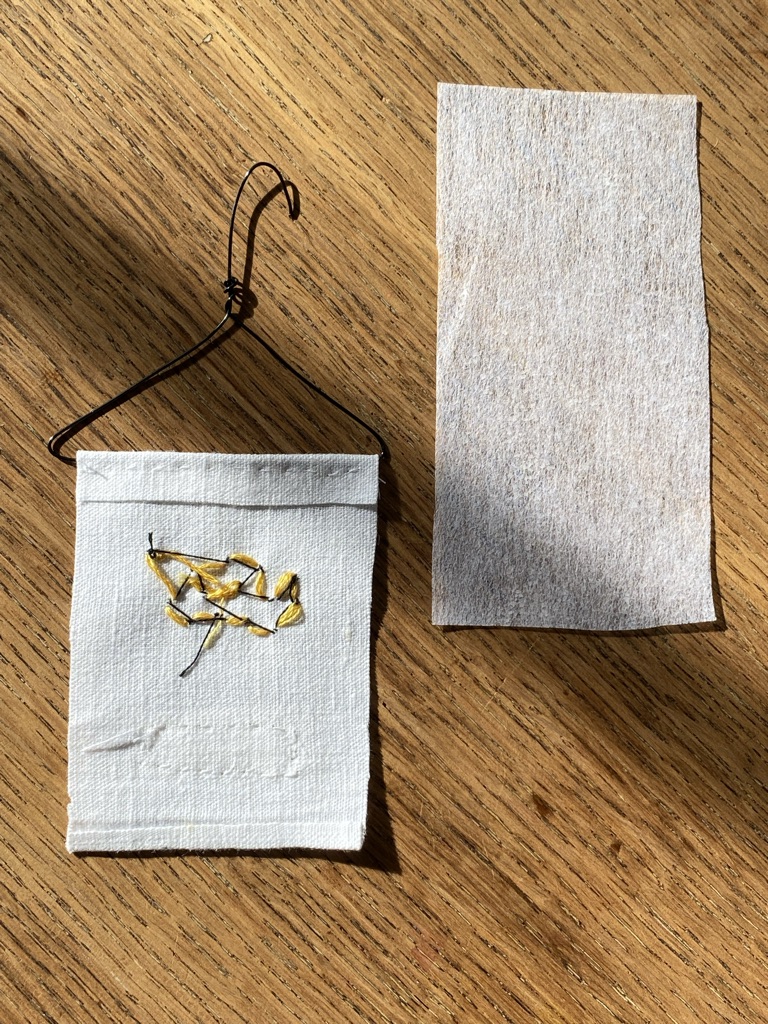
Now let’s make a start on that sweet little bumble bee. You’ll need four strands of yellow embroidery floss in your needle. Did you know there are 250 species of bumble bee? With that in mind you should be fine with any yellow thread you feel is appropriate. I used tonal golds and sunshine yellows. Knot the end of your thread and pass your needle and thread through the back to the front of the fabric, first photo below. I have zoomed in closely for the second photo, zoom in closer still if you like. You’ll be making the tiniest stab stitch you ever did make next, it is about two bumps on my linen, maybe three, no more. Gently pull your thread through to create the bumble bee’s body, photo three.
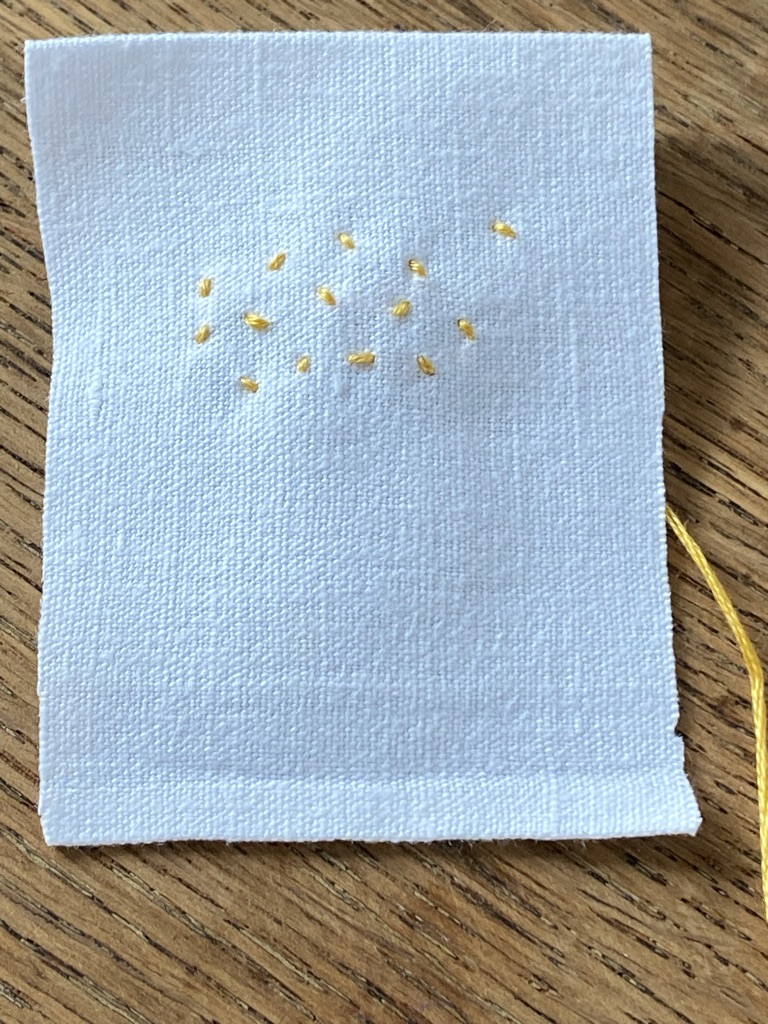
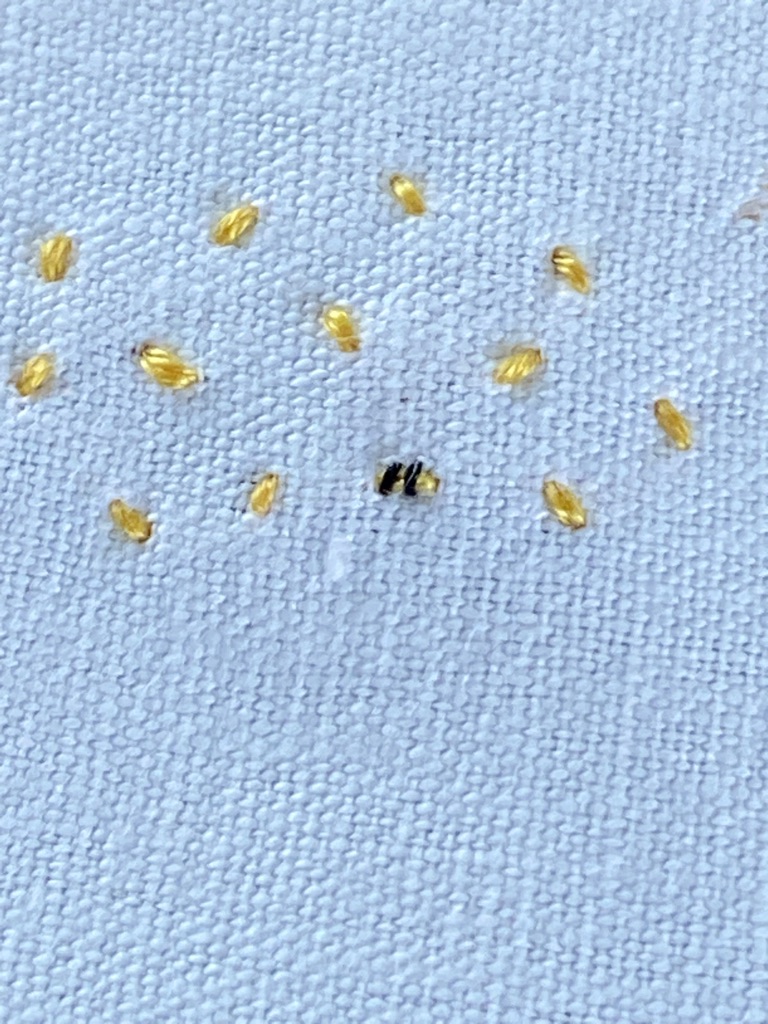
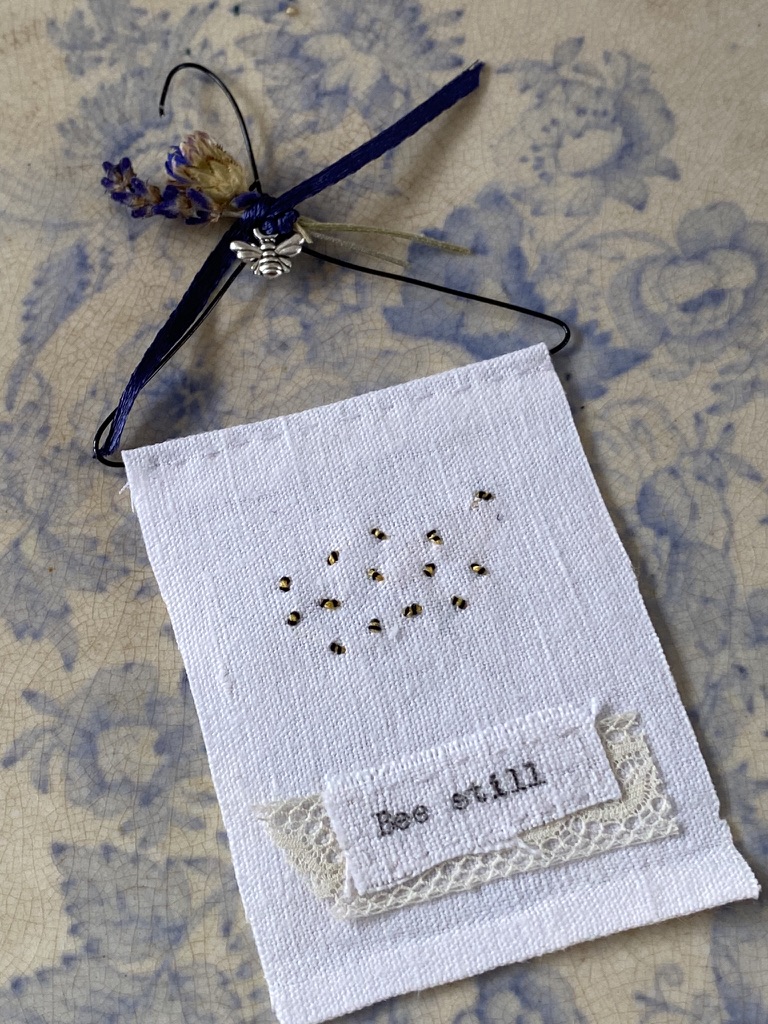
To create a colony of bees, continue the process across your linen mindful you should leave enough room for your words at the bottom of your project. Similarly you don’t want rogue bees too near the top, where you will be stitching your finished piece to the wire hanger. I have left a little more flying space between my colony and what will be the queen bee.

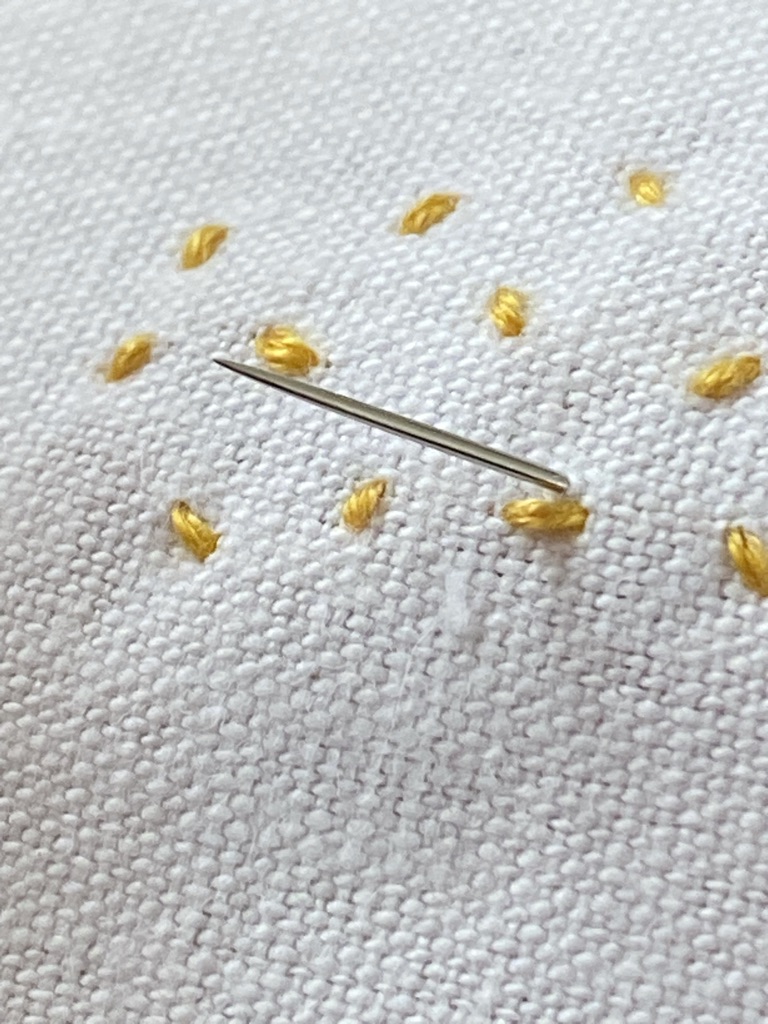
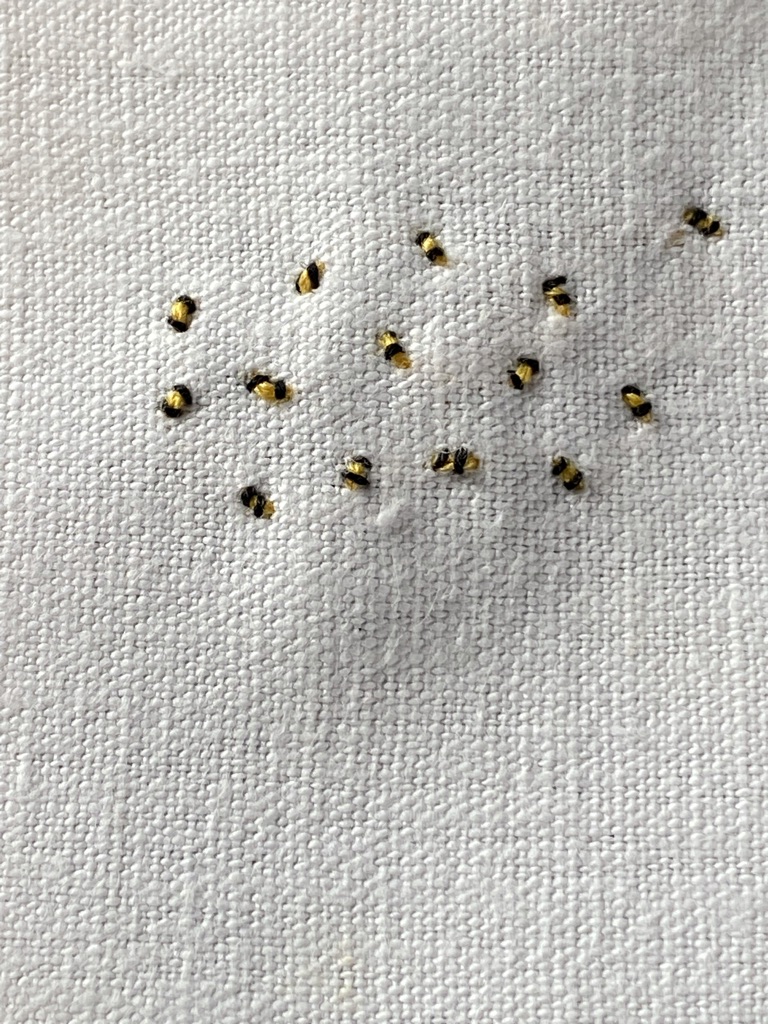
Seemingly there are a few black embroidery threads to choose from too. Again, use what you have, I have even used simple black sewing cotton for stripes on teeny bees in another of my embroidery projects. You need only one strand of floss for the stripes of your bee. Pass your thread from the back to the front of your project once again, about a third of the way down the bumble bees body and as close to it as you can get and use your thrumb nail to help determine where you would like your first stripe to finally sit. And as you guide the needle back into the linen again for the second stripe, try not to be too uniformed. You’ll see as your swarm builds, the bees look more lifelike and in flight, if their stripes are not parallel.


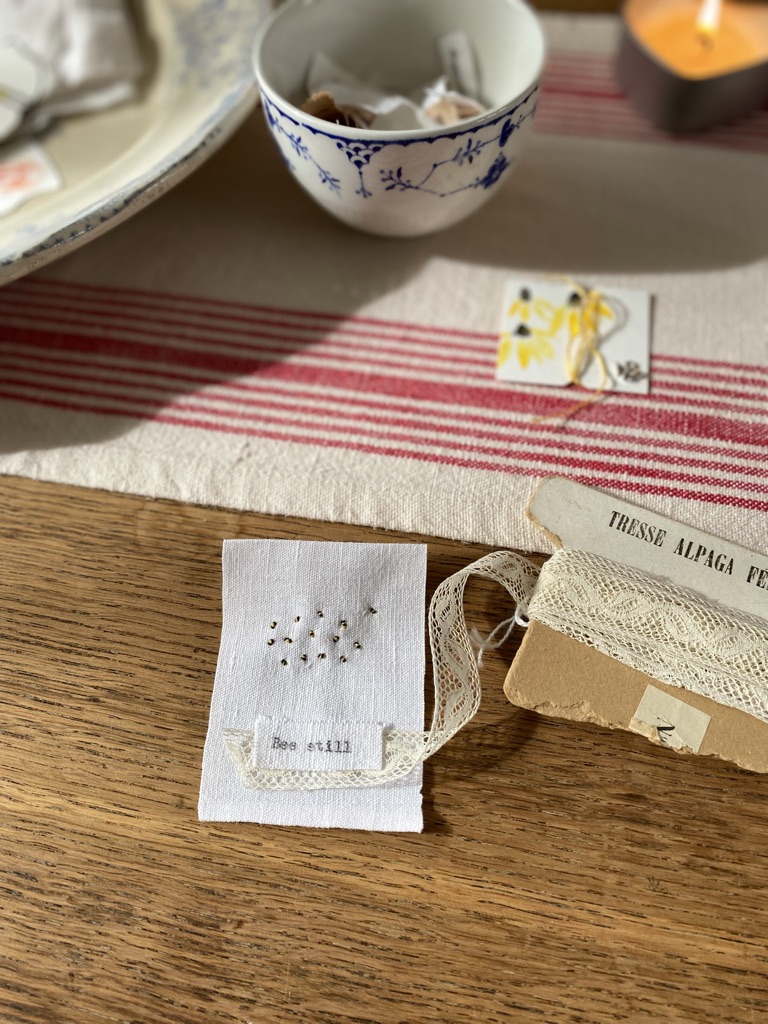
Time to add your words now and I’ve used my trusty old typewriter. No photos of this sorry, I simply tape thin fabric to a piece of paper and feed that through the typewriter roller and type away as you would back in the day. I stitched my words atop a scrap of lace with white cotton thread; you could replace the lace with ribbon or a tiny piece of coordinated fabric, either would look pretty too.
And with a simple running stitch, I’ve attached the bumble bee embroidery to the wire coat hanger. I like to use fusible interfacing on the reverse of the fabric at this point for two reasons. It offers a tidier reverse to your project and now your finished piece is a little sturdier and less likely to crinkle or curl over time.
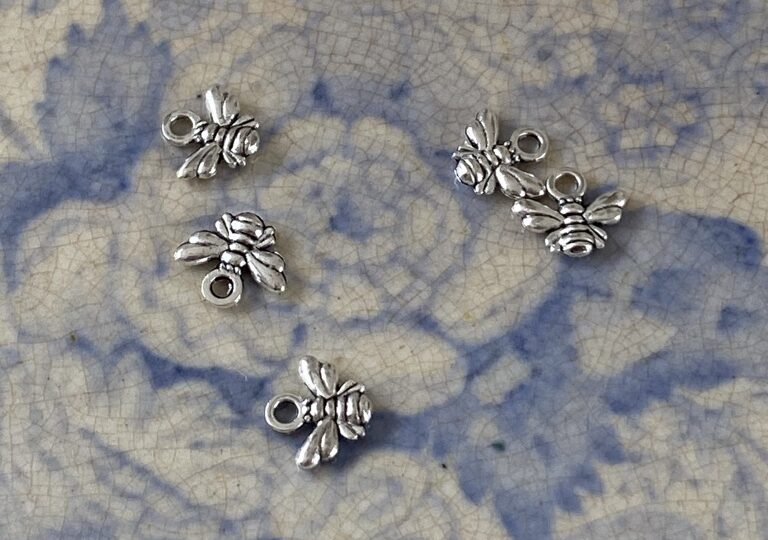
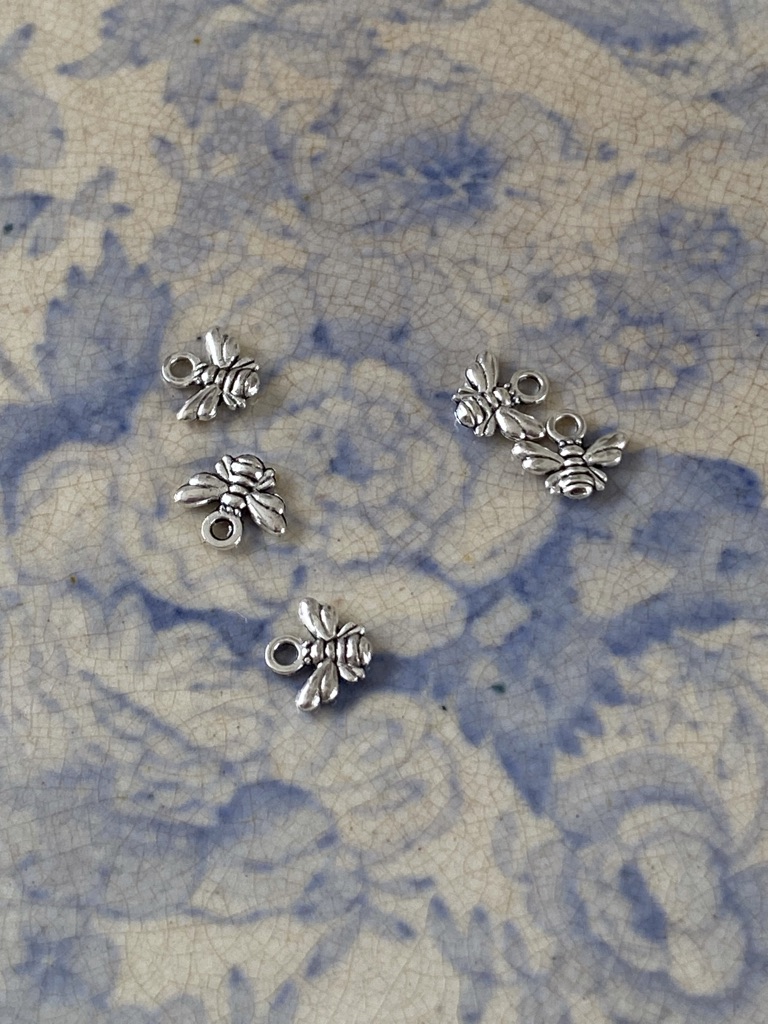
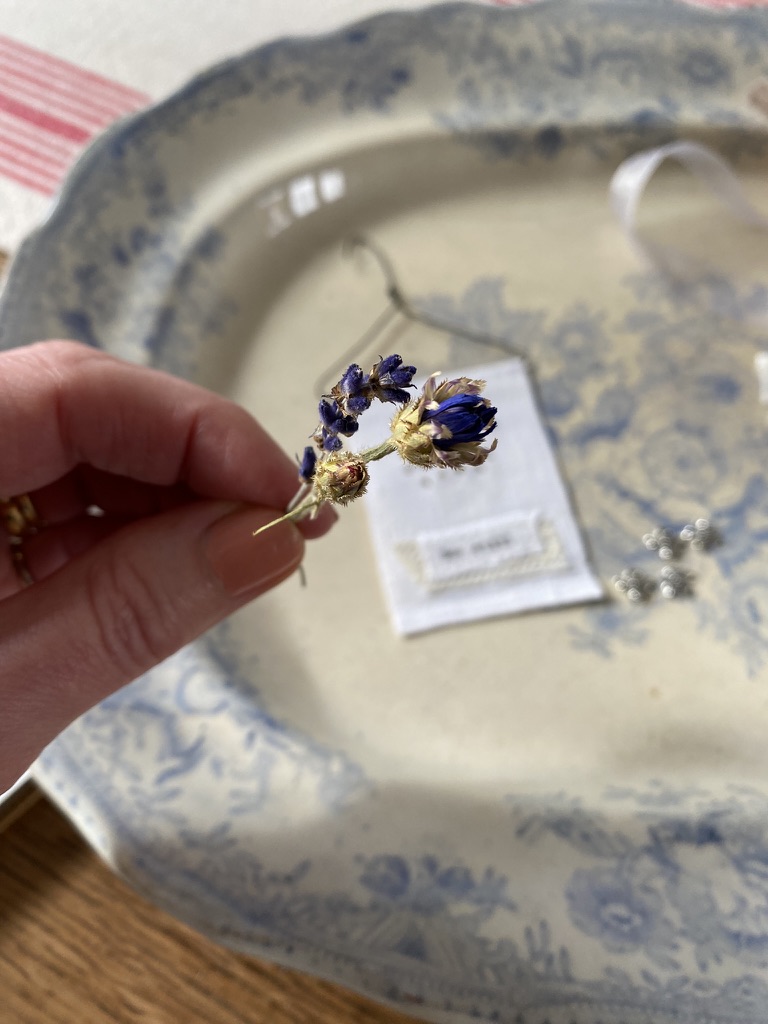
And now for the pretty extras. I found a tiny piece of navy ribbon lurking in the corner of the ribbon box and raided Doris’ skirt for the smallest of dried daisies from last years Cottage Garden. And the sweet little bee trinkets were left over from our recent Craft Day here in March when lovely ladies came to play at The Little House for the day. We had the most fun making beautiful spring-scented candles with Ruth from Cucumber Wood Candles in the morning and then, mindfully stitching the afternoon away making these bee decorations. Of course there was way too much cake eating and tons of laughter and story telling too. There are just a few spaces left now for my workshops later in the year, click here to see if there’s one that takes your fancy.
Of course once you know how to stitch a simple bumble bee, that is it, nothing is safe. I have some wonderful projects on the go at the moment incorporating wildflowers and bumble bees, more of that another day though. For now this design could easily lend itself to so much more. A cushion perhaps, a lavender bag or fabric heart, a simple purse or key ring or maybe even part of a larger embroidery you yourself might be designing or working on right now.
This simple project can be made in an afternoon and if you’re lucky enough to be enjoying a little sunshine as you read this, a cup of tea and slice of delicious cake might go down a treat whilst enjoying your moment. Whatever you decide to do with your little bumble bees, do let me know, I love to hear of the projects you are working on right now.
I have another craft coming soon for you where I shall be mixing up those crafting mediums again. I know, nothing for months and then two together, whatever next, until next time…x


Thank you so much Sara, I’m so pleased you do!x
So cute I love it!
Aah Dottie how wonderful to hear from you again! I am so pleased you have your own real life Bea to create with and for, what a wonderful image I have of the two of you stitching your colony together, enjoy every minute!x
It is my absolute pleasure to share this craft with you Syd enjoy creating your colony! I had a wonderful day in London thank you, it had been a while since I’d been and I was extremely lucky with the weather and the lovely company. Thankk you for your kind message x
My absolute pleasure! 🐝
Thank you so much Helen for sharing your latest crafty project, its lovely.
I shall endeavour to start my own little bee colony!
I hope you had a lovely day in London yesterday and I look forward to reading your future blogs as I have missed them.
Helen! Once again you made my day, our grand-daughter who is 8 is called Beatrice, well you try getting anything with her name on!! So I look out for anything Bee! And being crafty as well what a wonderful keepsake for her , she is an avid crafter as well, so we shall have fun. Thank You .
Yes there are now 251 types!!! I’m so pleased to have brightened up your Thursday’s again my darling, thank you for reading!x
Ah I just LOVE LOVE LOVE those little cute bees! I did not know how many types there were?! Yours are my favourite though! So nice to be able to sit and read your blogs again, it does make Thursday so much better xxxx
My absolute pleasure Maria, thank you for taking the time to let me know you enjoyed the craft too!x
I am thrilled you love the craft Liz, thank you for teaching me how to embroider a little buzzy bee! I also have a bee stencil so between the paint pots and embroidery floss, nothing is safe and I am in my element! It was wonderful showing the ladies on the craft workshop how to stitch them too, thank you for spreading bee lovex
Thank you very much for the idea! I love it 🐝
Oh my goodness, the sweetest little bees you ever did see! I also love how you finished this piece. Another lovely creation Helen! 🐝 🍯
I see what you did there Helen!! And I am so pleased to know you enjoyed creating your own little bees too. I have a zillion more ideas of how to use them in future projects, simple and versatile, thank you for reading!x
So simple yet so effective. Even I can do this and I can’t embroider! As was proved when I attended your extremely enjoyable workshop in March. There’s something so satisfying about
Making the little bees and seeing them come to life right in front if your eyes with a few very simple stitches. Simply Bee….autiful😘🐝