Mixing the medium is fast becoming my favourite way to craft at The Little House. And although my efforts are still naïve in comparison to the more accomplished mixed media artists out there, I have realised over time, I am thoroughly enjoying learning this craft. And by the way, I don’t tend to any more. Compare my work to others I mean. What’s the point? Surely if we all created the same art, there would be little of interest for us all to see? Today, once again inspired by a great many creatives, I am mixing two of my current favourite crafting materials together to create a special piece to live at Belle’s which I hope will inspire you to create something similar. By working with embroidery thread and wire, I am showing you today how to create your own unique embroidery wall art. Do join me to see mine…
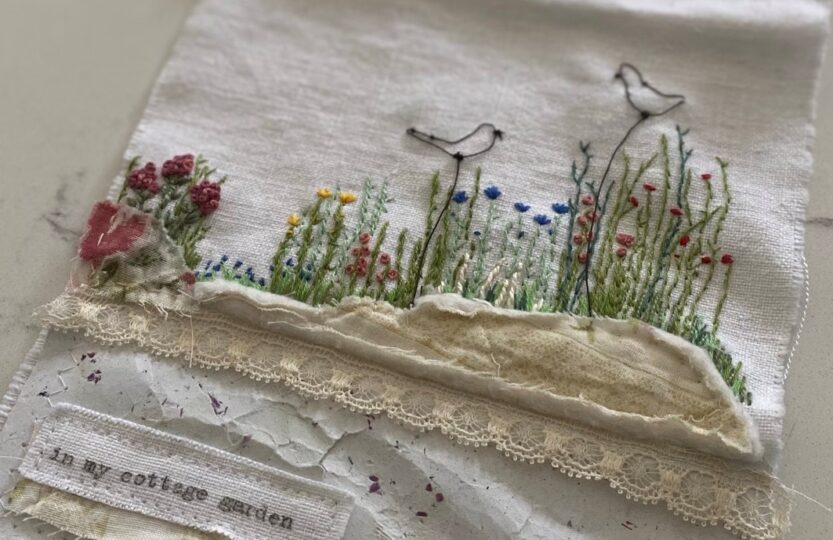
I recently chatted with one talented lady on Instagram and declared I am not sure which part of the crafting journey I find most exciting, the planning of the project or the end result. Especially for me, when it’s embroidery: I begin with a vague notion of what the finished piece should look like yet since I am still so new to the craft, I tend not to pin my hopes on anything too concrete. For this week’s embroidery wall art, I knew I wanted a nod to our Cottage Garden yet it wasn’t so important to get the likeness spot on; I have enough photos to serve that purpose. And as a great many of my craft projects are for gifts these days and thereby accompanied with the self-imposed pressure of perfection, I was looking forward to simply enjoying this piece, intended only for me.
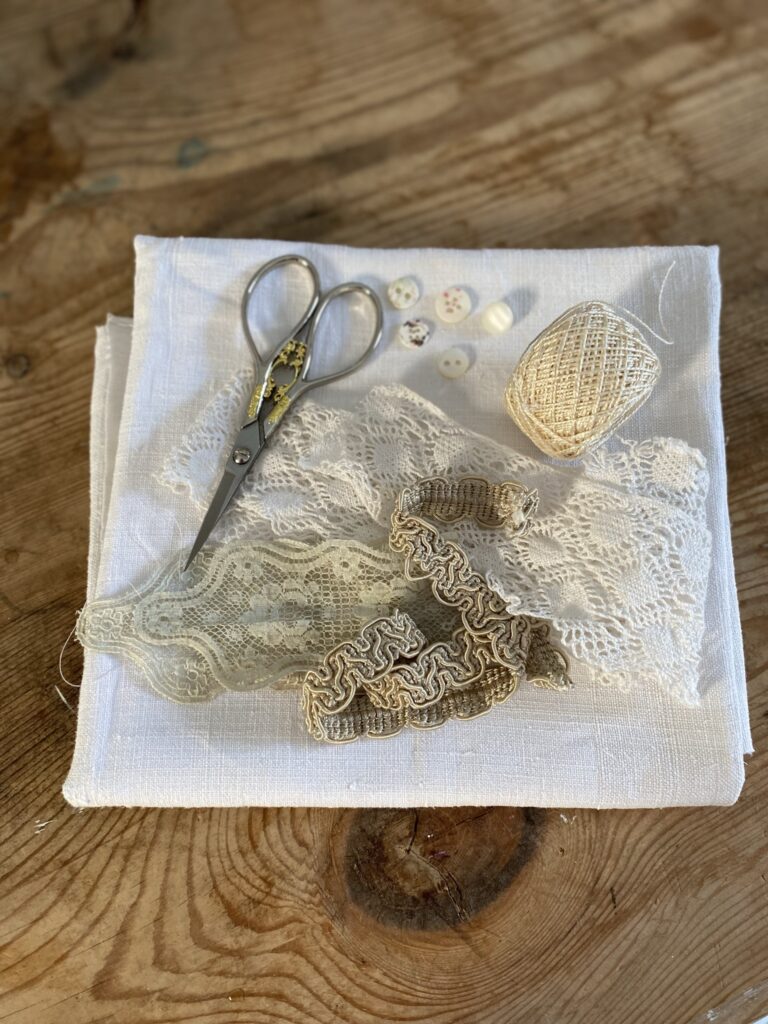
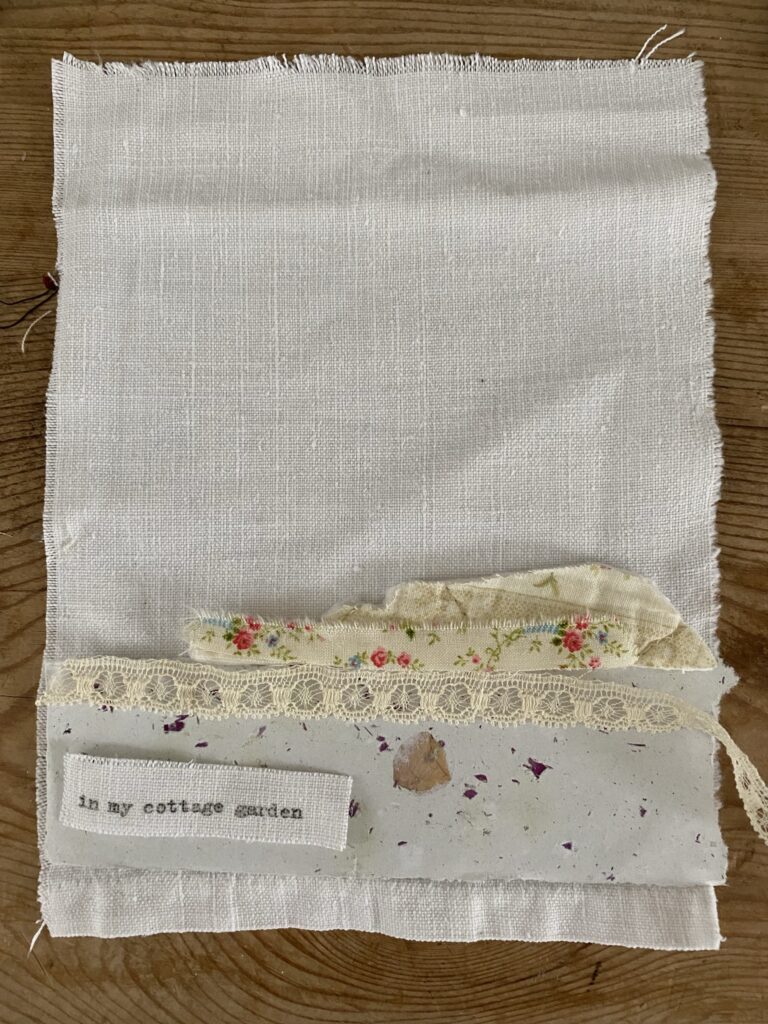
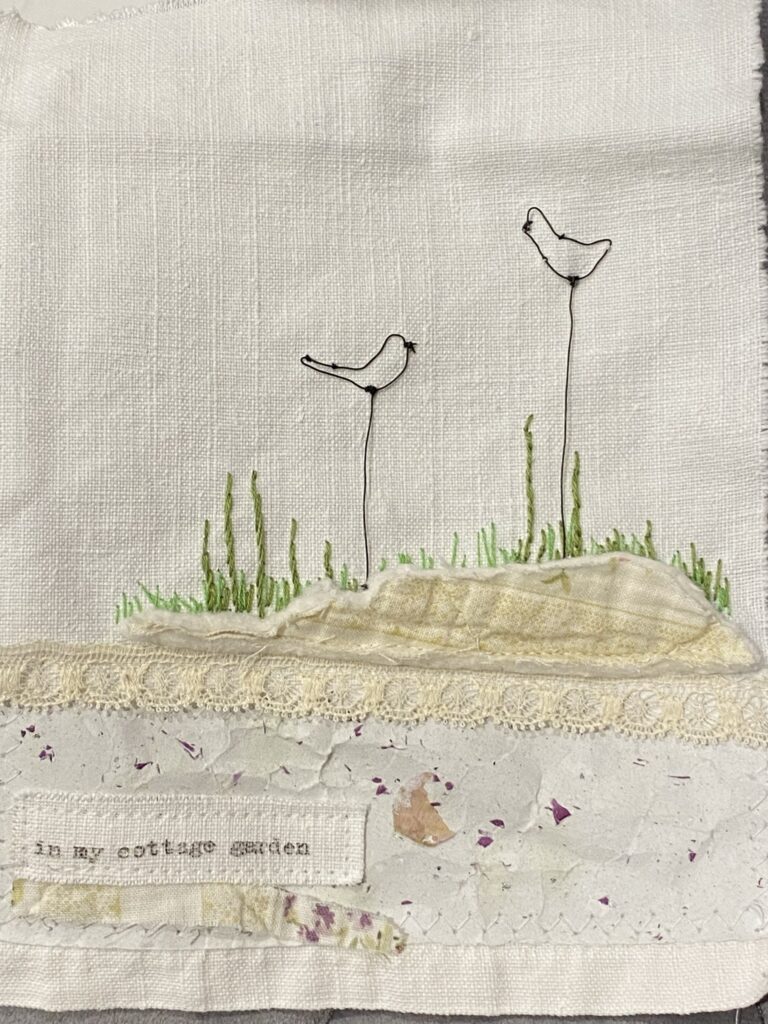
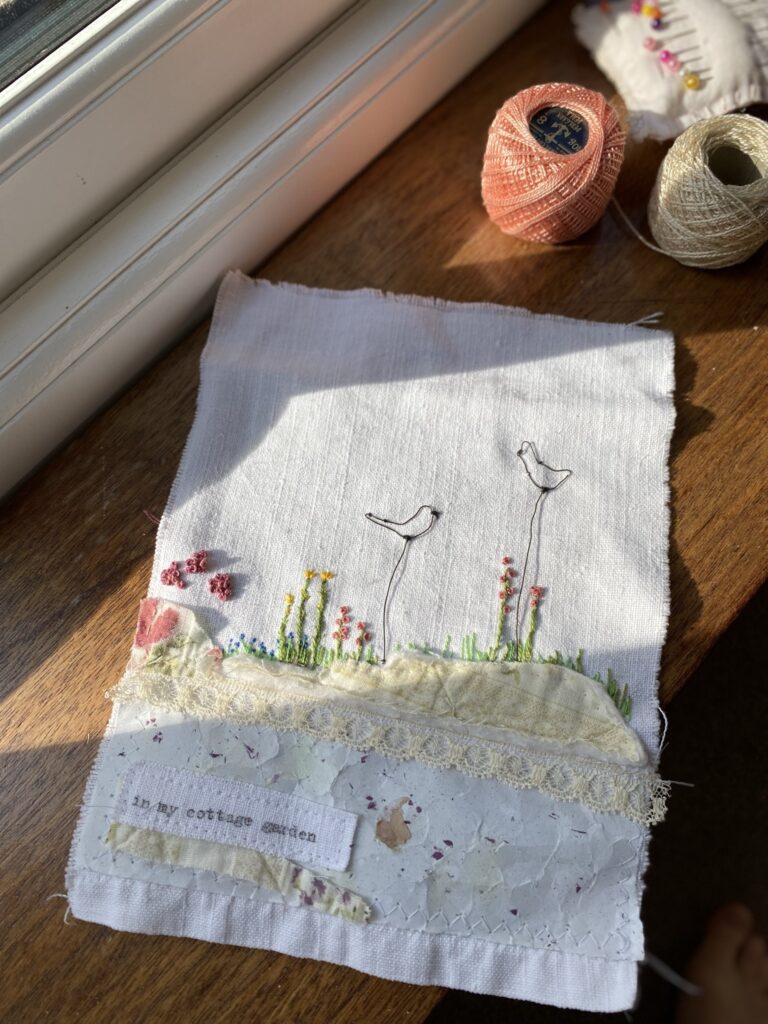
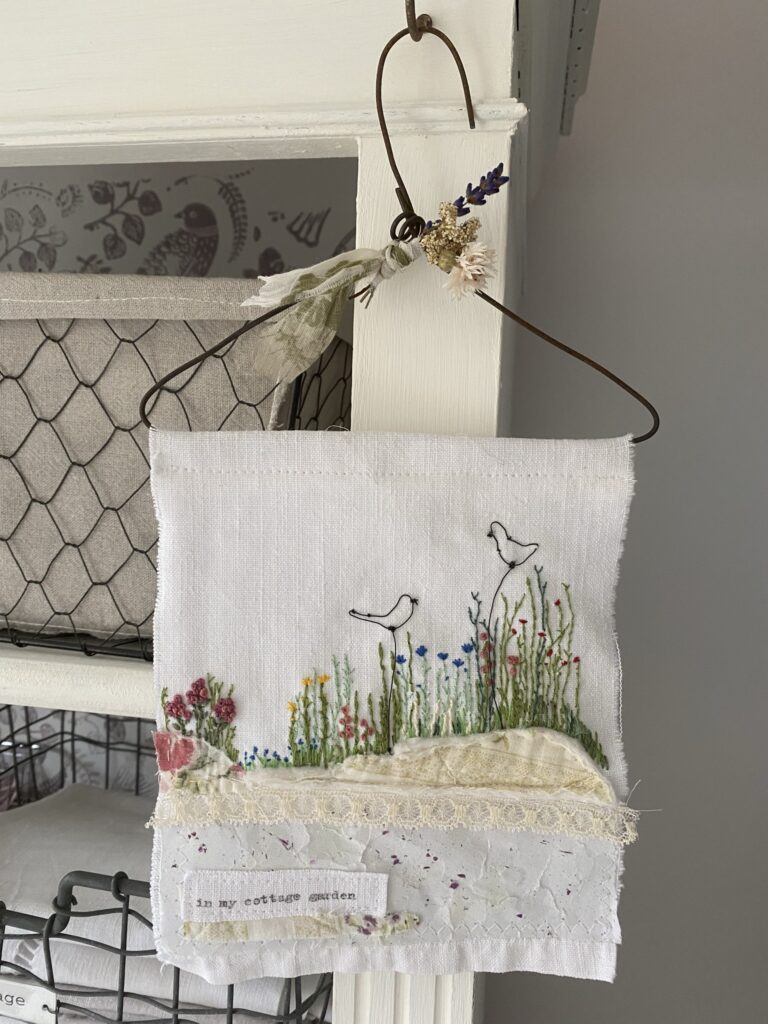
The base for my embroidery wall art was a piece of soft white linen already hemmed for such a craft. And anything else you see in the next two photos is inexpensive and usually a preloved item. Nothing has cost the earth and everything is interchangeable for your own particular piece.
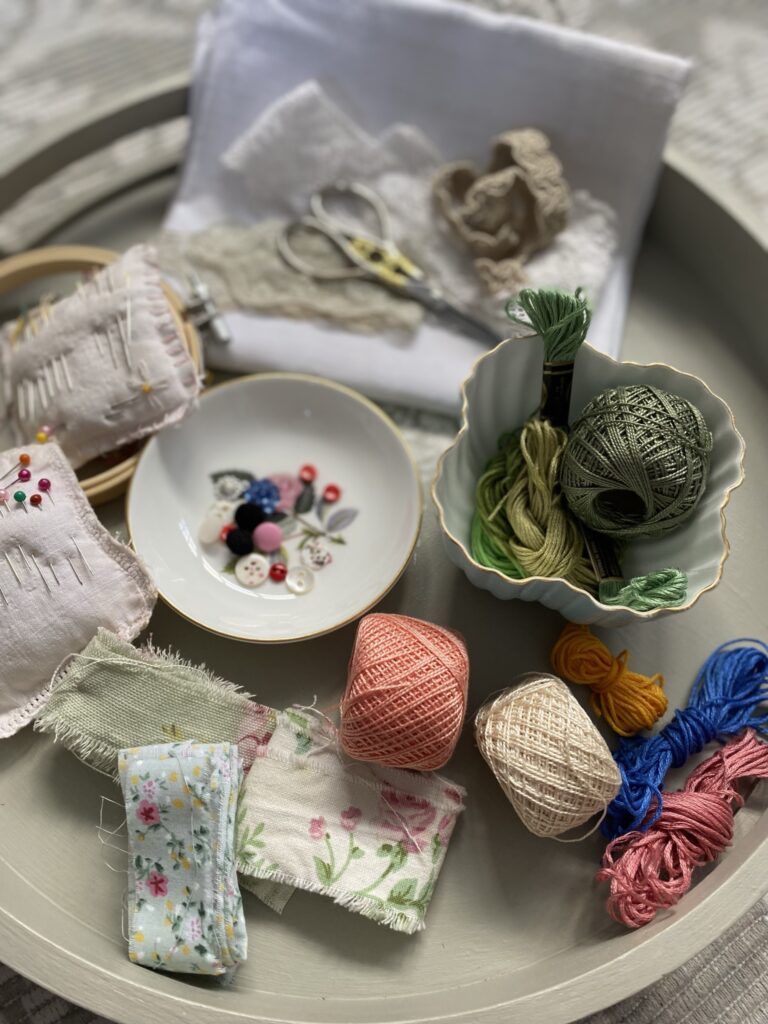
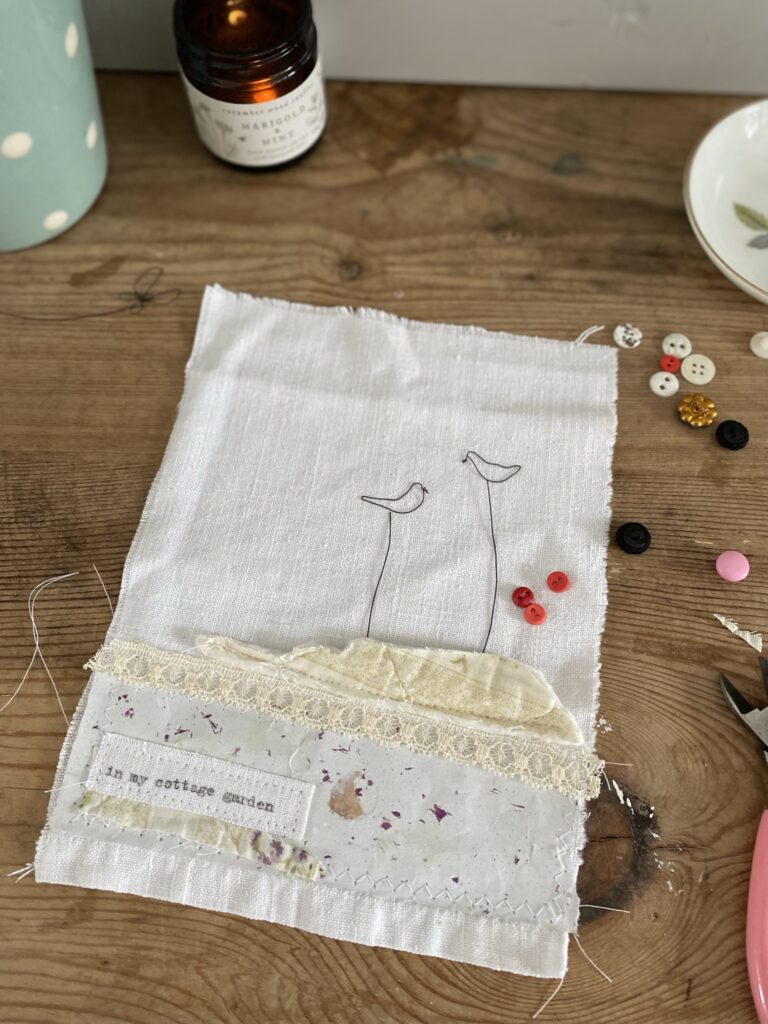
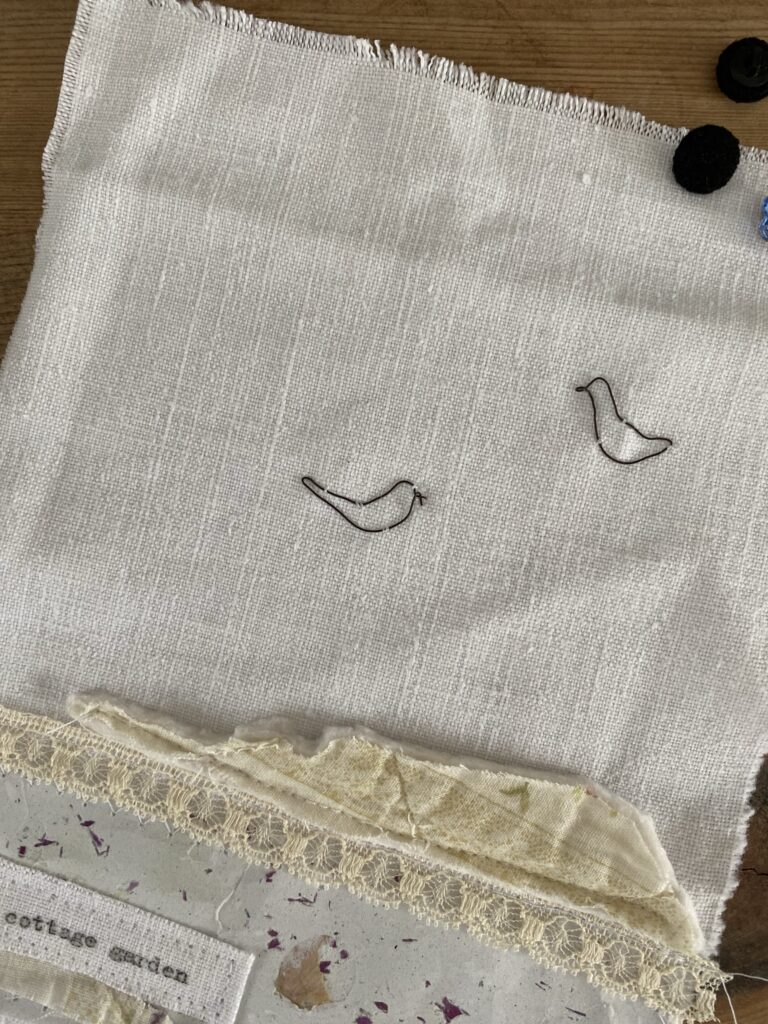
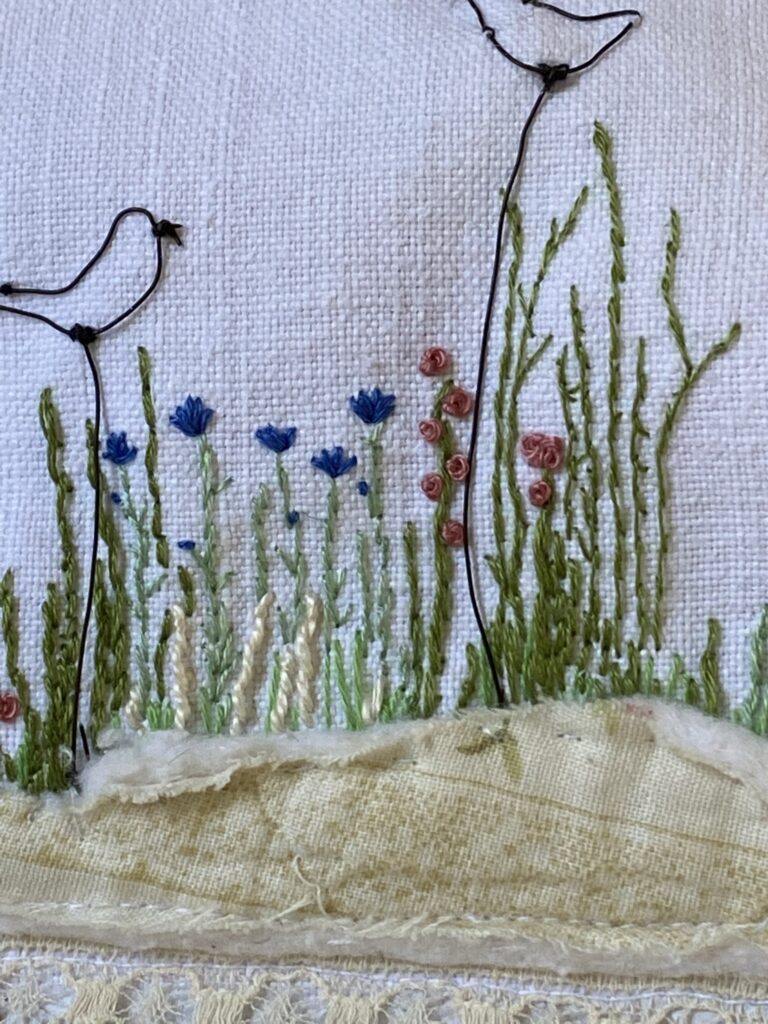
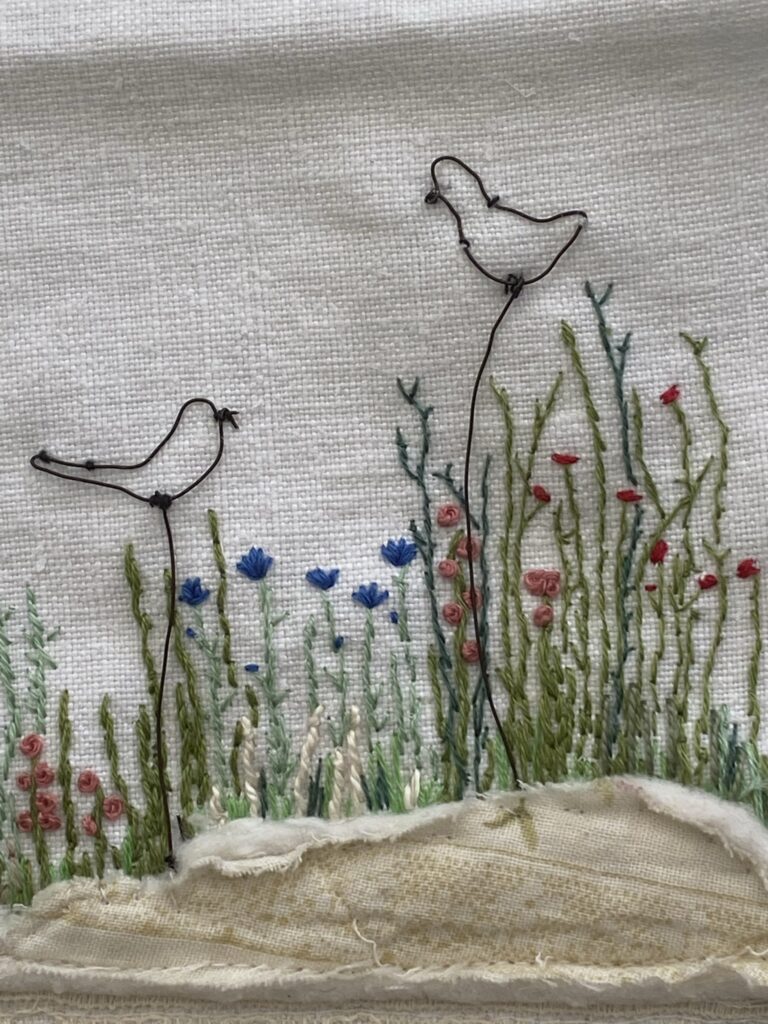
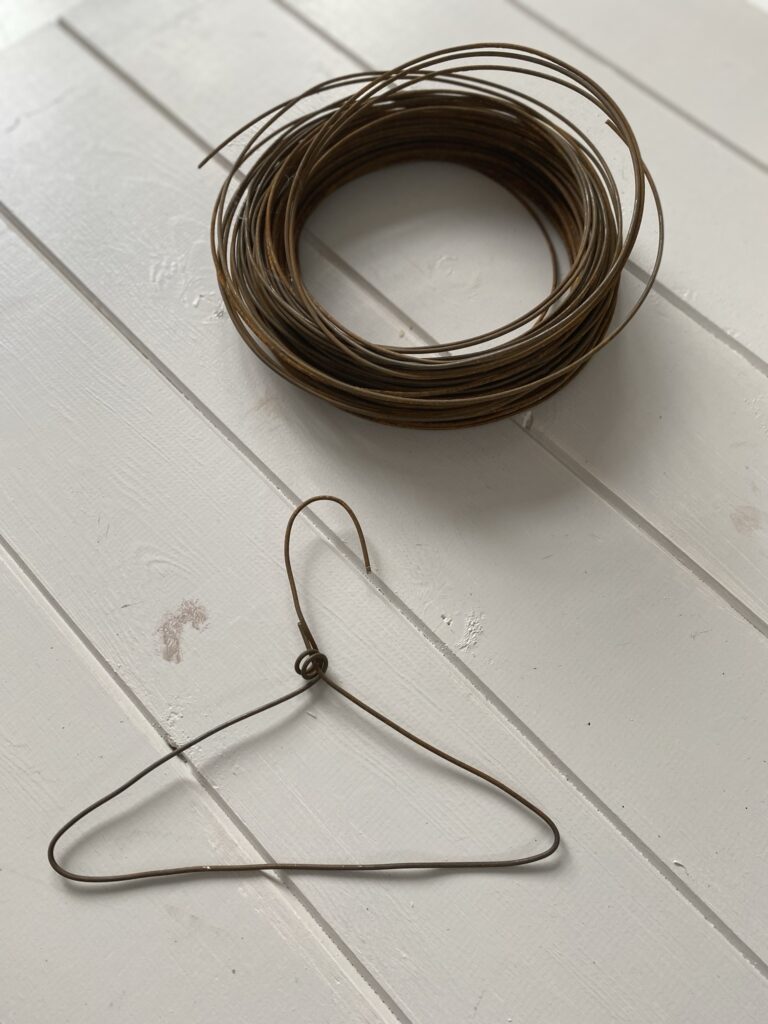
I recently added this book to my wish list after coming across it on Pinterest. Do you have it? If you do, I’d love to know your thoughts. The cover alone captured me and I’m unsure if the author has in fact used wire or thread for her bird although I knew at once, wire would be quite in keeping for my craft. I used this wire and fiddly though it was to make, I repeated the bending and twisting process a second time until I had a pair of birds I was pleased with. Mr M bought me this set which includes a useful pair of teeny round nose pliers which I recommend if you are starting out on a wire art journey.
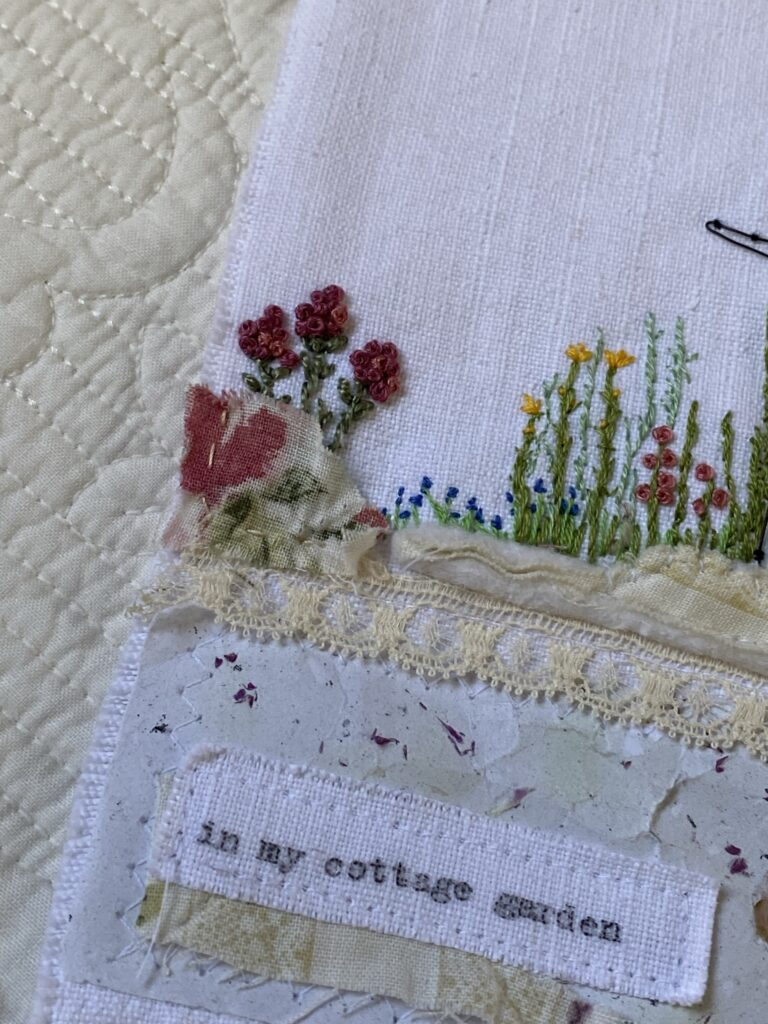
The handmade paper I used was gifted to me last year and you may remember I used it in this post and had some left over which worked perfectly as an anchor for the rest of the fabrics to sit and grow upon for my cottage garden art. Pay particular attention to the crumpled and creased end result when using fragile paper like this. The finish appeals to my style; if your aim is for a crisper, neater finish, you might instead use cardstock or perhaps a stiffer fabric.
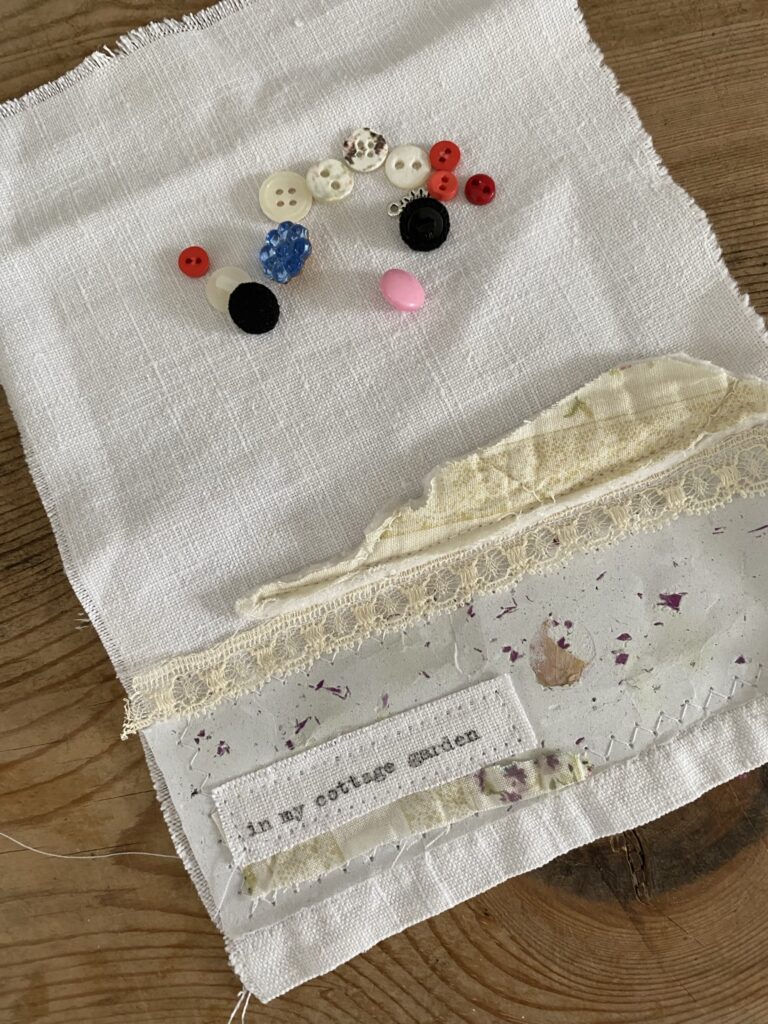
I used my lovely old typewriter for my wall embroidery art. You could use mini stamps or even write your own title or message if your handwriting is quite beautiful. Or there are many free fonts available on your computer which might work for your design and even simply tearing or cutting your words from a pretty magazine can look extremely effective. And then a sweetie shop moment occurred as I spent a long while working my way through endless boxes and baskets of vintage fabric until I found quite the right pieces for my wall embroidery art. A scrap of lace, a snip of vintage quilt and a torn strip of fragile cotton were all I needed.
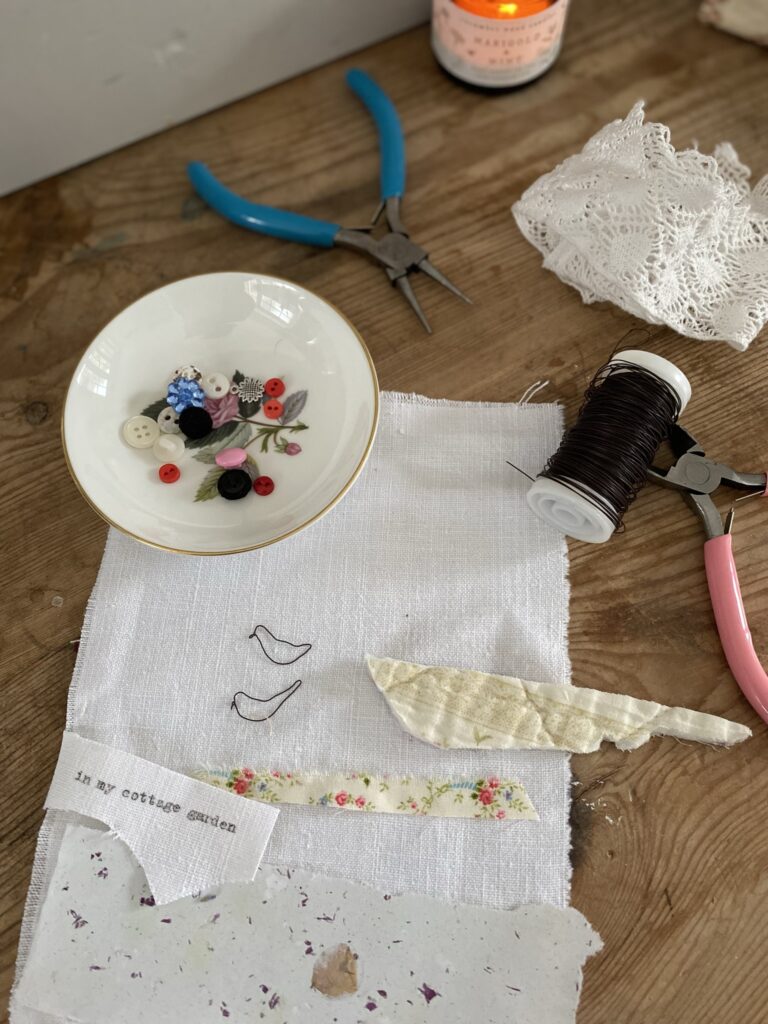
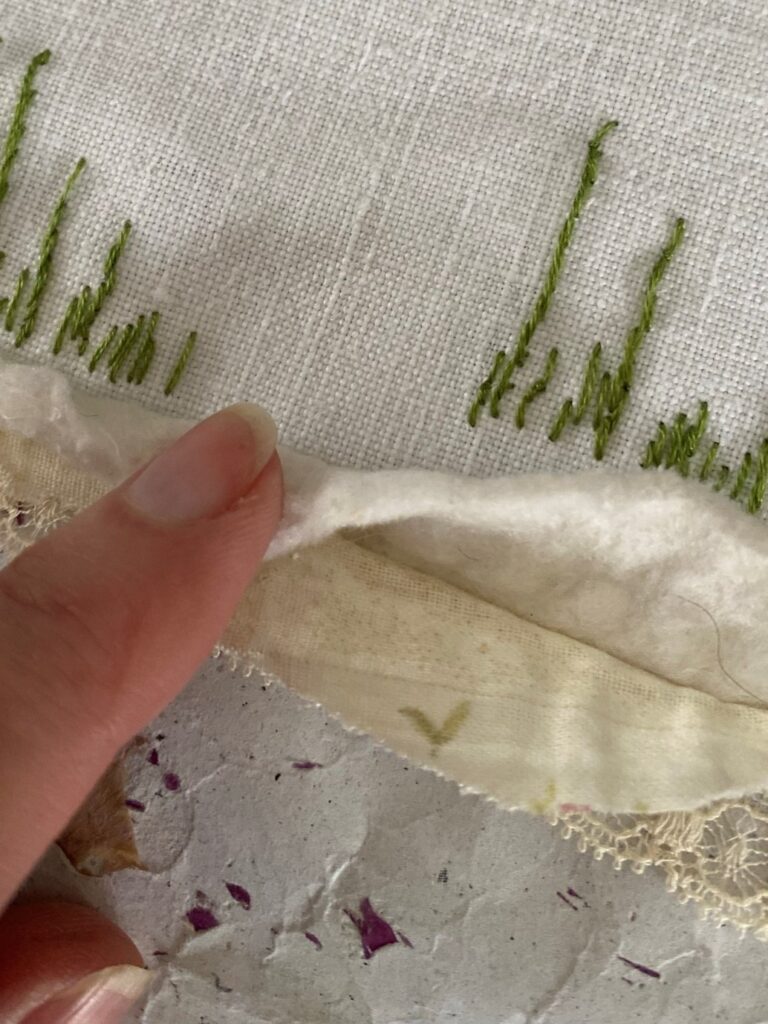
I used my machine and its various stitches to attach much of the main fabrics to my linen base and later additions you will see as we progress, were fixed in place by simple hand stitches. Of course, hand stitching all your trimmings would be perfectly appropriate too. I left the top of my quilt scrap unstitched at this stage, since I wished to hide tail ends of wire and the roots of grass and flowers, such that they might appear to be growing from the ground.
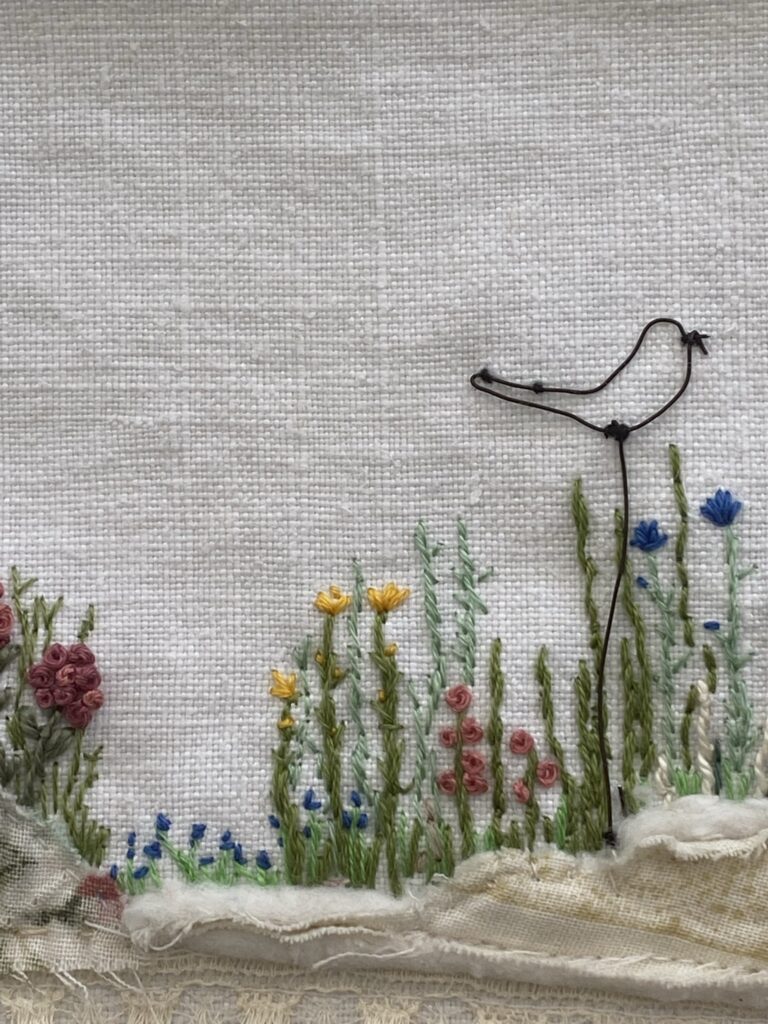
I determined where my birds would rest in the cottage garden and fixed their bodies in place first with white cotton, replacing later with a preferred black thread and I used a length of the wire to hook simply over the bird and tuck safely behind the vintage quilt piece, fastening at the base with a few simple over stitches. I procrastinated as to whether the long wire was indeed necessary however without, the birds looked simply plonked thus the wire stayed. I do think a more accomplished stitcher might appear to have their birds fly or even hover, somehow.
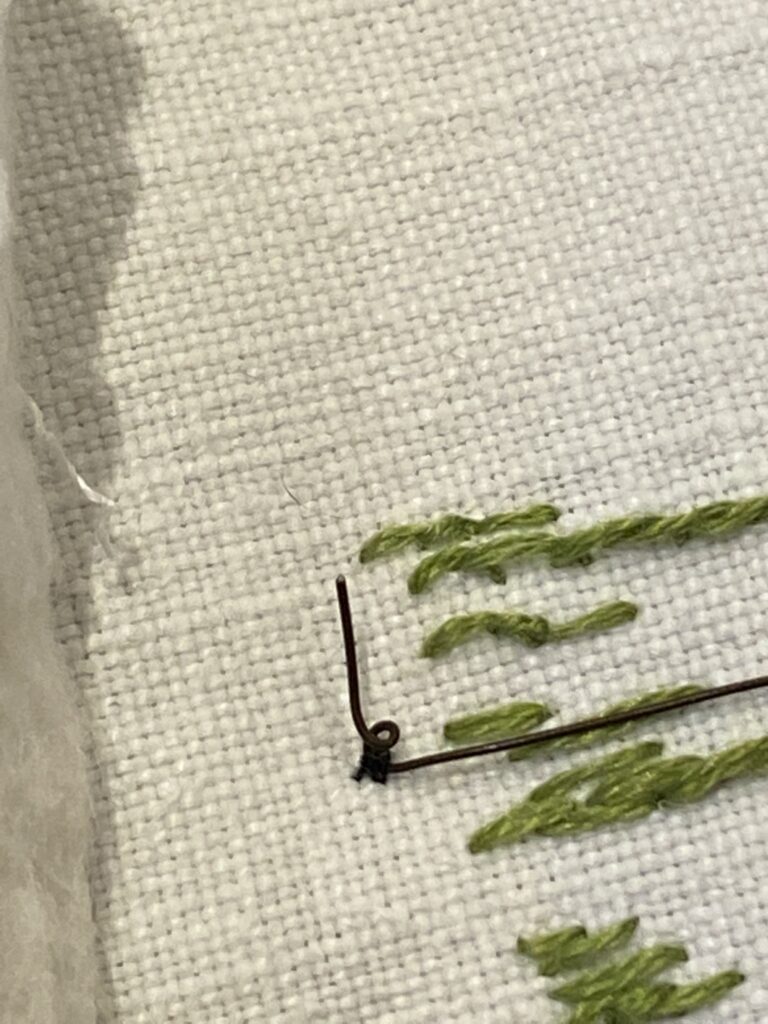
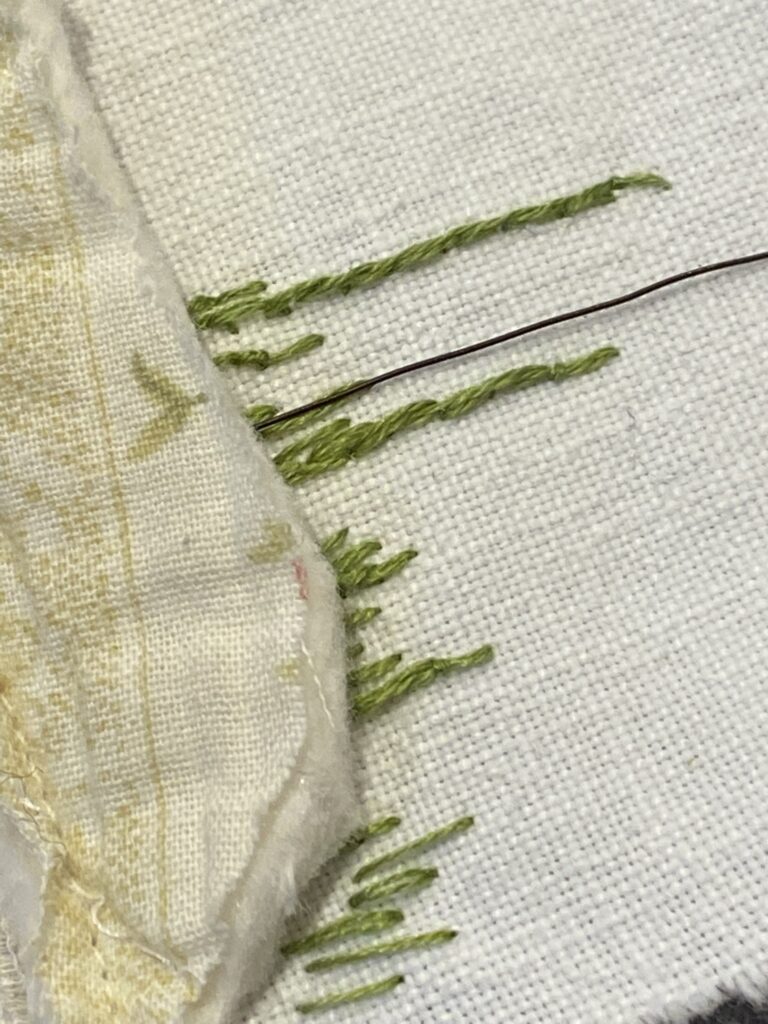
And for the rest of my embroidered wall art, I flitted between grass and flower stitches with a variety of green floss for grasses and stalks and a selection of appropriate floral shades for summer blooms. If a space looked too empty, I simply filled with more foliage. No more than four hand stitches are used in my wall embroidery art: stem stitch, French knot, the occasional back stitch and a simple running stitch in various lengths. If you don’t already have it, this beautiful book written by my dear friend has all the stitches in you will need. Sometimes I used single thread, on other occasions I doubled up; everything used came from bric-a-brac sales, emporiums and of course my favourite charity shops.
What a happy project this was. Picking it up and putting it down for evenings on end whilst it grew and blossomed…
Until I was completely happy with my interpretation of Belle’s Cottage Garden just as I wanted it to be.
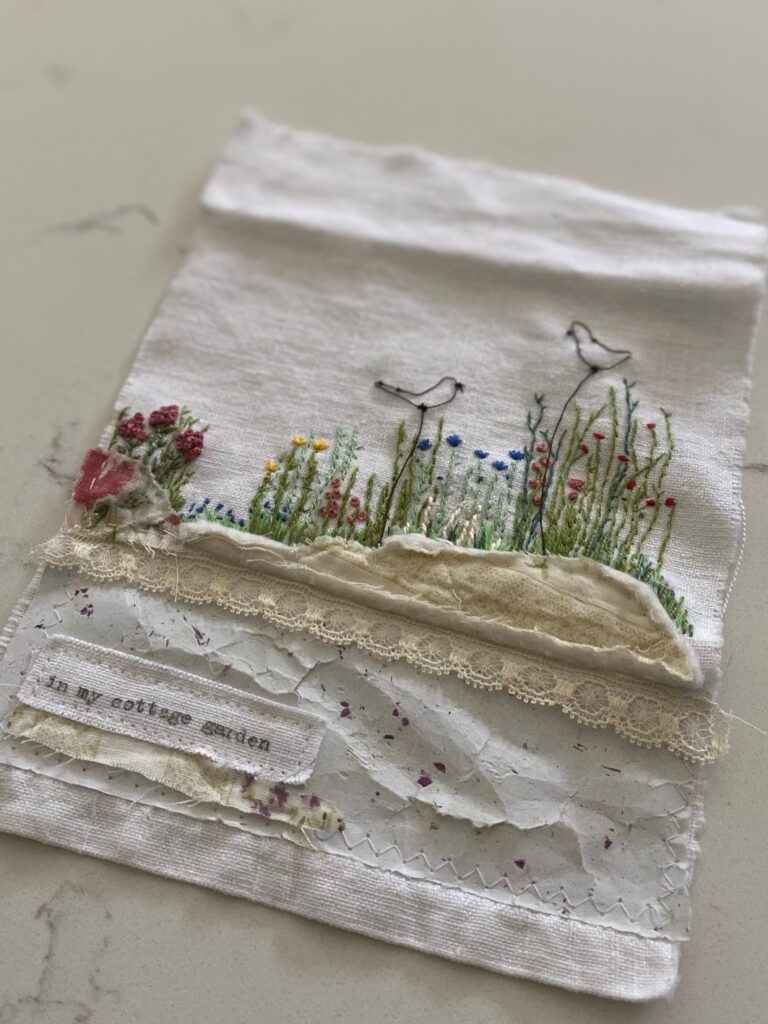
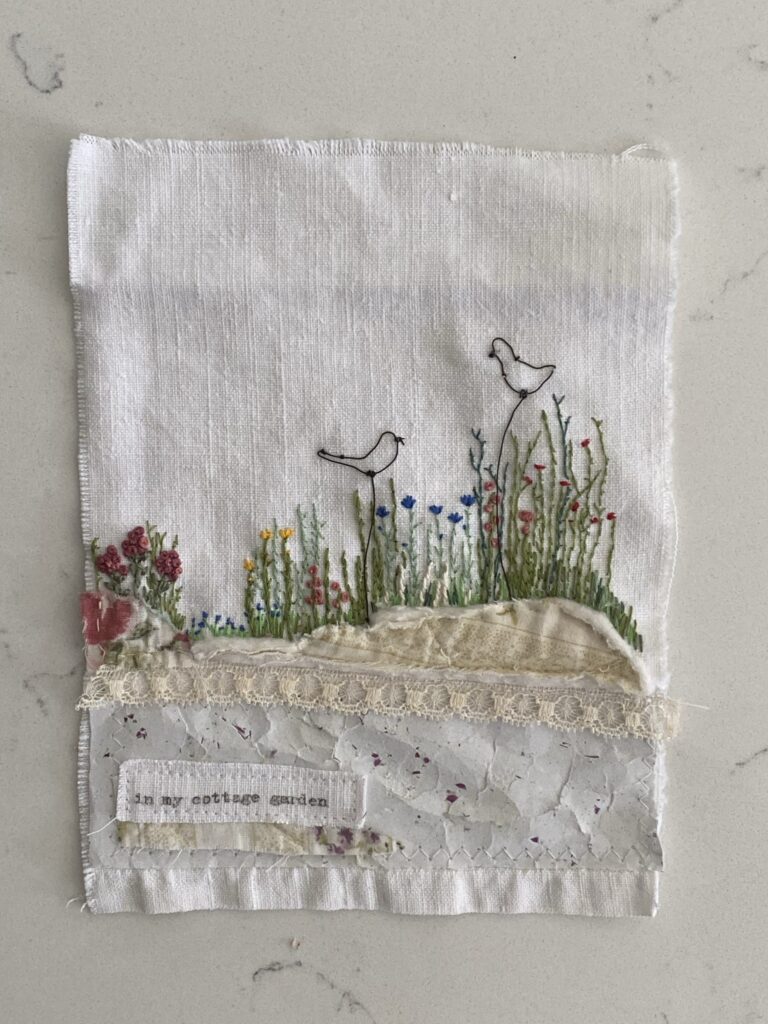
I fashioned a hanger similar to those I made here from rusty wire and turned the top of the linen over, securing in place with a simple machine running stitch, again hand stitching would look pretty too. My final touch was to add a rag ribbon with a few dried flower heads from Belle’s Cottage Garden and there, what do you think? Could you try something similar yourself? Do you have a favourite spot in your home or garden you could interpret in your own way and paint just for you with a needle and thread?
My wall embroidery art has not quite made it onto Belle’s wall, so busy have our weekends been of late. Keep a close watch on my Instagram account and indeed my Pinterest account to see the finished piece in situ in the coming weeks.
And now, you get a little break from me next week as I continue work behind the scenes on an extremely exciting new collaboration which needs my full focus. I will be sharing all with you very soon and I feel sure you will be just as excited as I, when you know more. For now though, I leave you with this thought: I believe the enjoyment I experienced from this week’s craft project must have come quite simply from creating for pleasures sake, with no real expectation for an outcome. I hope you are able to enjoy a few creative moments just like this in the coming weeks too. Until next time…x


Aah thank you so much my lovely friend. This was such an enjoyable slow project, no rush and no real plan, just something to remind me of the cottage garden in the winter months, I’m so pleased you like it and can only imagine how beautiful a representation like this of your own garden would look x
Aah Deolinda thank you for your very kind message, mixing up the medium is fast becoming my favourite new way to create, it’s lovely to see you here this week in my comments box, thank you for stopping by x
Hello Sue and thank you for your message. My rusty wire was purchased from a builders merchants (Travis Perkins) it is not rusty to begin however it is steel and any contact with water will turn it so. Mine is stored in a damp garage and thus rust appears as if by magic, I hope that helps x
Thank you Teresa! It wasn’t easy ‘gifting’ myself however it was wonderful to take the time to slowly create a representation of our pretty garden. I am so pleased you like the idea and the craft too, thank you for your kind message x
Hello Robin and thank you for your kind message, I’m so pleased you enjoyed the blog and the craft too!x
It’s beautiful, your stitches are perfect, I love using favorite things to make a spectacular new piece. Have fun on your new adventure.
Very inspirational! Can you please tell me where you buy your rusty wire.
It’s beautiful! What a lovely gift to give yourself Helen, a perfect example of self-care ❤️
So wonderful!! I love all your side suggestions so very thoughtful and enlightening!! You are so very creative and I love that you use so many different media!
Utterly gorgeous Helen! I love love love it!! I don’t think you need any more embroidery stitches than the ones you have used. ….. such a satisfying pastime making beautiful embroidery flowers. xxx
Aww, I think I might have always wished to be an autumnal woodland fairy!!!! I am so happy you love Belle’s Cottage Garden is stitches, it was an absolute pleasure to stitch each night, love you darling x
I’m so pleased you like it Ruth and yes maybe those days betwixt Christmas and NY hunkered down with a mug of hot chocolate eating more chocolate and stitching away! I think I might try it, thank you for your lovely message x
This made me feel all warm and fuzzy!! I think your beautiful tapestry is a fantastic representation of your cottage garden! I love love LOVE to think of you rustling through your trinkets and special scraps to find just the one you need to fit with your projects. You truly are a scrummy autumnal woodland fairy xxxxx
What a lovely project, it looks so gorgeous, this would be a lovely winter’s day activity, I’d def like to give it a go! Xxxx
Thank you Eunice! I’m so pleased you enjoyed the read and the craft. I so enjoyed embroidering this piece and am looking forward to perhaps more challenges with a needle and thread x
Happy fall to you too my dear friend! I’m so pleased you enjoyed the craft x
Lovely to see you embroidering Helen! It is a beautiful picture! X
Gorgeous and creative as always dear Helen!!! Happy fall ! ❤️