
Hello and welcome back or indeed, hello and welcome, to so many new readers who have found me over the summer! I have had a long and wonderful time off full of sunshine, flowers, family, friends and workshops and a heck of a lot of building work too. Somehow though, I have managed to be a little crafty along the way and today I have for you the sweetest little creation I stitched some months ago. As my Instagram journey continues, I get to virtually meet a great many talented folk along the way. I like to think I am curating my own online magazine of sorts which has seen many-a-content-change as I myself have settled into what inspires and delights me. These days my Instagram feed is full of favourite crafters and makers and one special account in particular I like to keep up with is @thelittlesewingmouse which is curated by Lesley, an extremely talented lady who also happens to be an all round lovely and kind human being too. Join me as I share with you Lesley’s Pinterest inspired signature make; a sweet little fabric mouse – of course – which she has generously agreed I can share the making of with you today…
If you don’t already follow Lesley, you may enjoy a peek at her Instagram page. Mice are only one of a great many sewing achievements as you will see for yourself when you get lost down this inspirational rabbit hole. It was during one of our online conversations when Lesley told me she is at her happiest with a needle and thread that I asked where the name of her account came from. “It was my dear Dad who called me mouse from the minute he saw me” she said. Quite a fitting Instagram name when you know the back story.
Had I known previously the joy of creating a fabric mouse, I may well have made a mischief of mice of my own before now. These little treasures are quick, simple and a great way to use up those scraps of fabric and embroidery threads we have hanging around. And if today becomes the start of your mouse journey, these fabric sweeties, can be created in a great many sizes and styles too. I am seriously considering themes and seasons. I quite like the idea of a horde of mice in autumn shades of orange, brown or maybe even tweed, nestled amongst my seasonal pumpkins.
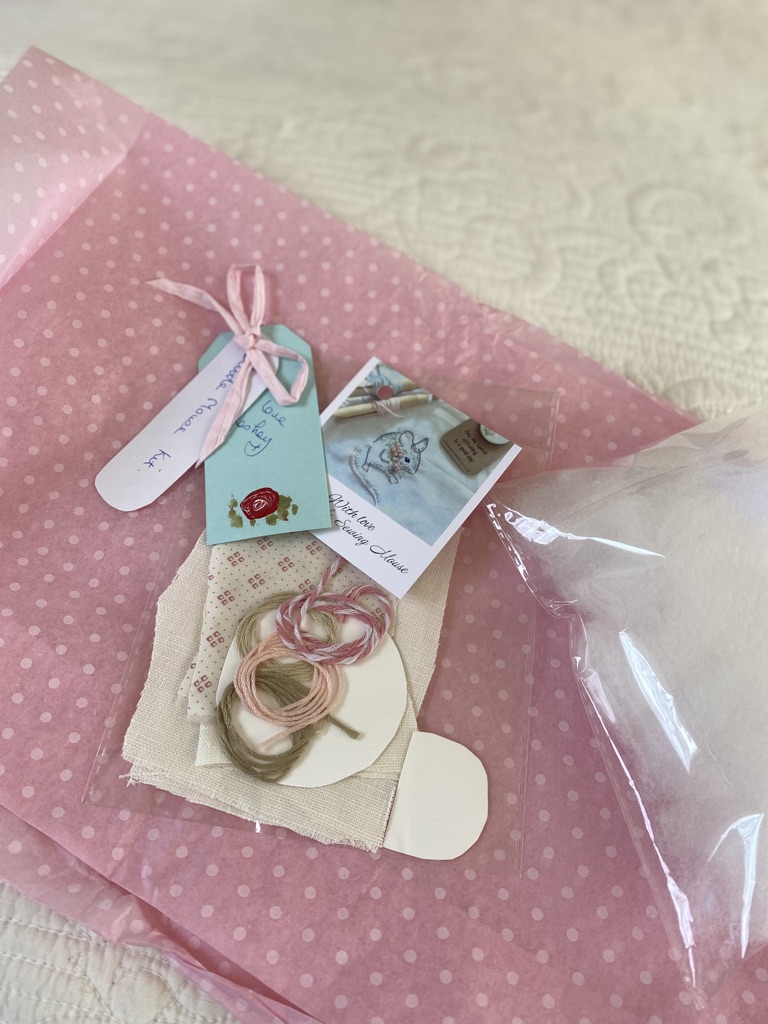
I was lucky enough to receive a little kit from Lesley complete with all my mouse pieces already cut out and my cutie measures approximately ten centimetres high. If your mouse is to be larger, just scale up from the measurements I give below or search Pinterest to see what other crafty folk out there are hoping to share with you too. There are a lot of free patterns available.
To create Bridget – of course that is her name – you will need:
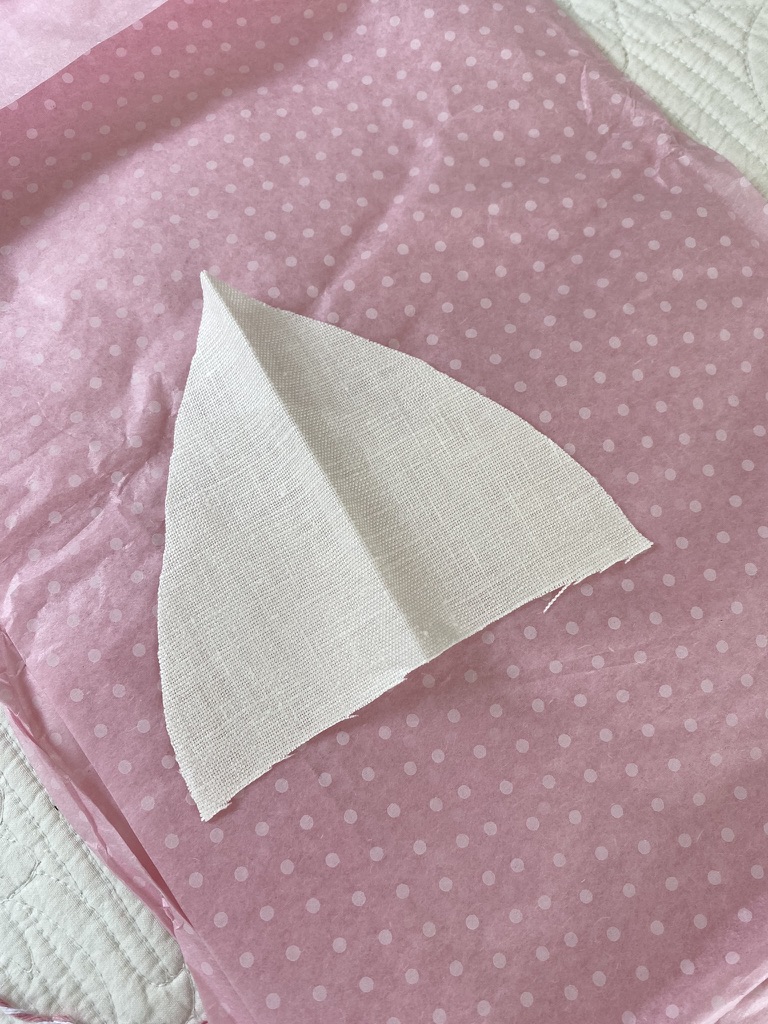
- Scrap fabric for the mouse body – I used white linen. The arc shape is shown in a photo below and measures twelve centimetres at the highest point and again, twelve centimetres along the entire base.
- Scrap fabric for the mouse base – I used white linen. The diameter of your circle should be approximately five centimetres
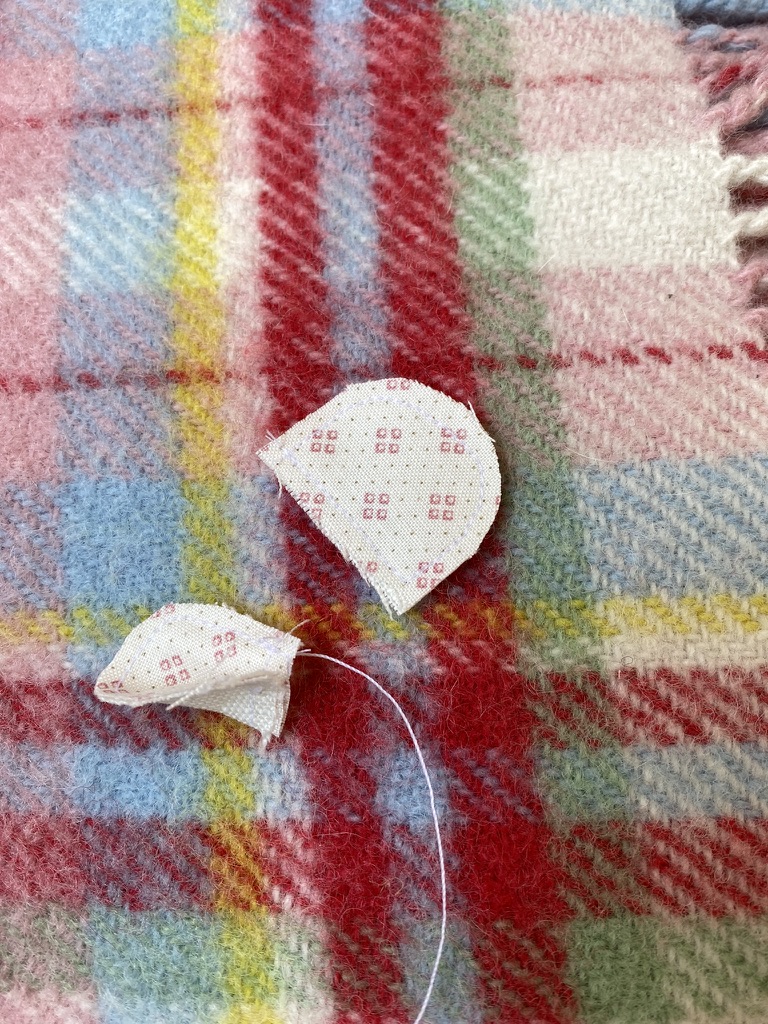
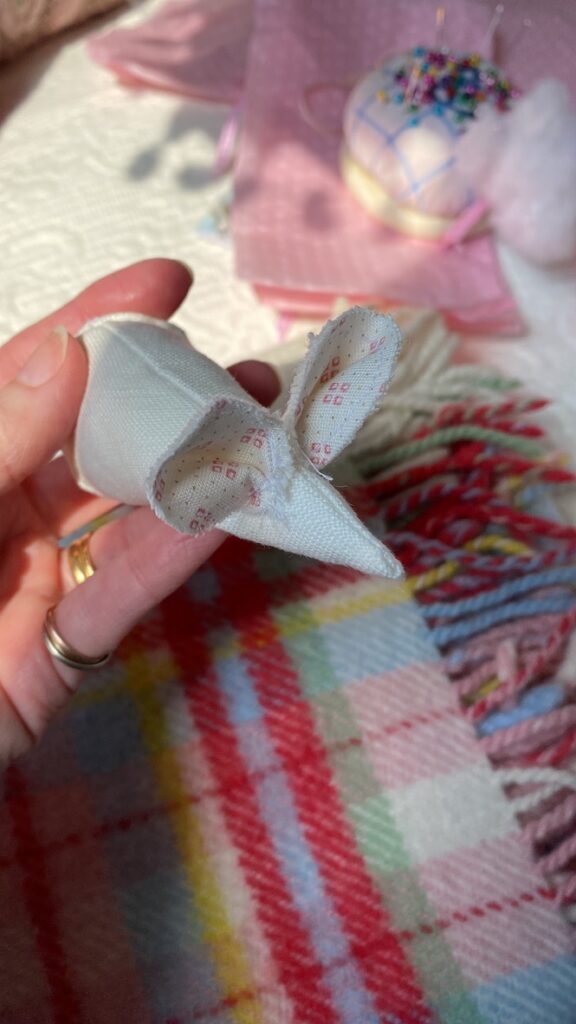
- Scrap fabric for the outer ears – I used white linen measuring approximately three centimetres square and cut out in the shape shown in a photo below
- Scrap fabric for the inner ears – I used ditsy pink and white as shown in a photo below
- Toy stuffing
- Embroidery thread in coordinating colours – I used pink and two shades of light brown
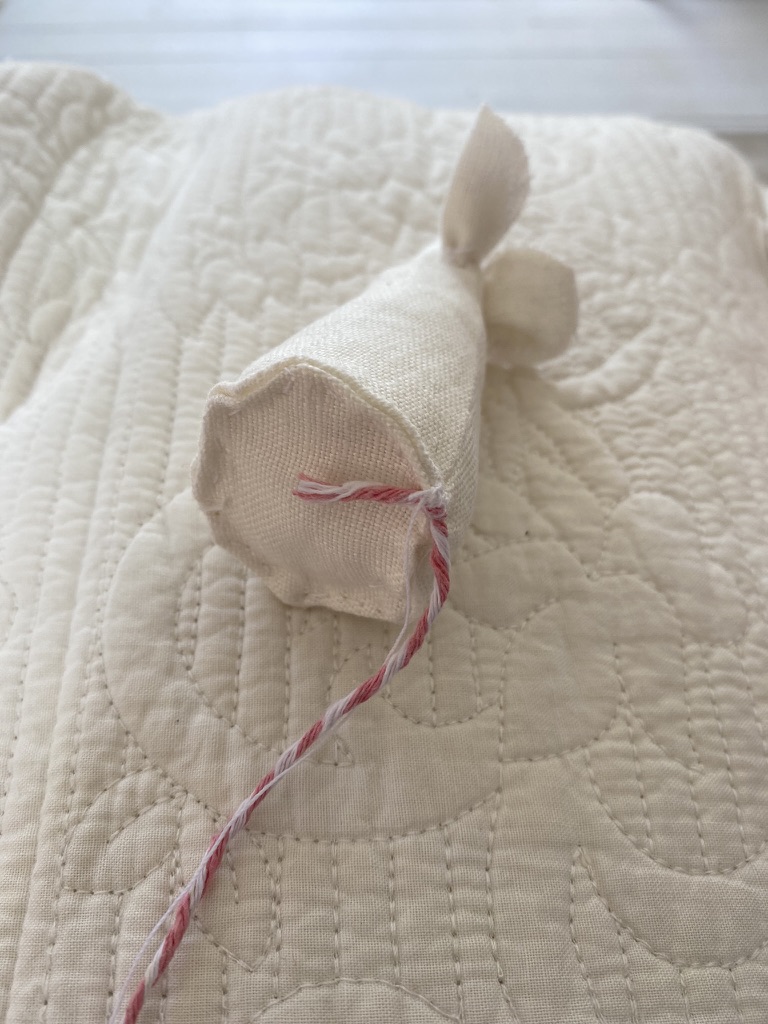
- String, wool or more embroidery thread for the mouse tail – I used soft pink and white bakers twine string
- White sewing thread to stitch your parts together

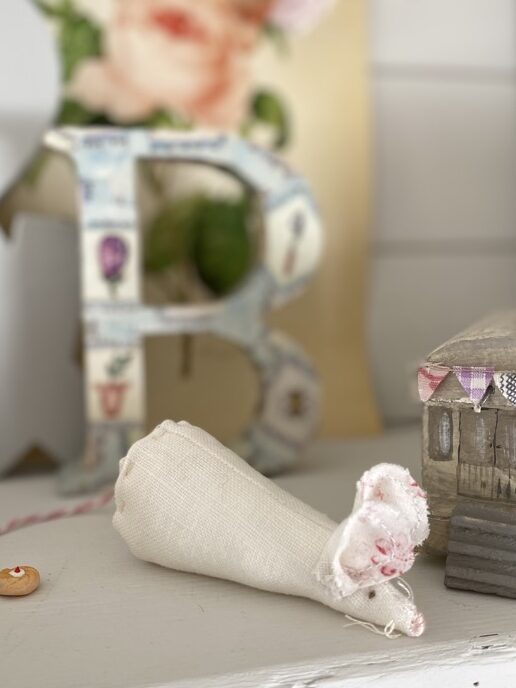
Begin by folding the arc shape fabric in half and sewing around the curved edge. I used my machine for this part of the craft. You can stitch this by hand, just keep your stitches small and close together. When you’ve finished, turn your fabric the right way around, poke to create the pointy ‘nose’ of the mouse and press flat with an iron. If you’ve used patterned fabric here remember to fold the fabric with right sides facing before you stitch.

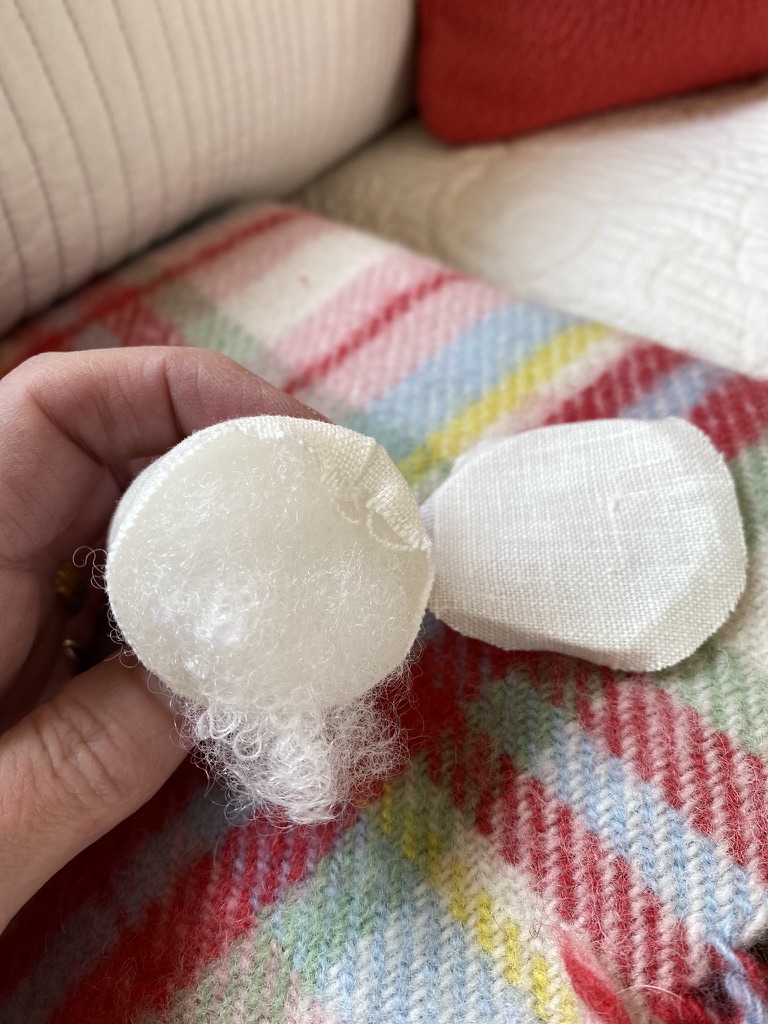
Next fill the body of the fabric mouse with your toy stuffing. If I was making this today for myself or a friend, I would certainly add some lavender buds for an extra treat, wouldn’t that be fancy? Perhaps not if gifting to little ones though. Now take a closer look at the first photo below. I turned both pieces of fabric under a little for a neater finish, see the second photo as I begin hand stitching the two pieces of fabric together. I simply used my finger nail to score sharp folds; you could iron yours if you like. Continue stitching all the way around your circle until you have a mouse body; picture three.


Now for the mouse ears and again I used my machine to join the white linen to the ditsy cotton twice, thus creating two flat ears, although easily achieved by hand stitching or by sticking with fabric glue if you prefer. I gathered each ear at its base with a running stitch and fixed them atop my mouse, where one might expect to find mouses ears. Mice ears? The ears of mice?? The ears of the mouse???!
I attached the tail as you can see in the first photo and trimmed it. I wouldn’t do this again, next time I would tuck the string into to base and stitch as I go. To cover the muddle I created, I patched with an antique scrap of fabric which you can see later on in this post. For the nose, I used several strands of the pink embroidery floss and simply stitched over, around and through the fabric.
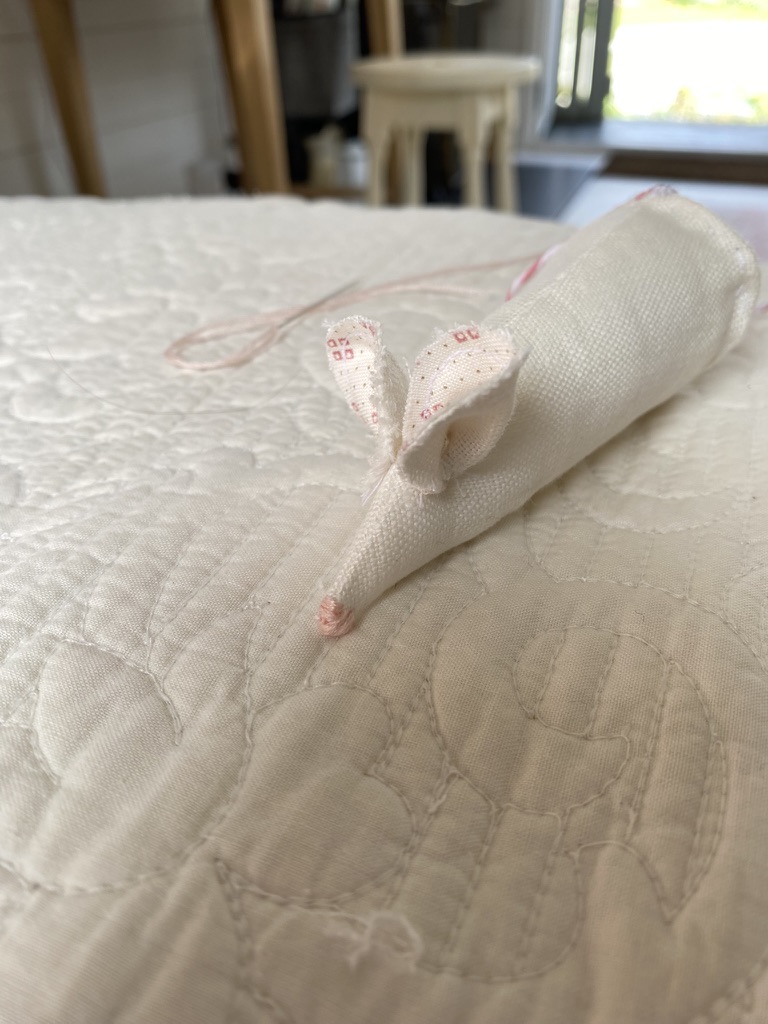
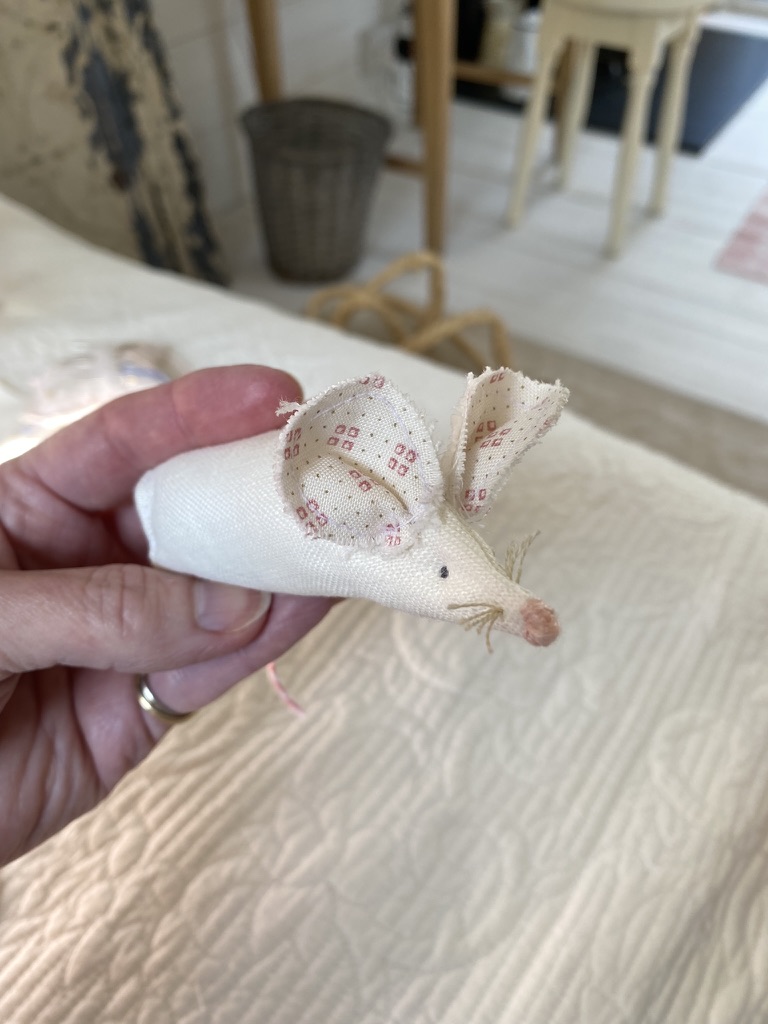
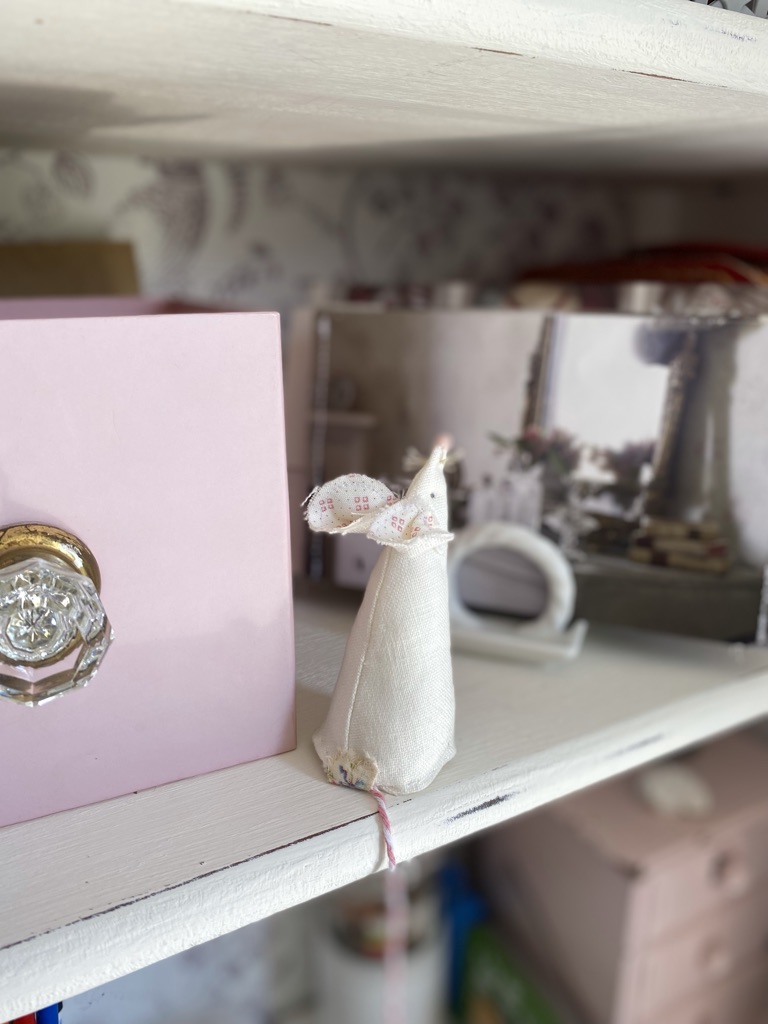
The whiskers were a delight to create simply by threading five strands of light brown embroidery thread through my needle at once and passing through the mouse nose from one side to the other and then snipping the thread when I was happy with its length thus forming a set of ten whiskers. And all my sweet little creature needed to complete her, was a pair of eyes which I attempted twice not liking my original positioning. I used a little French knot, wrapping one strand of darker brown embroidery floss around my needle just the once. Repeat on the other side of the mouse face for the second eye.

When Lesley sent me my kit, she also kindly sent me a completed mouse of her own. How thoughtful this was since had I not got around to making another mouse for some time, my mouse may have been a little lonely.
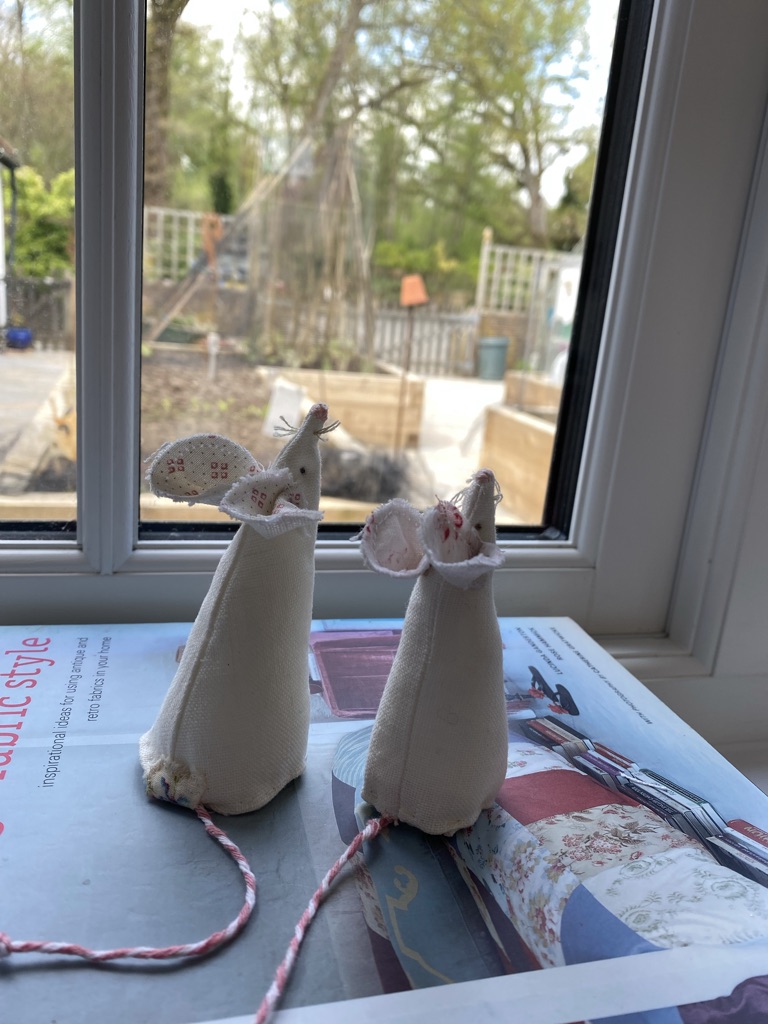
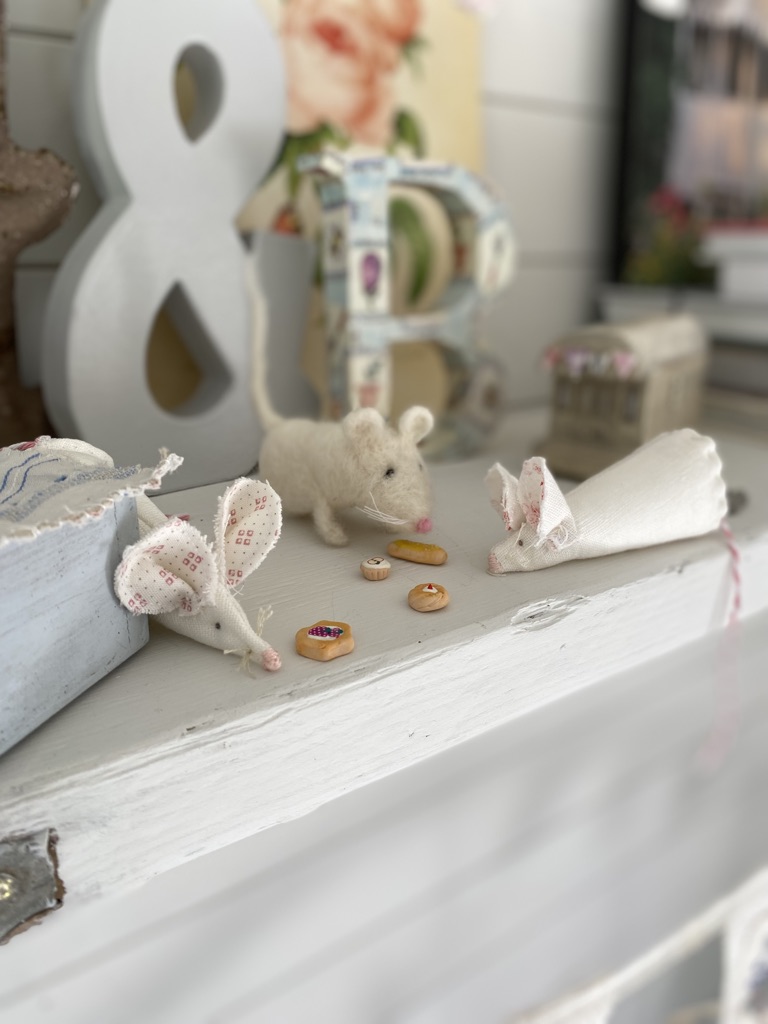
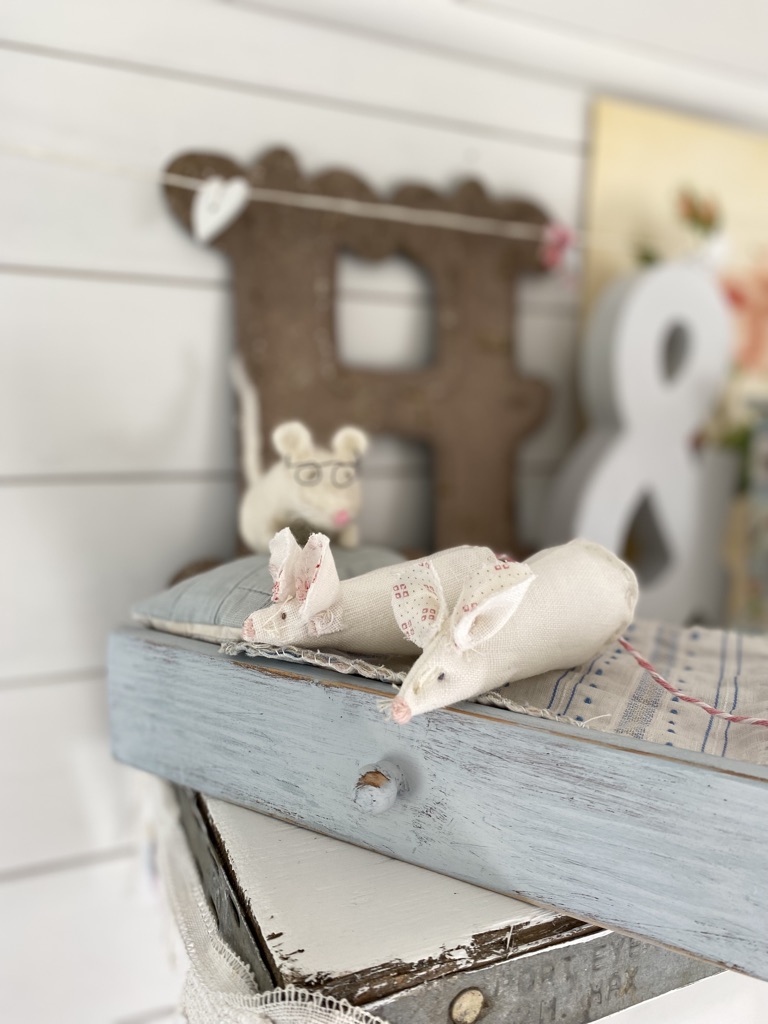
Abigail and Bridget are of course never lonely and have become quite inseparable. They spend their days at Belle’s getting into all kinds of mischief and they live upon a very special shelf, full of generous gifts and crafty makes from real life friends and folk I’ve met since I’ve been blogging. They have teamed up with a little felt mouse created one day long ago – Roquefort – and they all share and nibble their way through everlasting cake and breads until bedtime. None of them abide by human rules. When the last candle of the day is extinguished and the fairy lights are switched off, they think I cannot hear the chattering and scuttling and endless giggling of three firm friends getting up to all kinds of mischief, yet of course I do.
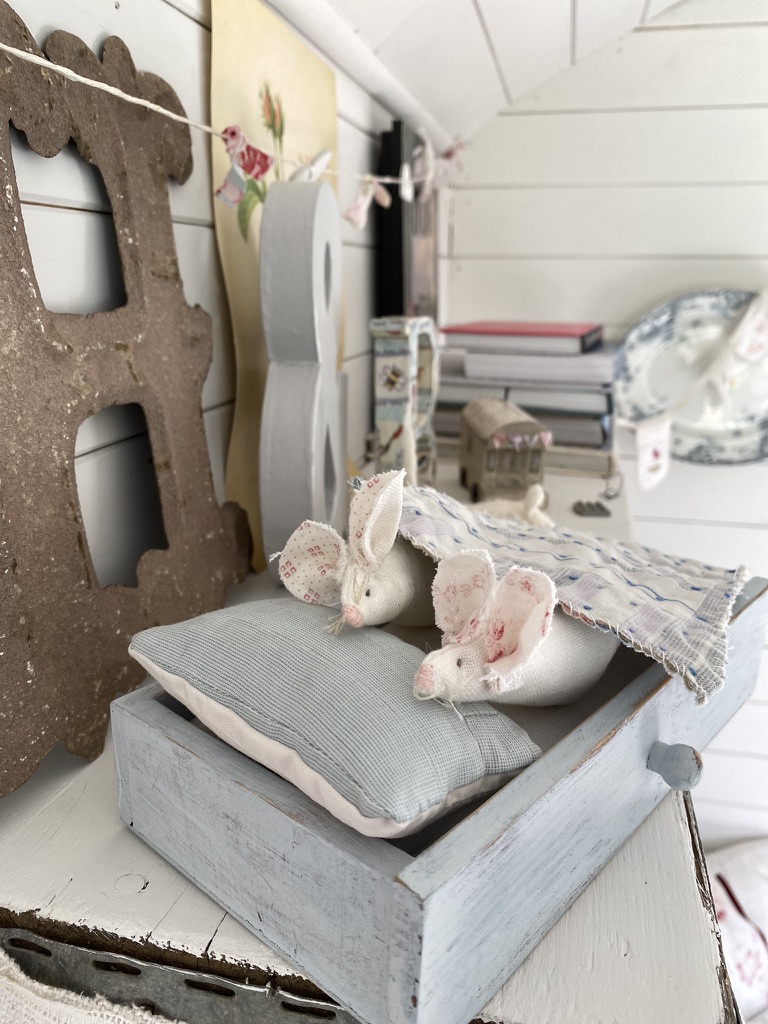
So tell me this, shall you be creating a fabric mouse of your own? For you or someone else perhaps? I imagine a zillion designs and creations could be achieved out of vintage scraps out there. Perhaps if you have small children or grandchildren this could be a half term craft with them. I think with the help of a grown up, small fingers could achieve a cheeky mouse or two. Next time my young niece comes to visit I imagine we may try a mouse, maybe with a change of clothes and maybe with a small wood and wire bed, quite vital for occasional napping and of course the tiny bed must have a teeny tiny vintage quilt and a snuggly little blanket or two and maybe our mouse should have a friend or two or three… Until next time x


Ha Ha you spotted the specs… your brother made those!! I am so pleased you loved the story of Abigail and Bridget’s adventures with Roquefort, time for more meeces to add to my mischief do you think?x
Oh HOW CUTEEEEE are they?!? I was smiling from ear to ear reading about their little adventures and seeing them in their bed!! Also…is one of them wearing glasses?!? Hilarious xxxxx
Oh wow I didn’t know this about you! how sweet to recall this and yes definitely no little mouse can be alone for long! These are so sweet to make and very theraputic too!x
Oh Helen, memories of my childhood came flooding back reading this post. I used to make little mice just like these but out of felt as a little girl and sell them on a little stall outside my house along with roses gathered from our garden. Little did I know then that was the start of my Home to Roost journey.
I think perhaps my little felt mouse we made together also needs a companion now.