
A late wish from me to you for a very Happy New Year. I hope your Christmas was a wonderful one and you managed to do something you enjoyed during those quieter days I like to call Betwixtmas. Mine went by in a flash although I did manage to while away some crafting time and achieve a little hand stitching and embroidery. And FC must have placed me on that good list of his at some point because I received a new sewing machine and enjoyed some time playing with that too. More on sewing another day. Today is all about rubber stamp projects and in particular, homemade Christmas thank you’s using my favourite new craft rubber stamps, do join me …
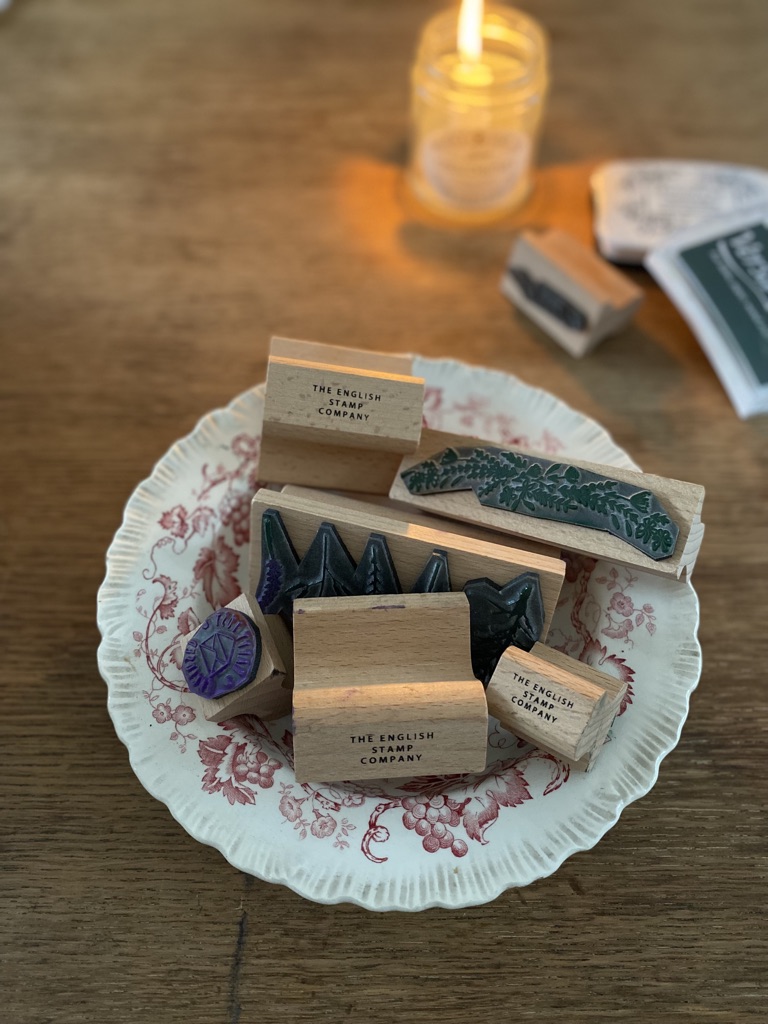
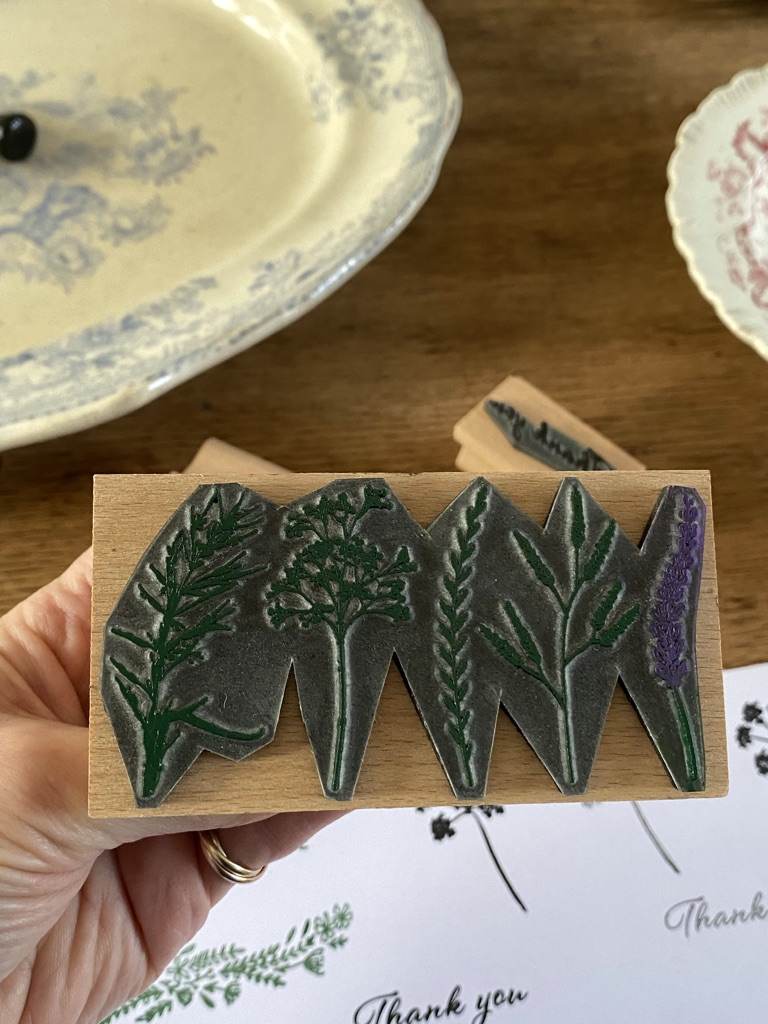
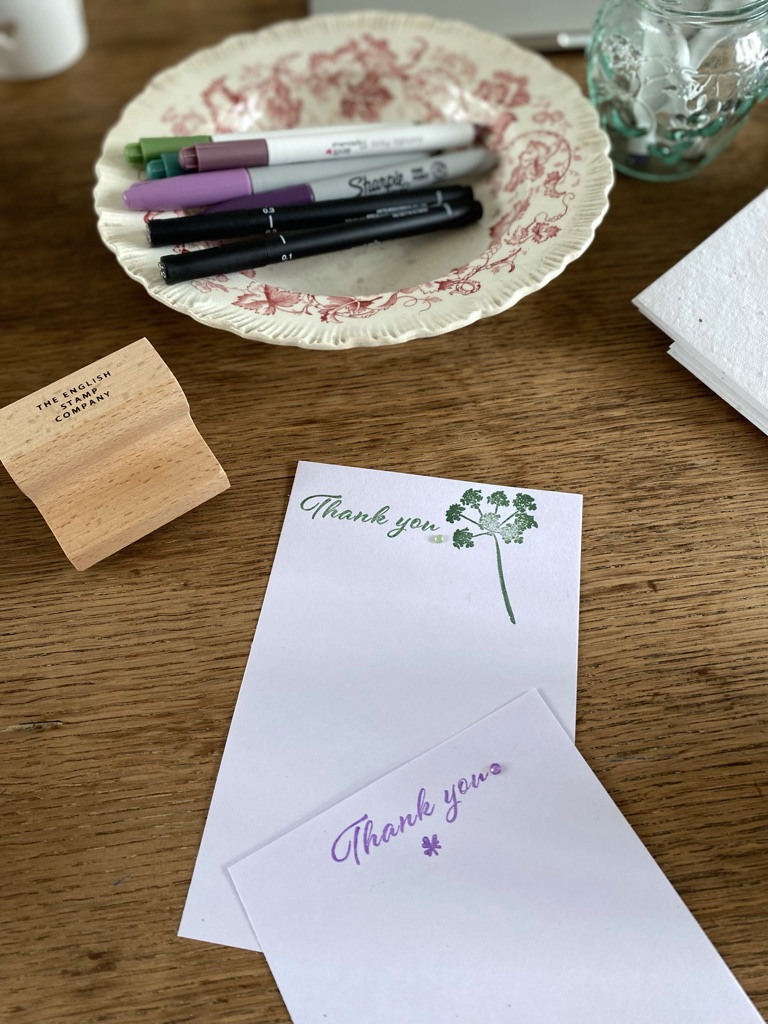
If you follow me on Instagram it will not come as a surprise to you that I have a new crafting addiction in the form of handmade rubber stamps. I’ve bought many from various suppliers and of course from my beloved charity shops as well. I’ve yet to find any I favour more than those from The English Stamp Company, a small family run business whose level of customer service is what is should all be about. Their rubber designs sit proud above simple beech handles so messy mishaps are fewer and I find this invaluable towards my personal ‘less waste’ goal. Of course I urge you to practice freely to get the hang of your new toy; once mastered though, you’ll find the process of stamping cards, paper, gift tags, invitations and fabric, yes fabric, a breeze.
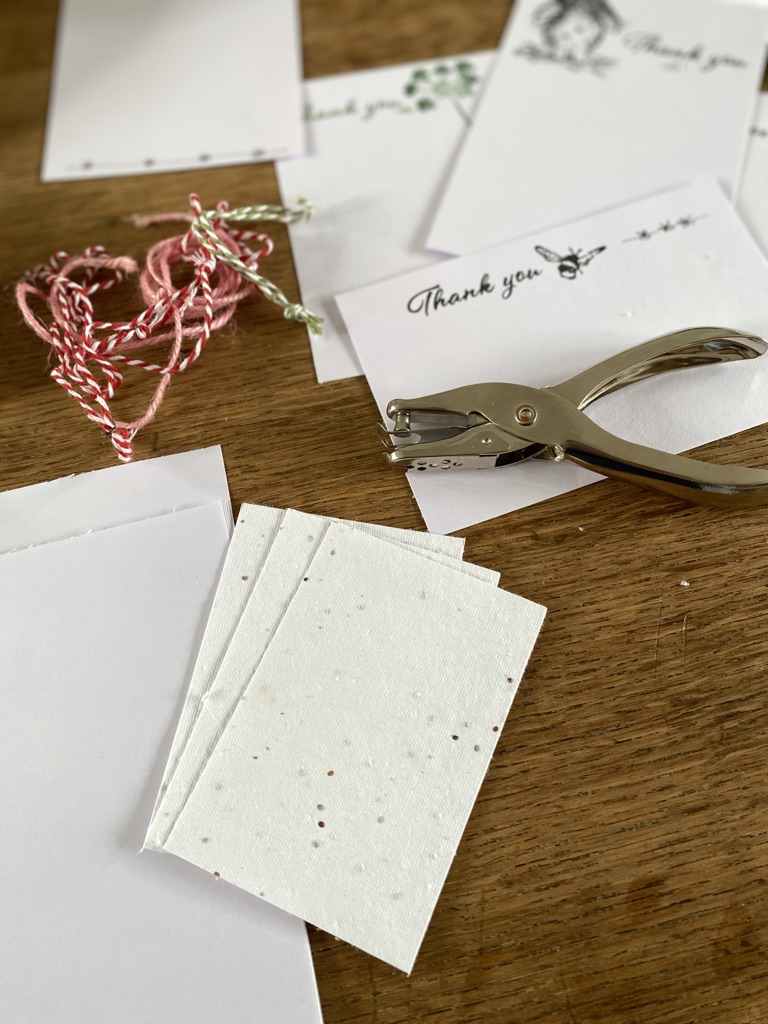
Today I am showing you a selection of my Christmas thank you cards. And it is only a selection. For as you can imagine I got just a little carried away and spent far too many hours playing and frankly stamping anything within easy reach once I got going.
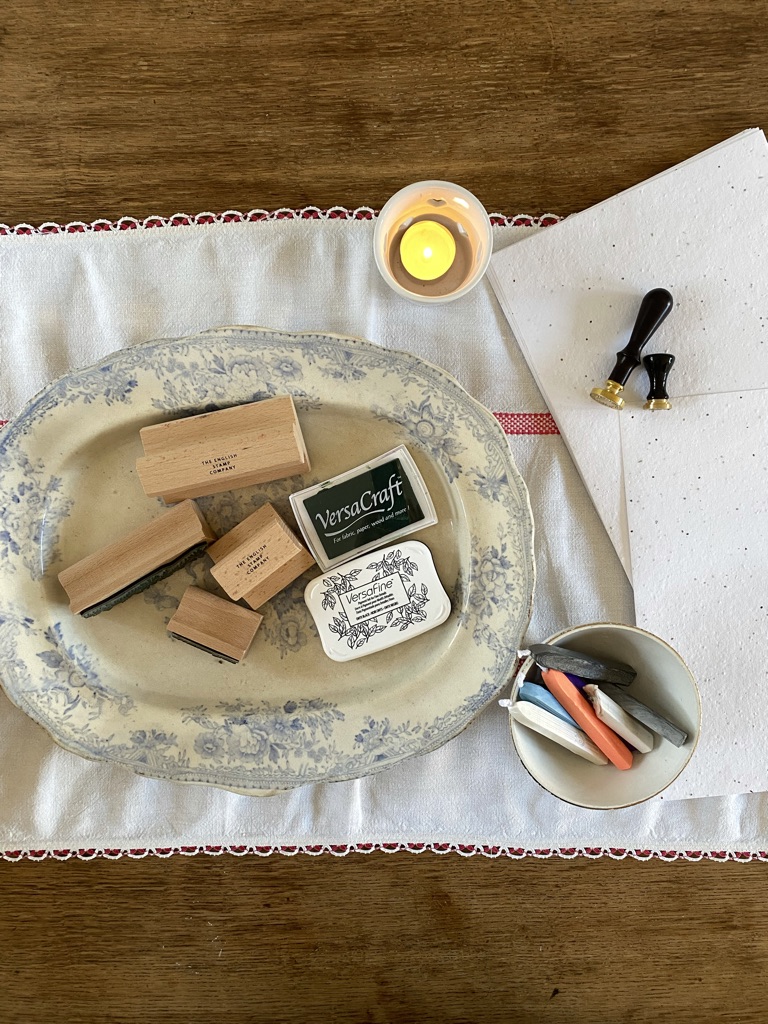
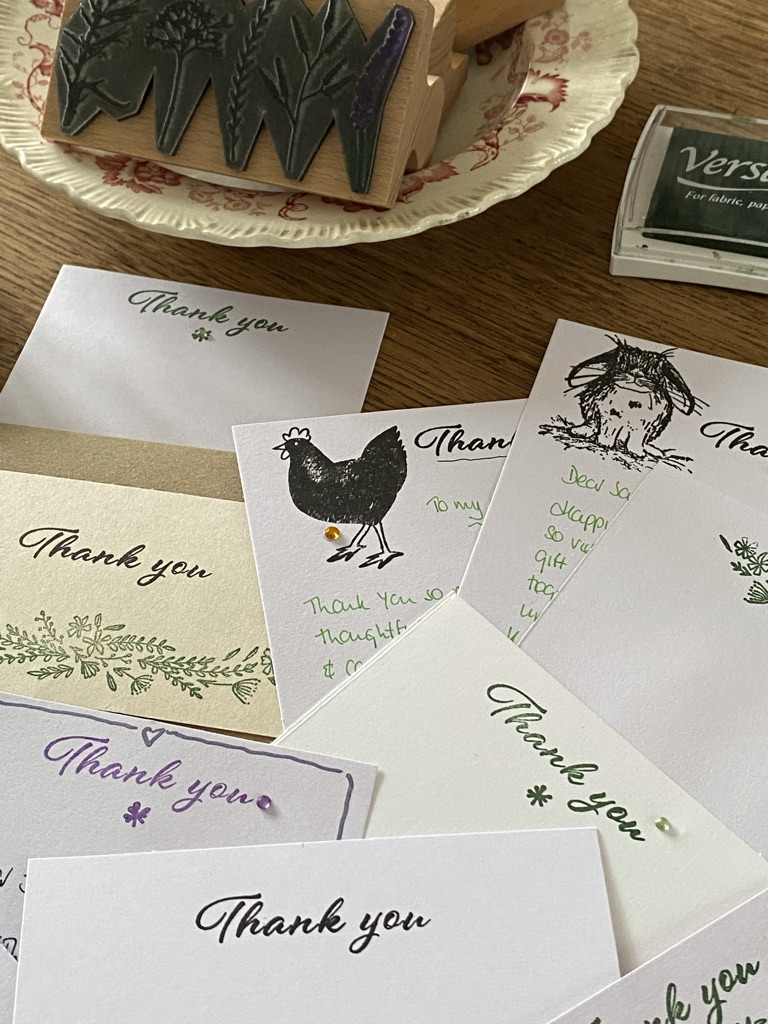
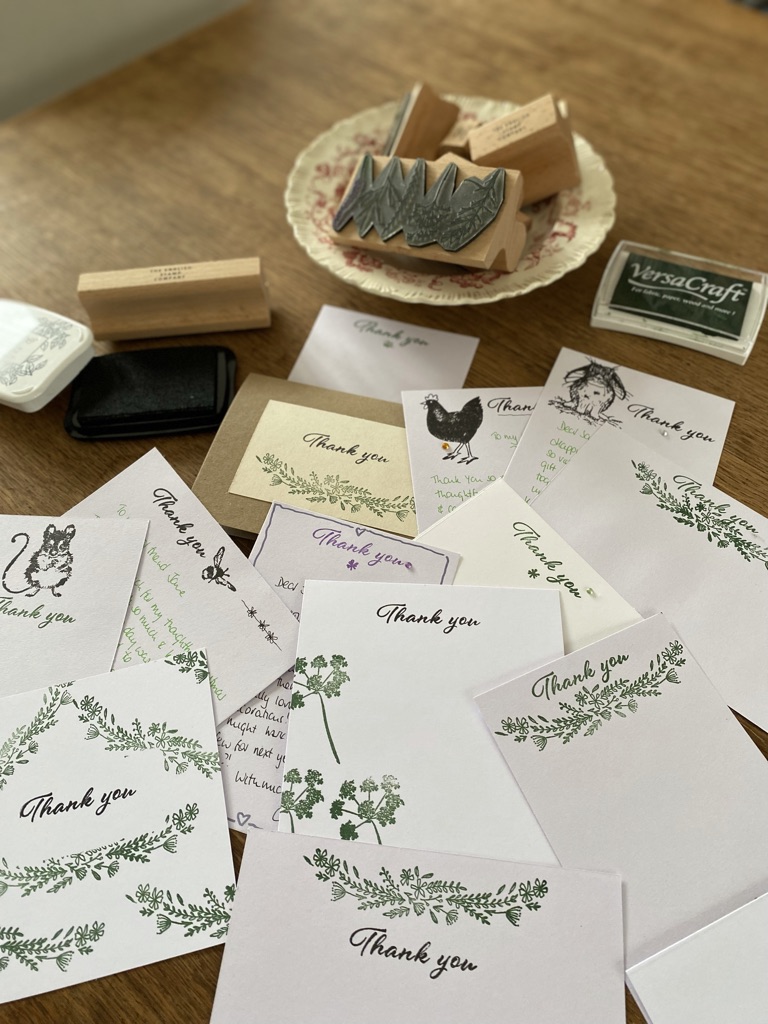
My collection of rubber stamps is leaning towards a floral theme so I gathered those I would use, together with my ink pads, which I also get from The English Stamp Company. You can find all the information you need regarding which ink pad for which craft on their informative website where you will also find a great many useful tips not least, how to clean and care for your stamps, necessary housekeeping if your collection is to last.
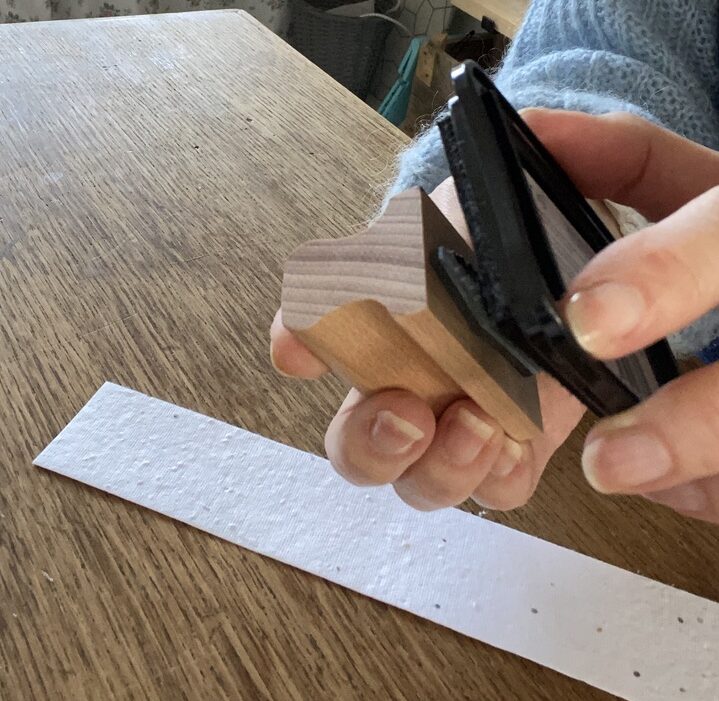
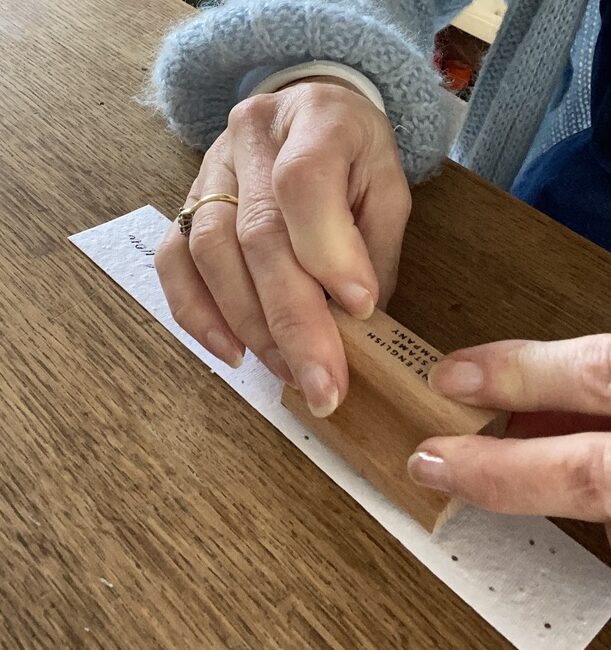
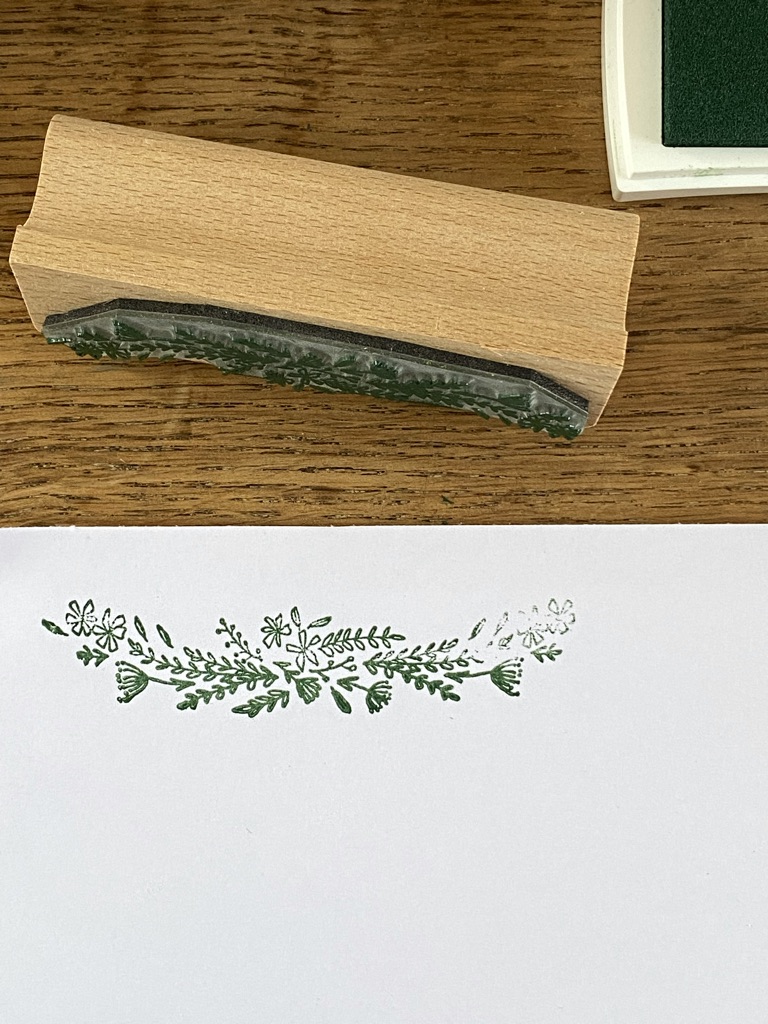
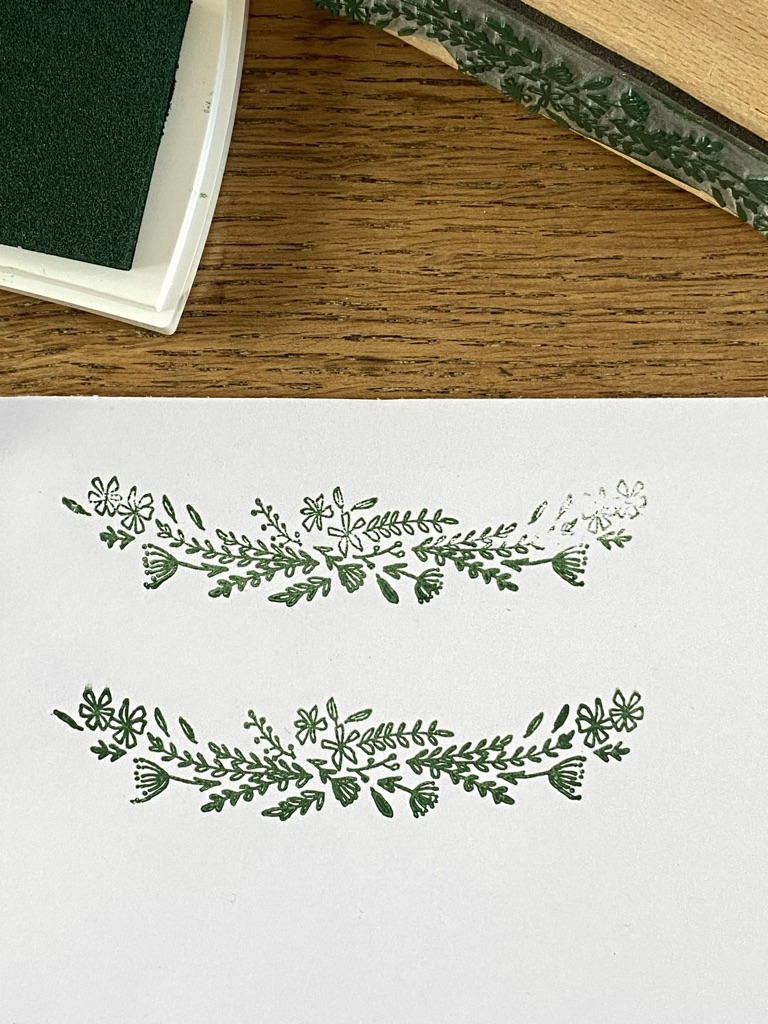
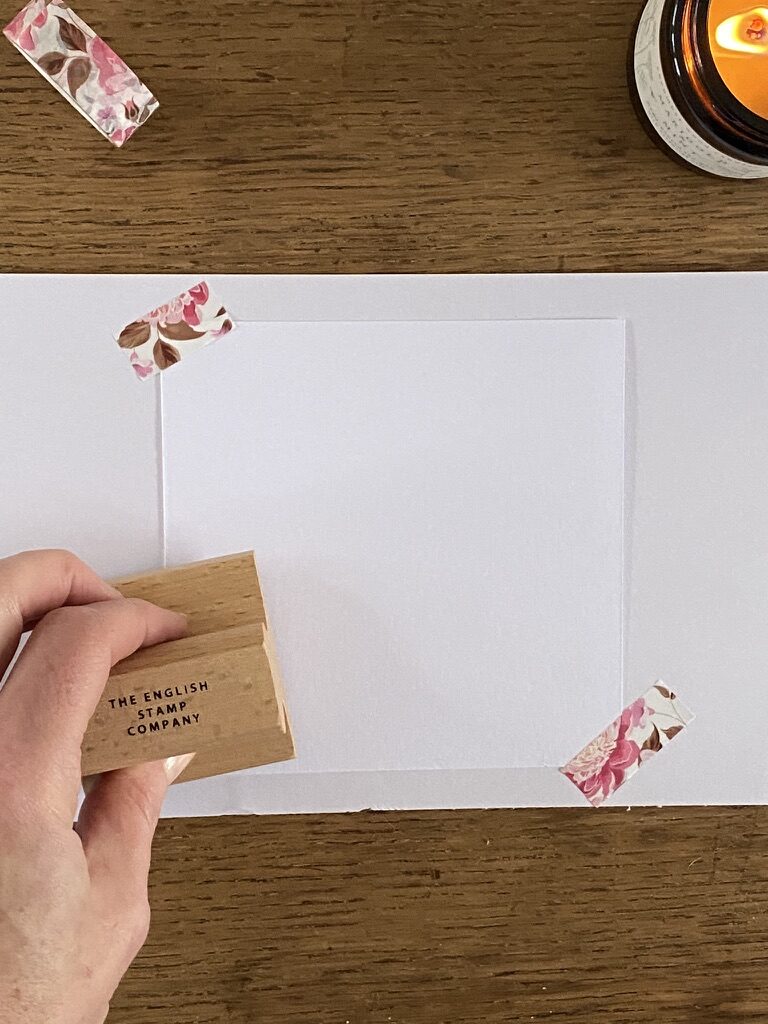
Top Tip: A gem I picked up and would like to share with you today is application of ink to rubber stamp. In simplest terms, take the ink pad to the stamp and not the other way around. Prior to this knowledge you would find me placing the stamp on top of the ink pad and applying my full body weight to the stamp. Much tutting and moaning would follow as I wondered why the ink bled and why the rubber surround of the pad imprinted on my paper as well as the design. You should lightly apply the ink, dab gently on the stamp, to ensure an even amount is distributed and then you will only print the design itself. Similarly many of my floral stamps are quite intricate – the cow parsley for example – and too much ink will simply clog up fine detail. Finally, when you apply the stamp to the paper, no wiggling nor rocking. Apply light, even pressure and holding your paper steady with one hand, lift the stamp away in one confident move.
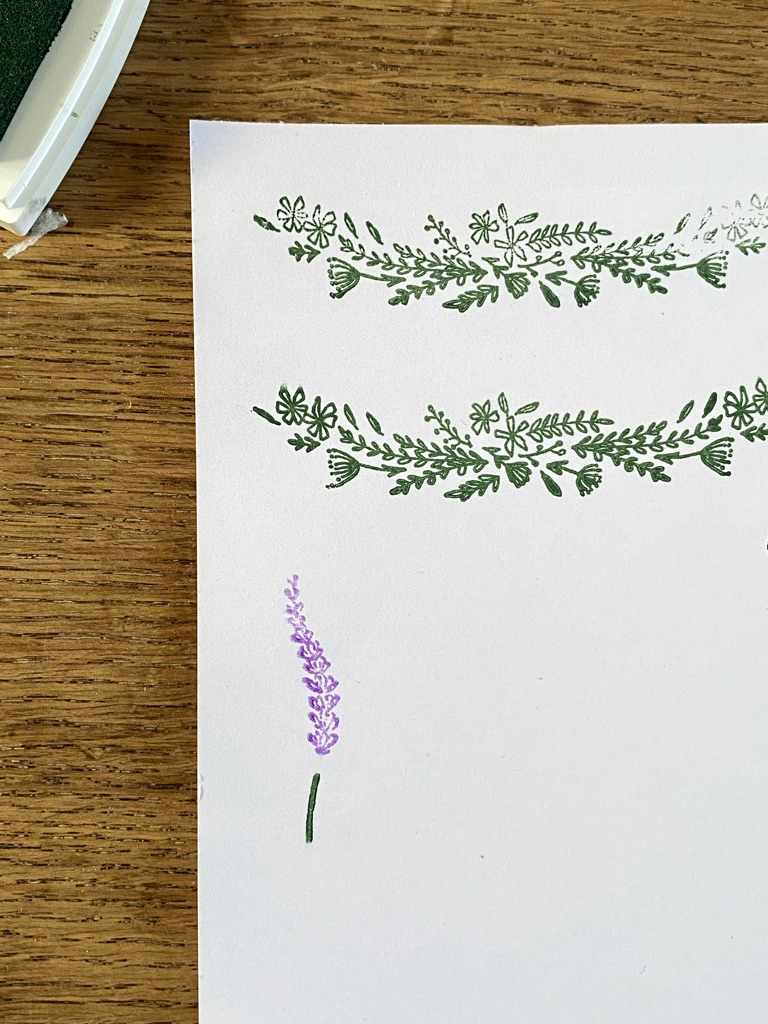
With this knowledge in mind go right ahead and prepare a practice station. Paper and card stock off cuts work nicely and be mindful of progressing to the actual paper and card you will use for your thank-you’s for a practice too. The finish of your paper or card can make such a difference to the final result. These four photos show well the practice process. The first, uneven pressure. The second, much improvement and the third photo shows the initial stamp with fresh ink and by its side, the cow parsley without refreshing the ink. I was curious to see how a vintage feel might look. And finally photo four, way too much ink. New pads are wet, proceed gently and lightly.
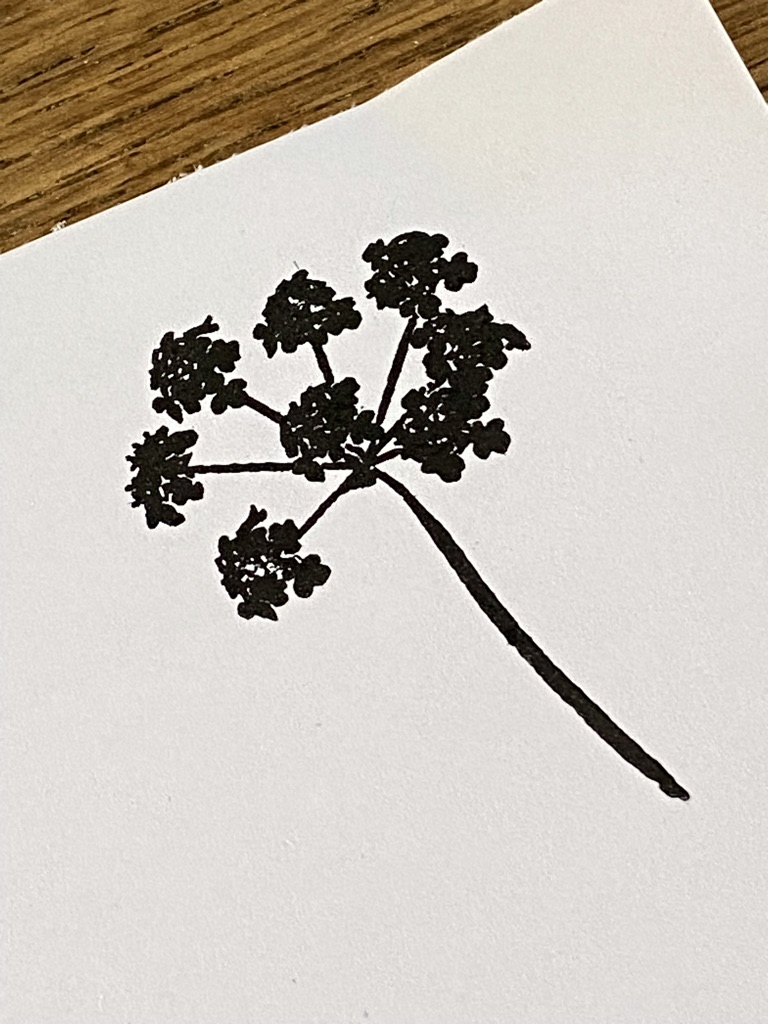
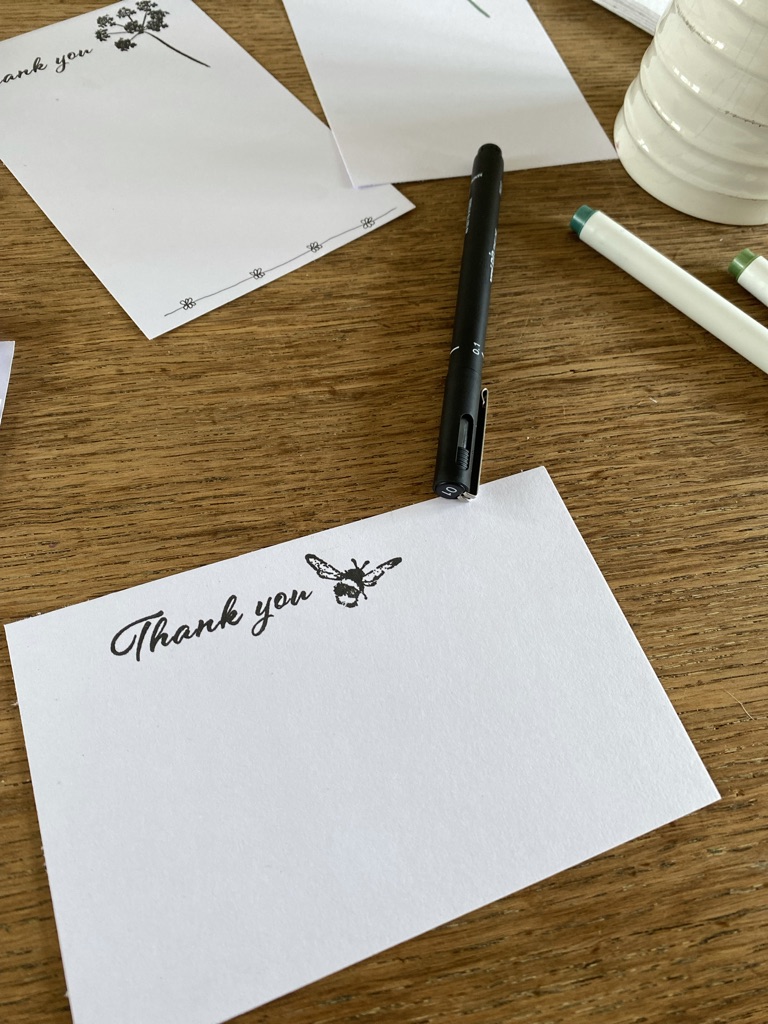
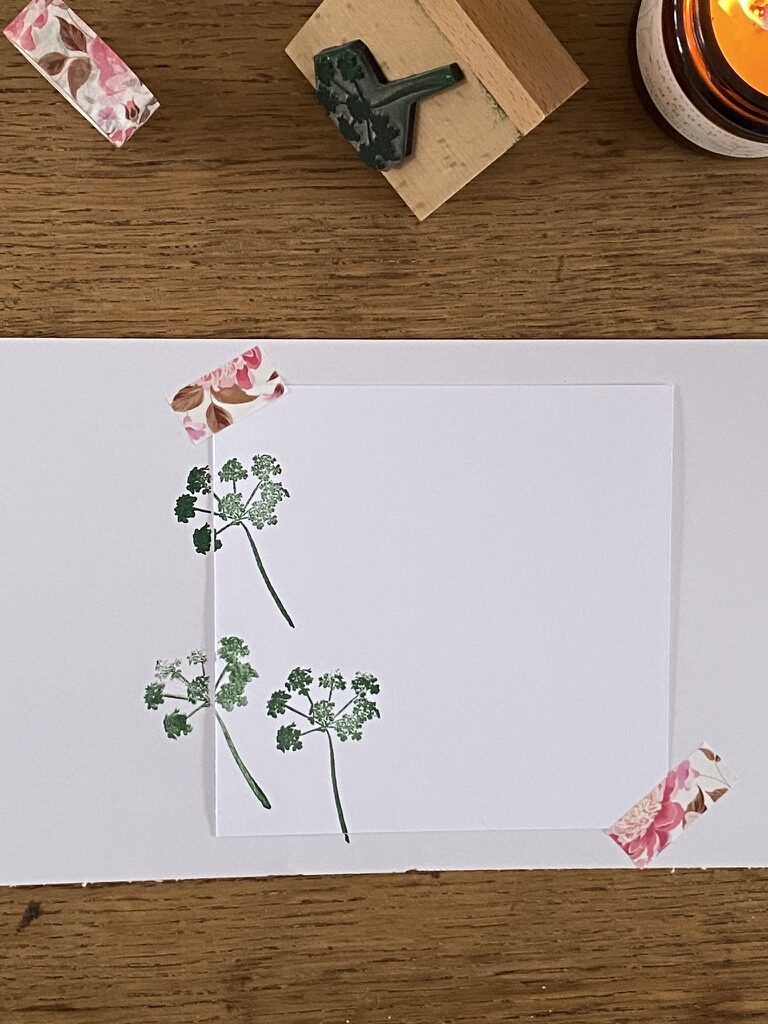
I am in love with this particular stamp and enjoying learning how to get the most from the design…
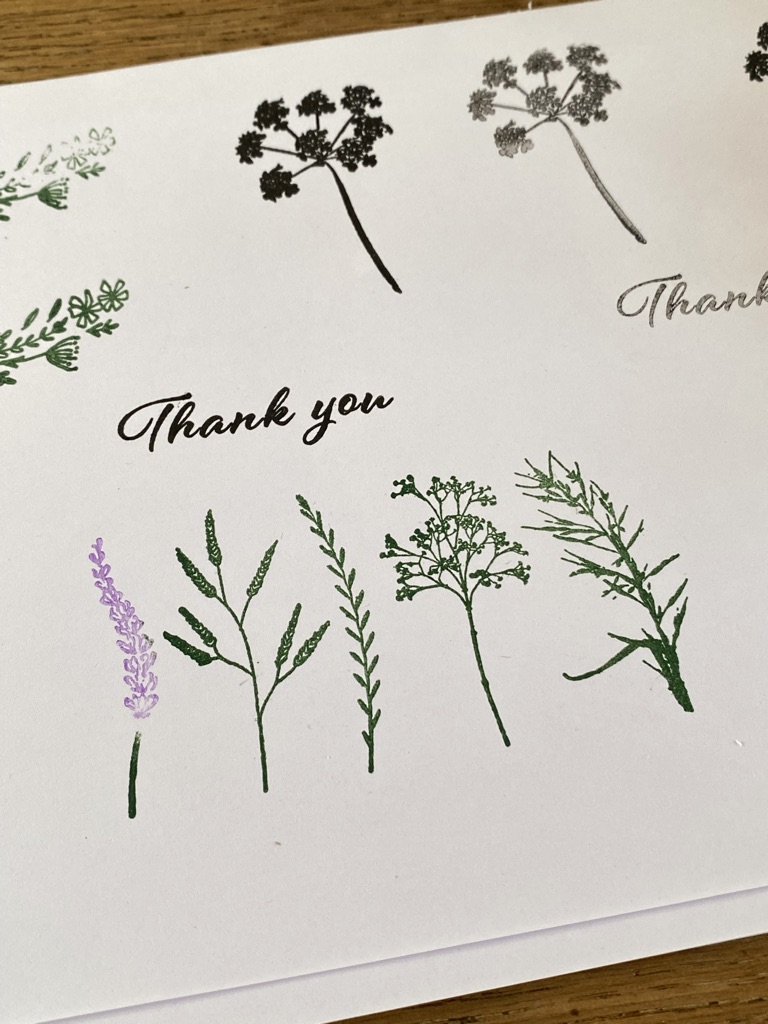
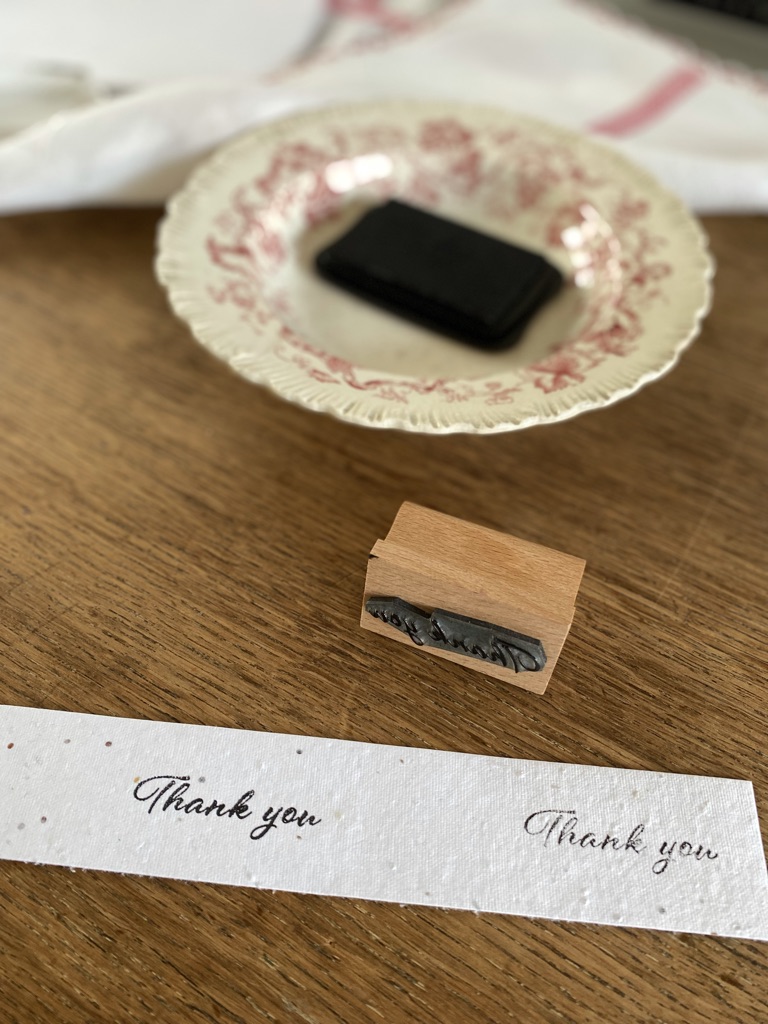
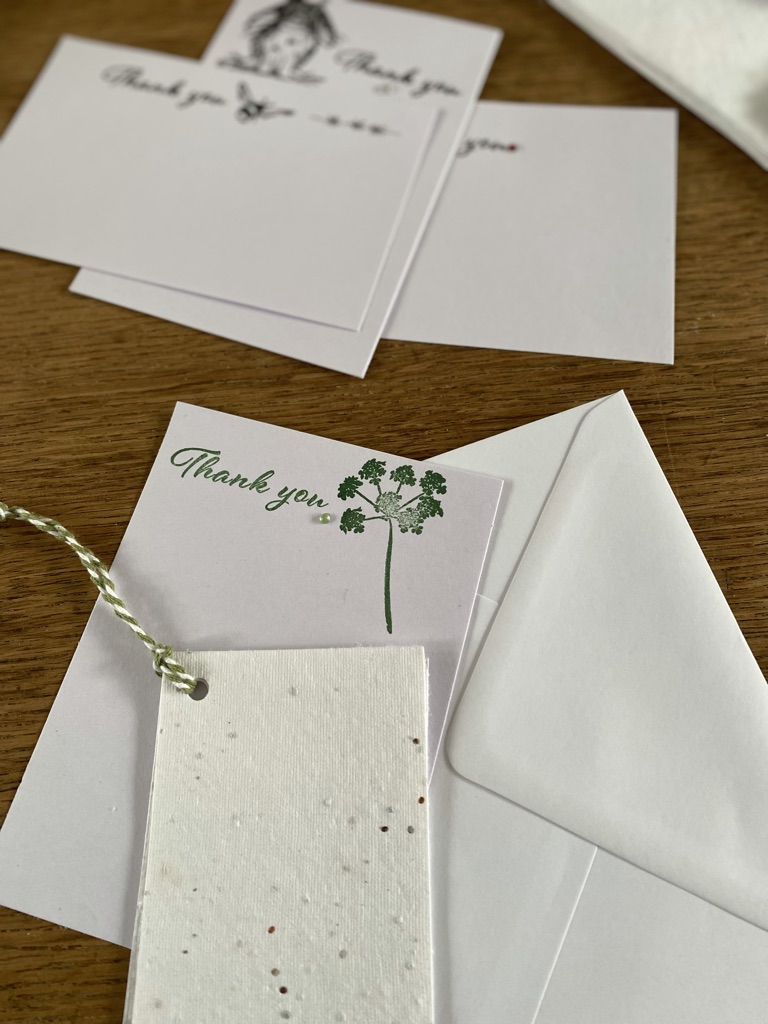
I decided my thank you cards this year would be one sided notelets and to do this I have simply cut a blank greetings card from my stash into two, using my guillotine. Sharp scissors or a scalpel with a ruler will do the trick too. I enjoyed a happy rainy afternoon, quietly crafting, trying out lots of ideas and thanking friends for thoughtful gifts. I used other stamps in my collection, doodled borders and added gem stones…
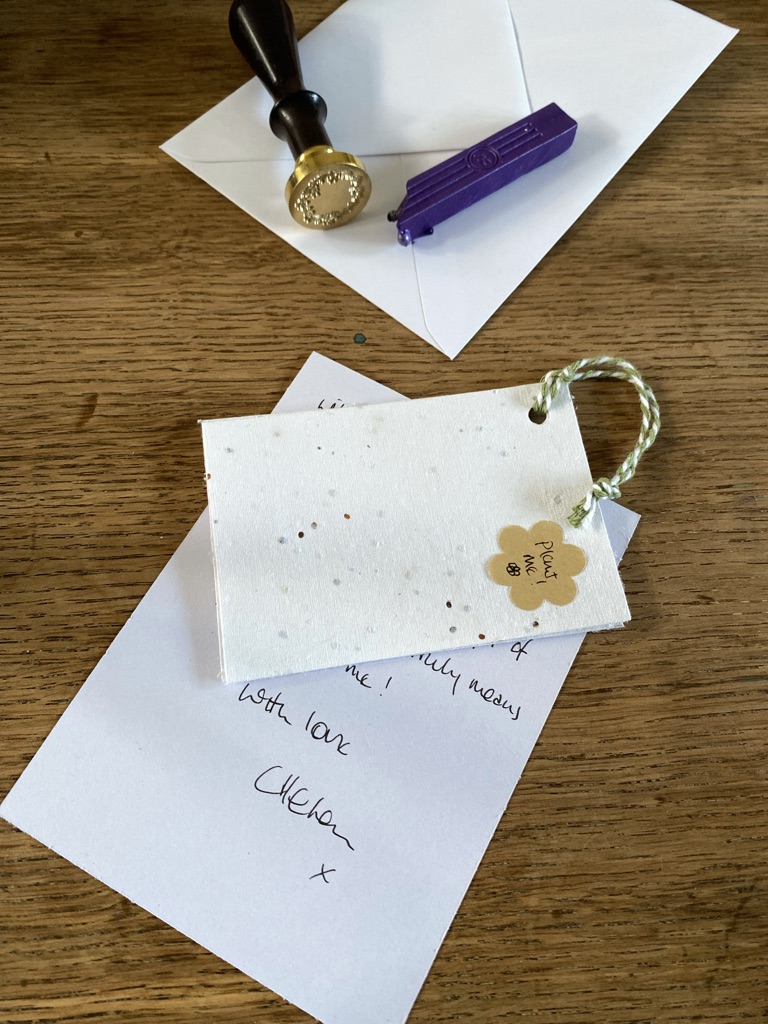
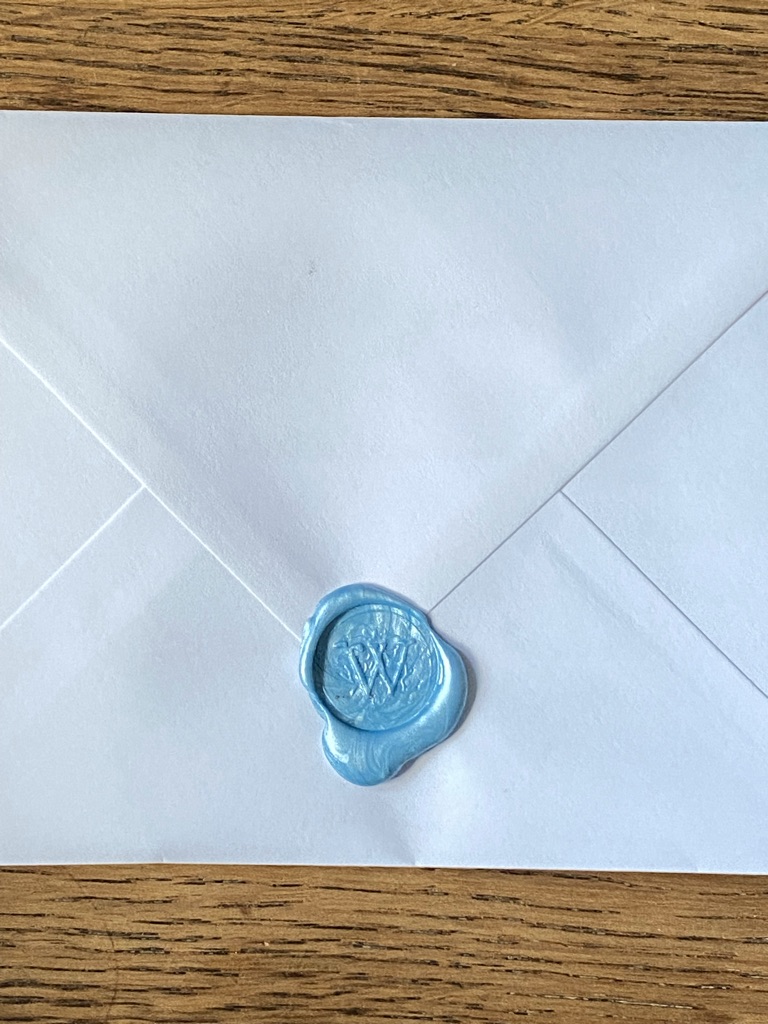
Originally I had bought seed paper to print my thank you’s onto. Whilst the ink pads I am using are water based, I hadn’t carried out quite enough research of my own to establish if planting this ink is a good thing for our environment, plus the seed paper is not entirely flat of course and I wondered about waste whilst experimenting. So I decided instead to create tags of seed paper to add to each of my thank you’s as a gift for anothers garden this springtime. If you think seed paper might be something you would like to try making yourself you might like this post.
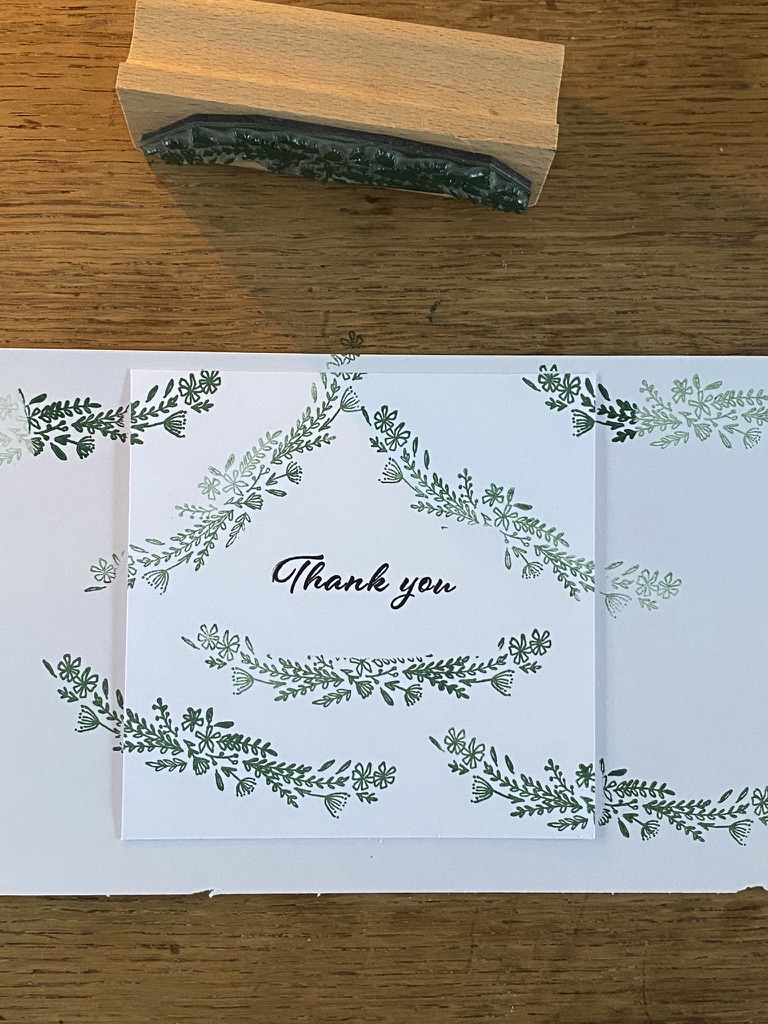
The last way with rubber stamps for today I would like to share with you is this trick, which I first saw on a reel The English Stamp Company posted on their Instagram account. Prepare a surface securing your thank you card lightly to some paper or newspaper perhaps. I used a low tack washi tape here. And this time when you stamp your design remembering all you have learnt, place your stamp purposely so it will only partially print on your thank you card. This is a lovely way to stamp a border or perhaps a corner like I tried.


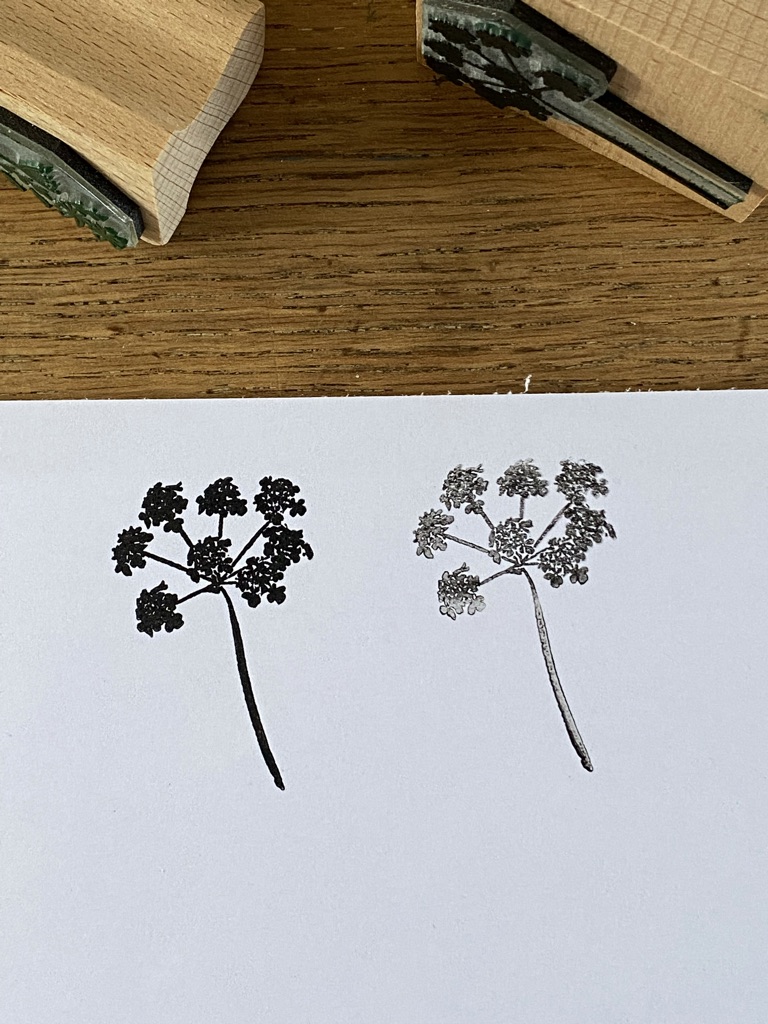
Another idea is to place a blank piece of paper in the centre of your card – I folded over the washi tape and gently stuck it behind the surfaces of the paper this time so I could place the stamp anywhere I wanted – and then stamp your design all over the card, again purposely going over those edges. And then when you peel away your waste middle you can add a thank you stamp there; you could write or maybe type the words ‘thank you’ or perhaps ‘grateful’ or a word you felt appropriate, if you didn’t have all the stamps. Try mixing your colours too. I found I enjoyed the cow parsley in both black and green ink.

With the seed paper tags and thank you card safely tucked inside the envelope, I used a wax seal kit Master M bought me two Christmas’ ago for a pretty finishing touch. “Don’t you like these Mum?” he asked this Christmas whilst keeping me company at The Little House as I stamped my wrapping paper, “only you don’t seem to have used them much.” “Of course I do darling, I just haven’t had much time to experiment recently, that’s all” I replied. It seemed to me this might be the perfect occasion to do just that. One day I’ll get around to showing you all the marvellous things you can do with wax seals as well.


And there are so very many more uses for these rubber stamps which I hope to share with you in this coming year. Do also take a look at The English Stamp Company’s own blog for tutorials, help and tips. They have some great craft projects of their own to share.
For now though I can’t sign off without telling you about the wonderful offer the kind folks at The English Stamp Company are making you throughout January. Readers of my blog are to receive 10% off purchases from their entire site until the end of January 2023, when the code WWL10 is used at the checkout. So to be clear, that is not just rubber stamps. Ink pads, punches, ribbons, stationery, way too much for me to mention here is discounted too. Isn’t that fabulous? Just click on either of the links in this post to take you to their website. You could be there a while.
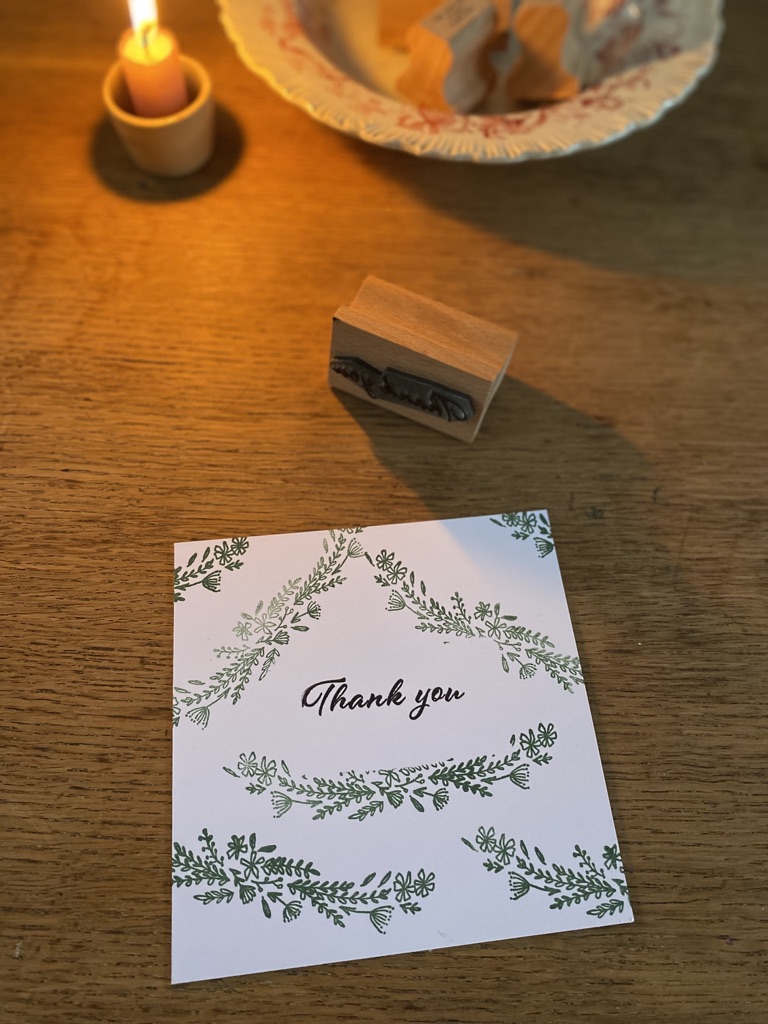
I know some of you reading today are enjoying sunshine in your part of the world. As I write this post to you here in England, the candles and fairy lights are twinkling and the rain is far from gentle. And it seems to me to be quite the perfect time to hunker down and try a new craft or maybe add to your existing rubber stamp collection. I do hope you will find some time to get crafty and enjoy this special treat in January. Until next time…x


Thank you Jane, you are welcome to come try the stamps anytime! Thank you for reading and stopping by x
And just that little tip – which I learned from ESC themselves – is a game changer! It really is such a fun activity and I think I may well be onto a table runner and napkins next, fancy helping?!x
I am going to be using the stapmps more Helen, especially on the Mixed Media workshops although I hadn’t thought to use the wax seals so good shout. Yes Master M is a thoughtful chap although he doesn’t read his mother’s blog as often as he should!! Still, can’t have it all can you?!x
Lovely blog and so pretty … I might try again.
Happy new year and roll on the craft days.
When can we stamp together?!
*Not me wiggling and pressing* who would have known you take the pad to the stamp?!
This looks soooo fun and satisfying and you know I love a satisfying activity! One for us to do together I hope! Xxxxx
I really must purchase some of these flower stamps as your tags and fabric bags from your last workshop were so pretty. There are just so many things you can do with them. I’m also very keen to purchase some more wax seals. I really hope you incorporate these two items in one of your upcoming creative workshops in The Little House . Tell Master M that it was my kind of perfect present too. How thoughtful he is. X
Thank you Sara, I’m so pleased you enjoyed the read. You are more than welcome to come and check mine out anytime you know that!x
A lovely blog Helen and great way to start 2023!
So now I definitely want some stamps! I just can’t decide which ones… I think I’ll have to come and check out yours first! Xx