“And it has to be recycled toilet paper” I added down the telephone line to Mr M on his way back from work recently. He was collecting some groceries and I had a special request of my own for this week’s craft. “Recycled toilet paper?” he asked bemused and clearly curling his nose up at the other end “is there even such a thing?” His pitch gave away the notion I might be taking this whole save the planet for the next generation thing a little too far. Join me today as I have a wonderfully pretty way to pass on your home-grown flower seed to your friends and family. Wonderfully pretty if it works. My homemade seed paper only sort of worked. Come and read the story and see for yourself…
Not so long ago you may recall I asked for suggestions from you as to what you might like to see me craft and write about in these pages. Several of you asked if I had ever tried my hand at homemade seed paper, which I hadn’t. Once researched, it seemed a popular craft and with our friends over the pond in particular teaching how to make homemade seed paper at elementary school level, I determined it surely couldn’t be that difficult to make could it? Mmm… read on.
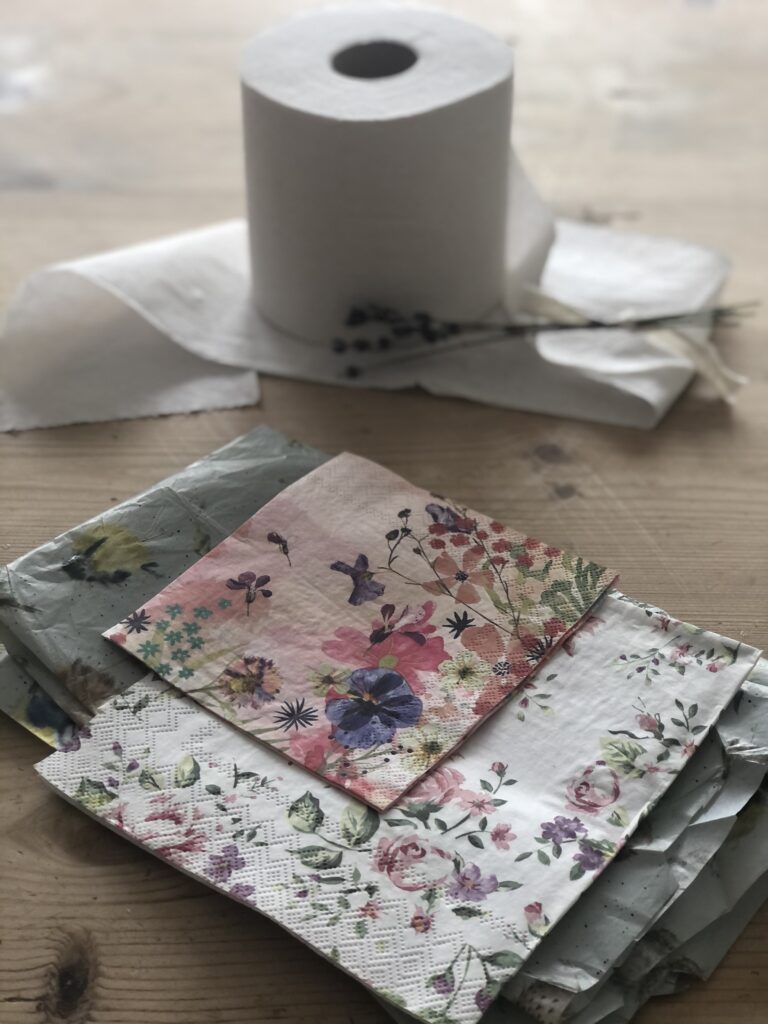
Most tutorials suggest using a paper making frame and blender to make your own paper from recycled waste, since shop bought often has chemicals and colours you might not wish to introduce into your soil once you plant the finished project. I read quite a few blogs all with similar yet differing techniques for making handmade seed paper, so I’ve added a few to this board in my Pinterest account if you are interested in carrying out further research yourself. Since I don’t have a paper making gadget, I decided to improvise still further and adapt another idea I had read of and gathered together all I would need, hence the toilet roll…
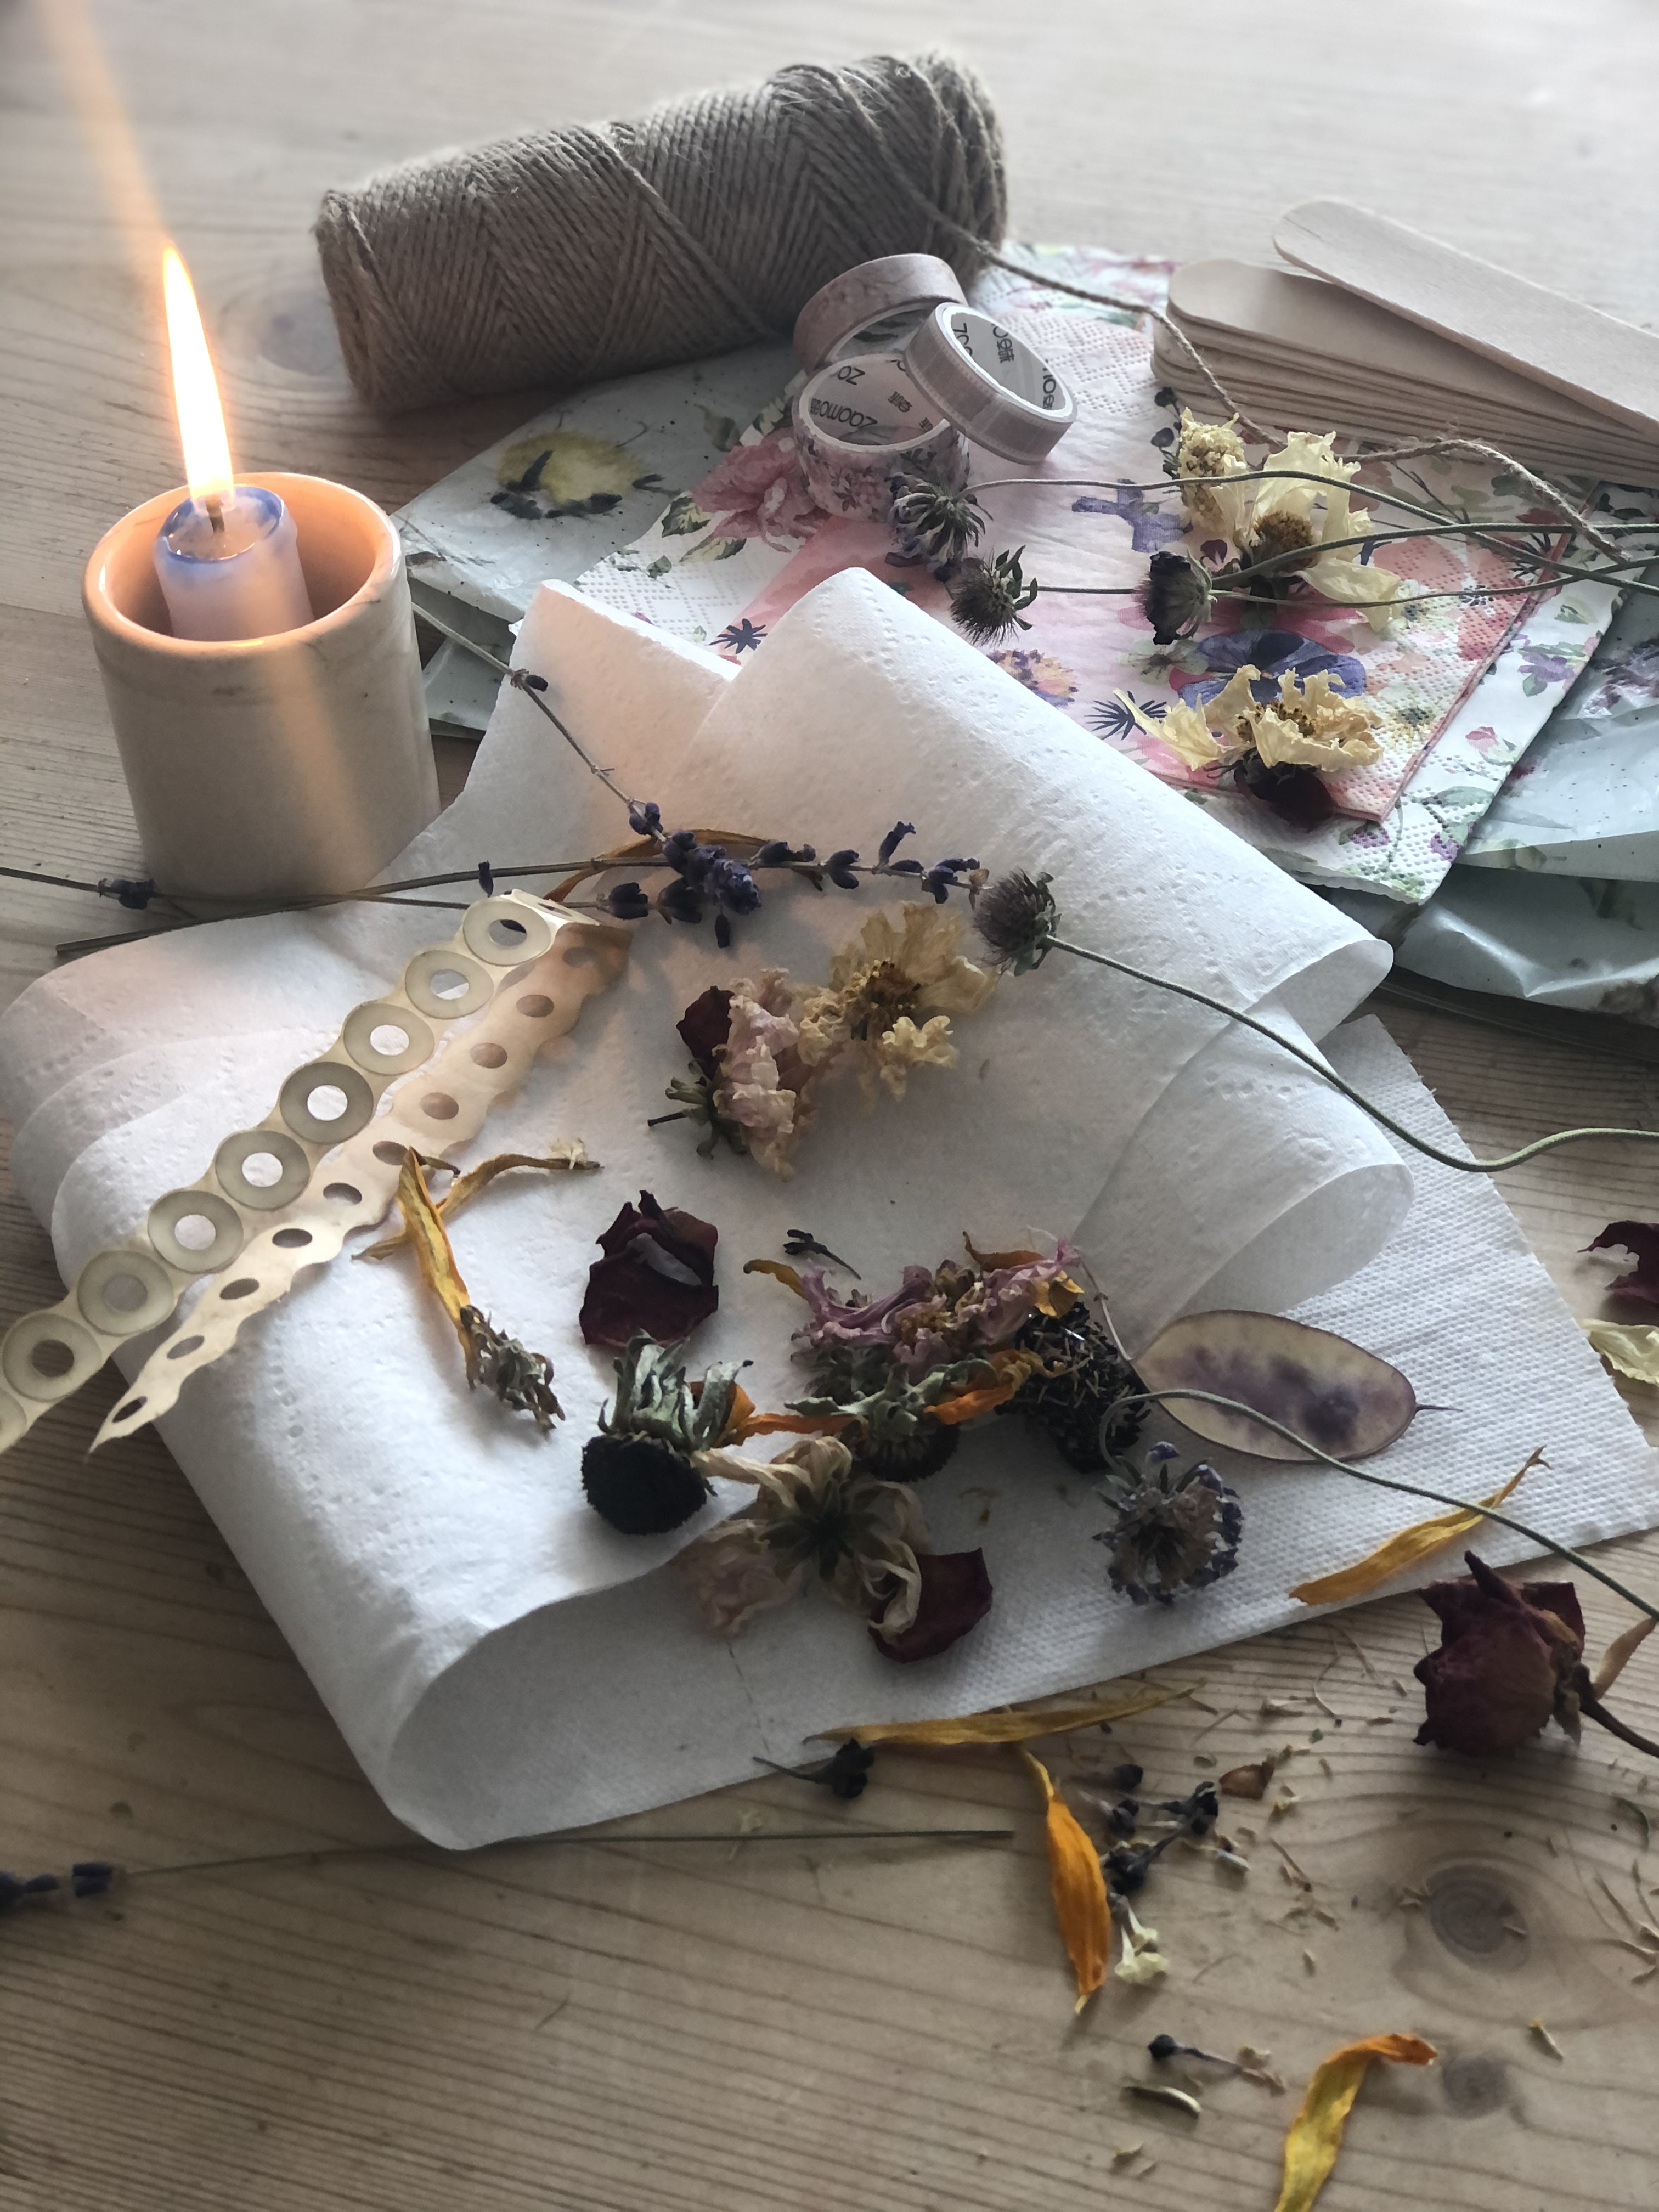
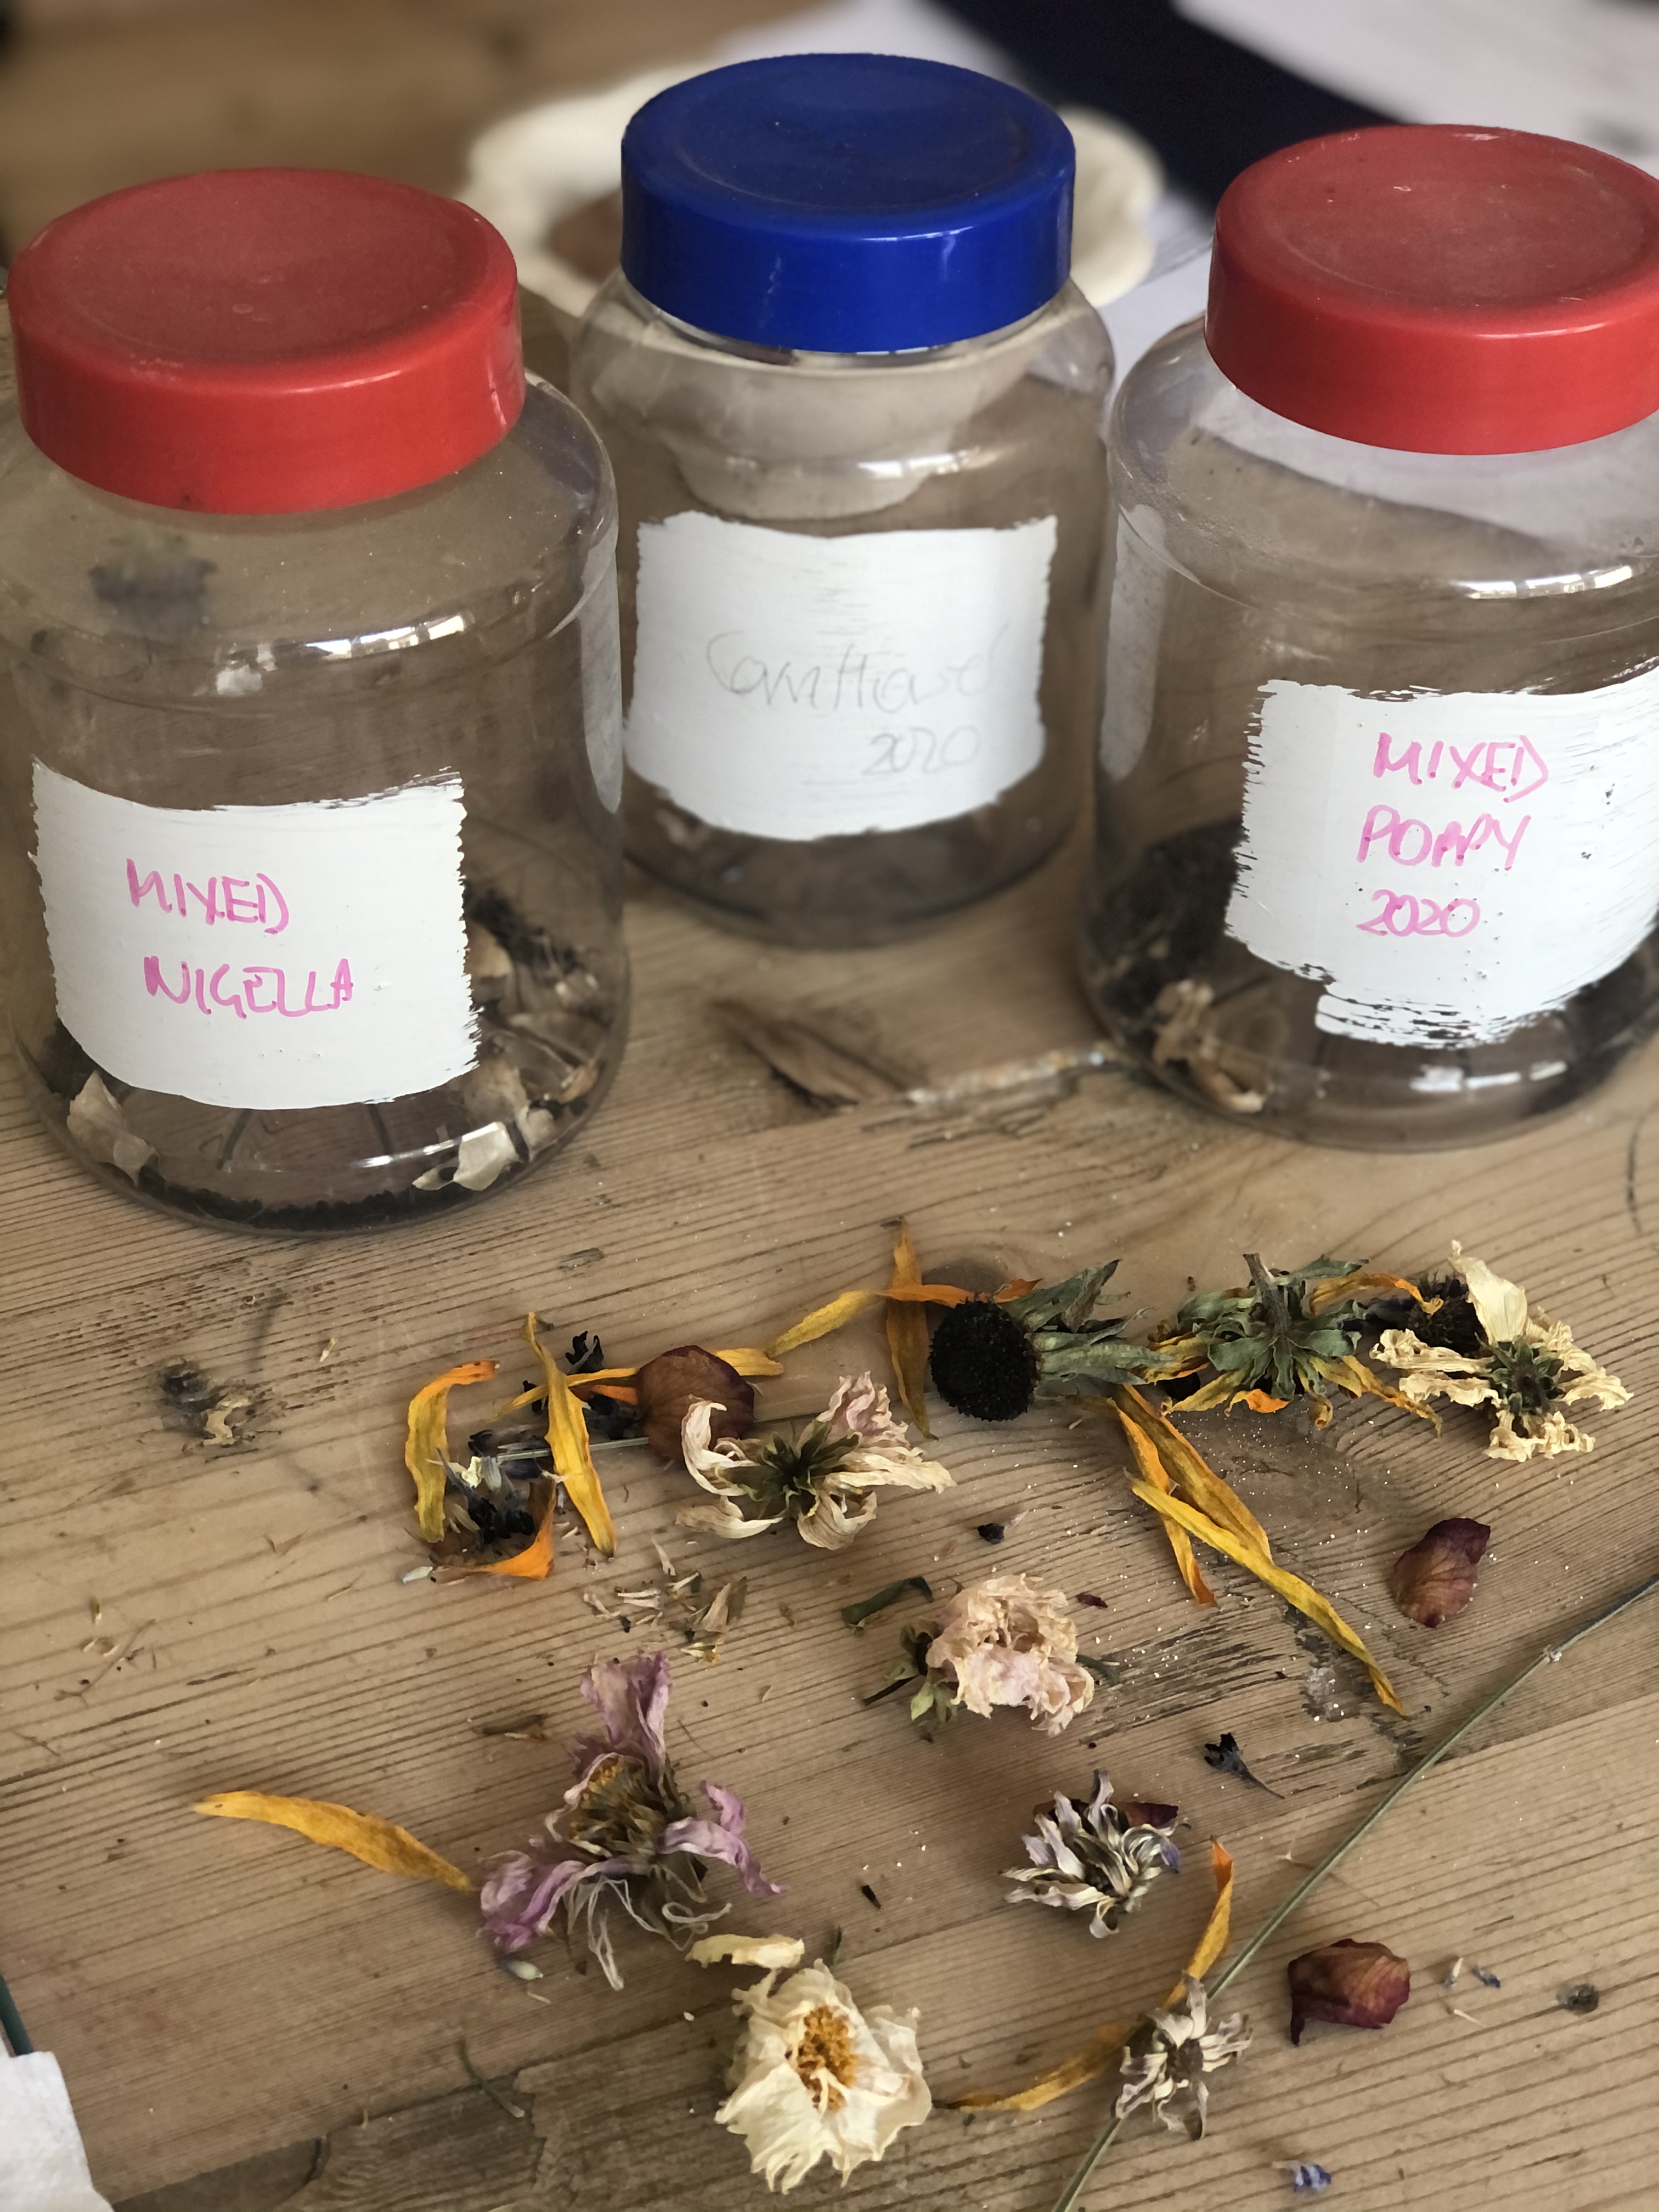
I decided to use a wire shelf from my greenhouse and set about carefully separating the layers in the toilet paper and covering the shelf with one thin layer. Then using a water spray, I sprayed and sprayed until the paper was soaked with tap water. I scattered a layer of cornflower, nigella and poppy seed collected last autumn, over the toilet paper and also added a few crushed up rose and dried flower petals together with a handful of dried lavender buds, to pretty the look up and then zapped the entire lot with yet more water.
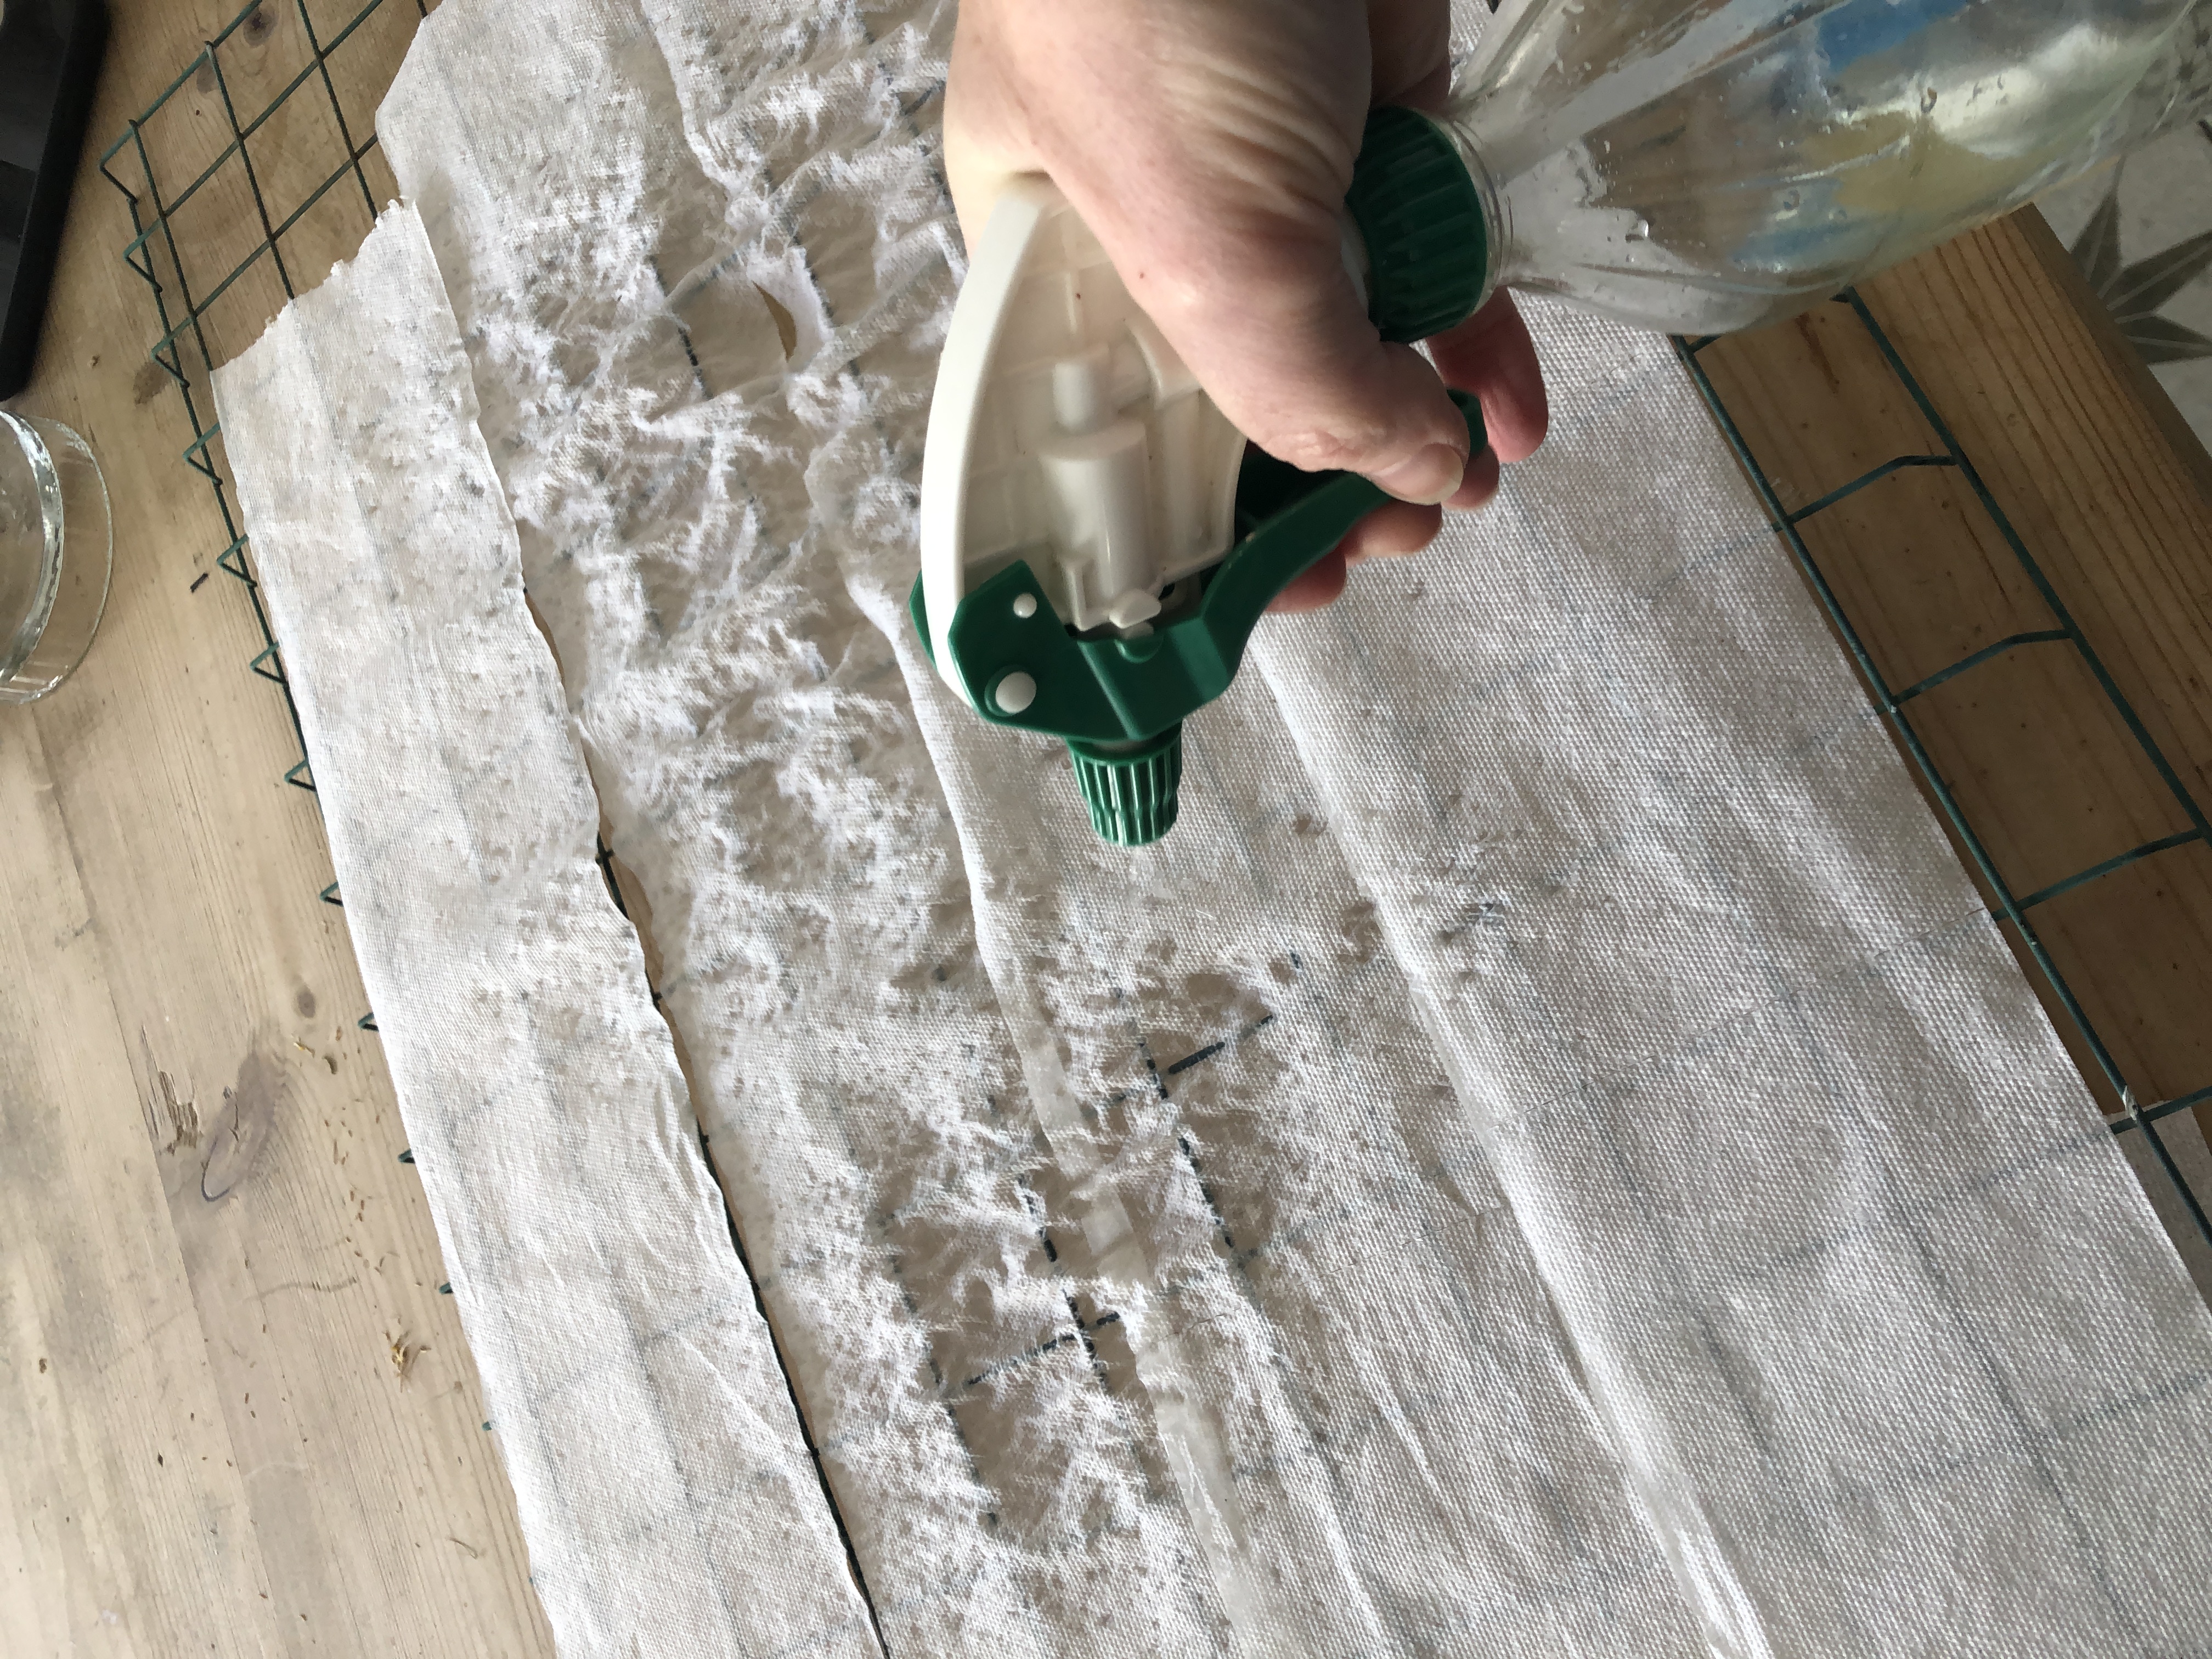

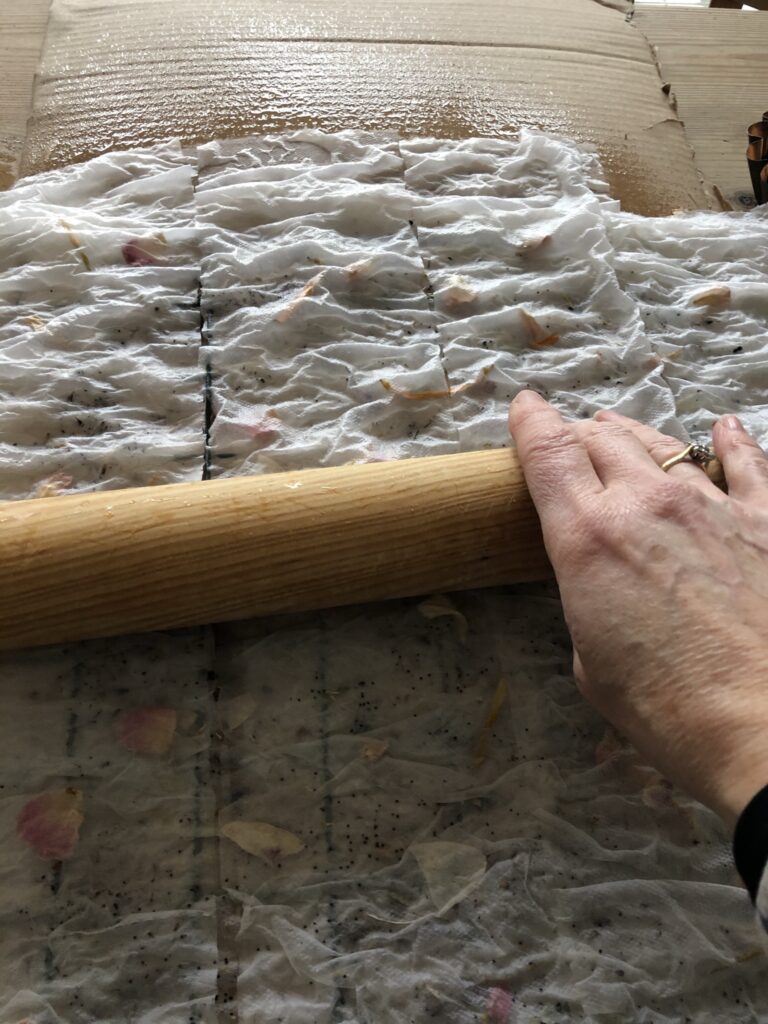
A second layer of toilet paper is added next, then more seed and dried flora and finally lots more water. I repeated this process until I had four layers of paper and three of seeds and at the point of each completed layer, I used a rolling pin to flatten everything together.
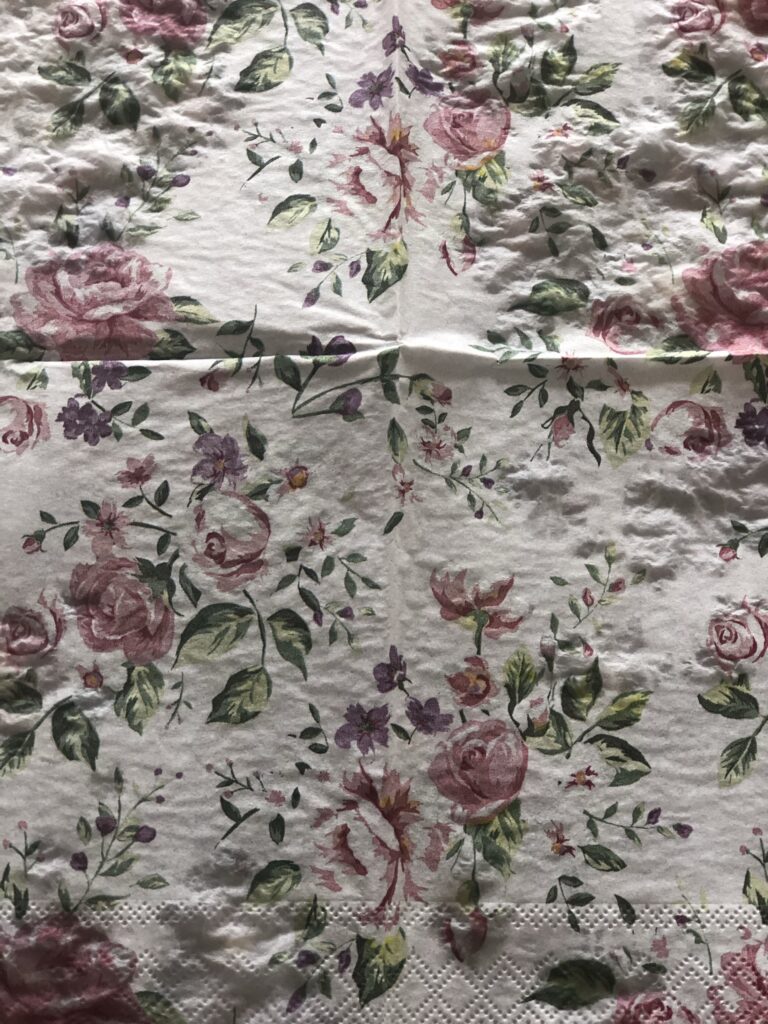
In addition, I carried out the same process using a floral napkin similar to the ones I used in this project, although of course there will be some chemicals released into the soil with this variation, so this may not be for you.
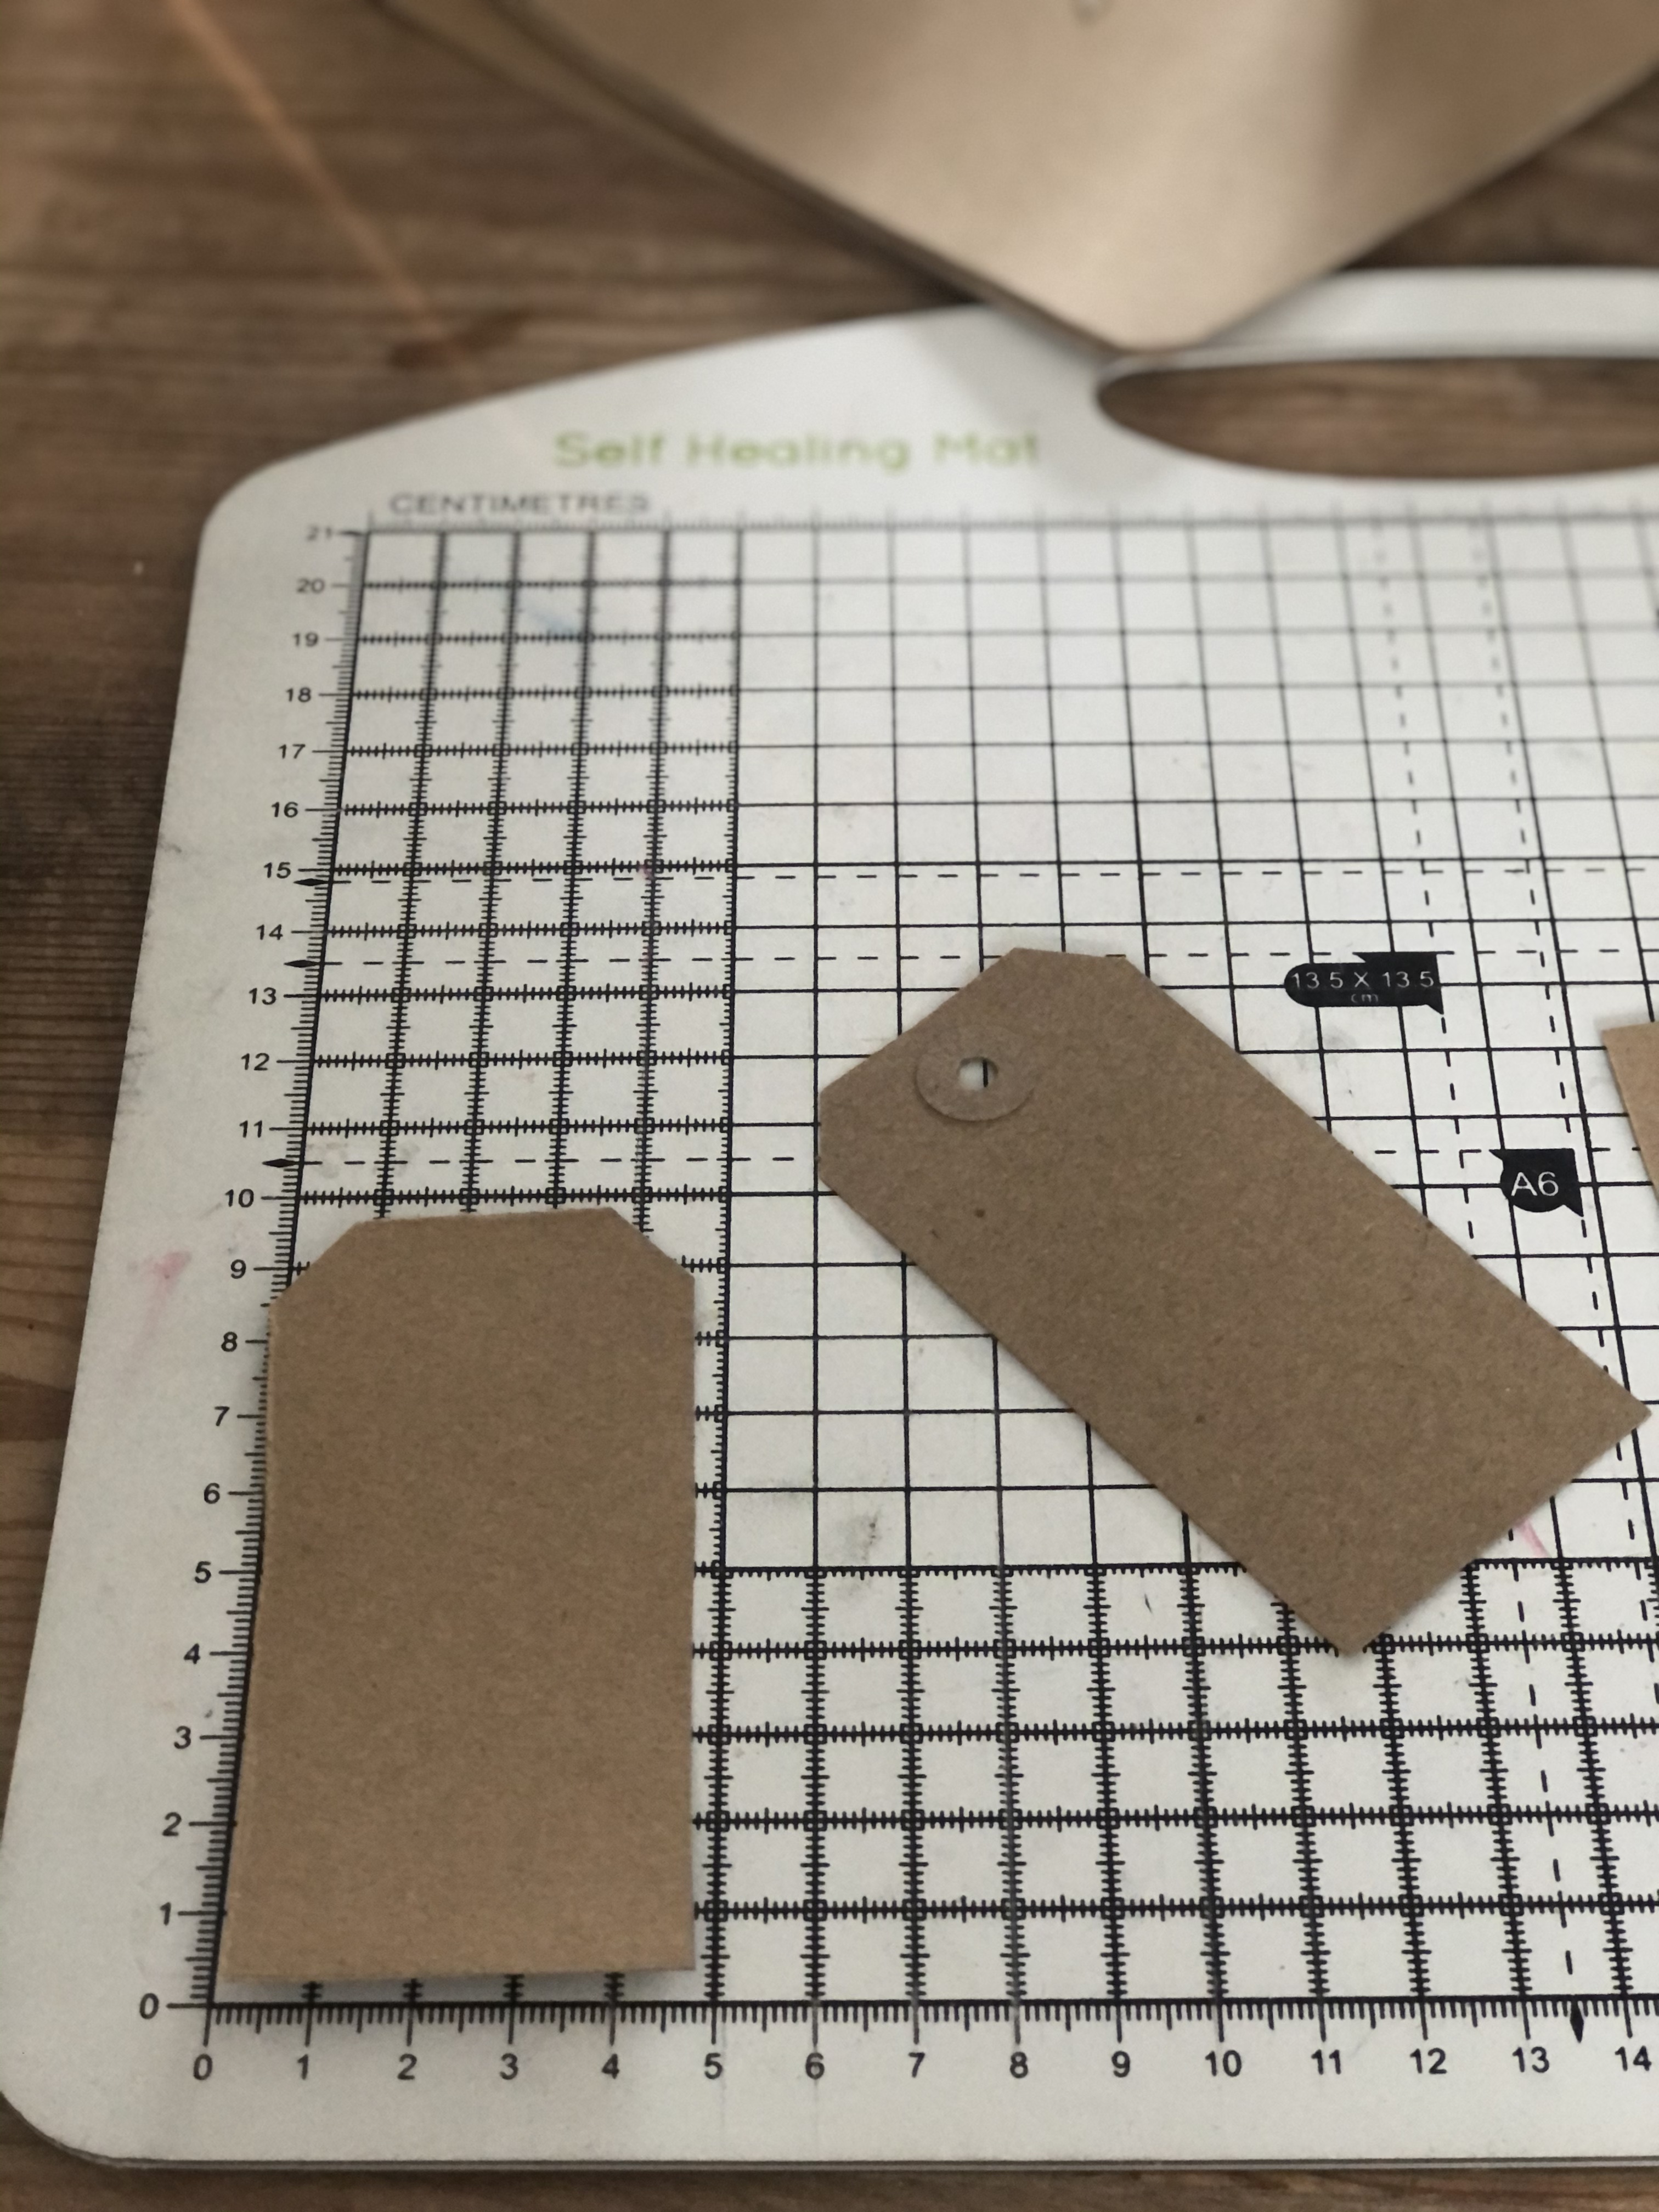
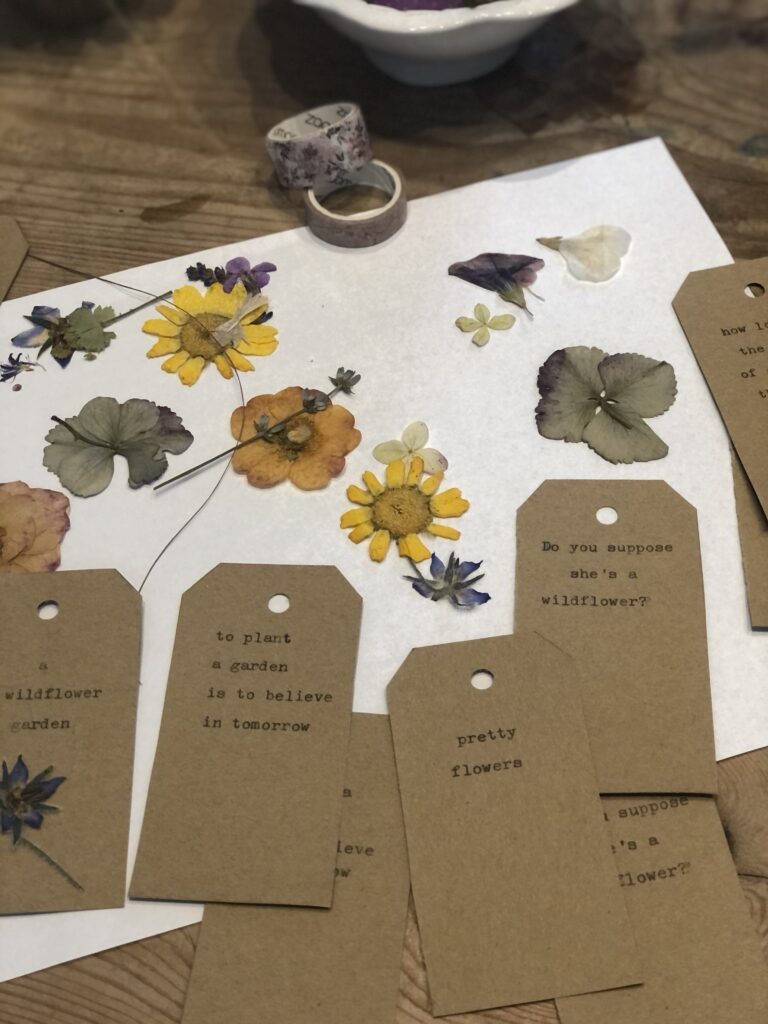
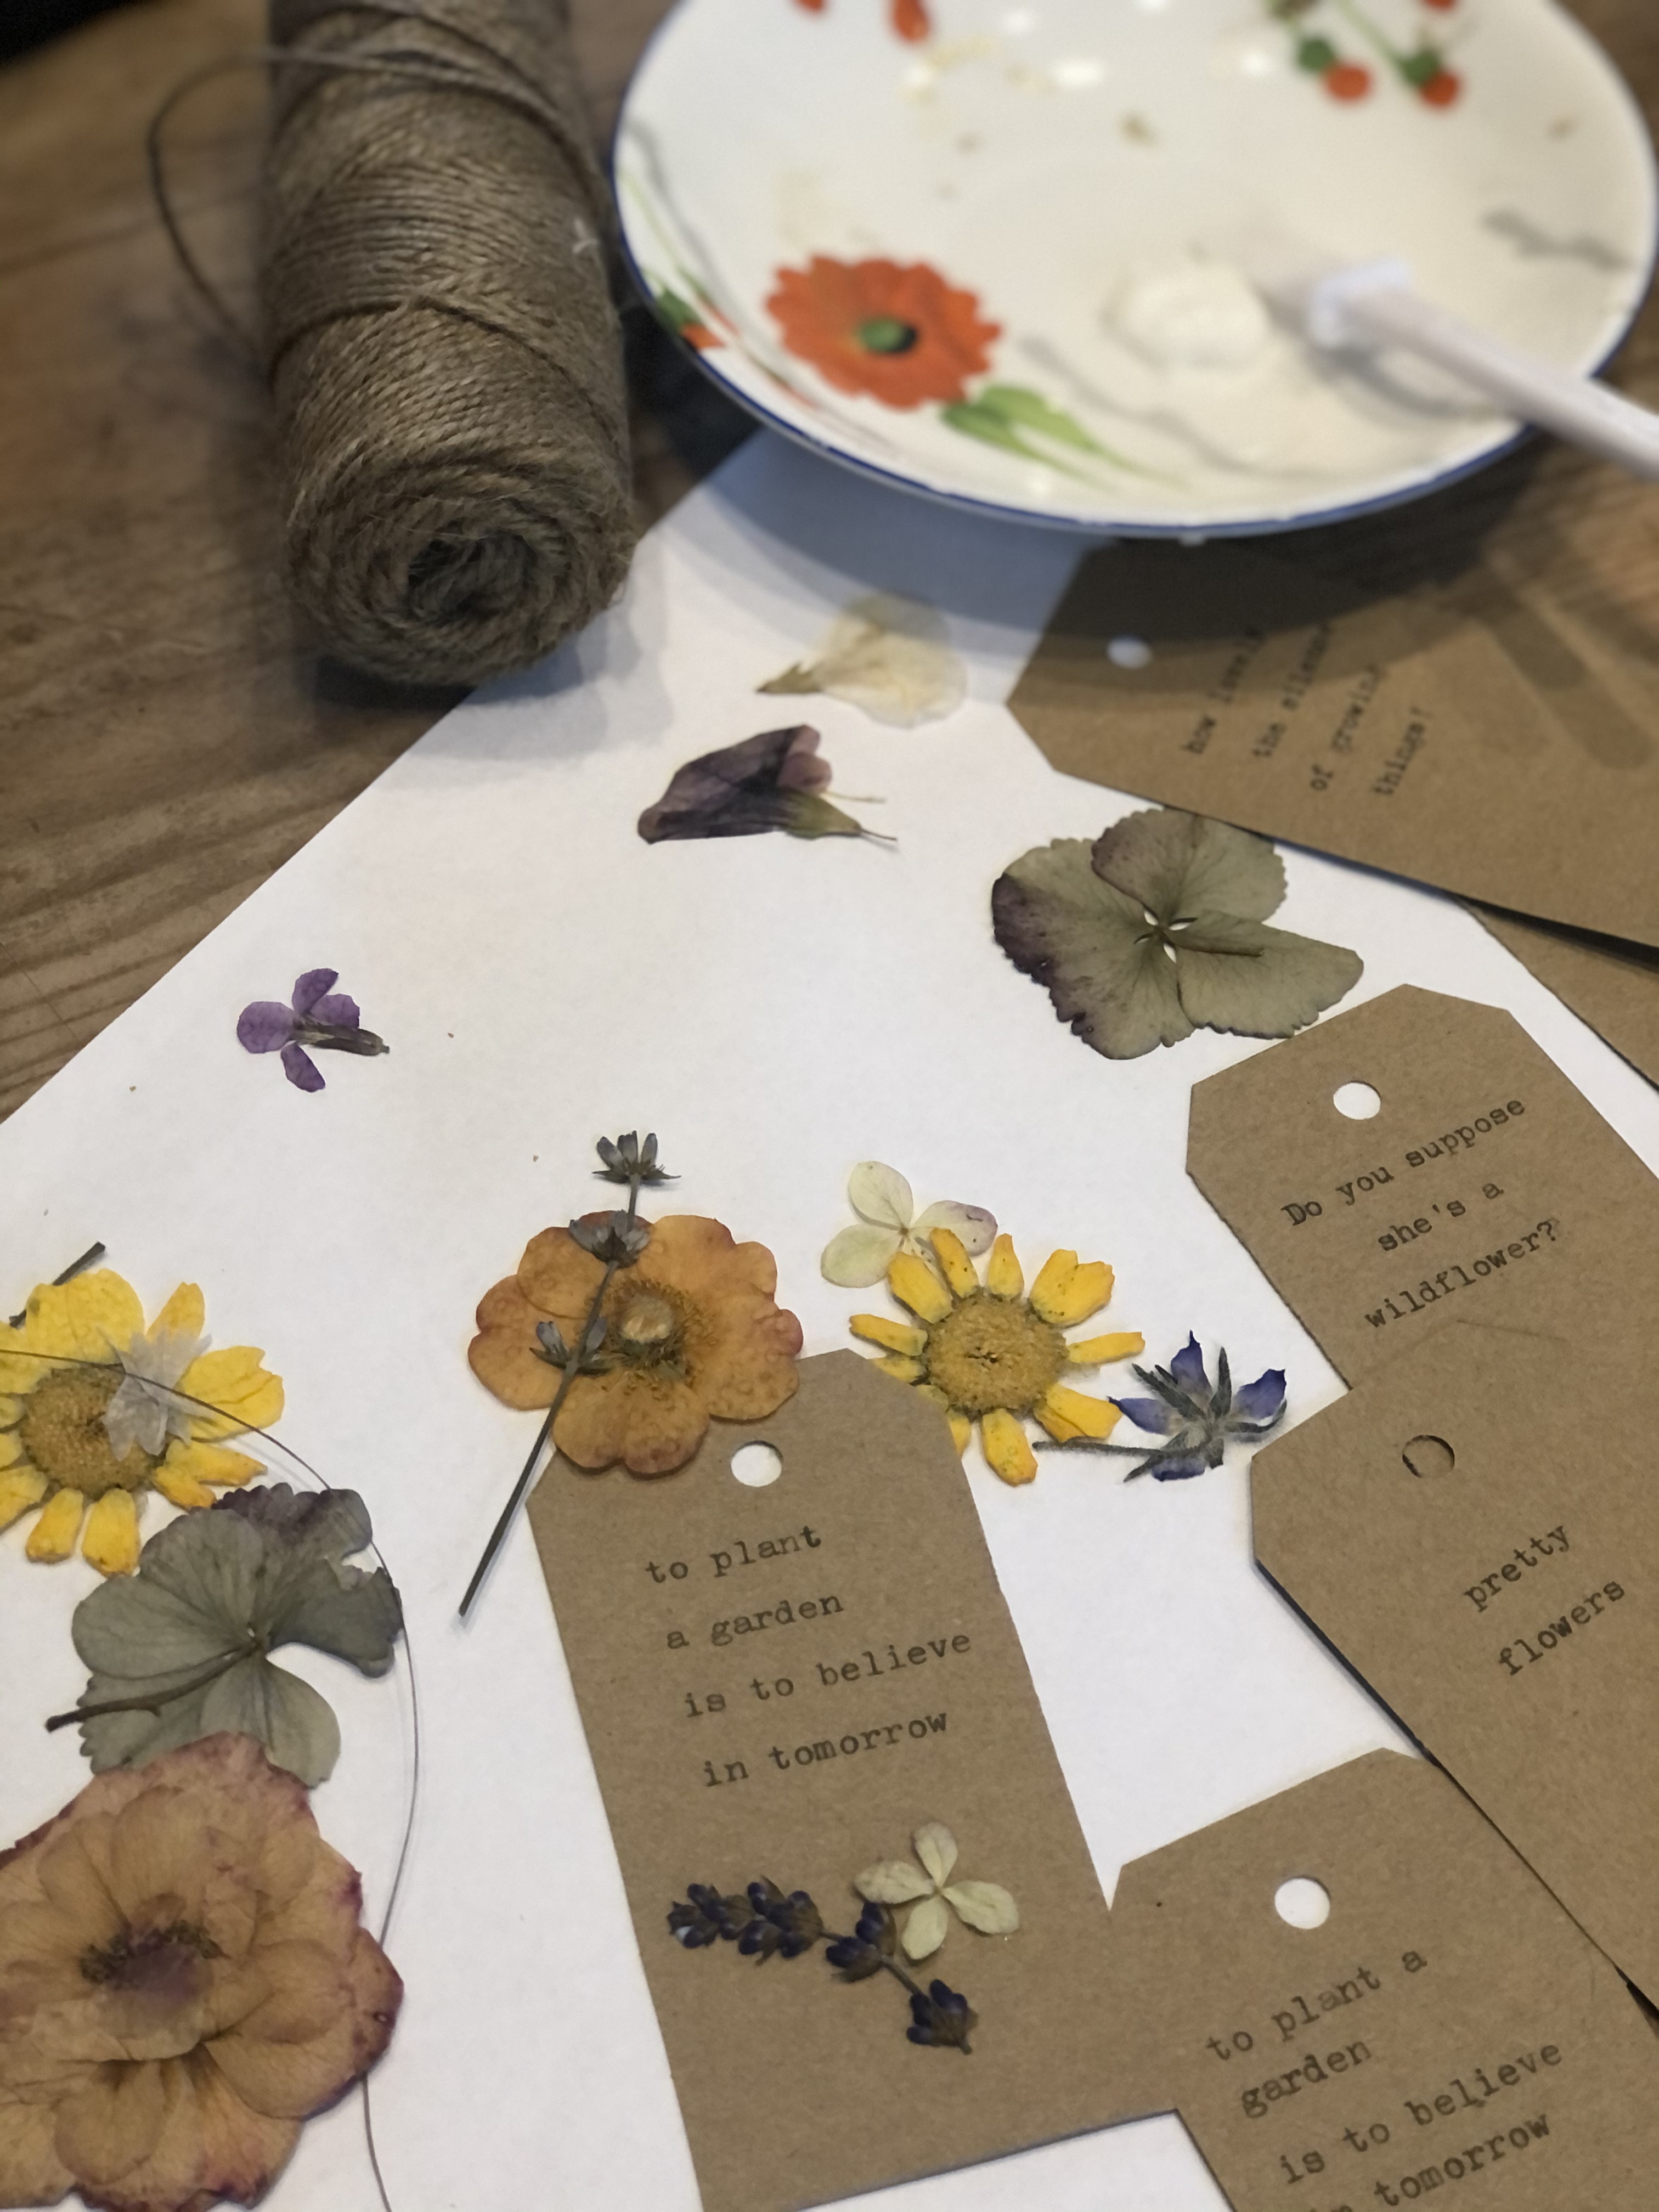
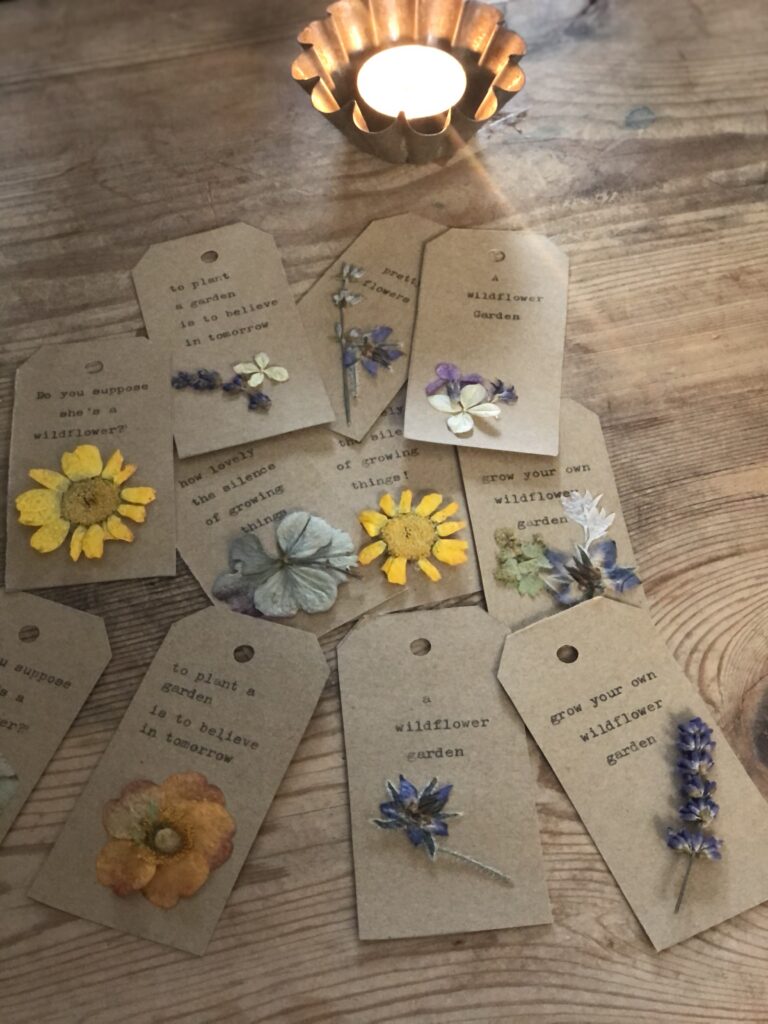
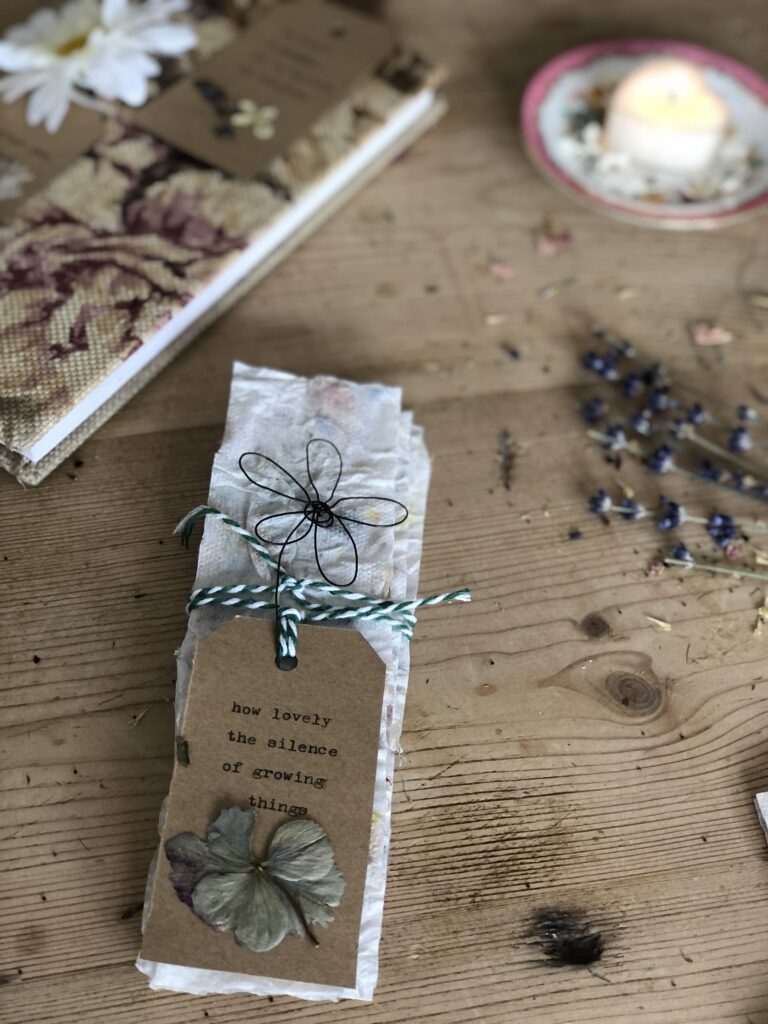
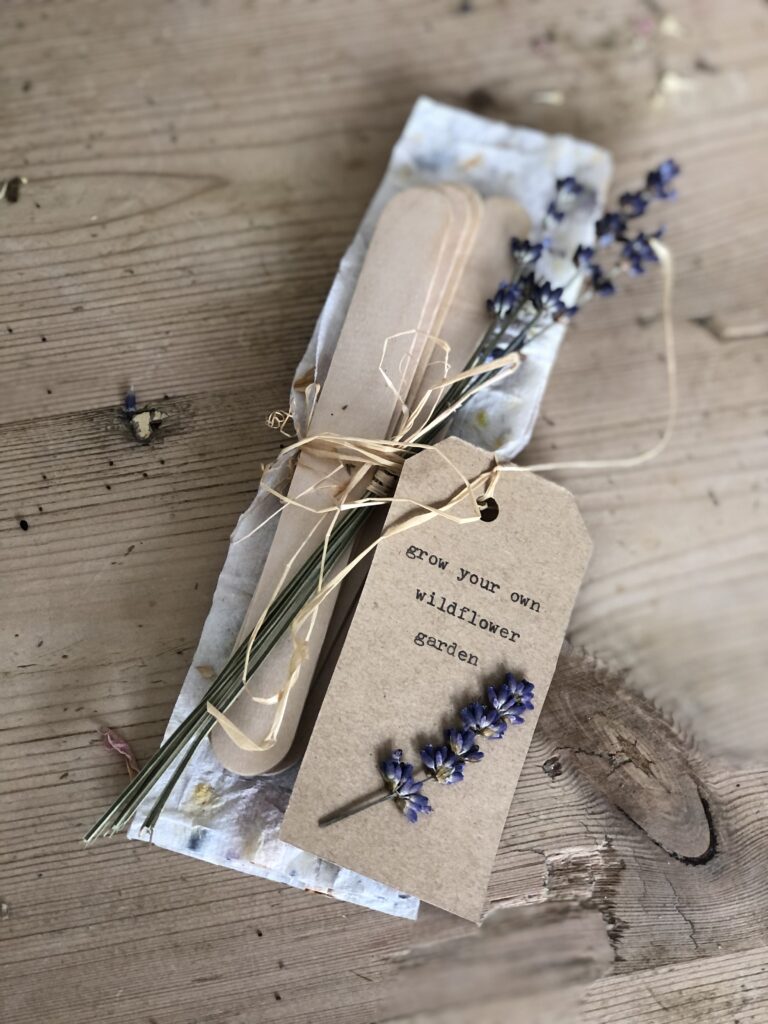
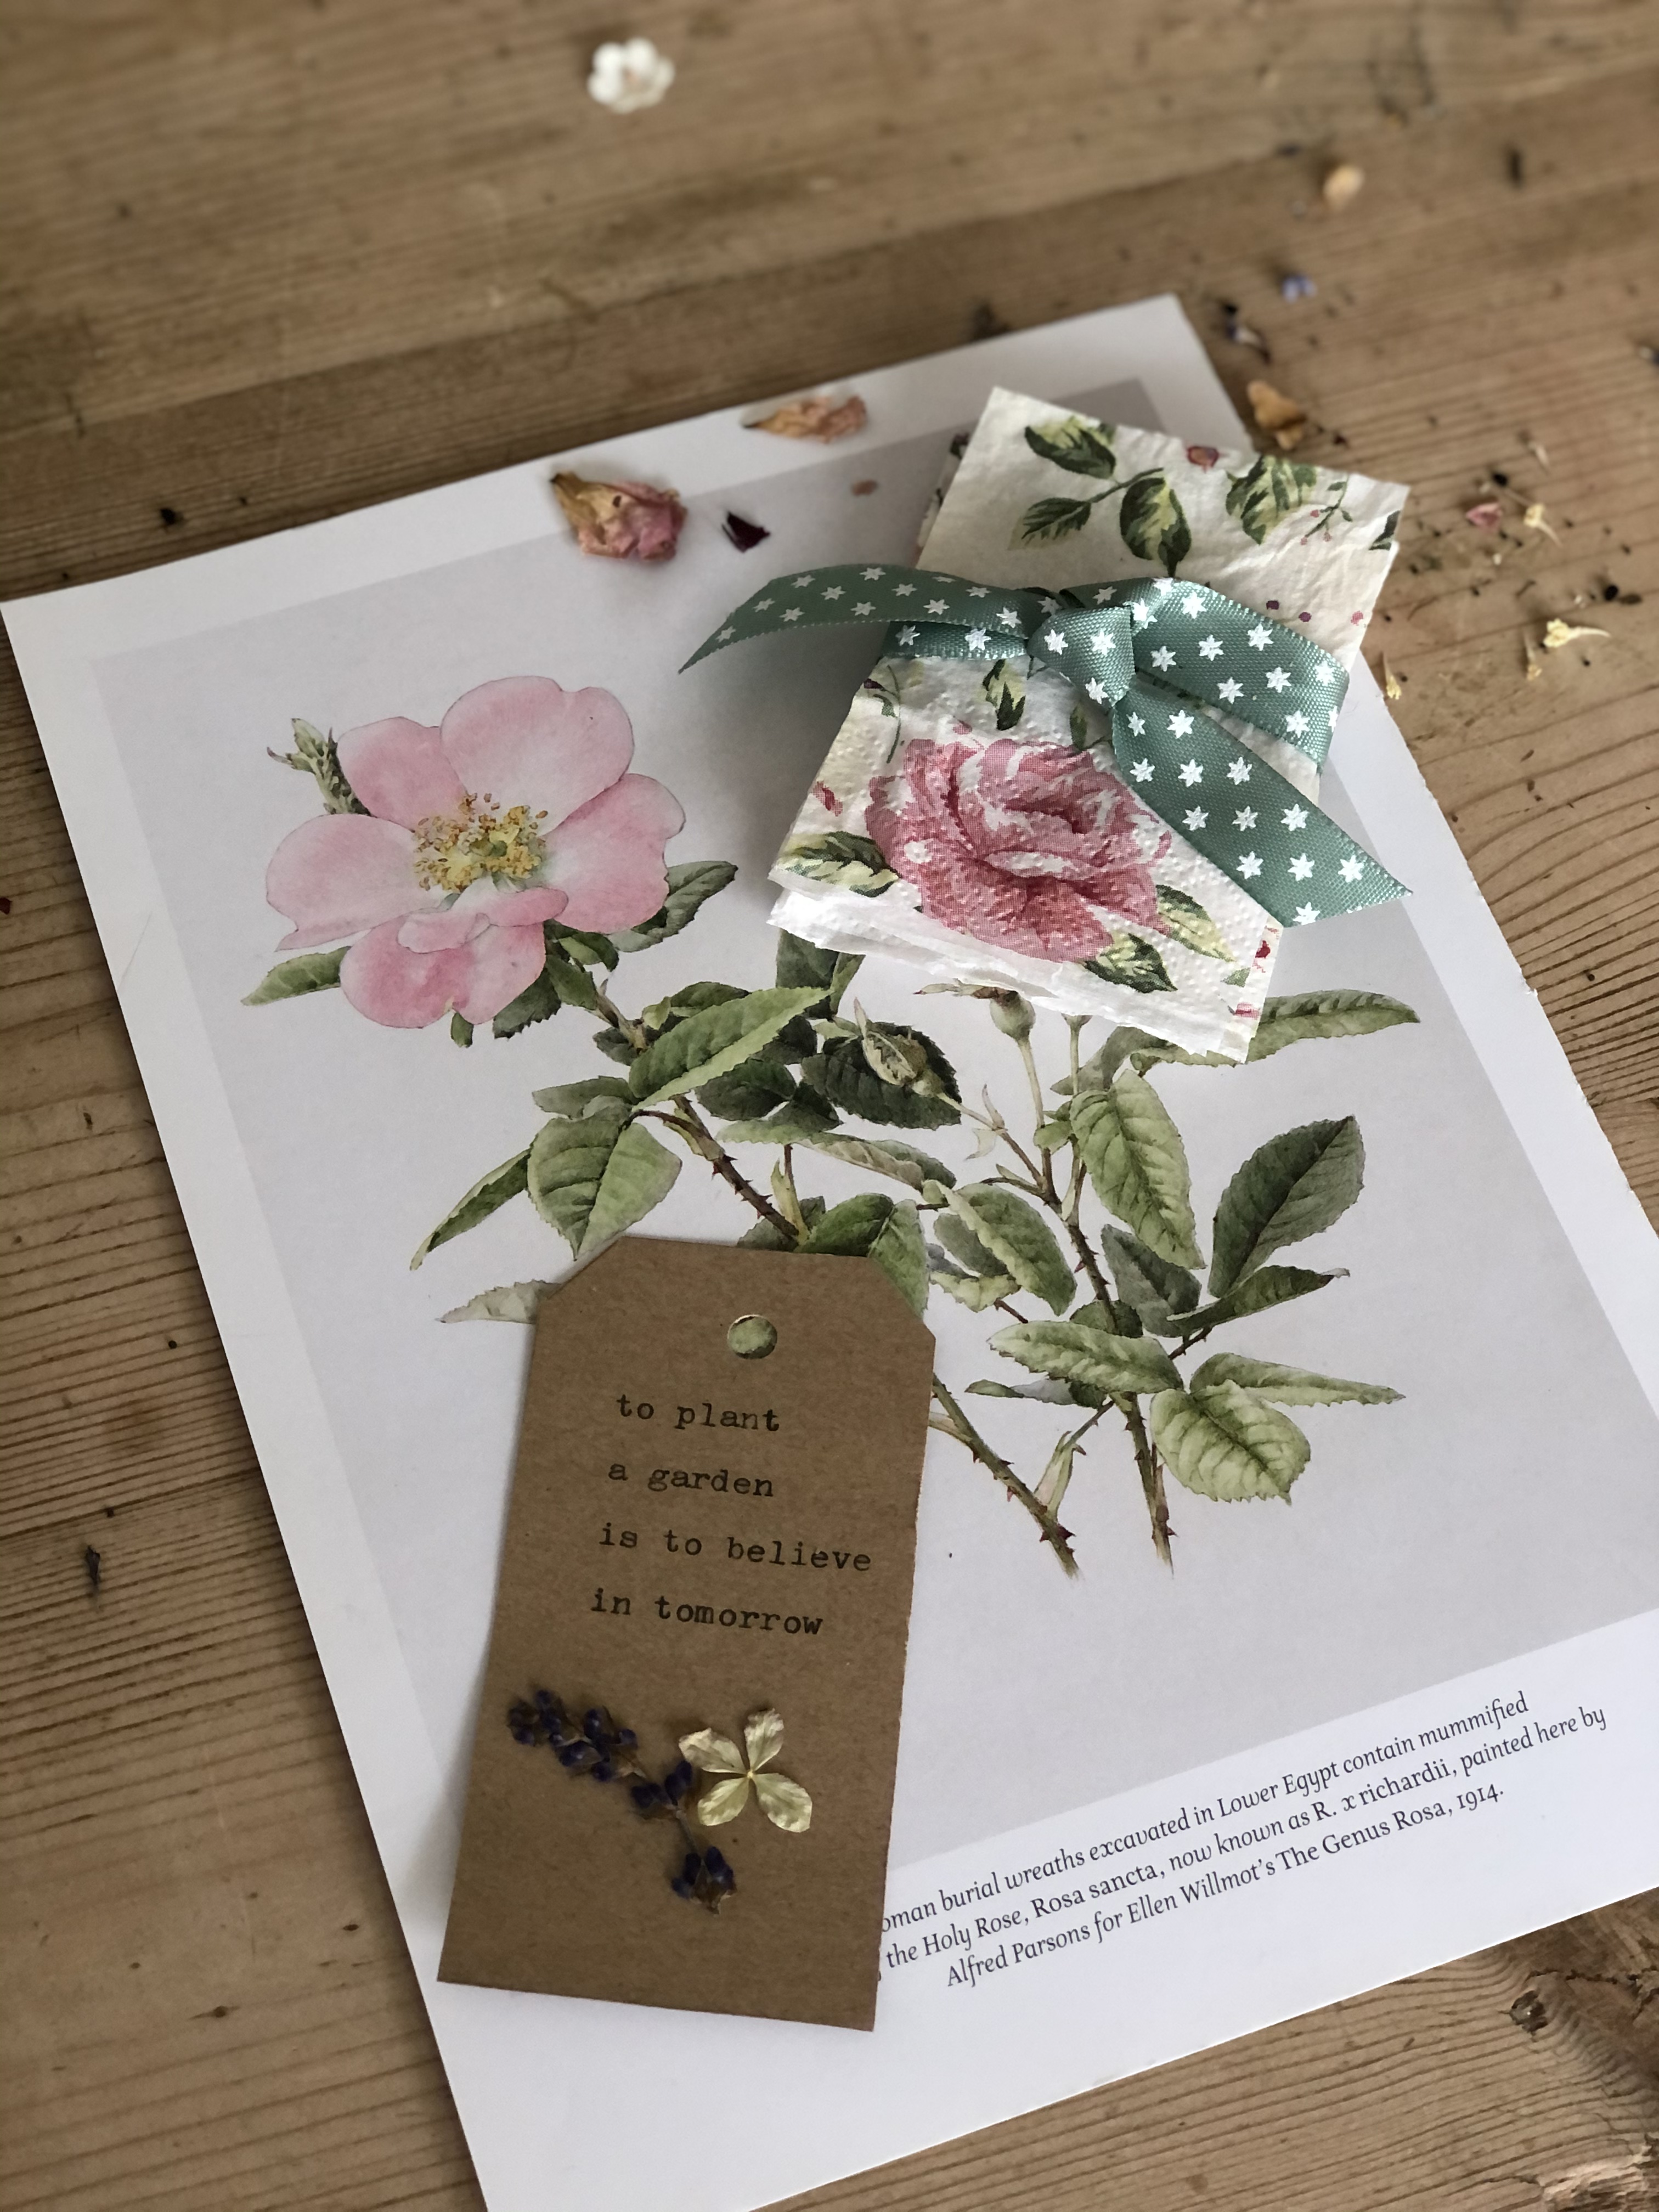
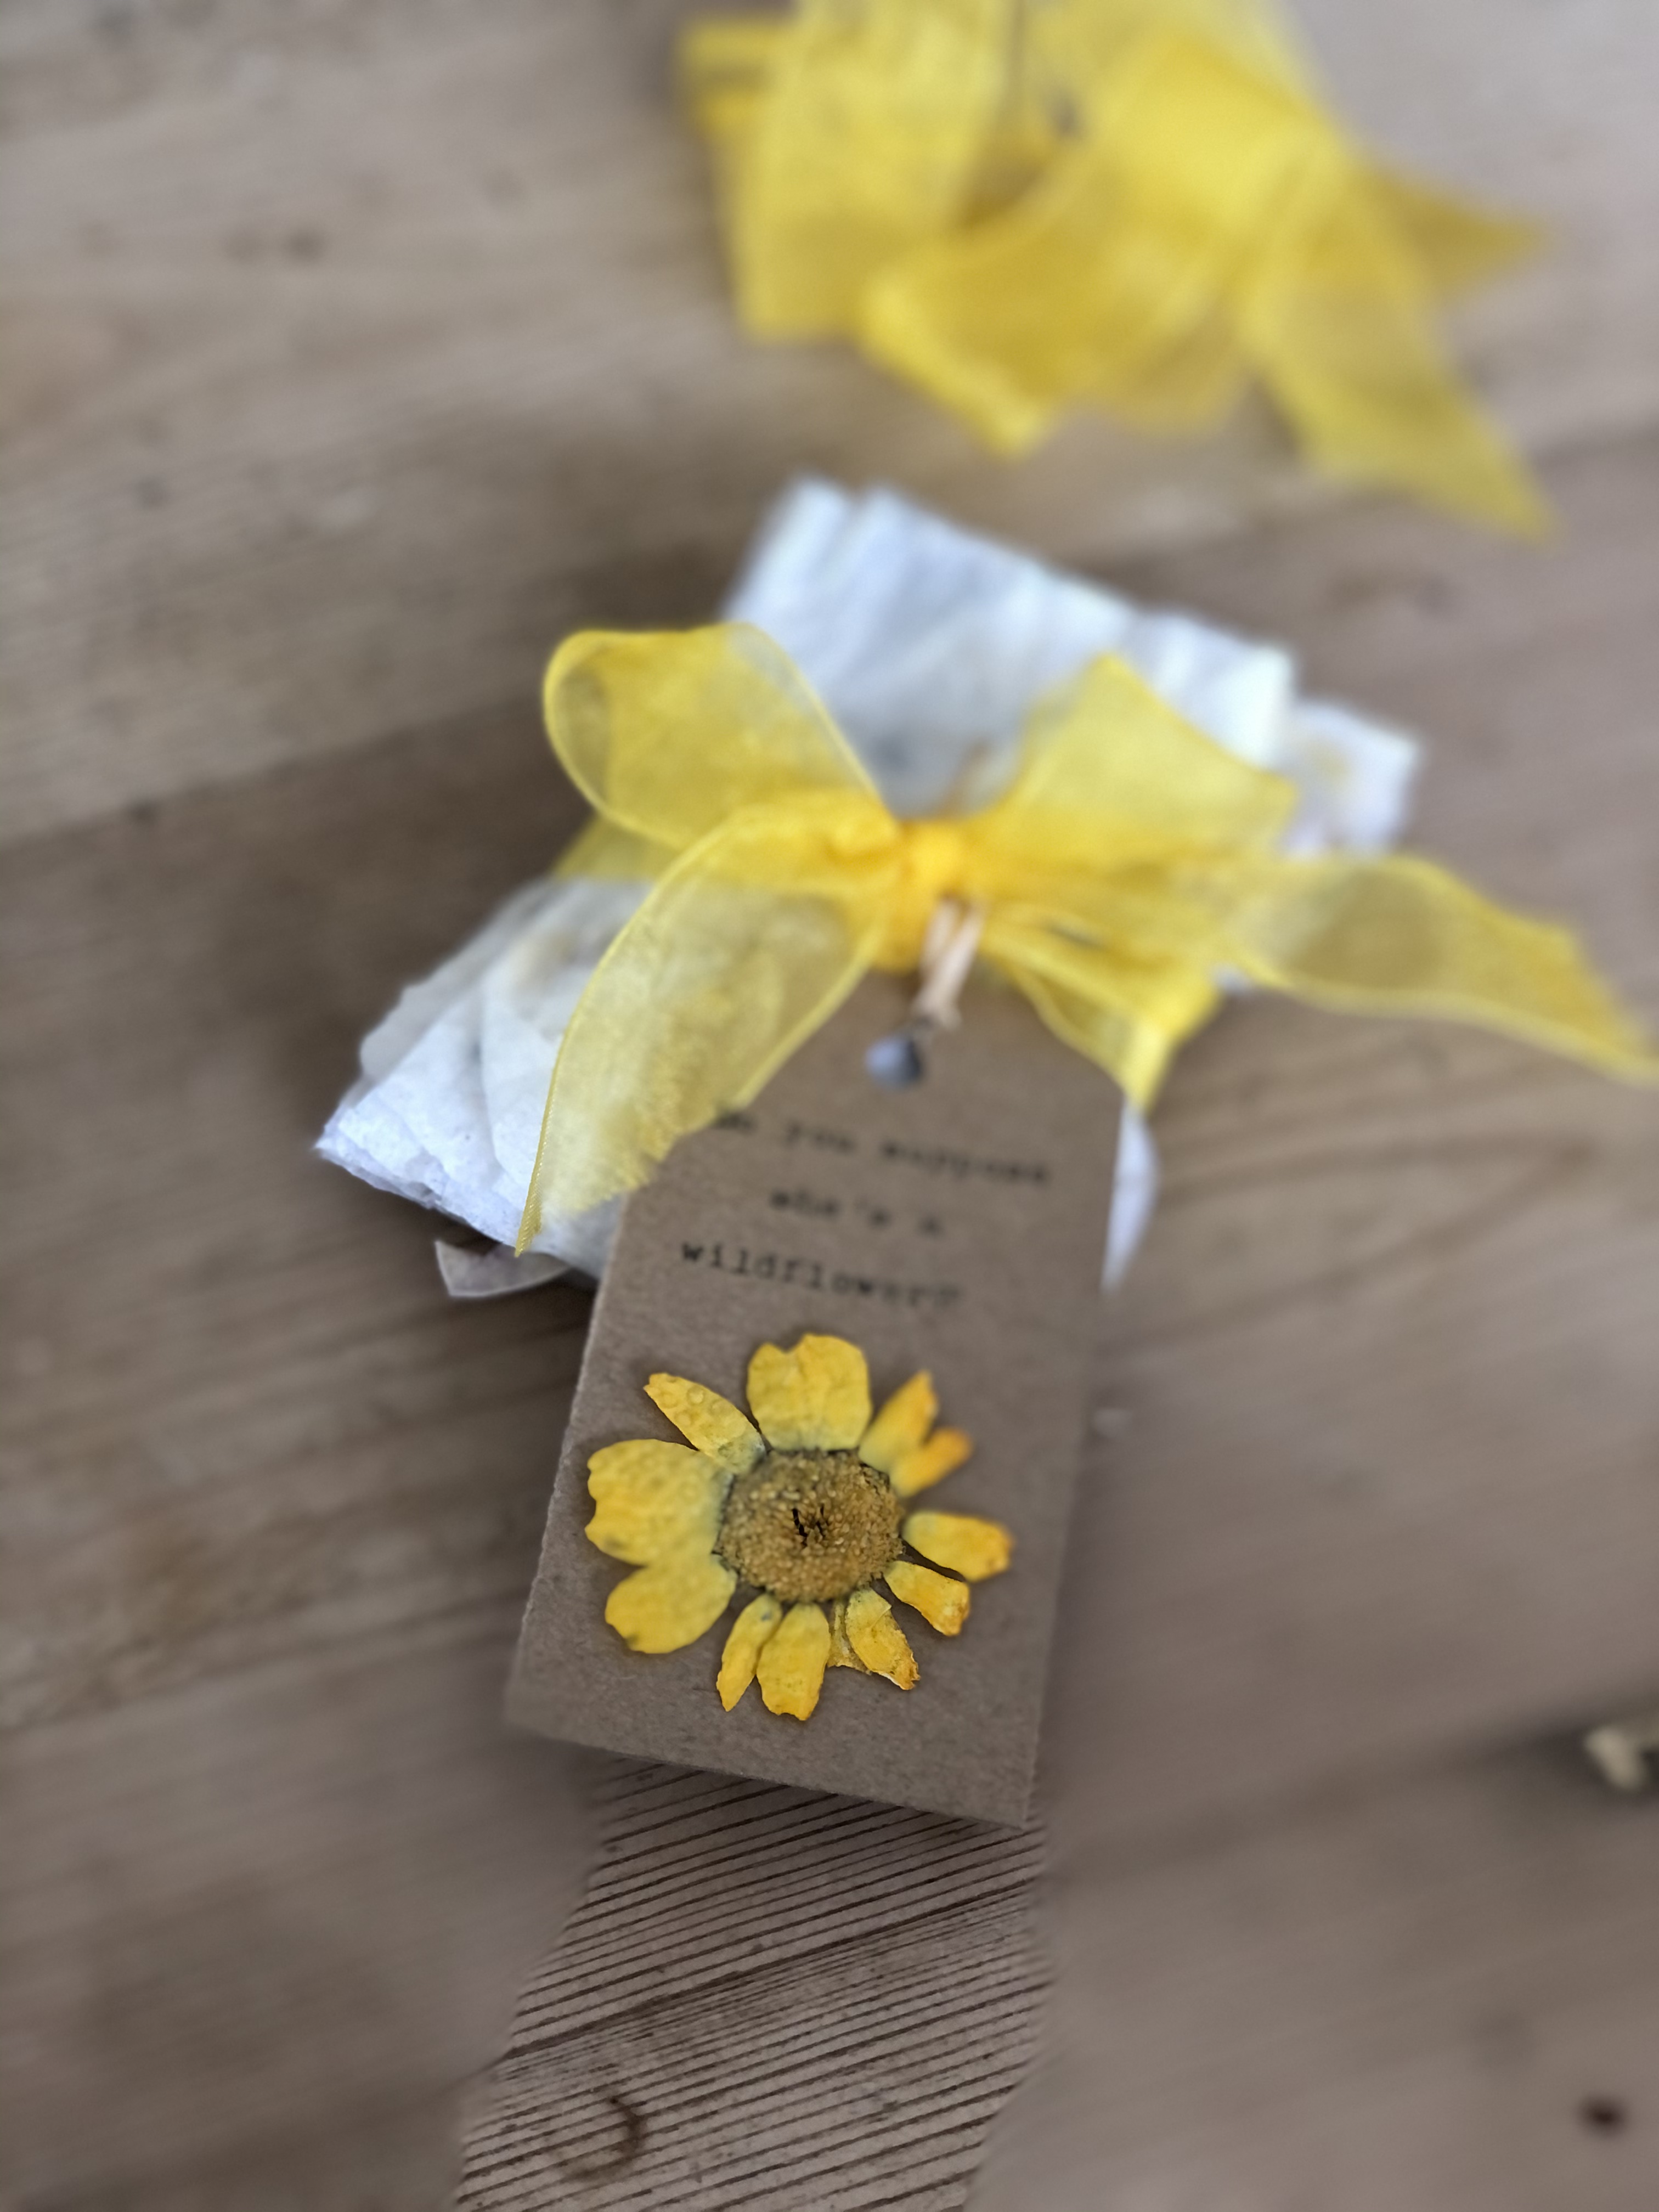
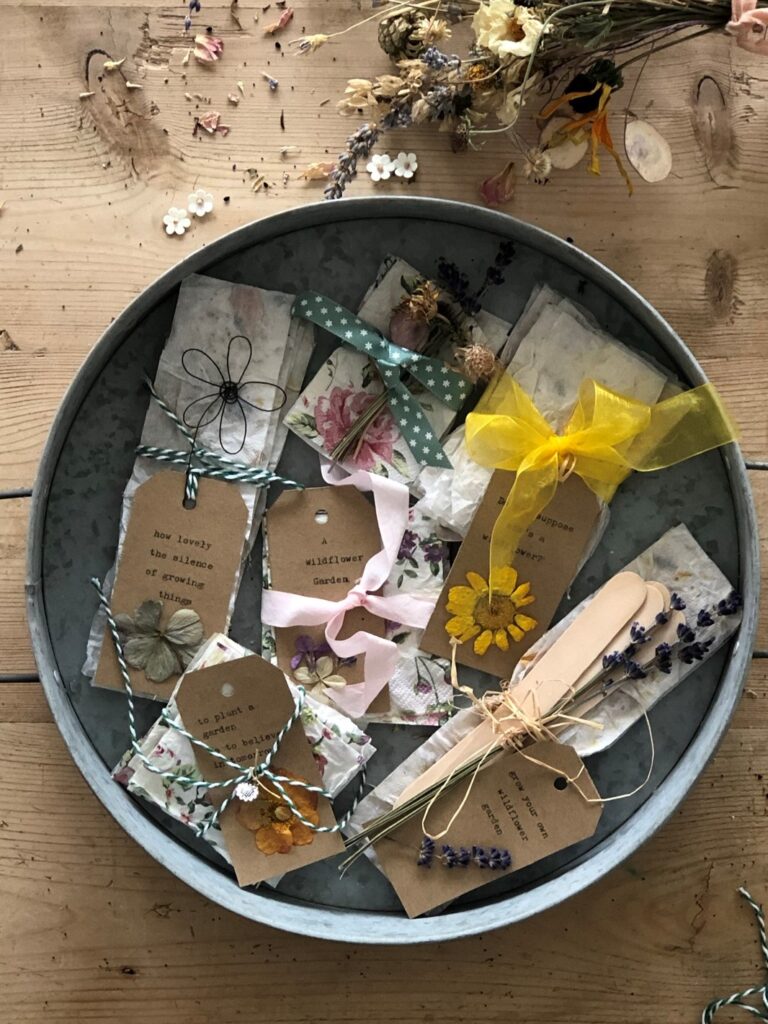
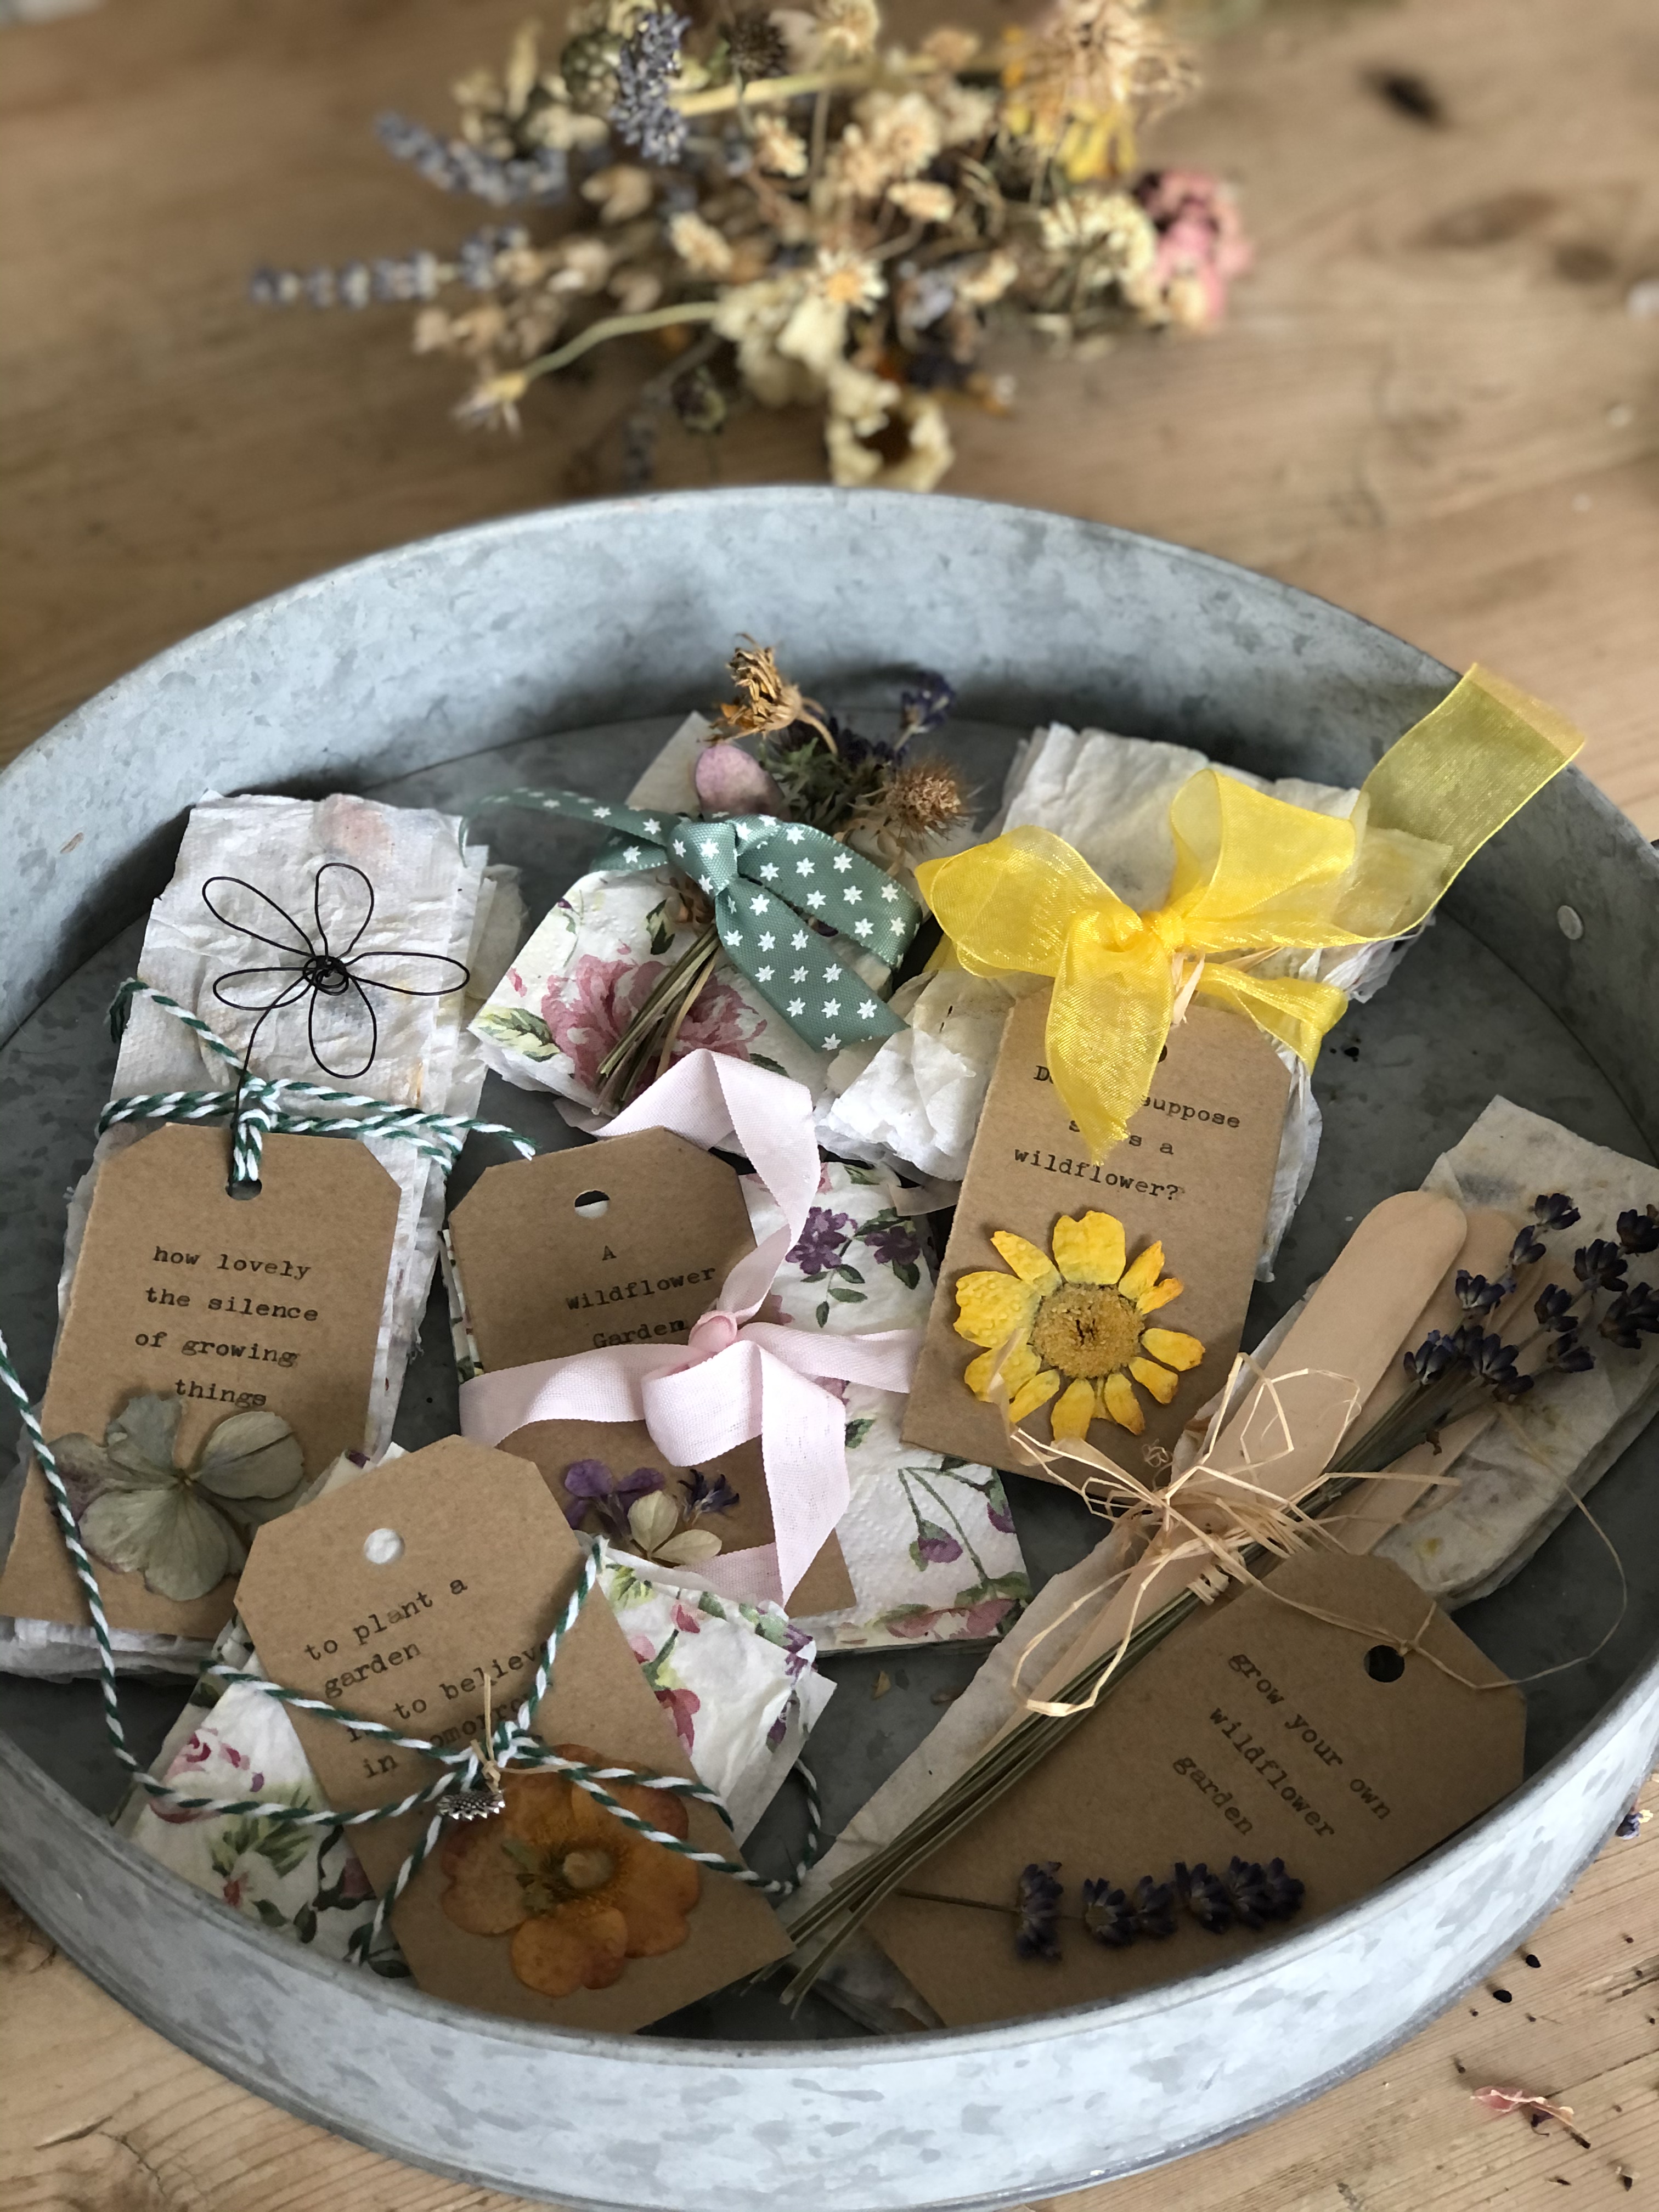
The homemade seed paper needs to dry thoroughly now, so I popped mine into the airing cupboard and whilst it was drying, I set about making my own luggage labels from old card stock embellishing each with last summers pressed and dried flowers from the wildflower garden together with a few appropriate type written quotes.
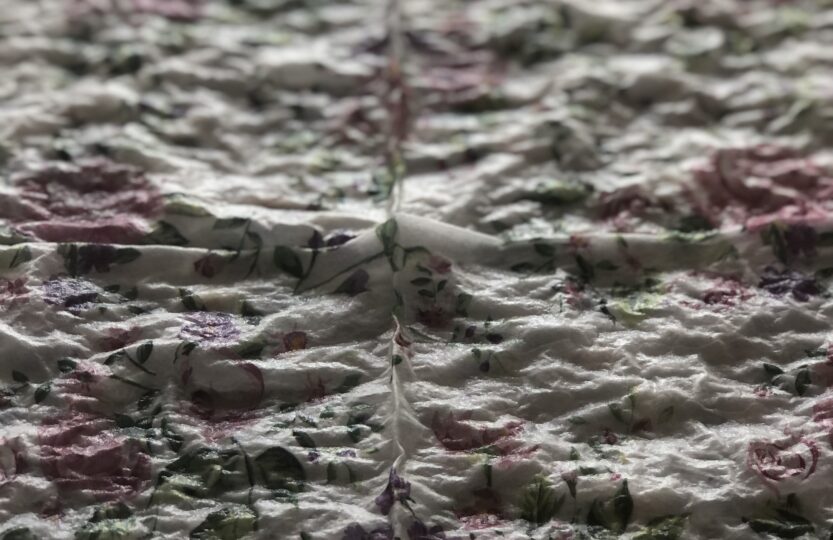
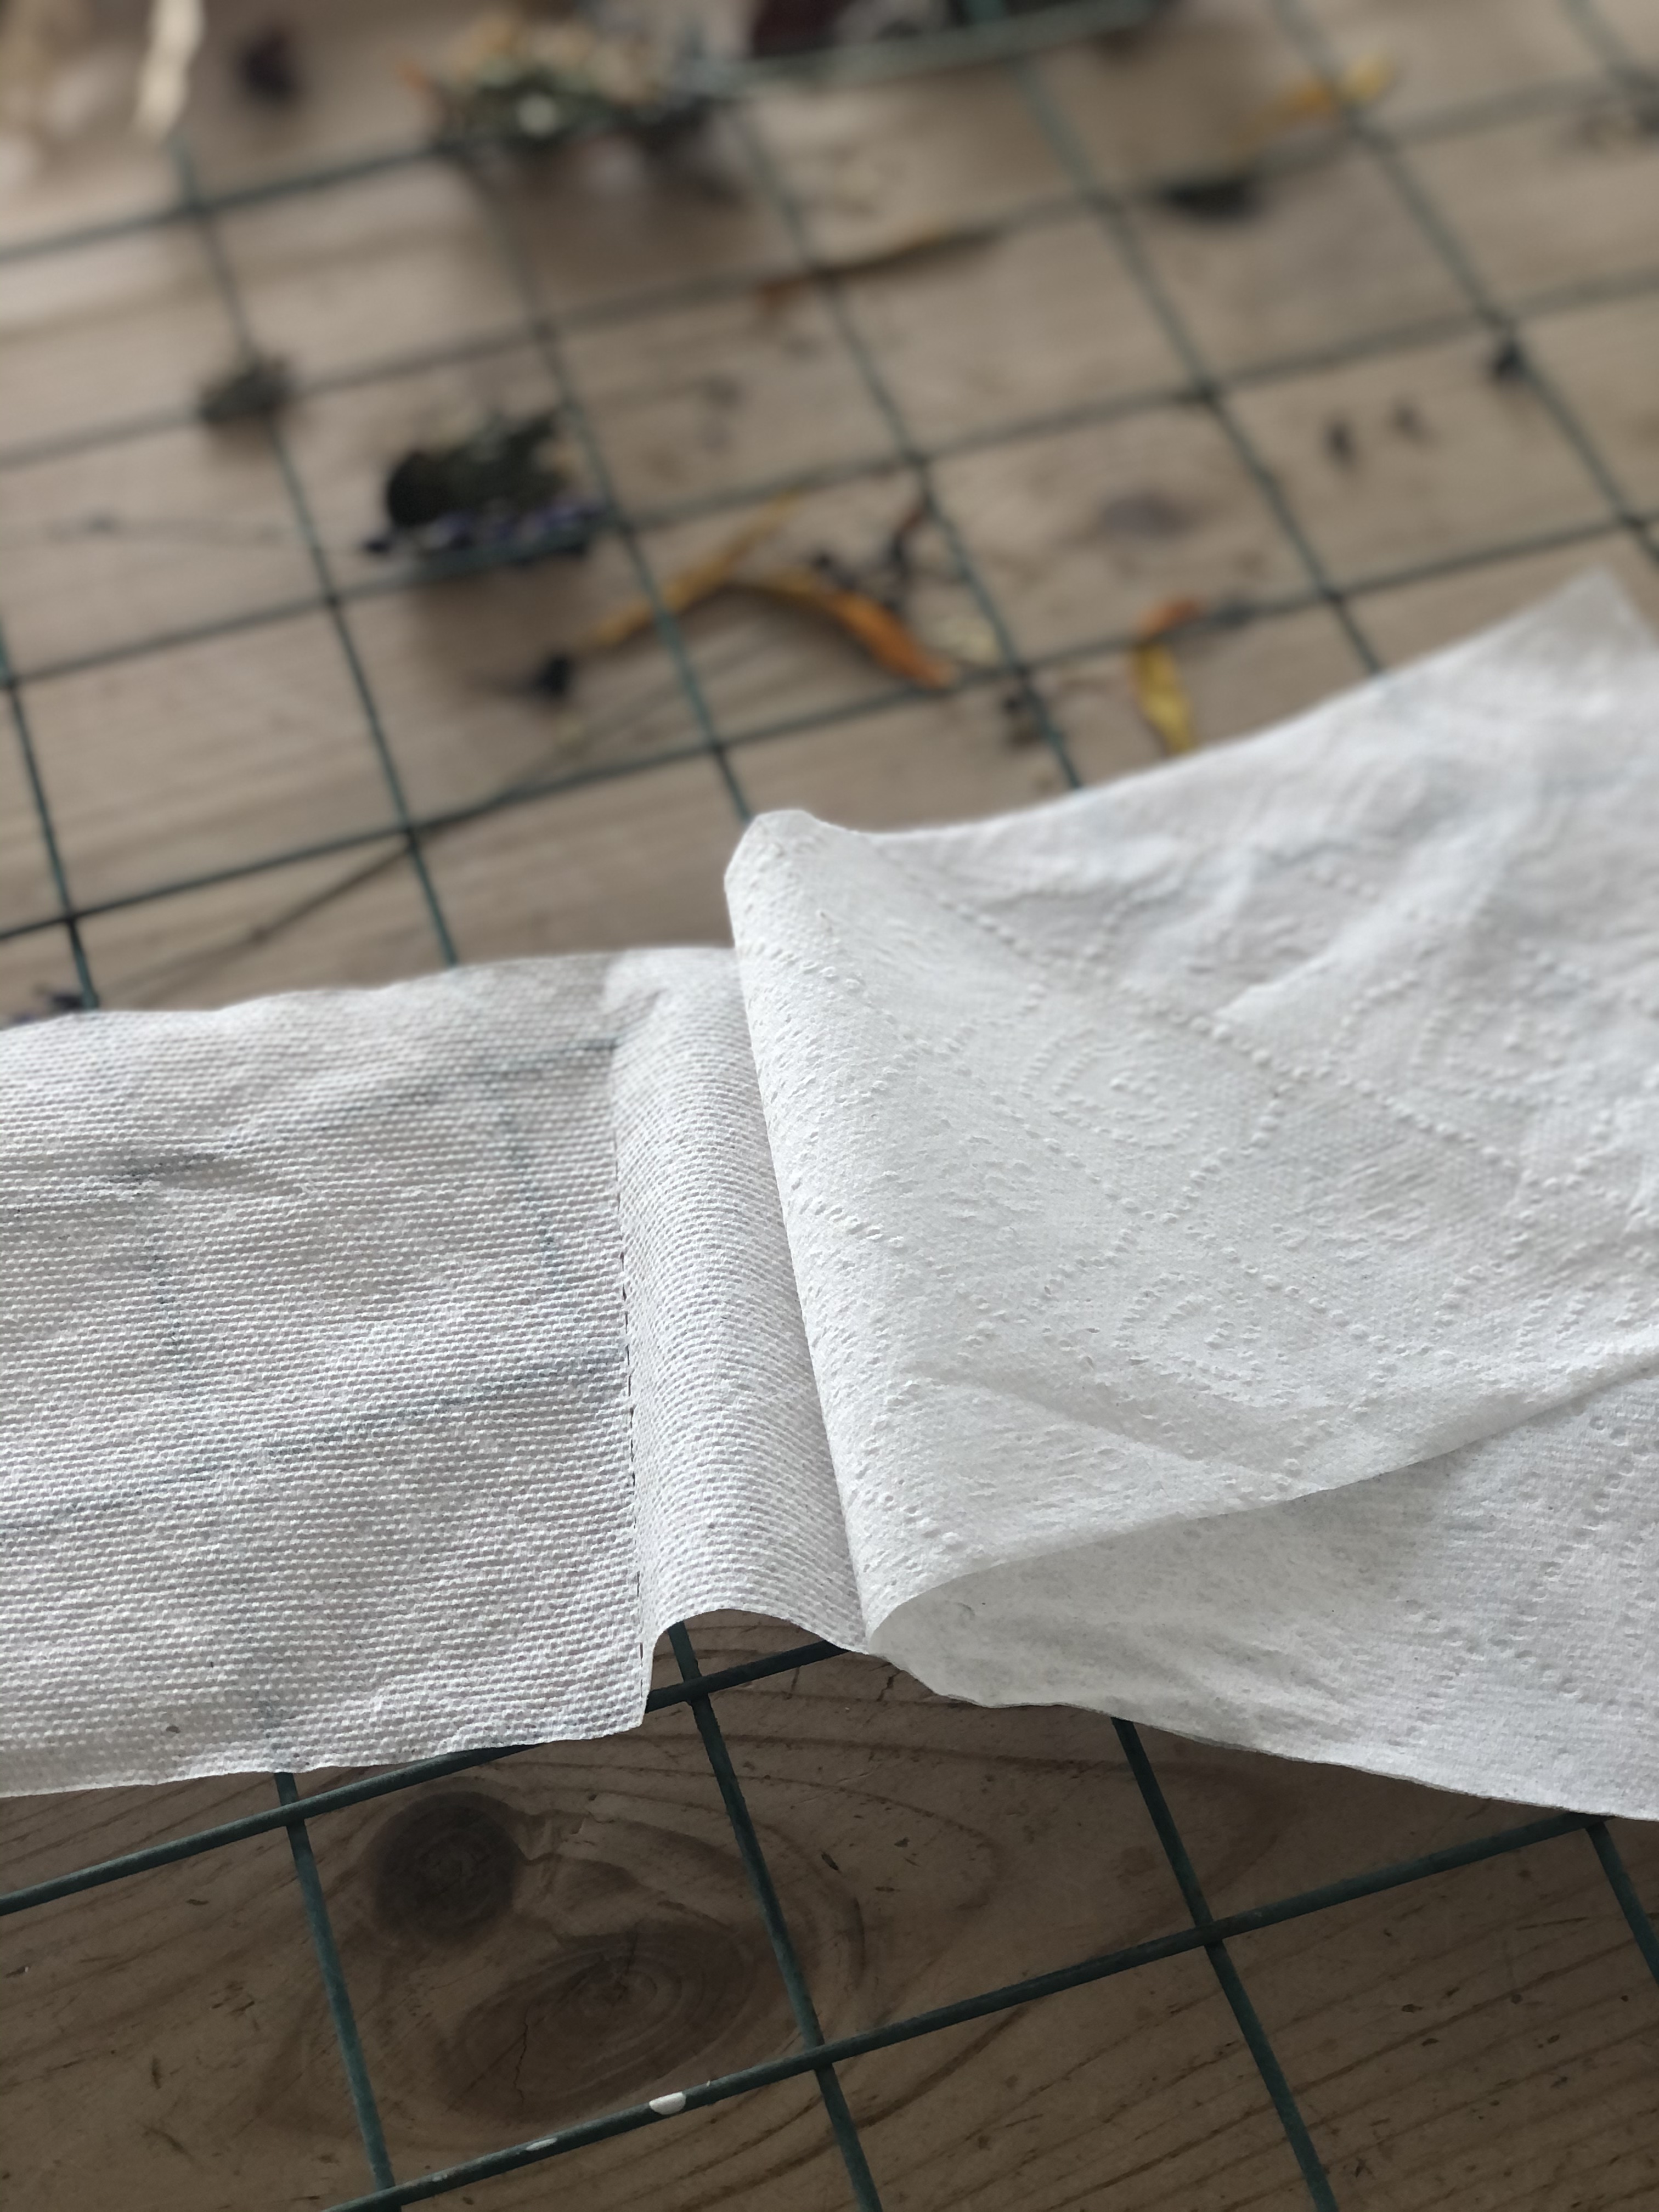
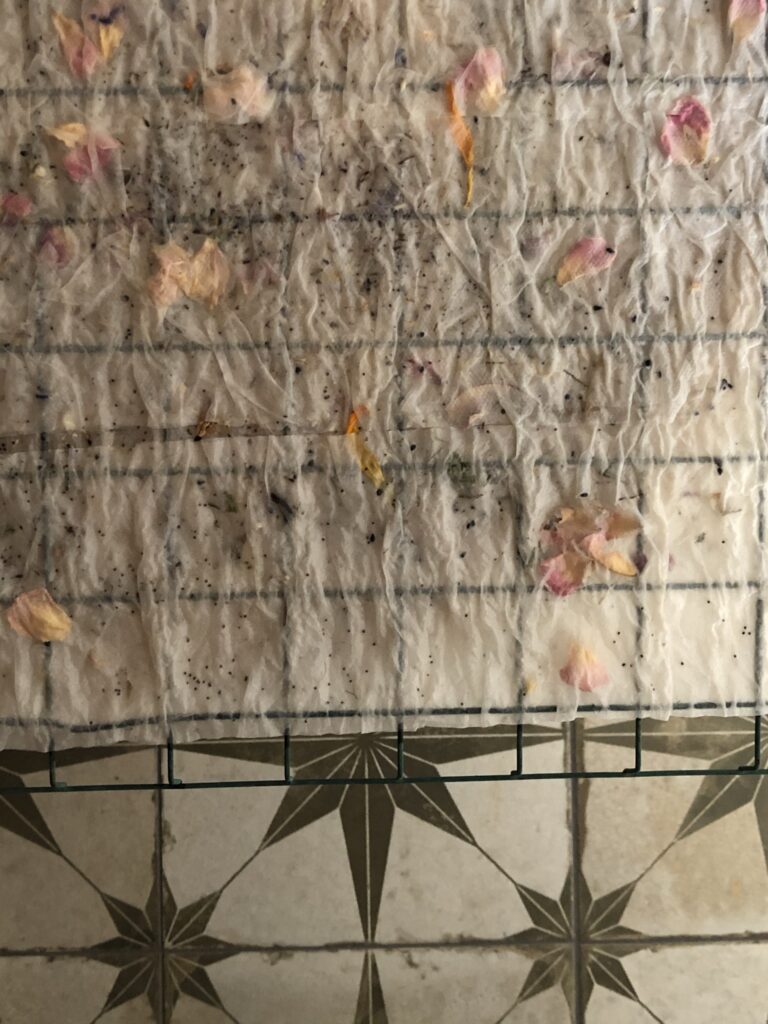
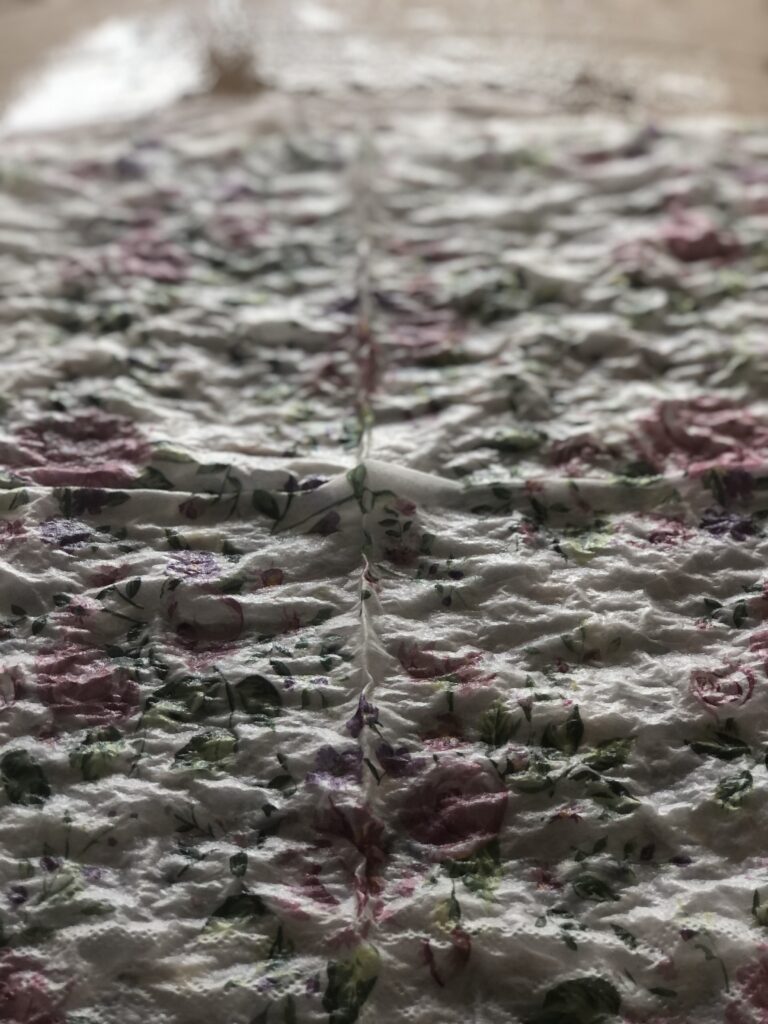
Once thoroughly dry, I began cutting the homemade seed paper into squares and rectangles and this is where I noticed my problem. I had hoped truly soaking each sheet of toilet paper and reinforcing the layers with the rolling pin, might negate the need for the press. Seemingly not since as the four layers of paper dried out, they once again separated which you can see if you look carefully in the next two photos and truthfully, I lost some seed. Not all of it, so in theory, the end craft should still work. Perhaps not as well as it might if using the press though. And perhaps another wire shelf, weighted down on top of the wet paper, might have resulted in the one layer look I was after for my own experiment. We live and learn.
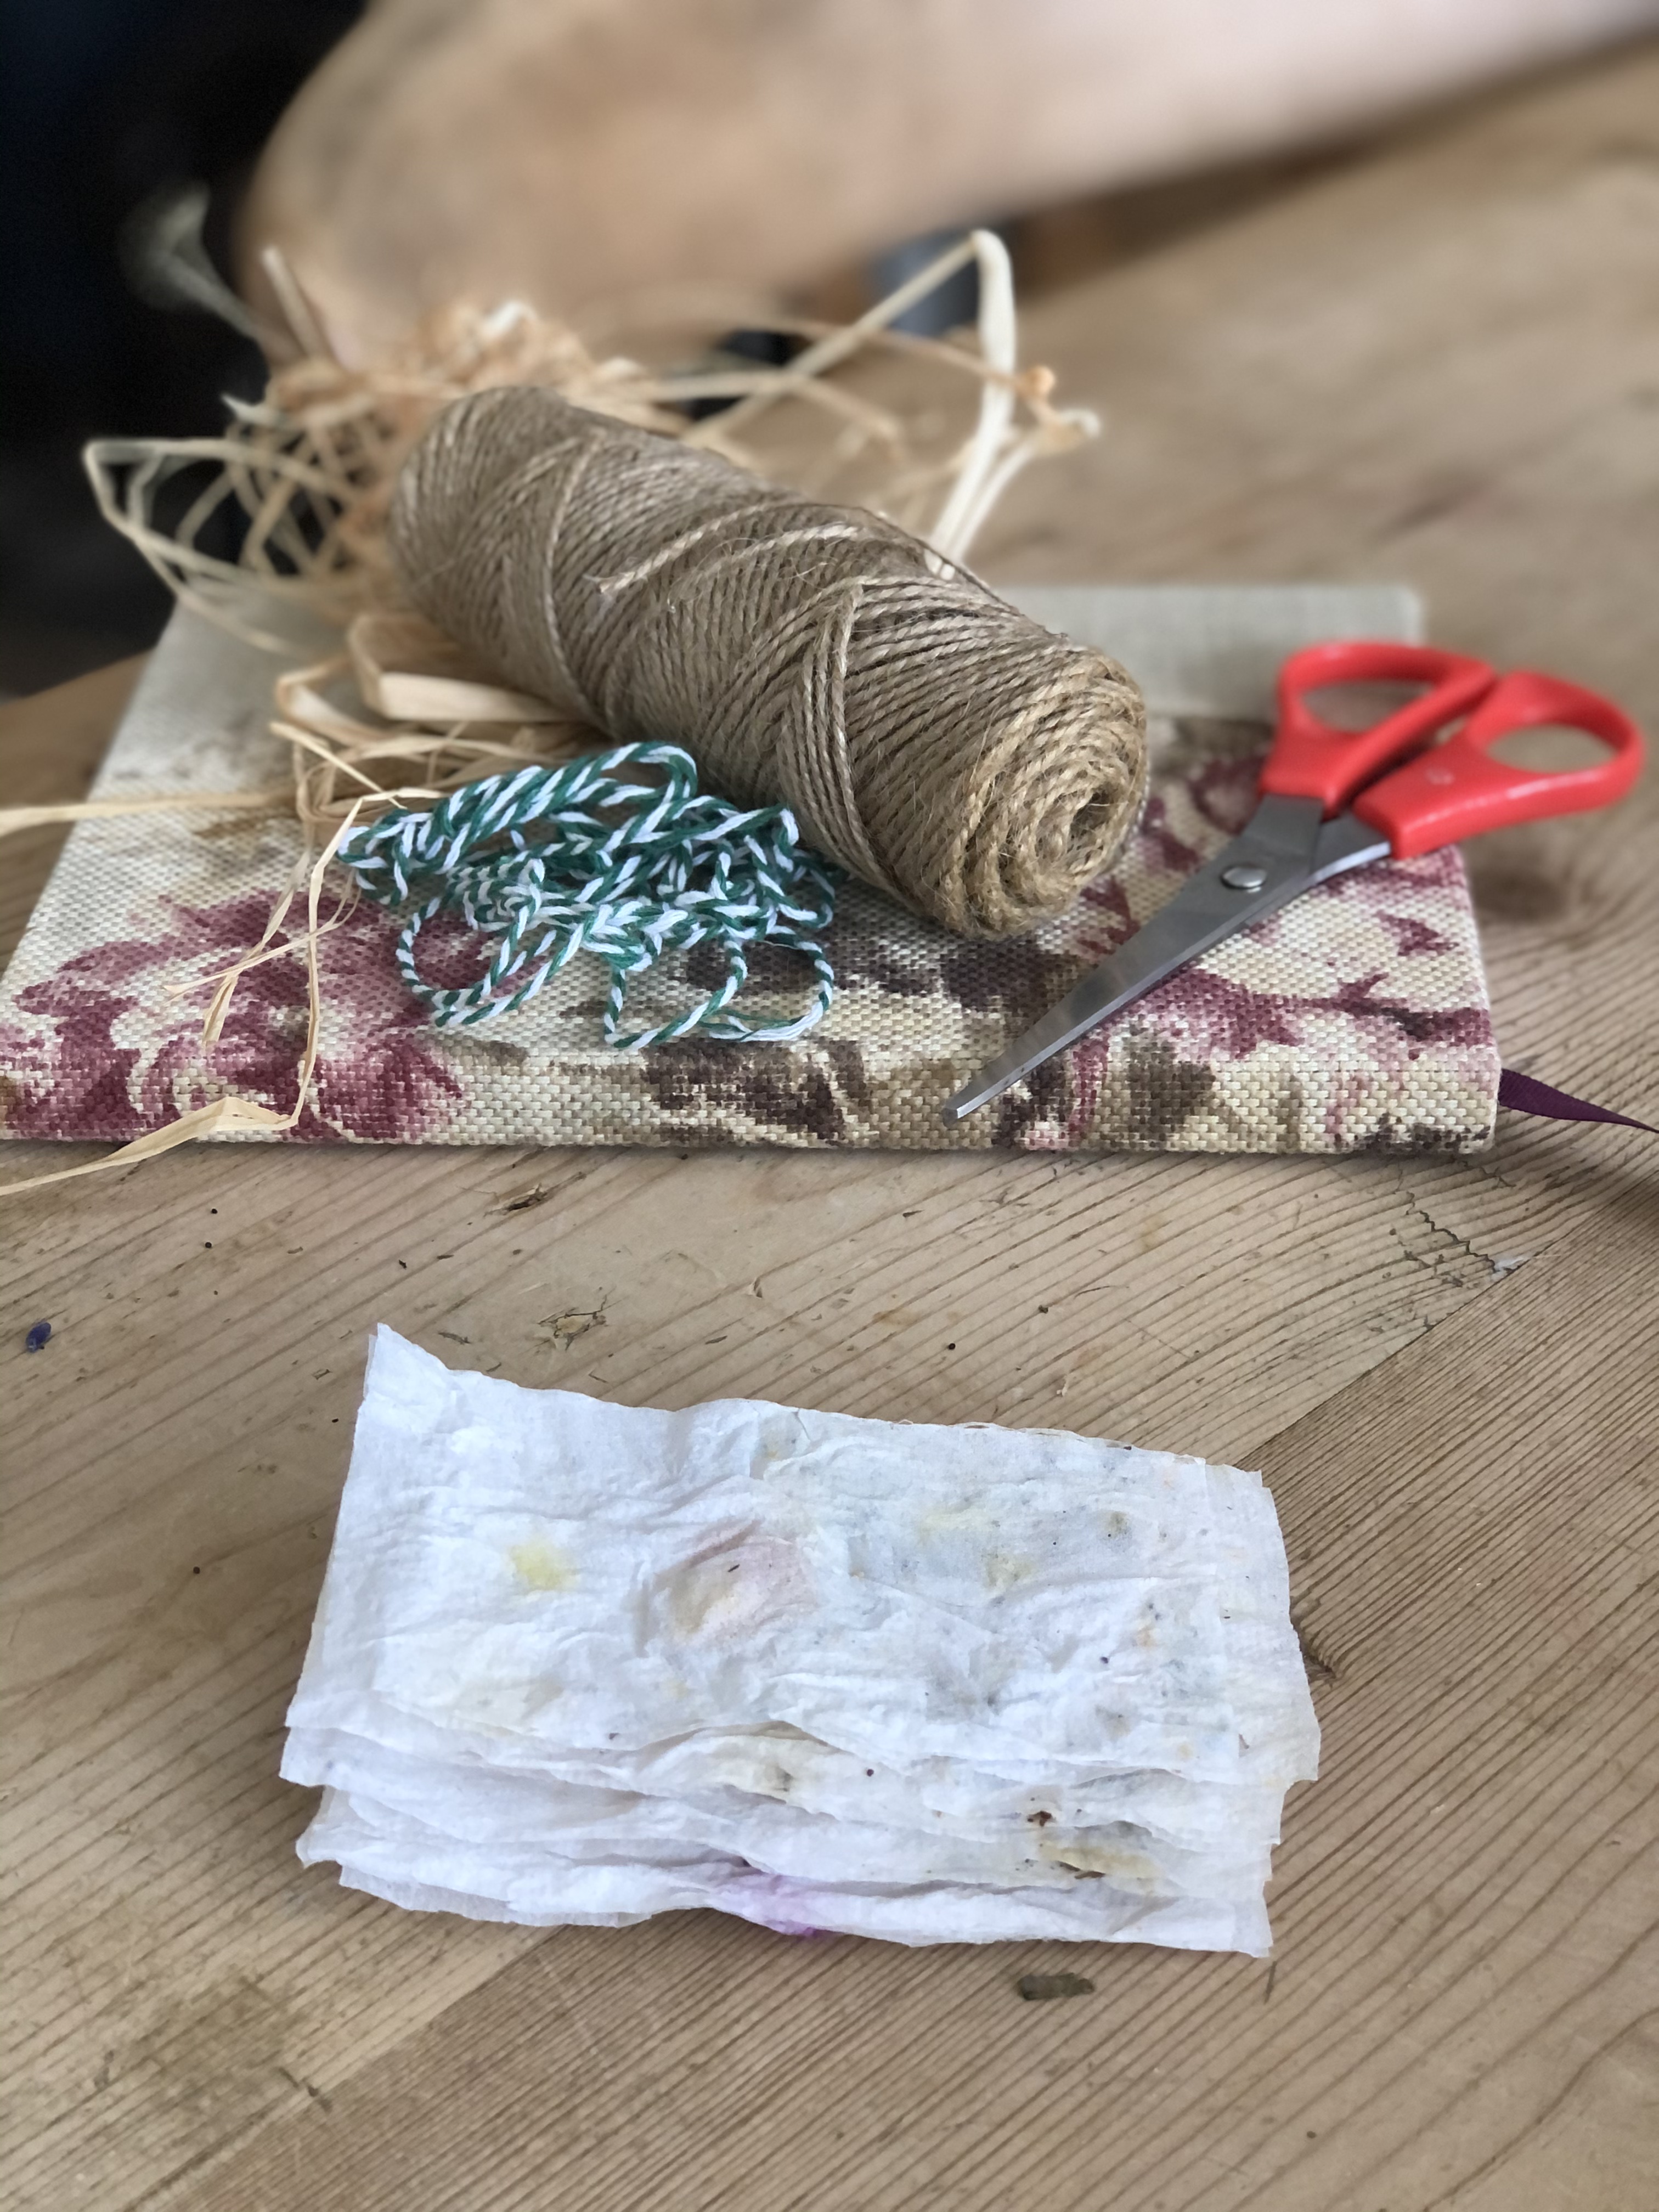
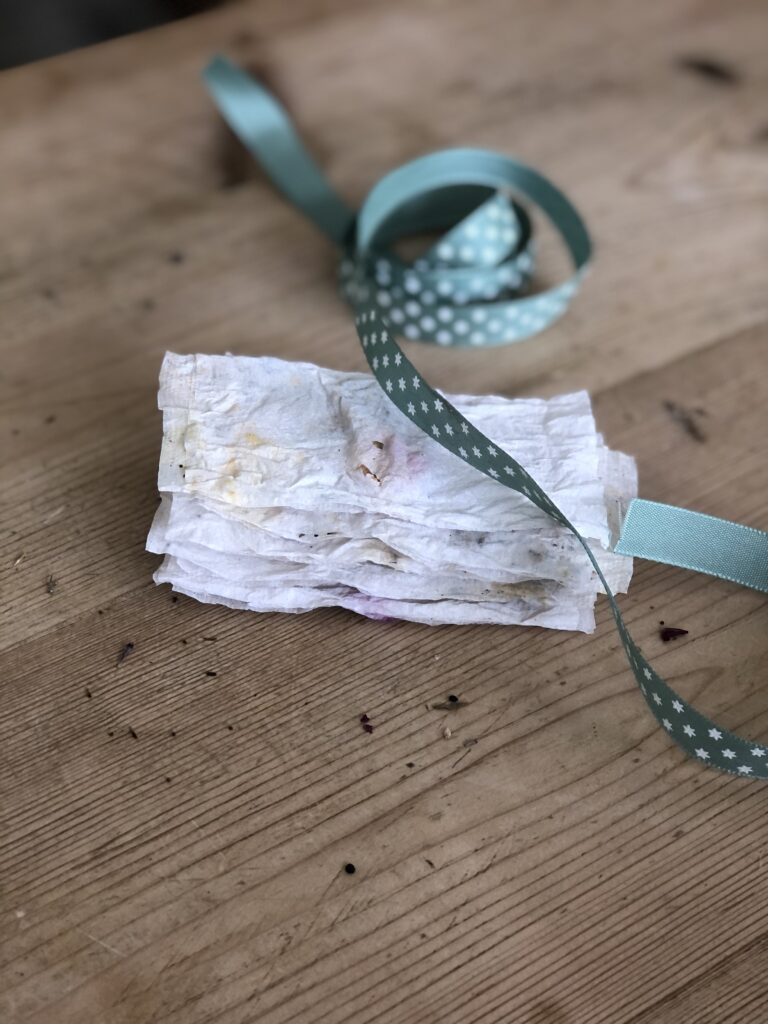
All that was left to do was to tie together a few bundles of homemade seed paper, add a little décor, a label and happily gift to friends. If you receive one, you might like to shake the bag the gift comes in, as well as plant the seed paper directly into your chosen growing spot, since I feel pretty sure you might find a few more fallen seeds in the bag somewhere. I tied each stack with pretty spring ribbon and twine and added one of last week’s craft to one and seed marker lollipop sticks to another. And salvaged torn pages in an old flower book bought from lovely Julie @junkandgeraniums teamed up with the seed paper quite nicely for a gift too.
In conclusion, I think this experiment would work well with the recycled toilet paper if you have the press which I should like to try at some stage although I feel sure it won’t be this side of Christmas since I may be quite busy in the garden and home in the coming months.
Do let me know if you try any variation of this craft or indeed if you have already tried seed paper yourself. And by the way there are endless ways to gift this craft too. A heart on the front of a homemade card for your Valentine was a clever idea I saw and I thought a watering can shape on the front of a gift card or voucher for a gardening friend would be fun too. I would have tried a few more ideas myself if I thought I wouldn’t have lost yet more seed.
Next week I have an Easter decoration for you. Although we are still a few weeks off that date, I thought you might like the craft ahead of schedule just in case you wanted to try something similar for your own home. Until then…x


Aah thank you Molly and for the idea of course too. Yes a little tweaking here and there I think and Mr M was full of the joys of seed making when I suggested he might like to make me a paper making frame!!I’m sure you can imagine x
Thank you Wendy! I’m so pleased you enjoyed the read and craft x
Oh Helen I love this one! I think it is particularly charming because it has been so experimental allowing further progression, perfection comes to all those that wait.
It would be such a thoughtful card to receive and such clever ideas, you have as always made them look oh so pretty! Xx
How absolutely lovely!!!!🥰🥰🥰
Hello Lucie and thank you for your lovely message. I have just packaged some up for dear friends in the hope they make them smile I hope you’ll get to make some too!x
I was so surprised that in all my years of crafting I had never heard of this Ruth. I shall be asking Santa or Mr M for a paper press one day since I think the ideas are endless here! So glad you like it too x
Thank you Dottie, I do agree a handmade . is beautiful because it shows you care. Thank you for your lovely message x
A thing of beauty is a joy for-ever as my mum used to say. I say homemade anything is a joy forever it not only shows the thoughtfulness but also the genius in that hand made item is beyond reproach of any kind. Have faith. x
Such a lovely idea, I’d never have thought of attempting to make this…l9vrvit!
Oh this looks brilliant .I love sending things like this to cheer friends up . Lovely 💐
And thank you for stopping by to see Julie. It’s a lovely way to gift the seeds isn’t it and I’m sure so long as there is more weight added during the drying process you would get more pleasing results!x
I’m going to try this one !
It’s amazing ! I’m thinking a few heavy books to press it down ?
Thank you for using the floral ephemera from my shop ! It’s so good to see what wonderful things are created !
You are too kind to your old Mum! Thank you darling, not every craft can be a roaring success can it? Lots of lovex
Aww I am so pleased you love it Nancy! As flawed as my experiment is, I do think with the suggested tweaks it would be a success! Have a lovely weekend ahead x
What a fabulous idea!!! They look absolutely beautiful too – I love your honesty when you write it’s so refreshing! A wonderful idea a beautiful gift and a fantastic read! I love it can’t wait to see what next week brings! Xxxxxx
Helen, this is genius!