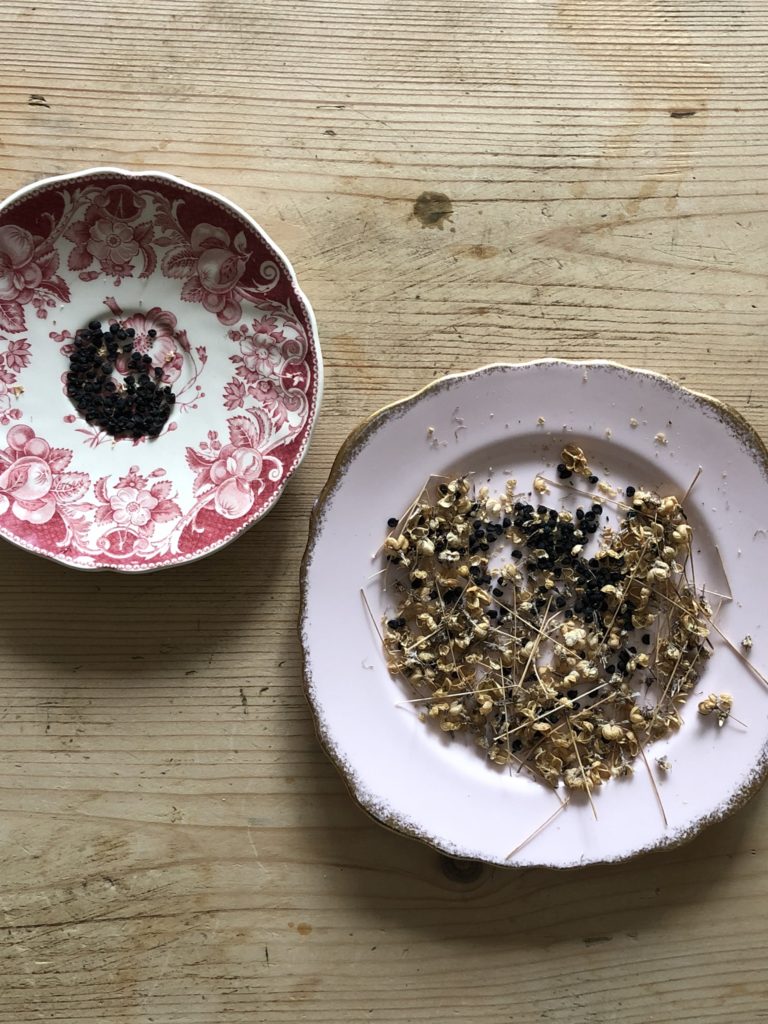
I had for some time been sitting at the breakfast table trying to separate my harvested seeds from their protective coats when I said out loud “I saw Carol Klein on Gardeners World do something like this.” I gently blew what I hoped to be only the dried waste across the table perhaps with a little too much vigour. Master M was at the time tucking into what would be his third breakfast of the day just a little further down the table and shrieked “Mum, what on earth are you doing? There are poppy seeds all over my breakfast now!” “Oh dear, so there are” I said looking across at his potatoes and eggs “never mind darling, no need to make a fuss, poppy seeds are good for you” I continued “come on, eat up now before it gets cold.” Join me today as I show you how to make charming DIY seed envelopes the Whitewood and Linen way…
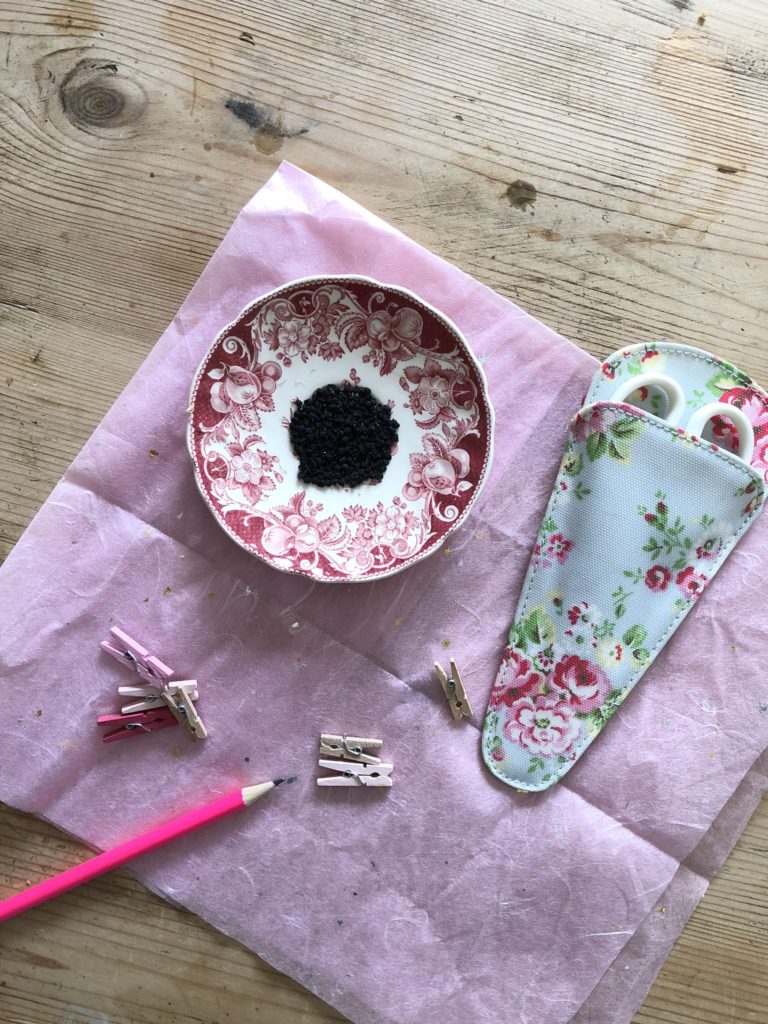
Early on this year a dear friend gifted me seeds from her garden in the most beautiful of hand decorated envelopes. Not for the first time did she and Pinterest inspire me to try something a little similar myself and as my own flora and wildflowers begin settling down to recharge their batteries, I have harvested many seeds to add to my own diy seed envelopes. Firstly, I gathered my seed stock and crafty bits.
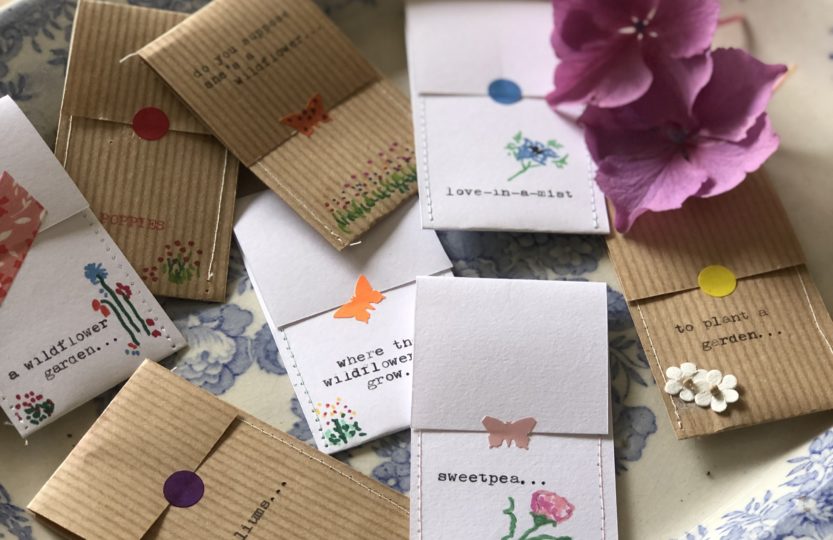
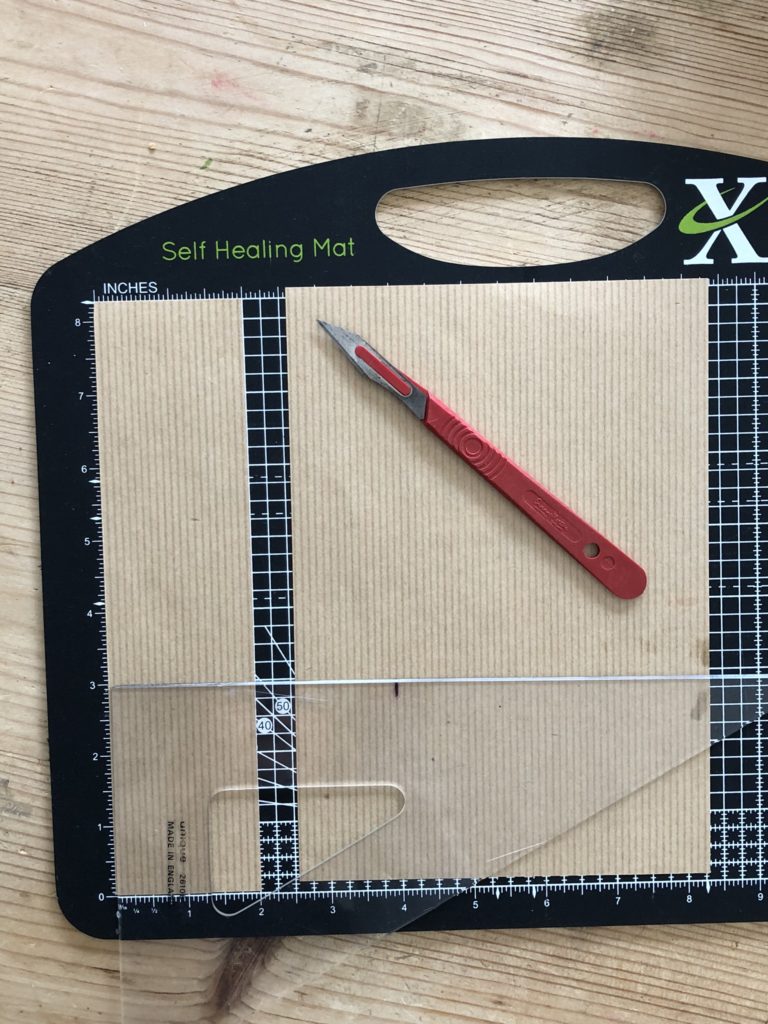
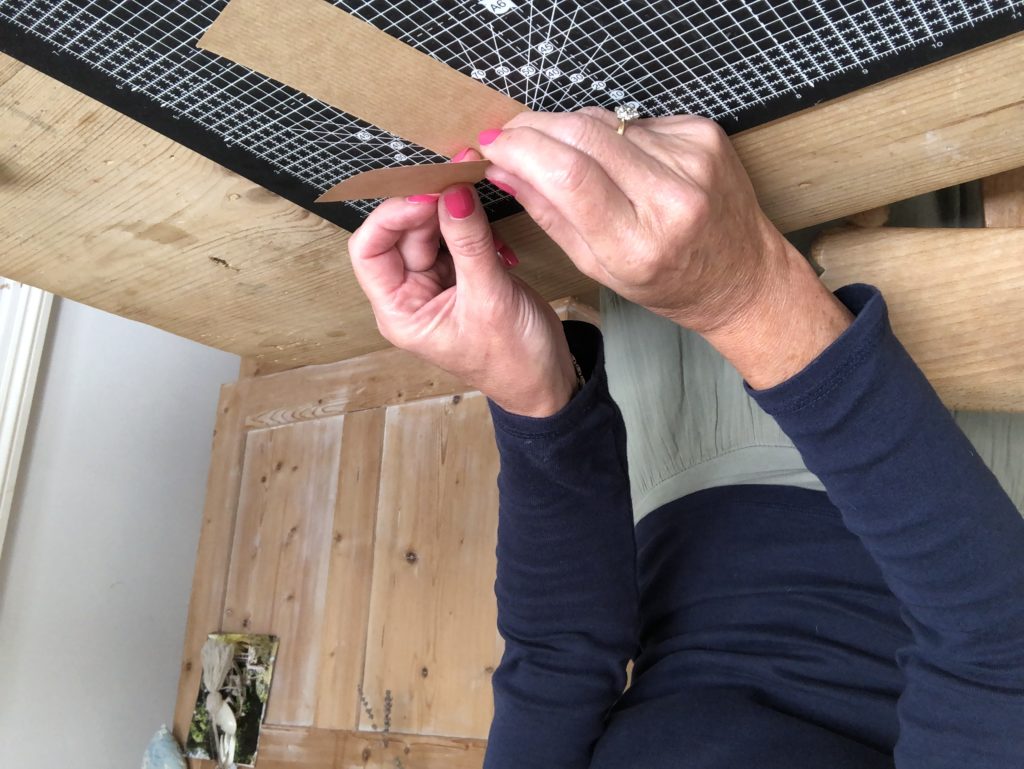
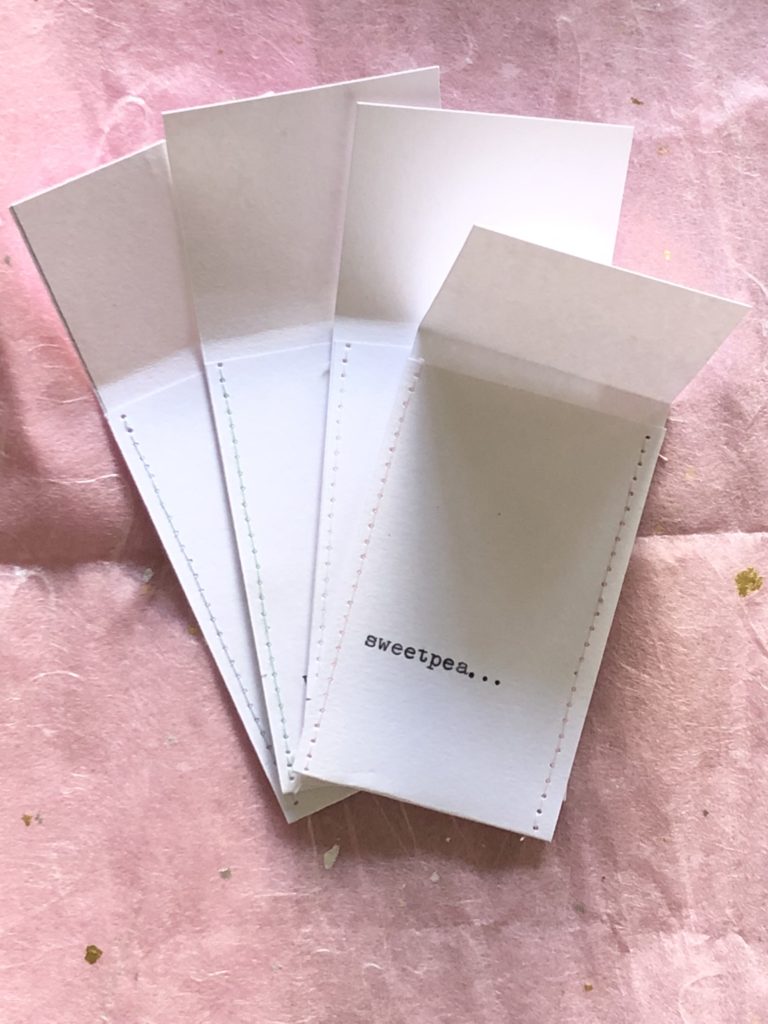
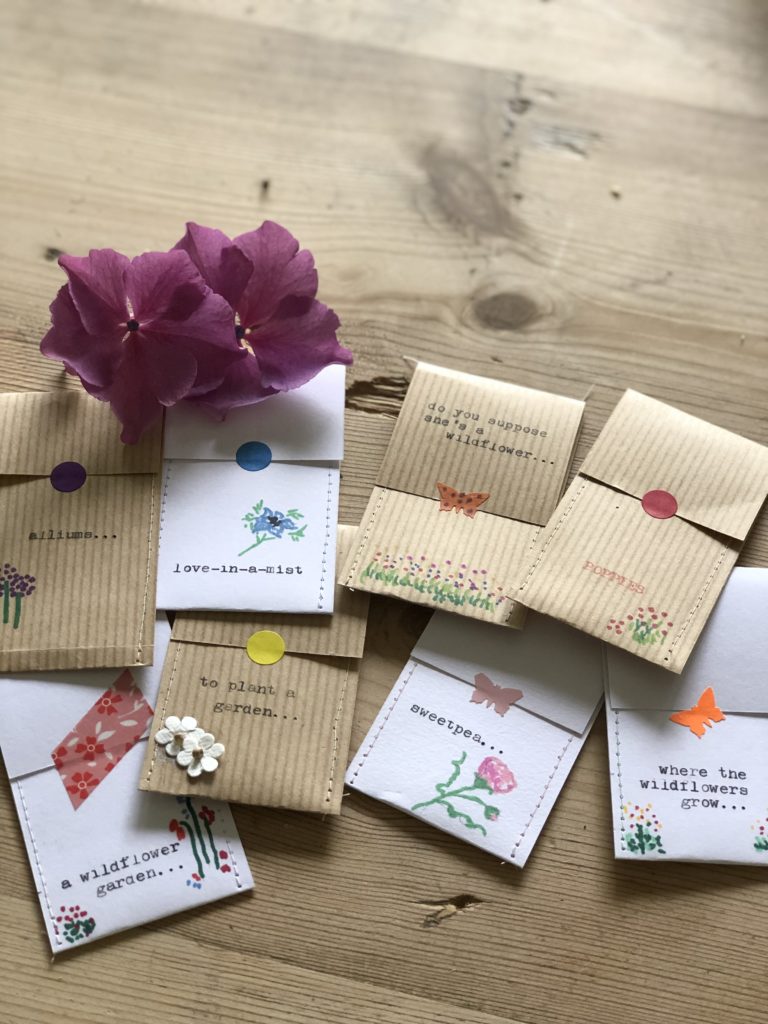
I wanted to keep the idea as simple as I could since I imagine I shall be crafting a fair few of these. I had brown paper in my stock which I cut into strips two inches wide and a little over eight inches long. Then I simply used my eye to determine the size of both the body and flap of the seed envelope.
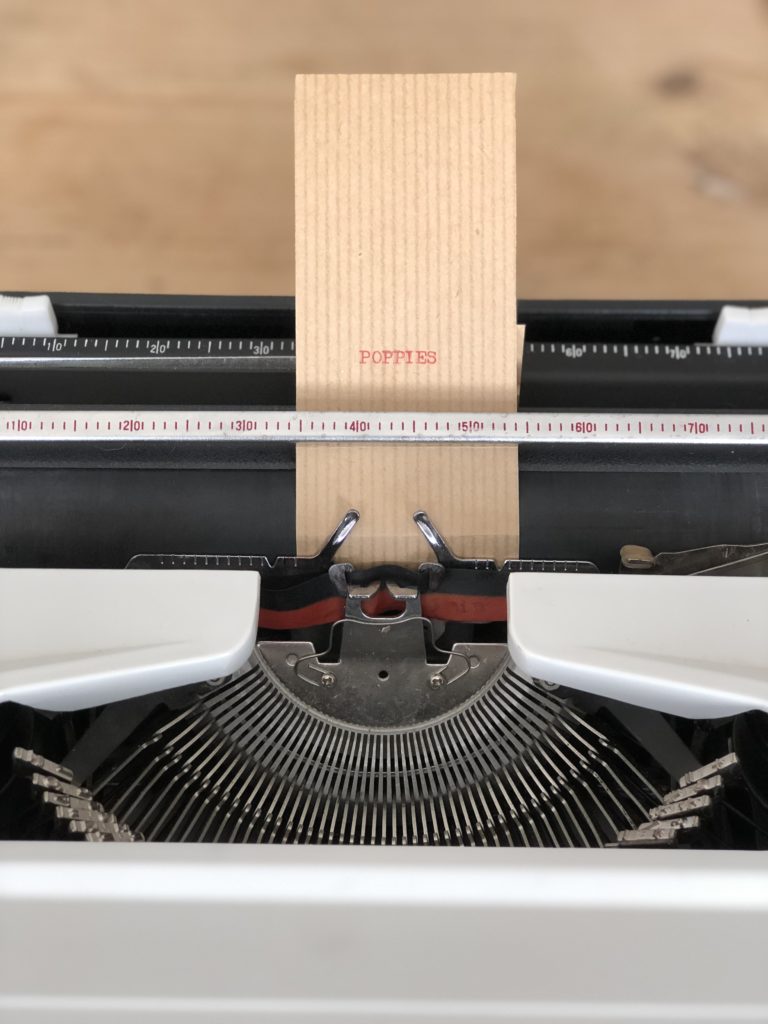
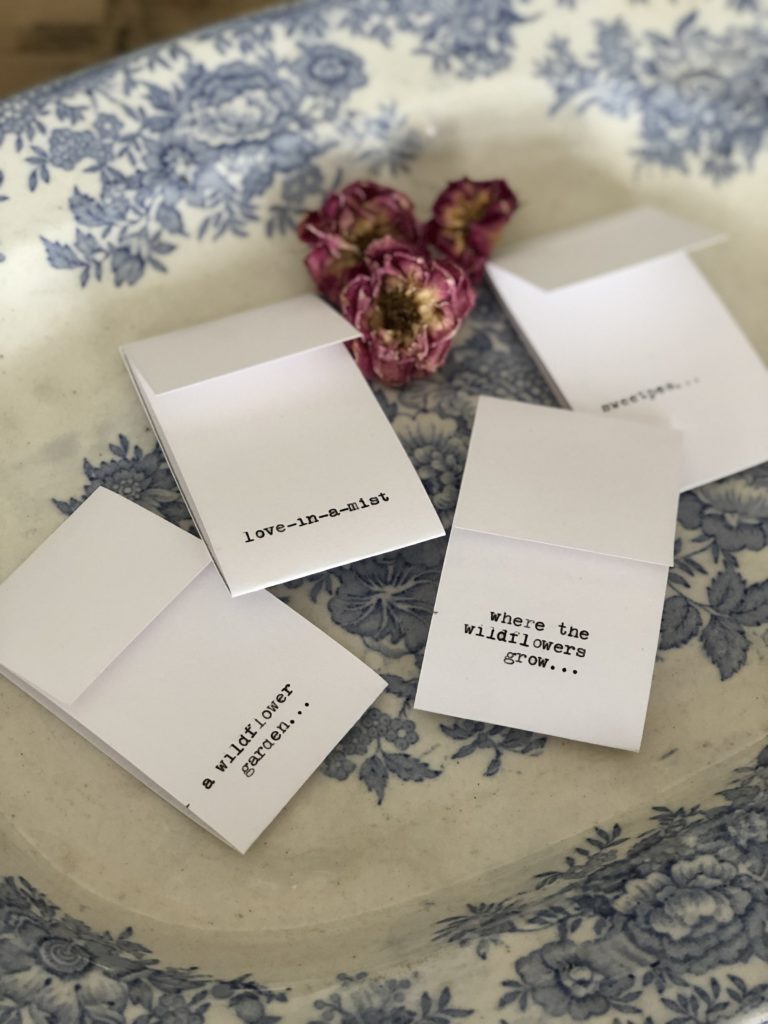
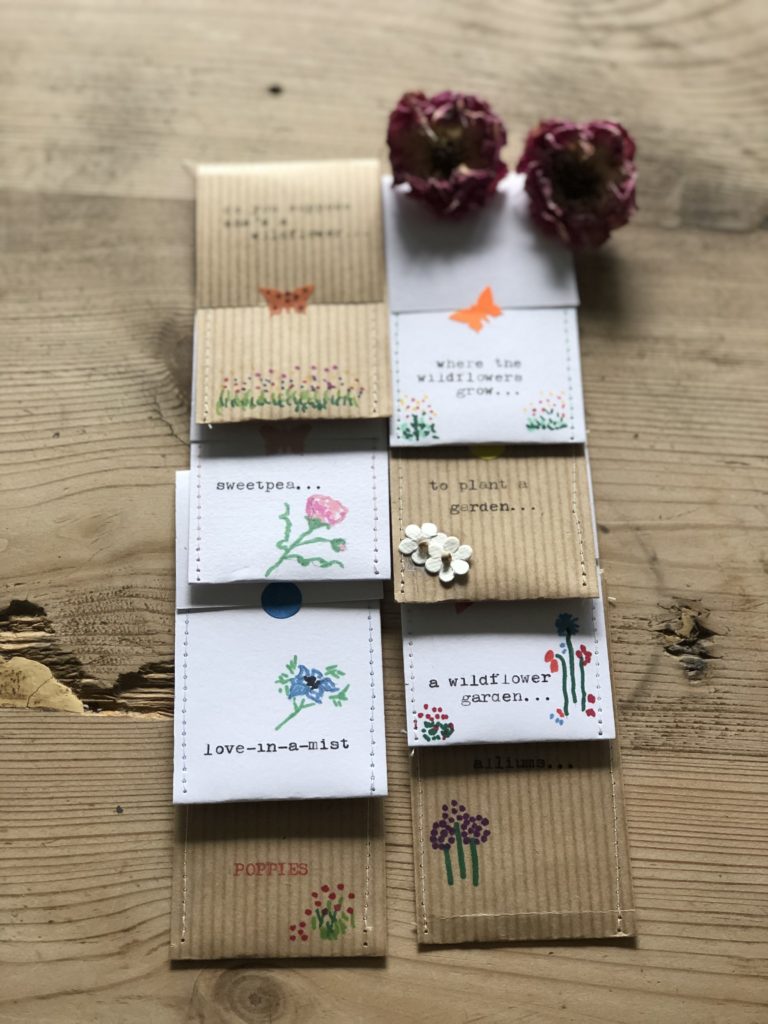
My faithful old typewriter was dusted off once again as I typed seed names and whimsical quotes to remind recipients of each seed envelopes surprise to come. And enjoying the simple look each little pouch offered I cut and folded a few plain white envelopes too.
Sealing the sides could be done with something as instant as a glue stick yet I wanted a little more for my diy seed envelopes and opted for a simple machine running stitch along both long edges. Plain white cotton for the brown seed envelopes and an assortment of pastel threads for the white seed envelopes was used.
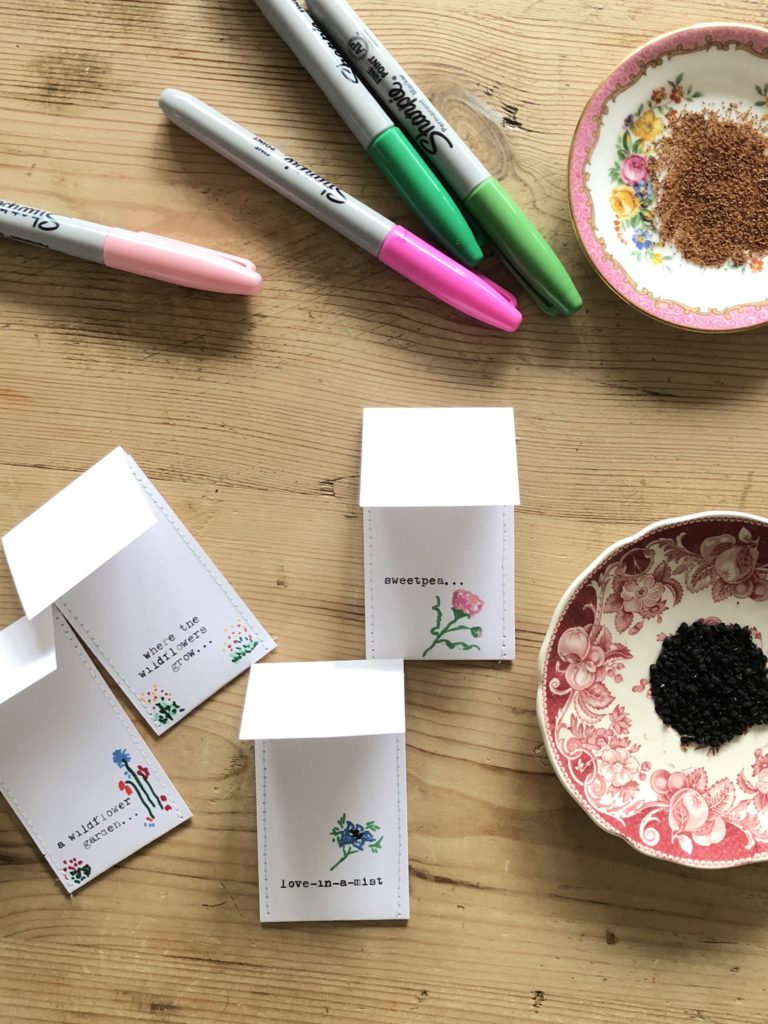
And then if you really wanted to do no more, you need not since each one looks rather sweet in its simplicity. I have however a newish set of Sharpies and I have been itching to try out the pretty colours. I may already have mentioned drawing and sketching is not my forte so instead I used a mass of colourful dots to create a wildflower garden and tiny red dots for my field of poppies. And again, Pinterest came into its own as it guided me through quick ideas for drawing delicate love-in-a-mist and sweet peas. My results were somewhat charming if not a little naïve.

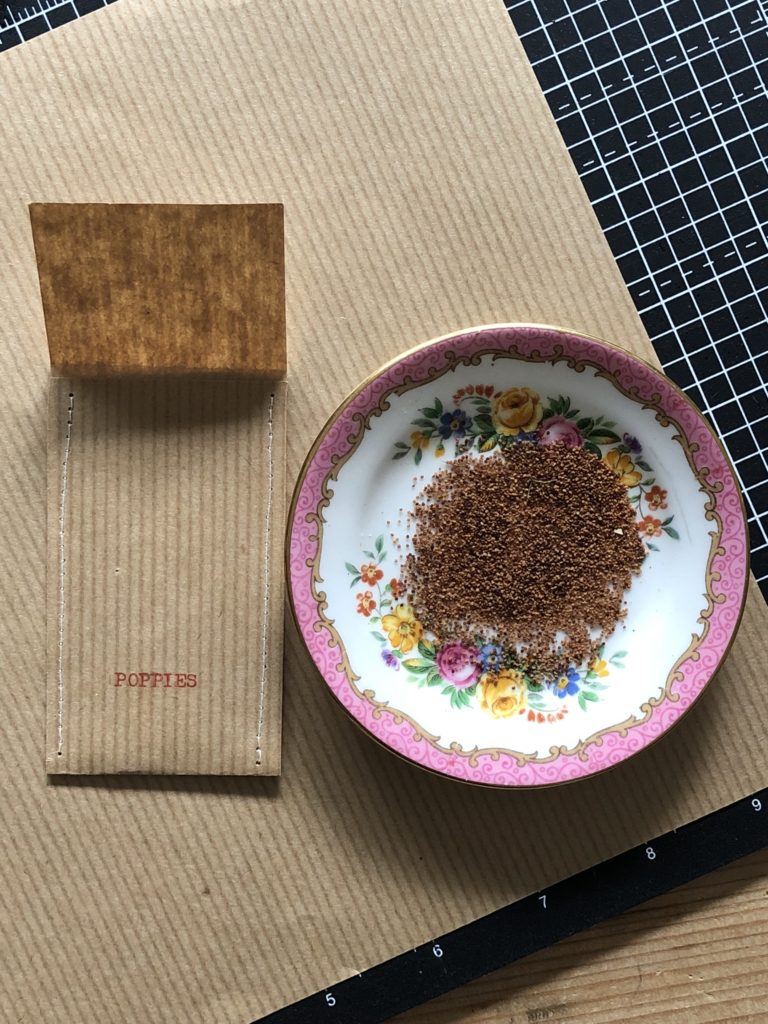
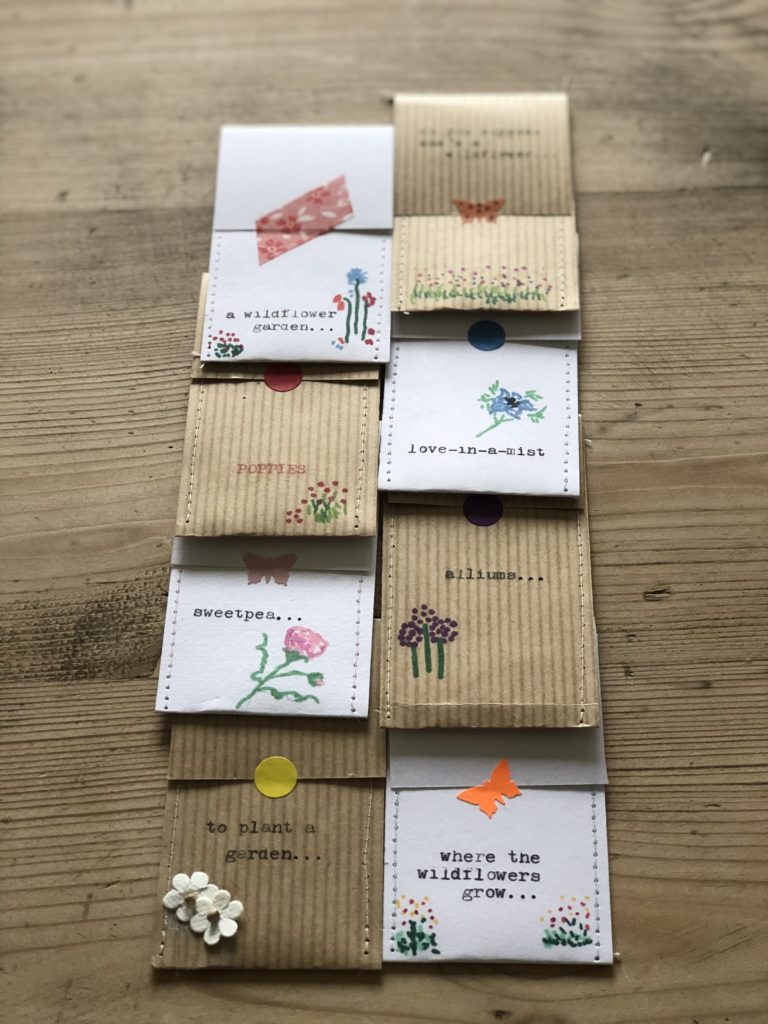
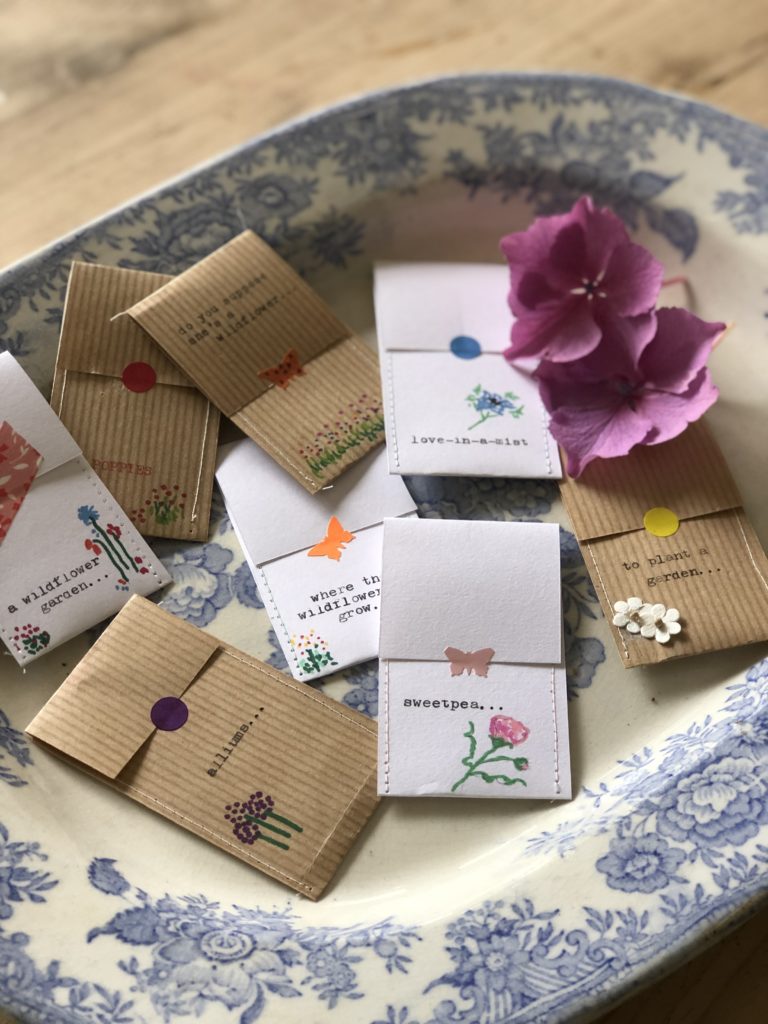
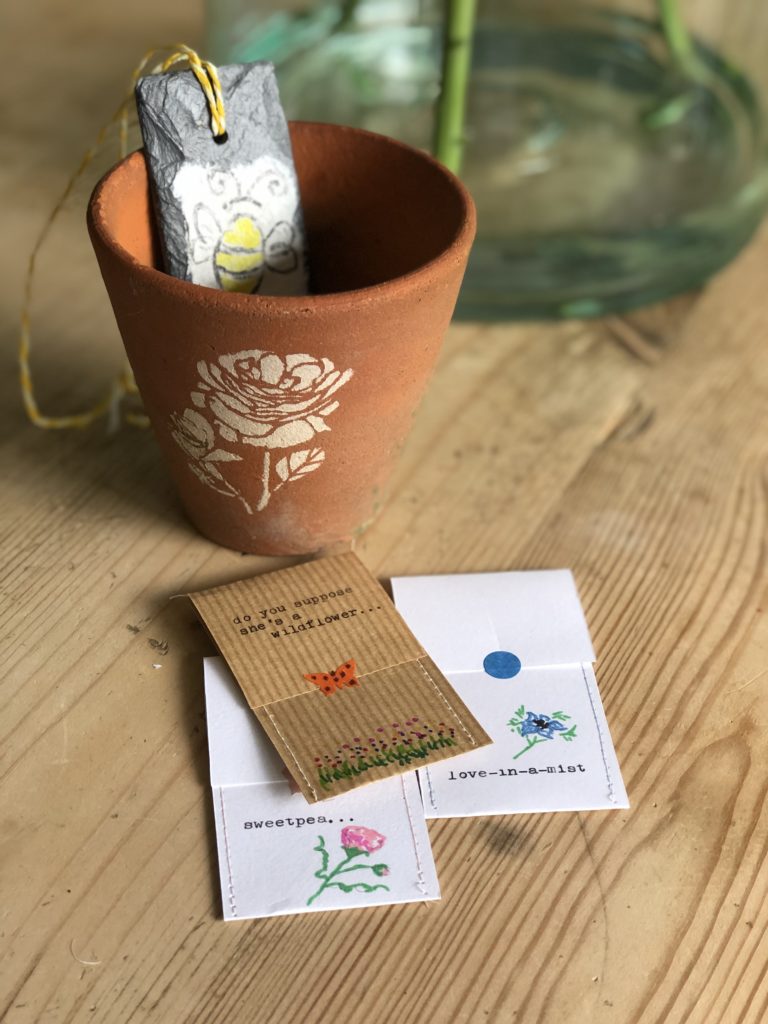
As well as love-in-a-mist and the remaining poppy seeds (thankfully not all of them ended up on Master M’s plate) I have foraged allium seed. Later in the year I hope to have more of a variety of sweet pea and numerous wildflower seeds when the cottage garden goes to sleep for winter. I carefully tipped each seed into its appropriate seed envelope and sealed with washi tape, colourful sticky dots and I used my butterfly hole punch on pink sticky paper too. You could leave out the flap in the design process entirely if you prefer and carry your simple running stitch along the top of each seed envelope since in my experience, most are torn open anyway. These would also make fabulous wedding favours and could be co-ordinated with the wedding theme and colour beautifully don’t you think?
I am particularly enamoured with this craft since the possibilities are, as I have said before, limited only by your imagination. Keep your diy seed envelopes simple with muted colours or make them zing with vibrant hues. Stitch or stick, draw or paint, type or handwrite, flap or do not flap. And as for the contents, who wouldn’t want a few of your beautiful flowers in their garden? I remain unsure if you are allowed to send seeds through the post to one another; wise to do some research first perhaps. If you are, I can imagine a great many friends grinning as they open their mail that day.
I may pop these delightful diy seed envelopes into local Christmas, birthday and thank you cards too for friends and family. And whilst I had gifts on my mind, I quickly took last week’s creative make off the picket fence, added it to this garden gift idea from another post, to see how they both looked together with these pretty seed envelopes. I rather think a green fingered friend might enjoy this surprise, what do you think?
You get a week off from my ramblings next week and I’m also taking the first week away in September as I help Master M prepare for his last year away at university. I am always a blubbering wreck around this time, so a break away from me will do you the world of good. I hope I’ll see you back here on Thursday 12th September when I shall bring you the first story in a craft trilogy, with beautiful recycling at its core. Until then, enjoy the sunshine if you get it and keep cosy if not x
You’ll find more summer and gardening crafts here and here and here too!


Molly as I type, Master M has decided to extend his stay another week (having already extended it by another week!) and continues to enjoy the comforts of home. I do not enjoy the dropping off at uni at all: I do like having him around longer though! These seed envelopes have been such a triumph with many readers making their own interpretation, which makes my heart sing. And you are quite right, I thoroughly enjoy them all! Look out for this week coming too as I have another quick recycle with a twist which makes the most wonderful giftx
Helen you always have such fun with your creations. I love how passionate you are about every single project you undertake. Such a joy to read.
Hope Master M has returned for his final year. It will seem strange that this event won’t be marked this time next year. It will be another new chapter. You are blessed with such wonderful children ….also sounds like MasterM is a dab hand at a cooked breakfast!
Hope you have had a refreshing break lovely lady Xx
I am so glad you enjoyed this craft Debbie and thank you for stopping by to tell me. These seed envelopes really do make the perfect gift and what a wonderful way to spread your beautiful garden ino your daughters too!x
Aah yes I can totally identify with the uni mess that goes with a summer break Helen! I imagine you will have some beautiful flowers giving seeds from your wonderful garden this year. Do let me see if you have a go at making these! Have a wonderful week ahead Helen x
What another great idea Helen. I’ve never successfully collected my own seeds yet so this will encourage me to have a go. On the uni front, I have to admit as much as I love having the youngest home I shall be glad to get rid off all her uni stuff out of the hall 😂
I love this idea!! These will be great tucked inside birthday cards, since my daughters love adding something new every year…especially if it’s something I can share from my own gardens. Thank you. xo
And you may never know Mary Katherine how happy I am to see your comments pop up in my comments box each week… thank heavens for the internet. The typewriter was a lucky find at a local brocante store. Master M (22 years of age) plodded and plonked as I created… “why is this letter so faded?” he asked “why do you have to press the keys so hard?” he moaned “this is sooooo slow” he finished…x
I am always pleased you manage to live under the same roof as I and often not see the creation… obelisk excluded. You will have to contend with a few ‘behind the scenes’ giggles over the next few weeks Little Miss whilst I deposit your brother safely back to uni and fret as to why he is so opposed to the odd poppy seed in his food x
Thank you lovely friend however I must concede, I was totally inspired by the expert herself!! Harris still does not have his mothers healthy approach to eating and would prefer I did not blow poppy seeds all over his food in future!x
Lovely idea! I especially like that you still have and (obviously) appreciate an actual typewriter! These are great inspiration for gift tags as well. Your posts are always a welcome and cosy respite in my hectic days.
Cheers!
OH MY GOODNESS i loveeee them so sweet! Could you get any more thoughtful?!
Sad we have 2 weeks with no story they always make me smile on a Thursday! I guess I’m one of the lucky ones who gets a chuckle from you every day!
Amazing as always mum xxxxxxxxx
Just brilliant Mrs M!…..there is no end to your talent! …. and I’m sure Harris feels so much healthier with the added poppyseed to his 3rd breakfast!! x
I’m glad you like it Master M and I’m glad you’re here to eat us out of house and home!!x
It does make me chuckle that behind these photos there is normally me gorging on some sort of food! Such a clever and pretty craft !well done you x
Ha Ha Sarah and now your beautiful seeds will be beautifully wrapped; it really is a happy and quick make. Thanks for reading and for your lovely comment x
Thank you Annie for your lovely message they really are a delightful quick make. I’d love to see yours if you’re happy to share! Have a lovely couple of weeks too!x
Oh I love that idea Helen – I’ve always got seeds wrapped in tissue paper, nasty sandwich bags and allsorts!
x
These are just so pretty and what a lovely idea. I shall enjoy making these and popping them into gifts. Enjoy your time off and look forward to more crafty ideas. xx
Thanks lovely, I’m glad you like them since there may be one in your Christmas bundle!x
another fantastic idea and so clever and so lovely. have a good week away and look forward to catching up around christmas!!