
If you go down to the woods today… With the autumn season wrapping its colours warmly around us in my part of the world, there is no better time than now to share with you my new seasonal craft. I have spent a considerable part of my creative days recently staring at my vintage French bowl of Suffolk puffs imagining all kinds of wonderful creative adventures for them. I felt the tightly gathered stitches found in a Suffolk puff lent themselves quite nicely to the gills of a fabric mushroom and today I am showing you how with inspiration taken from many accomplished textile artists, I have created my own version of a magical mini woodland setting, do join me…
There are a great number of textile artists I admire throughout my social media feeds. suzannecurtis_textileartist is one on Instagram who creates the most incredible fungi with her artistic skills and if you are a lover of an original quirky design, her account is one I urge you to follow. Over on Pinterest, a simple search for fabric mushrooms or fabric toadstools will provide you with sooooo many ideas and it was here that I stumbled upon one tutorial in particular from a lovely blog tiny craft world to help me with the internal wire structure of my fabric mushroom for todays craft.
Firstly gather together all you will need and as always, if you don’t have what I used, you can improvise:
Suffolk puffs – I bought mine from this lovely account. If you don’t have any, a simple search on Pinterest will present tutorials galore to show you how to make your own with your scraps of fabric
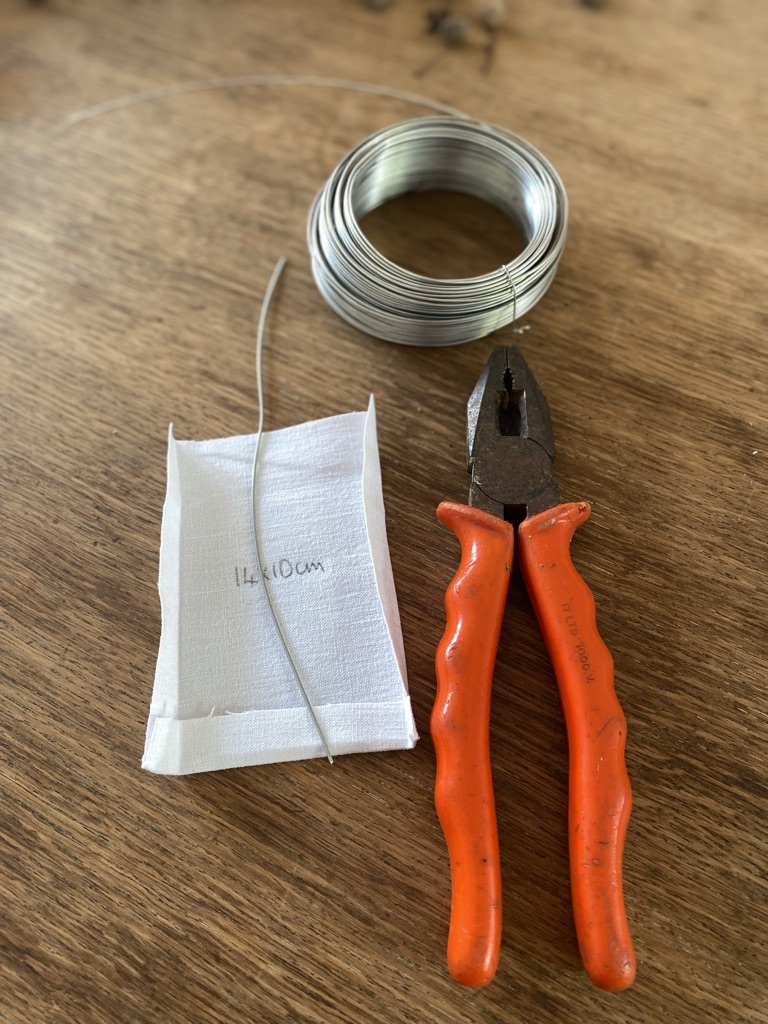
Wire and cutters
Toy stuffing
Needle and sewing thread
Scissors
Glue gun
Wooden skewer or something similar
White linen or other
Ink pad and sponge or something similar
Piece of wood or tree bark
Cinnamon, cloves, dried flowers and berries
Paper and label and a twinkle or two for decoration
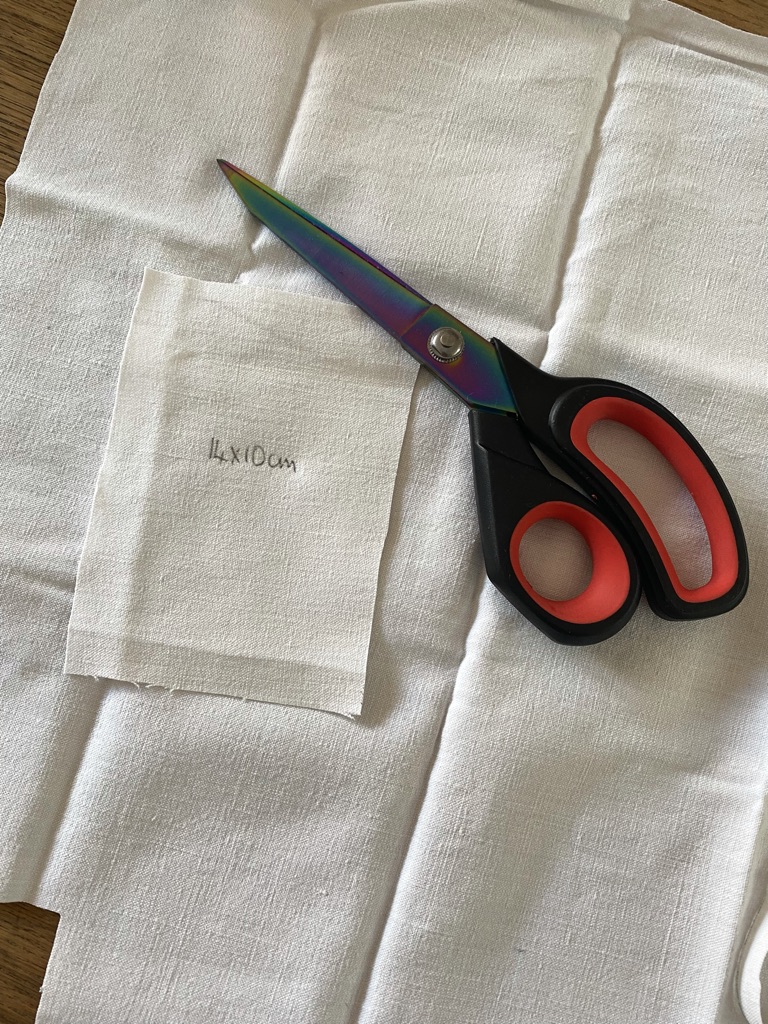
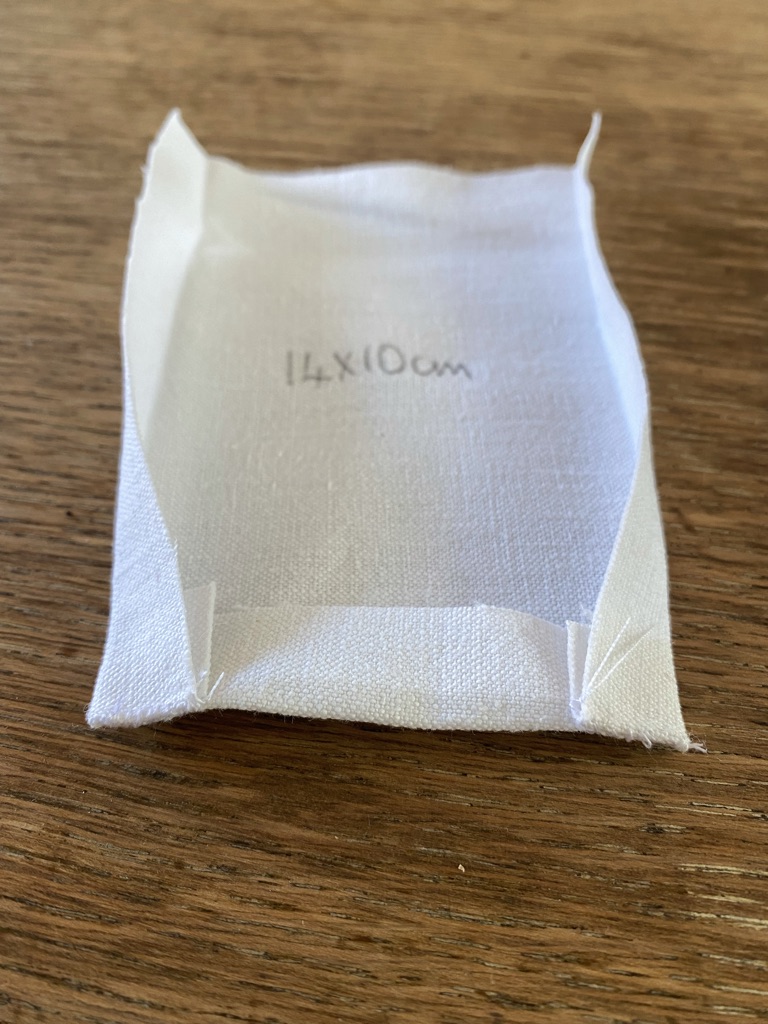
Your first task is to determine how many textile mushrooms your setting will have and then their measurements, in particular pay attention to height. A variation in height is good if your woodland scene is to have more than one shroom. For this tutorial I am making the fabric mushroom to the left of the photo and for this I began with a piece of vintage white linen cut to the size of fourteen centimetres by ten. To be honest, for its stem to be as thick as mine you don’t really need the material to be so wide, just keep in mind when you do chop into your precious stash, you’ll be hemming here too.

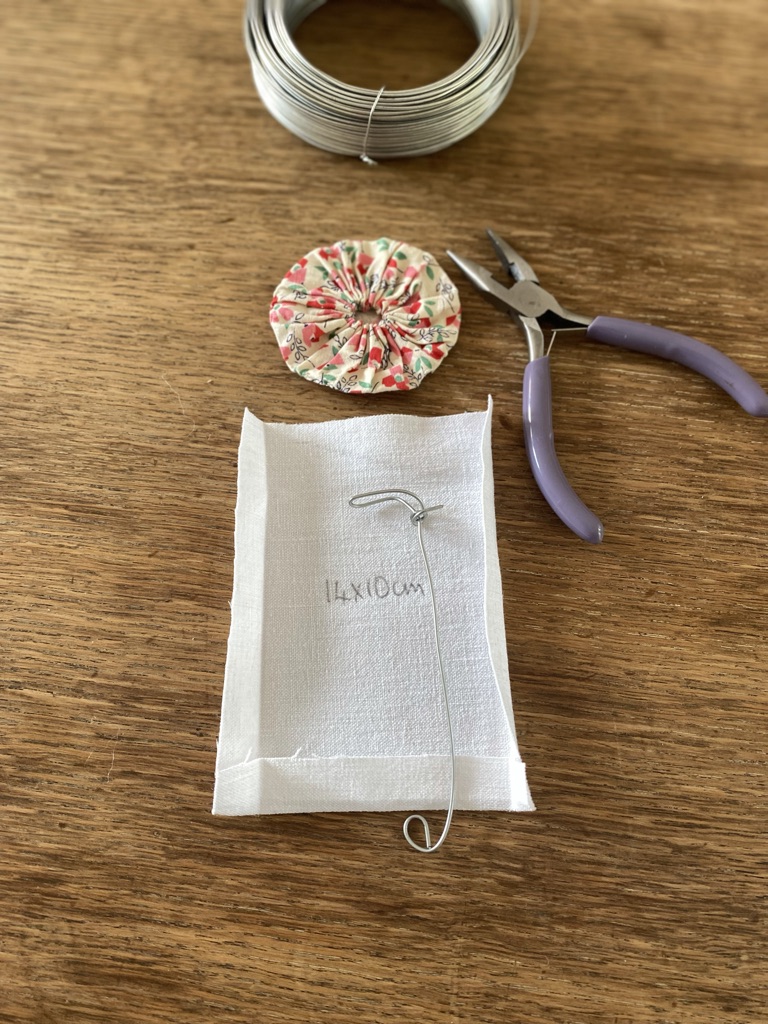
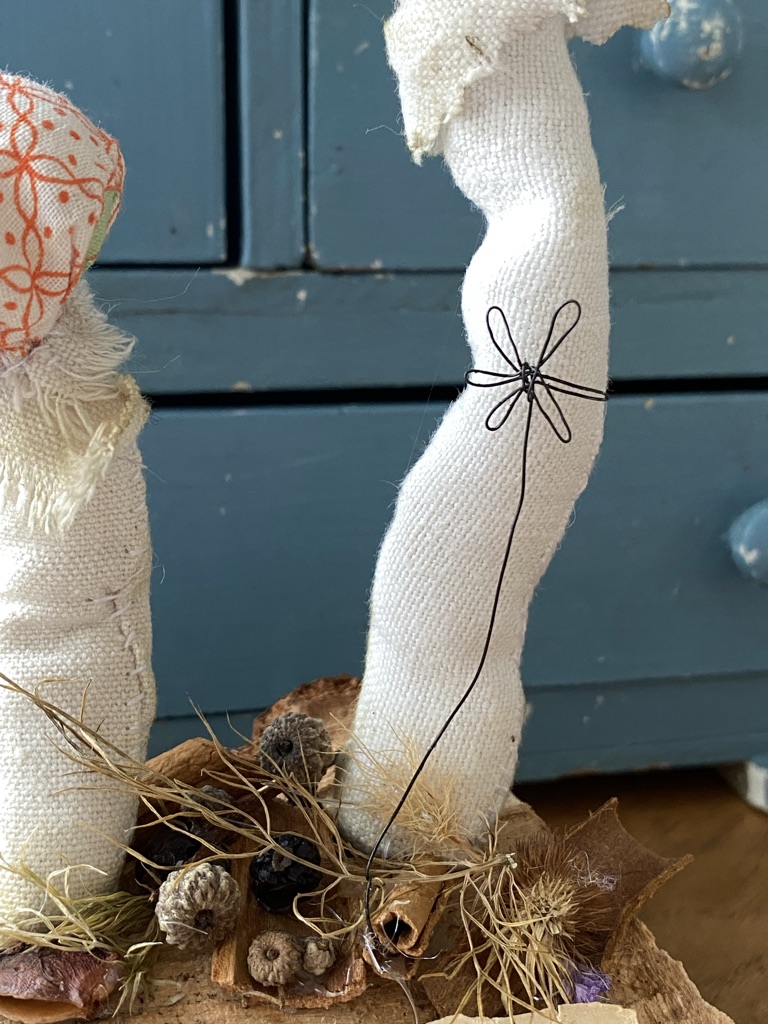
The purpose of the wire is to add stability and flexibility to you fabric mushroom. In the first photo below, note the cut length of my piece of wire and keep your eyes moving along as you see what happens as I prepare to use it in my piece. Firstly I soften the base of the wire so no accidents happen during assembly and hopefully thereafter – second photo – and then the top of the wire needs some kind of ’T’ shape to pop inside your Suffolk puff – third photo. The ’T’ should also be stubbier one end than the other to help ease it in and out without snapping the stitches of the puff. Of course I snapped my first Suffolk puff hence the change in appearance of the fabric mushroom as we progress through this craft. Now try your puff out for good measure.

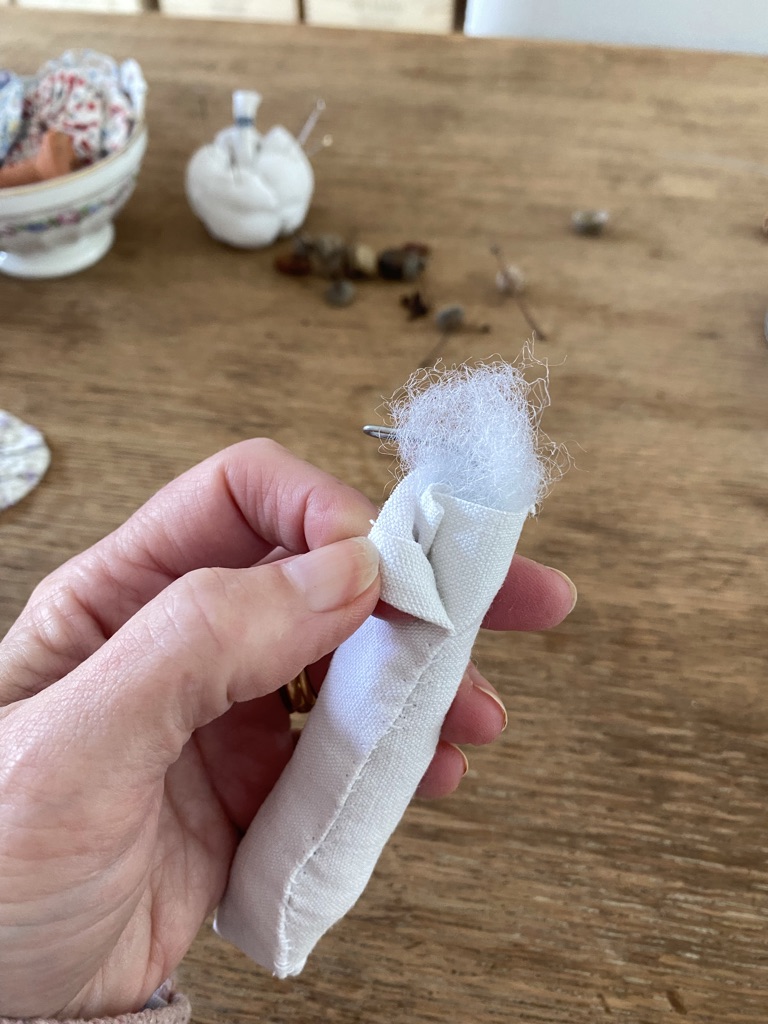
Next wrap around your wire the toy stuffing. The amount you use will depend upon the thickness you desire for your stem. Secure the stuffing with a matrix of the cotton thread.
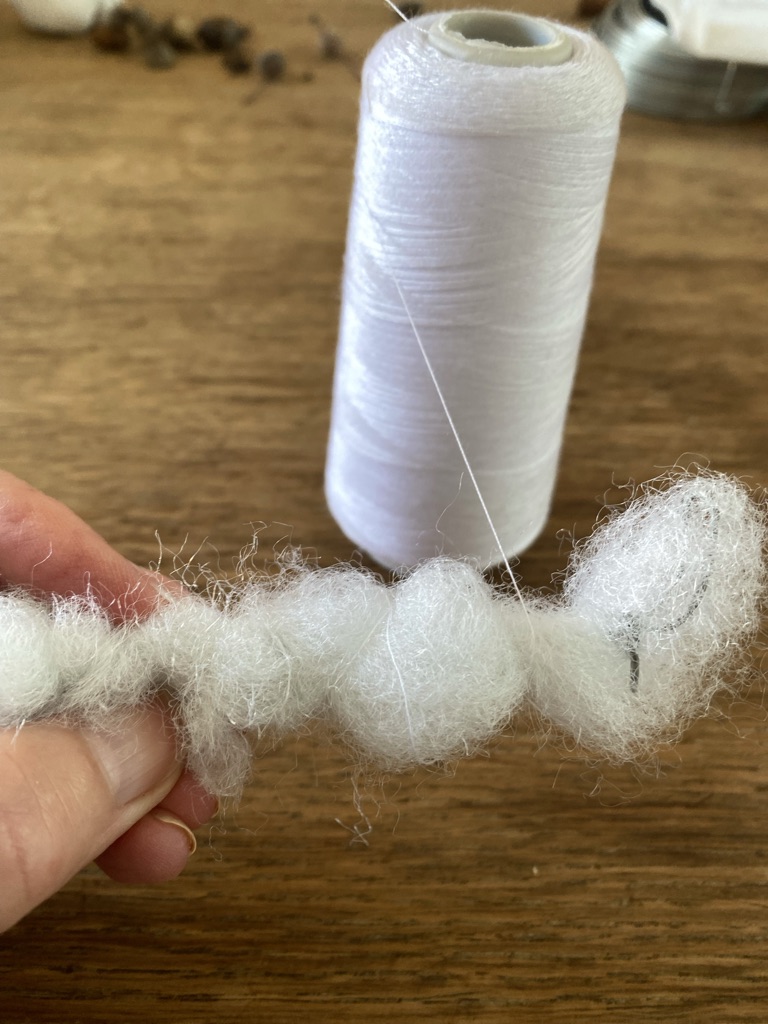
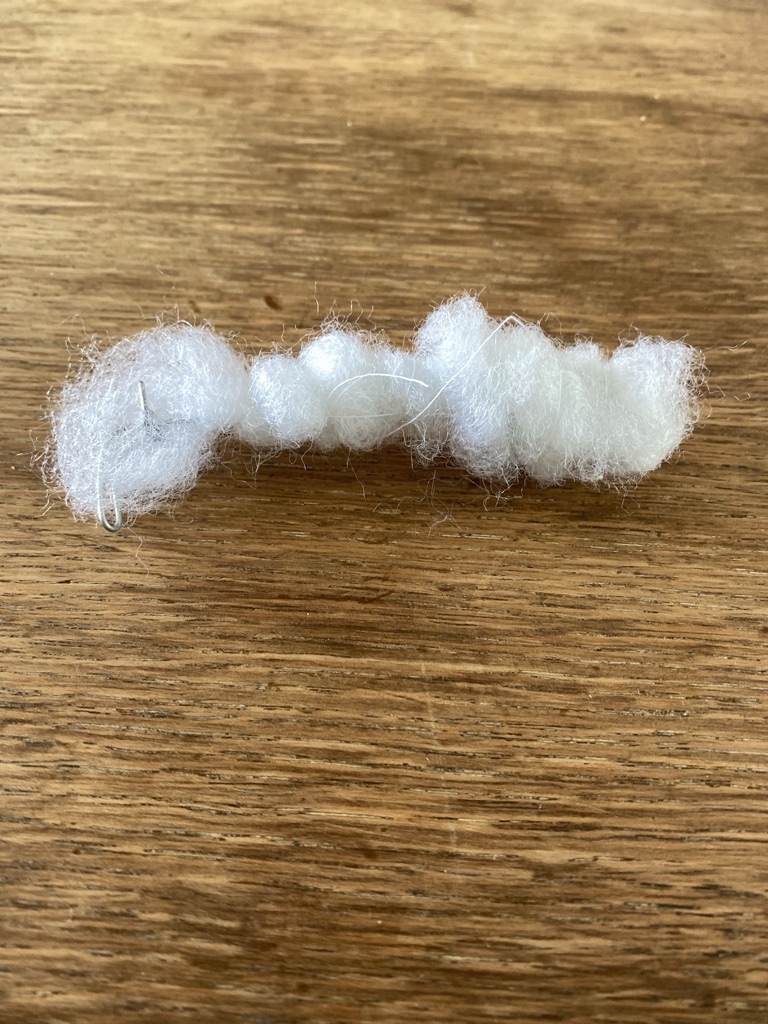
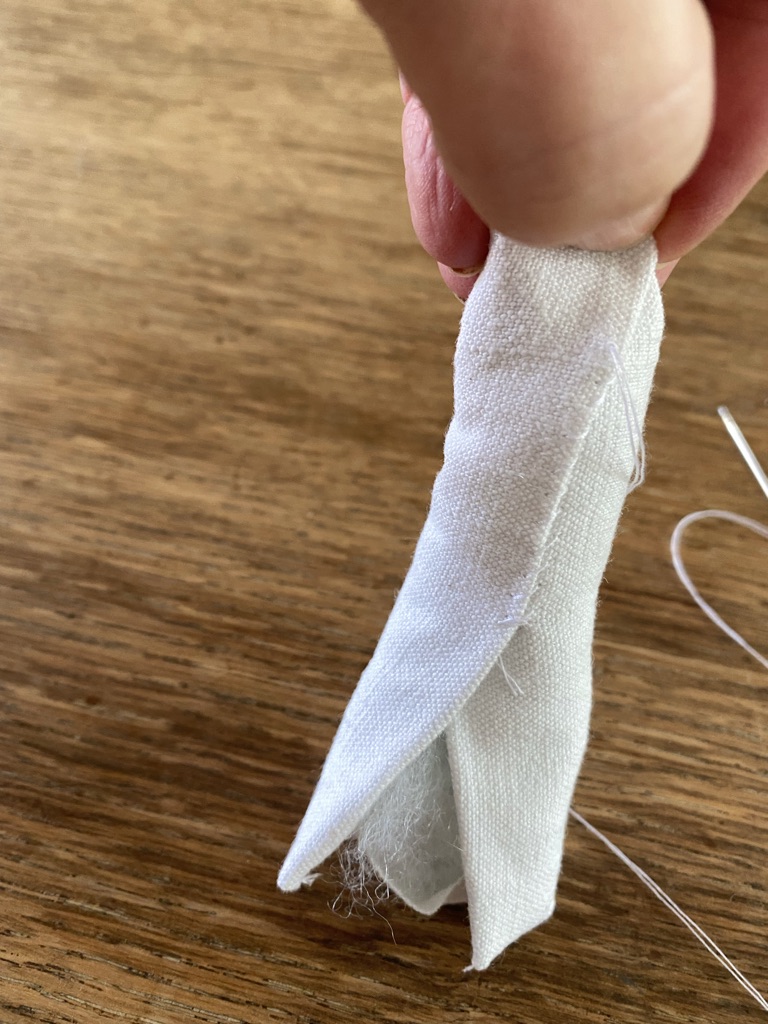
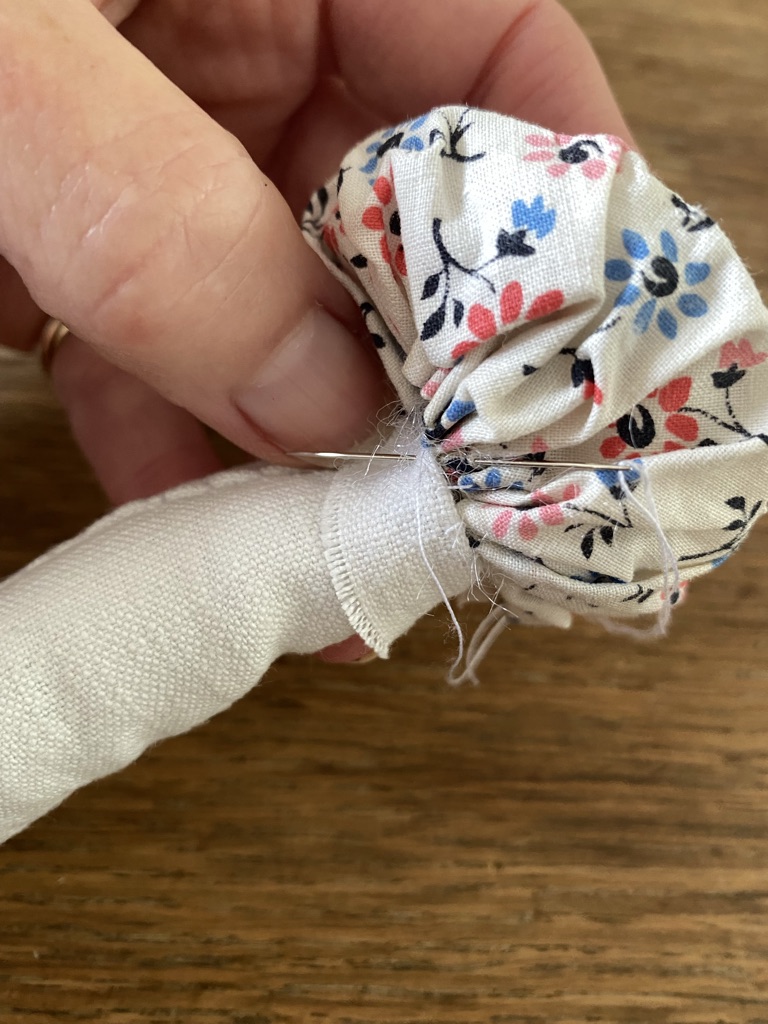
I found creating a pocket for the wire stem base to nestle into useful next. If you decide not to glue your shroom into a setting perhaps, this pocket provides a neat finish. My pocket fold is a little over a centimetre as are each of the seams. Ironing or running your finger along the sides to create a seam simply helps with the stitching process. Stitch the corners to create your pocket and then nestle your wrapped wire into its new home. Hold your two long seams together around the stuffing and with the your thread doubled, simply stitch haphazardly, creating the stem twirling the craft as you go and purposely not trying to be too precious with your stitches. Your ’T’ should be left poking out and you want to stop stitching as I have in the last photo, so you can turn your fabric over for a layer of toadstool stem authenticity.

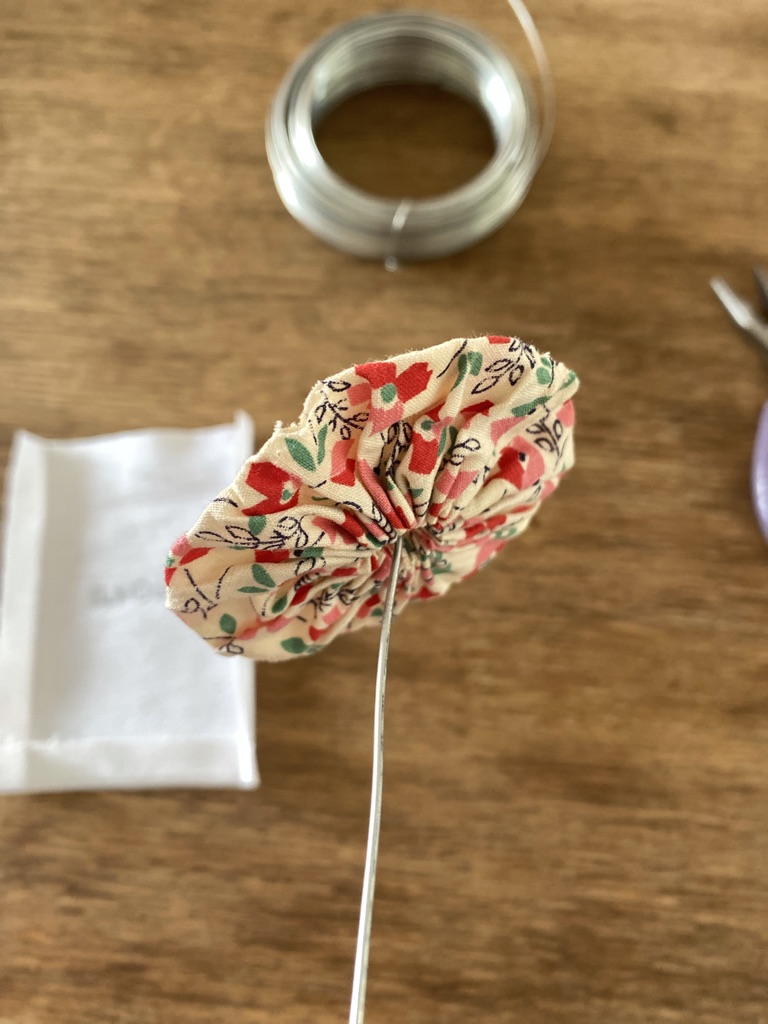
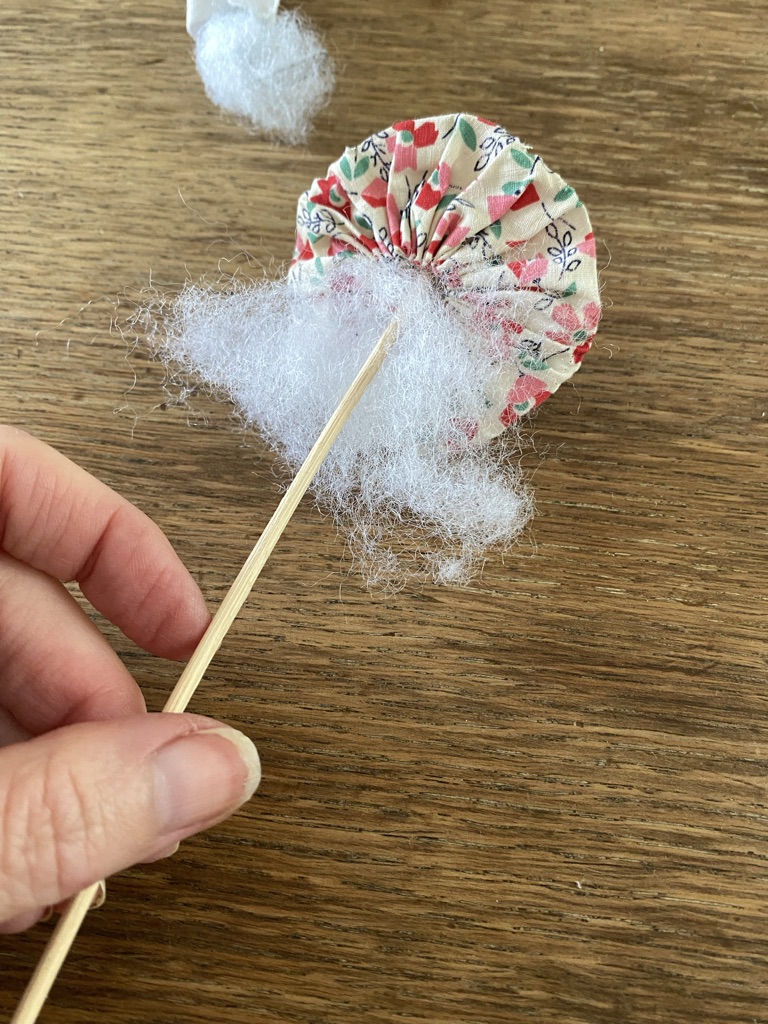
Now using your skewer or other such implement carefully – if you don’t wish to be a Suffolk puff stitch splitter that is – stuff your puff. Don’t over stuff at this stage, you can always add more later. And now even more carefully, push the ’T’ top into your stuffed puff. Tilt, twiddle and bend appropriately, the puff not you, until you have a shroom cap. I think a little of the stuffing coming out is good too, if you don’t, trim off any excess. And if at this stage you think your Suffolk puff needs more oomph, add extra stuffing.
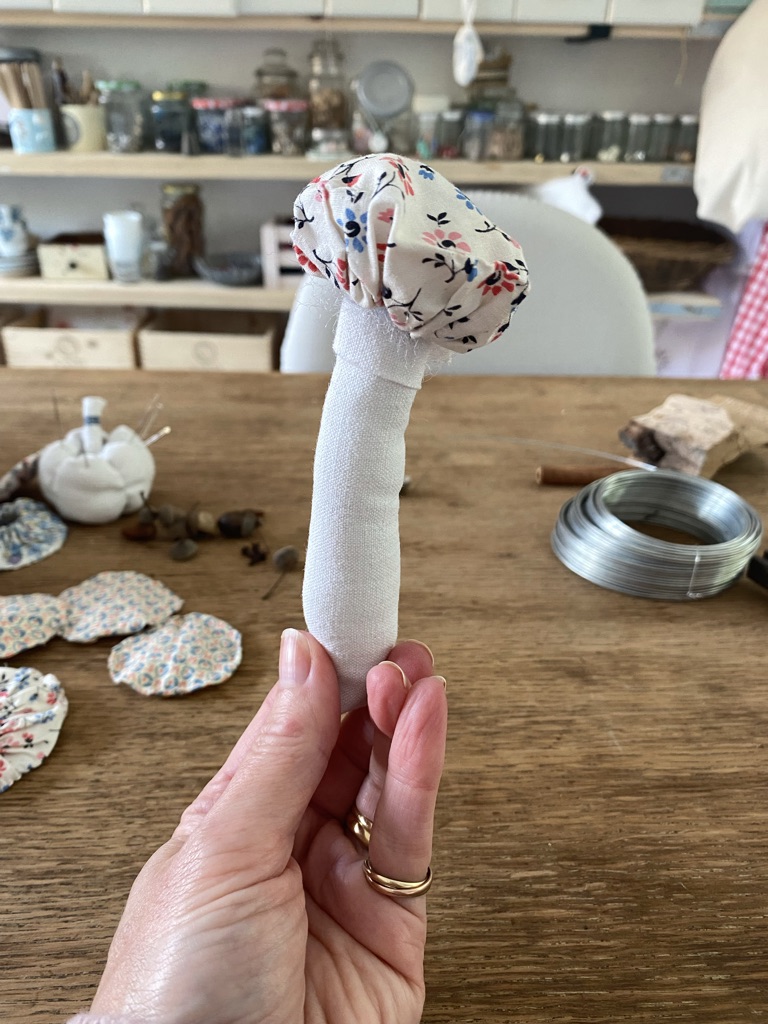
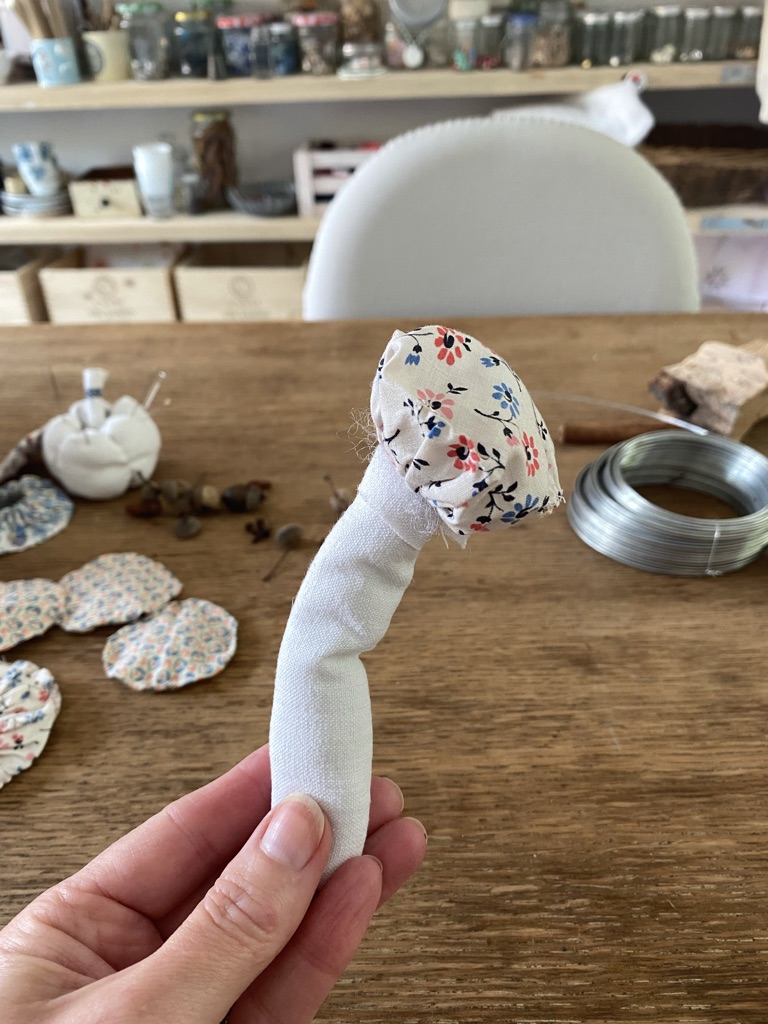
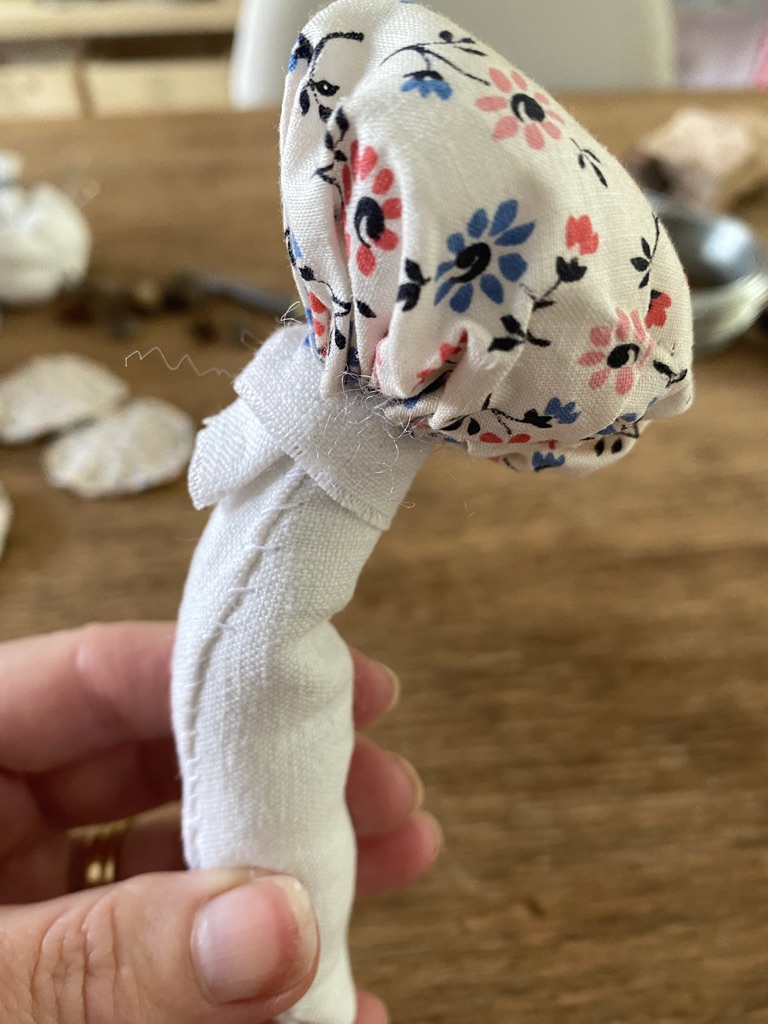
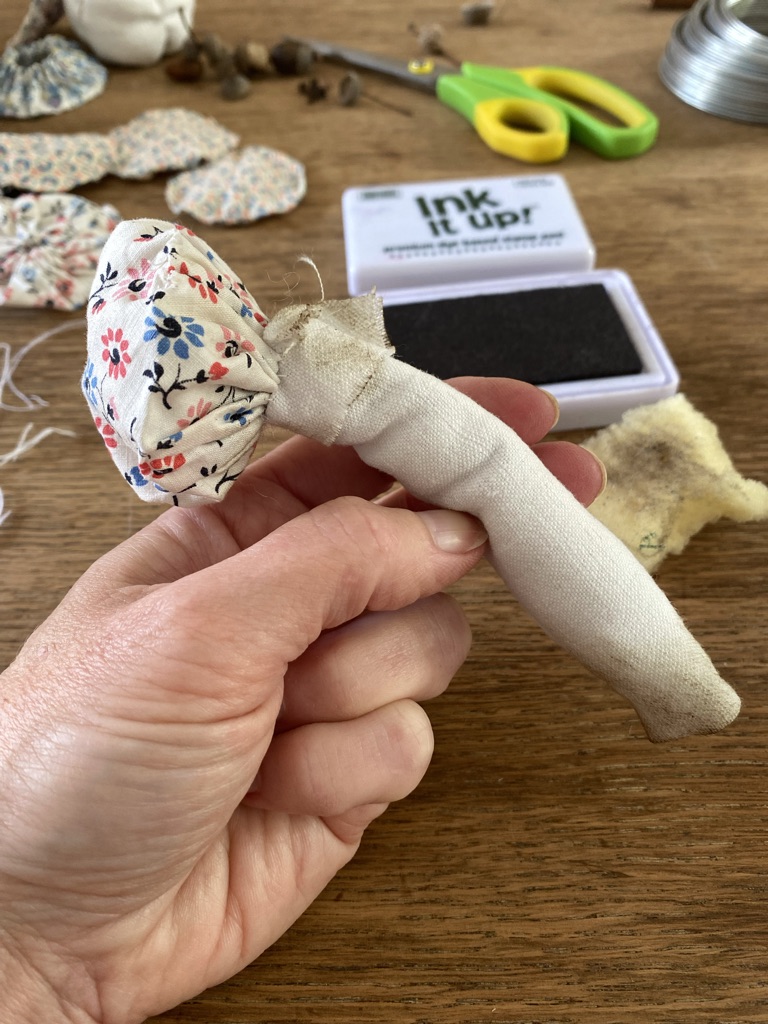
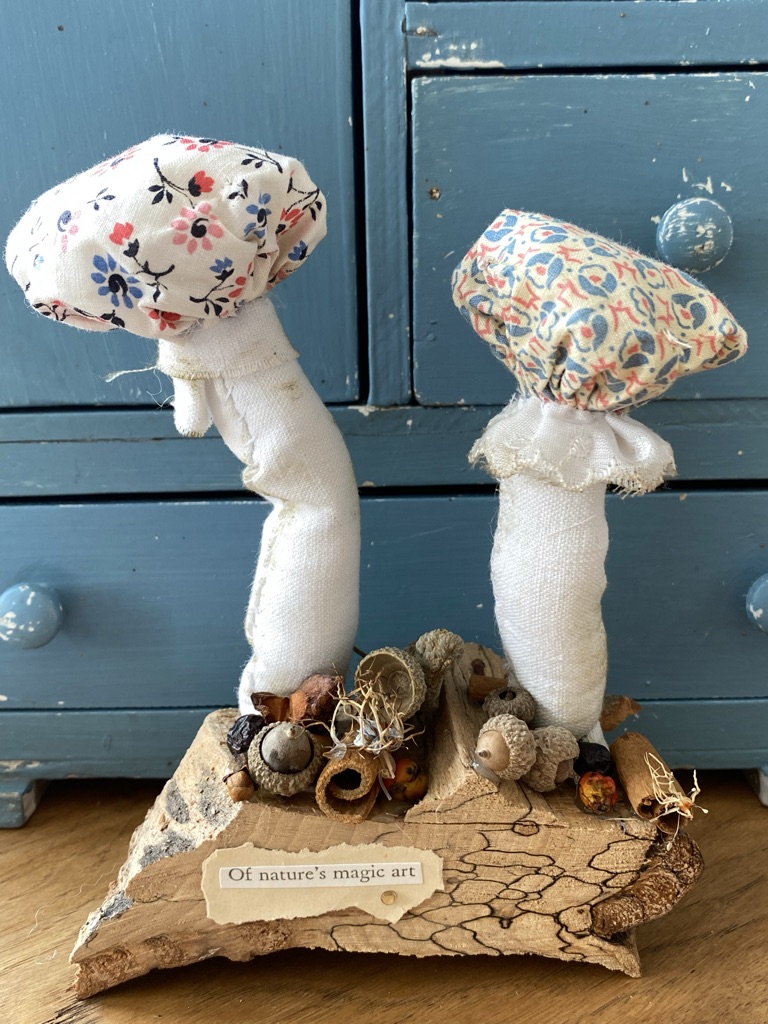
And with a simple over stitch, secure the puff to the stem. No self respecting shroom is ever this clean so out came an old ink pad and a corner of sponge and a little dirt was added. Shoe polish, tea or coffee perhaps could be good substitutes for ink if you don’t have any. My other fabric mushroom had a neck of lace added to mimic the ring often found under a mushrooms gills.
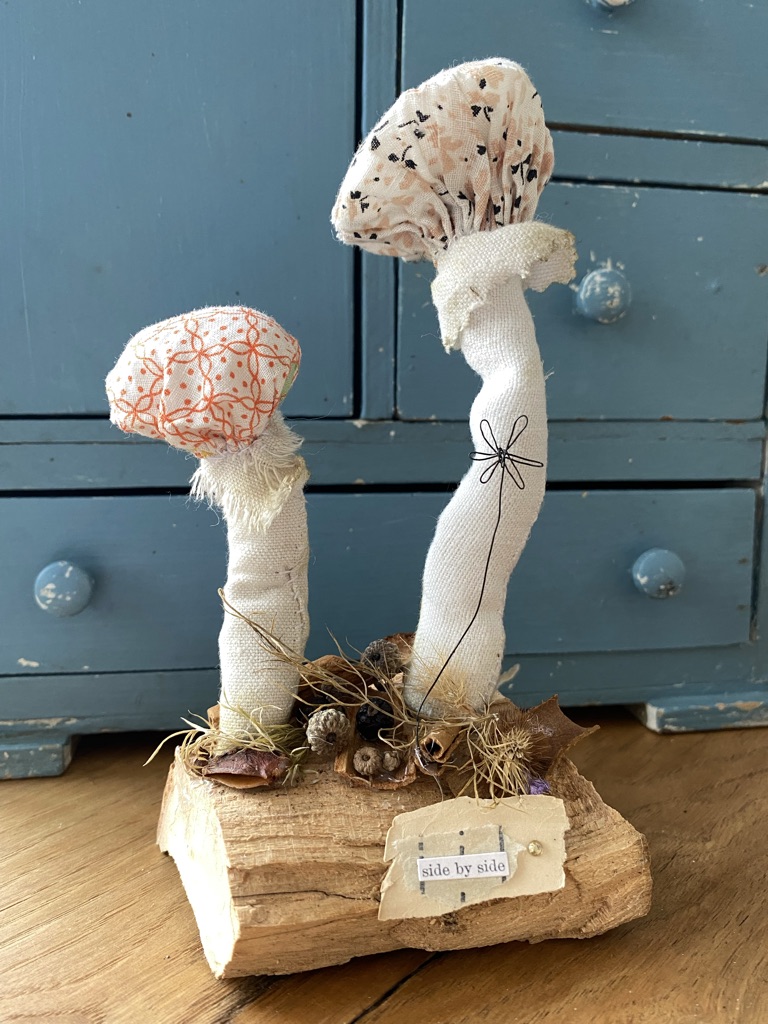
And now for the magic. Acorns and berries from autumn wanderings, cloves and cinnamon sticks from the local deli and crispy bits from our cottage garden make up the woodland carpet all hot glue gunned into place, atop a piece of wood destined for Belle’s pot bellied stove. And the name for my woodland setting came from this book full of inspiring sticky quotes for crafty projects.

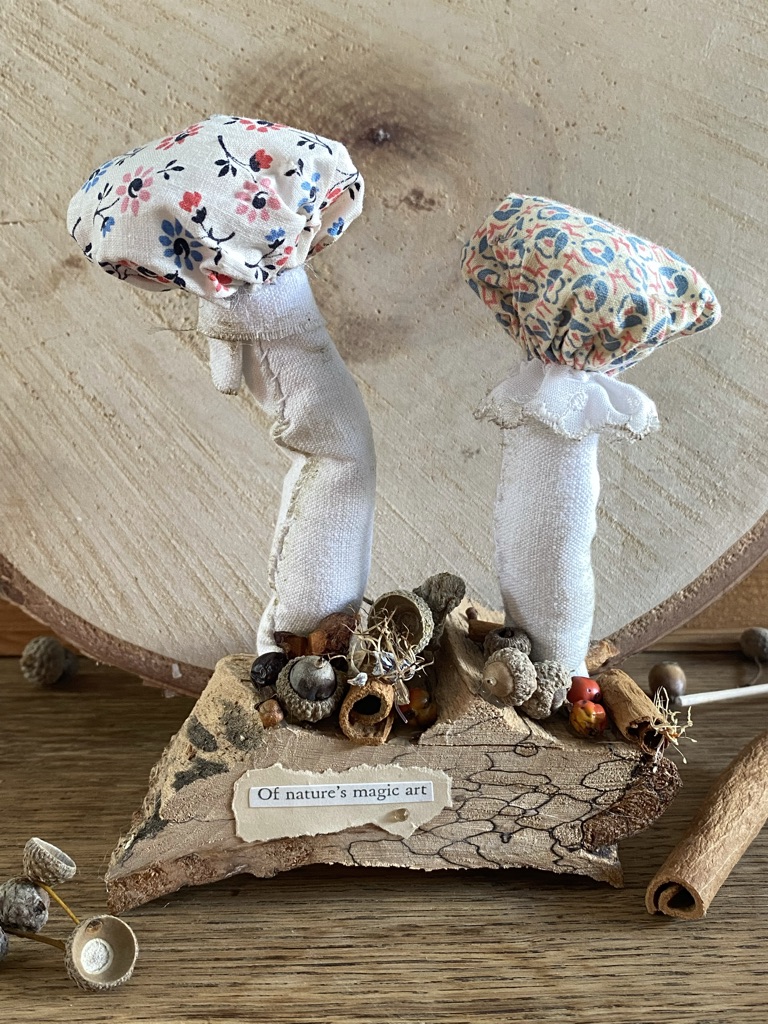
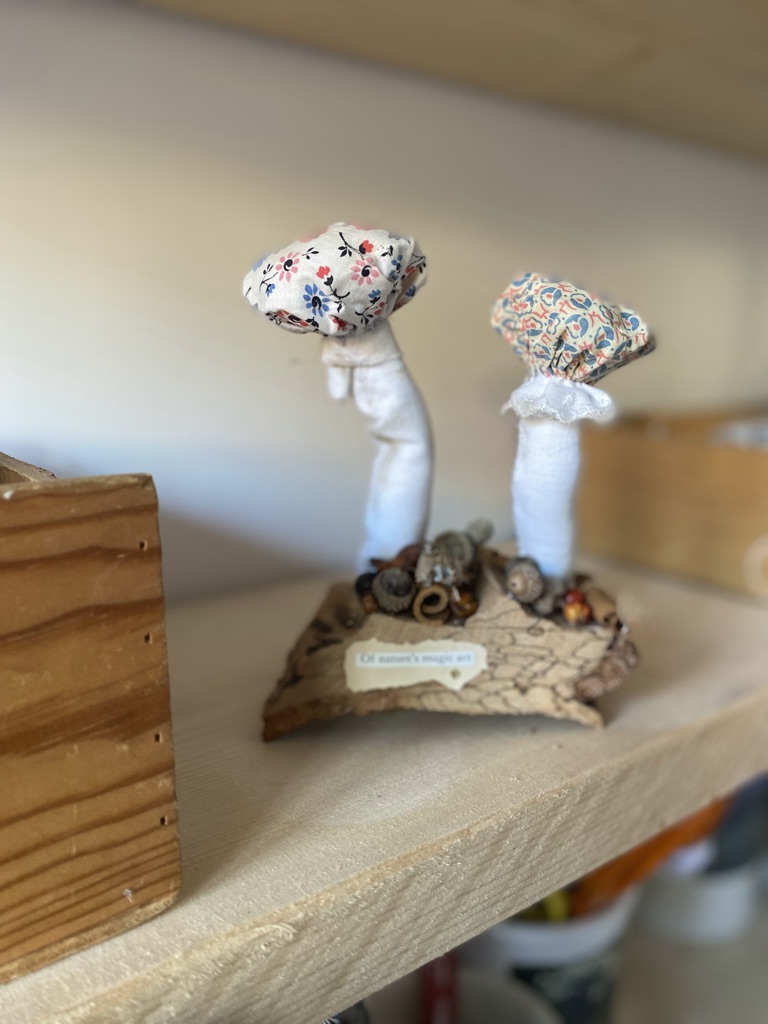
Those of you who follow me on Instagram will know of course my woodland setting was the prize in a recent competition I ran and is now nestled on pretty shelves in its new home. The one below is mine to which I added a version of one of these and currently my woodland setting sits proudly at The Little House on a windowsill often lit by candlelight as the evenings draw in. Along with my vintage pumpkins and fabric apples, I think fabric mushrooms made using beautiful vintage Suffolk puffs shall become a seasonal decoration brought out each year to decorate my home. I do so love autumn with all its cosiness and endless opportunities to dress the shelves with rustic homespun decor. Until next time…
There are a great many more autumnal crafts in this blog. For more inspiration try here or here and here!


Firstly you so did inherit the creative gene. Thank you so much for loving my mushrooms. I fear I shall become known only for these and firestarters since both bring me such creative enjoyment. I hope others who are Suffolk pufferless can see clearly how to make these without for there is a way, I know!x
Oh FINALLY I know what to do with all my Suffolk Puffs (*awaits trolling from all crafty Suffolk Puffers*)
I joke but if I was one, I would LOVE to be able to make them into such beautiful mushrooms! You’re so creative it blows my mind I love how you look at simple objects and always have an adventure for them to go on…it’s admirable and I so wish I had inherited that gene!
Ps..I’ll never forget the squeaky LOOK WHAT I MADE OUT OF MY SUFFOLK PUFFS FaceTime – made my day, as you do every day xxxxxxxx