This week I have for you an easy DIY project however before we begin, a little picture painting with words is needed I feel. Recently I went to two country brocantes in two days. This made me very happy. It doesn’t get an awful lot better than that if you are a vintage home decor fan like me. Stalls and tents were set out with countless treasures to suit all pockets and budgets. From old faded buttons and spools of vintage silks to French iron beds and glorious feathered eiderdowns …..I was in my happy place. I invested in several beauties myself and one very plain wooden box which caused my friend and fellow shopper to look at me in the way that simply says, here we go again…
My simple wooden box was silently holding a selection of vintage paraphernalia some of which had seen better days. As you know by now this is just the way I like my treasures. I wasn’t on the look out for a DIY project, nevertheless I had found one and so I gathered up the plain old box together with a few more vintage home decor finds including this rather beautiful oval picture frame

Empty picture frames get a similar reaction from Mr M as do too many pretty cushions. And as with cushions I do believe you can never have enough empty frames. With the addition of a ragged old ribbon, this frame creates a wonderful focal point.
I digress, back to my DIY project. This wooden box seemed neither vintage nor new to me. It seemed to me it was in need of a DIY makeover and that is what it got. It was more dusty than dirty so all it needed was a quick wipe over with a little white spirit on an old lint free rag.


Then I lost myself in my collection of sample paint pots (another favourite pastime of mine) and began stirring a potion of various whites to use with my favourite Laura Ashley pink paint you first saw in this post.


I took no care at all. Plenty of patchy brush strokes with thin layers of paint was all it needed plus a little drying time. Not too much time, I’m impatient and all about quick wins.

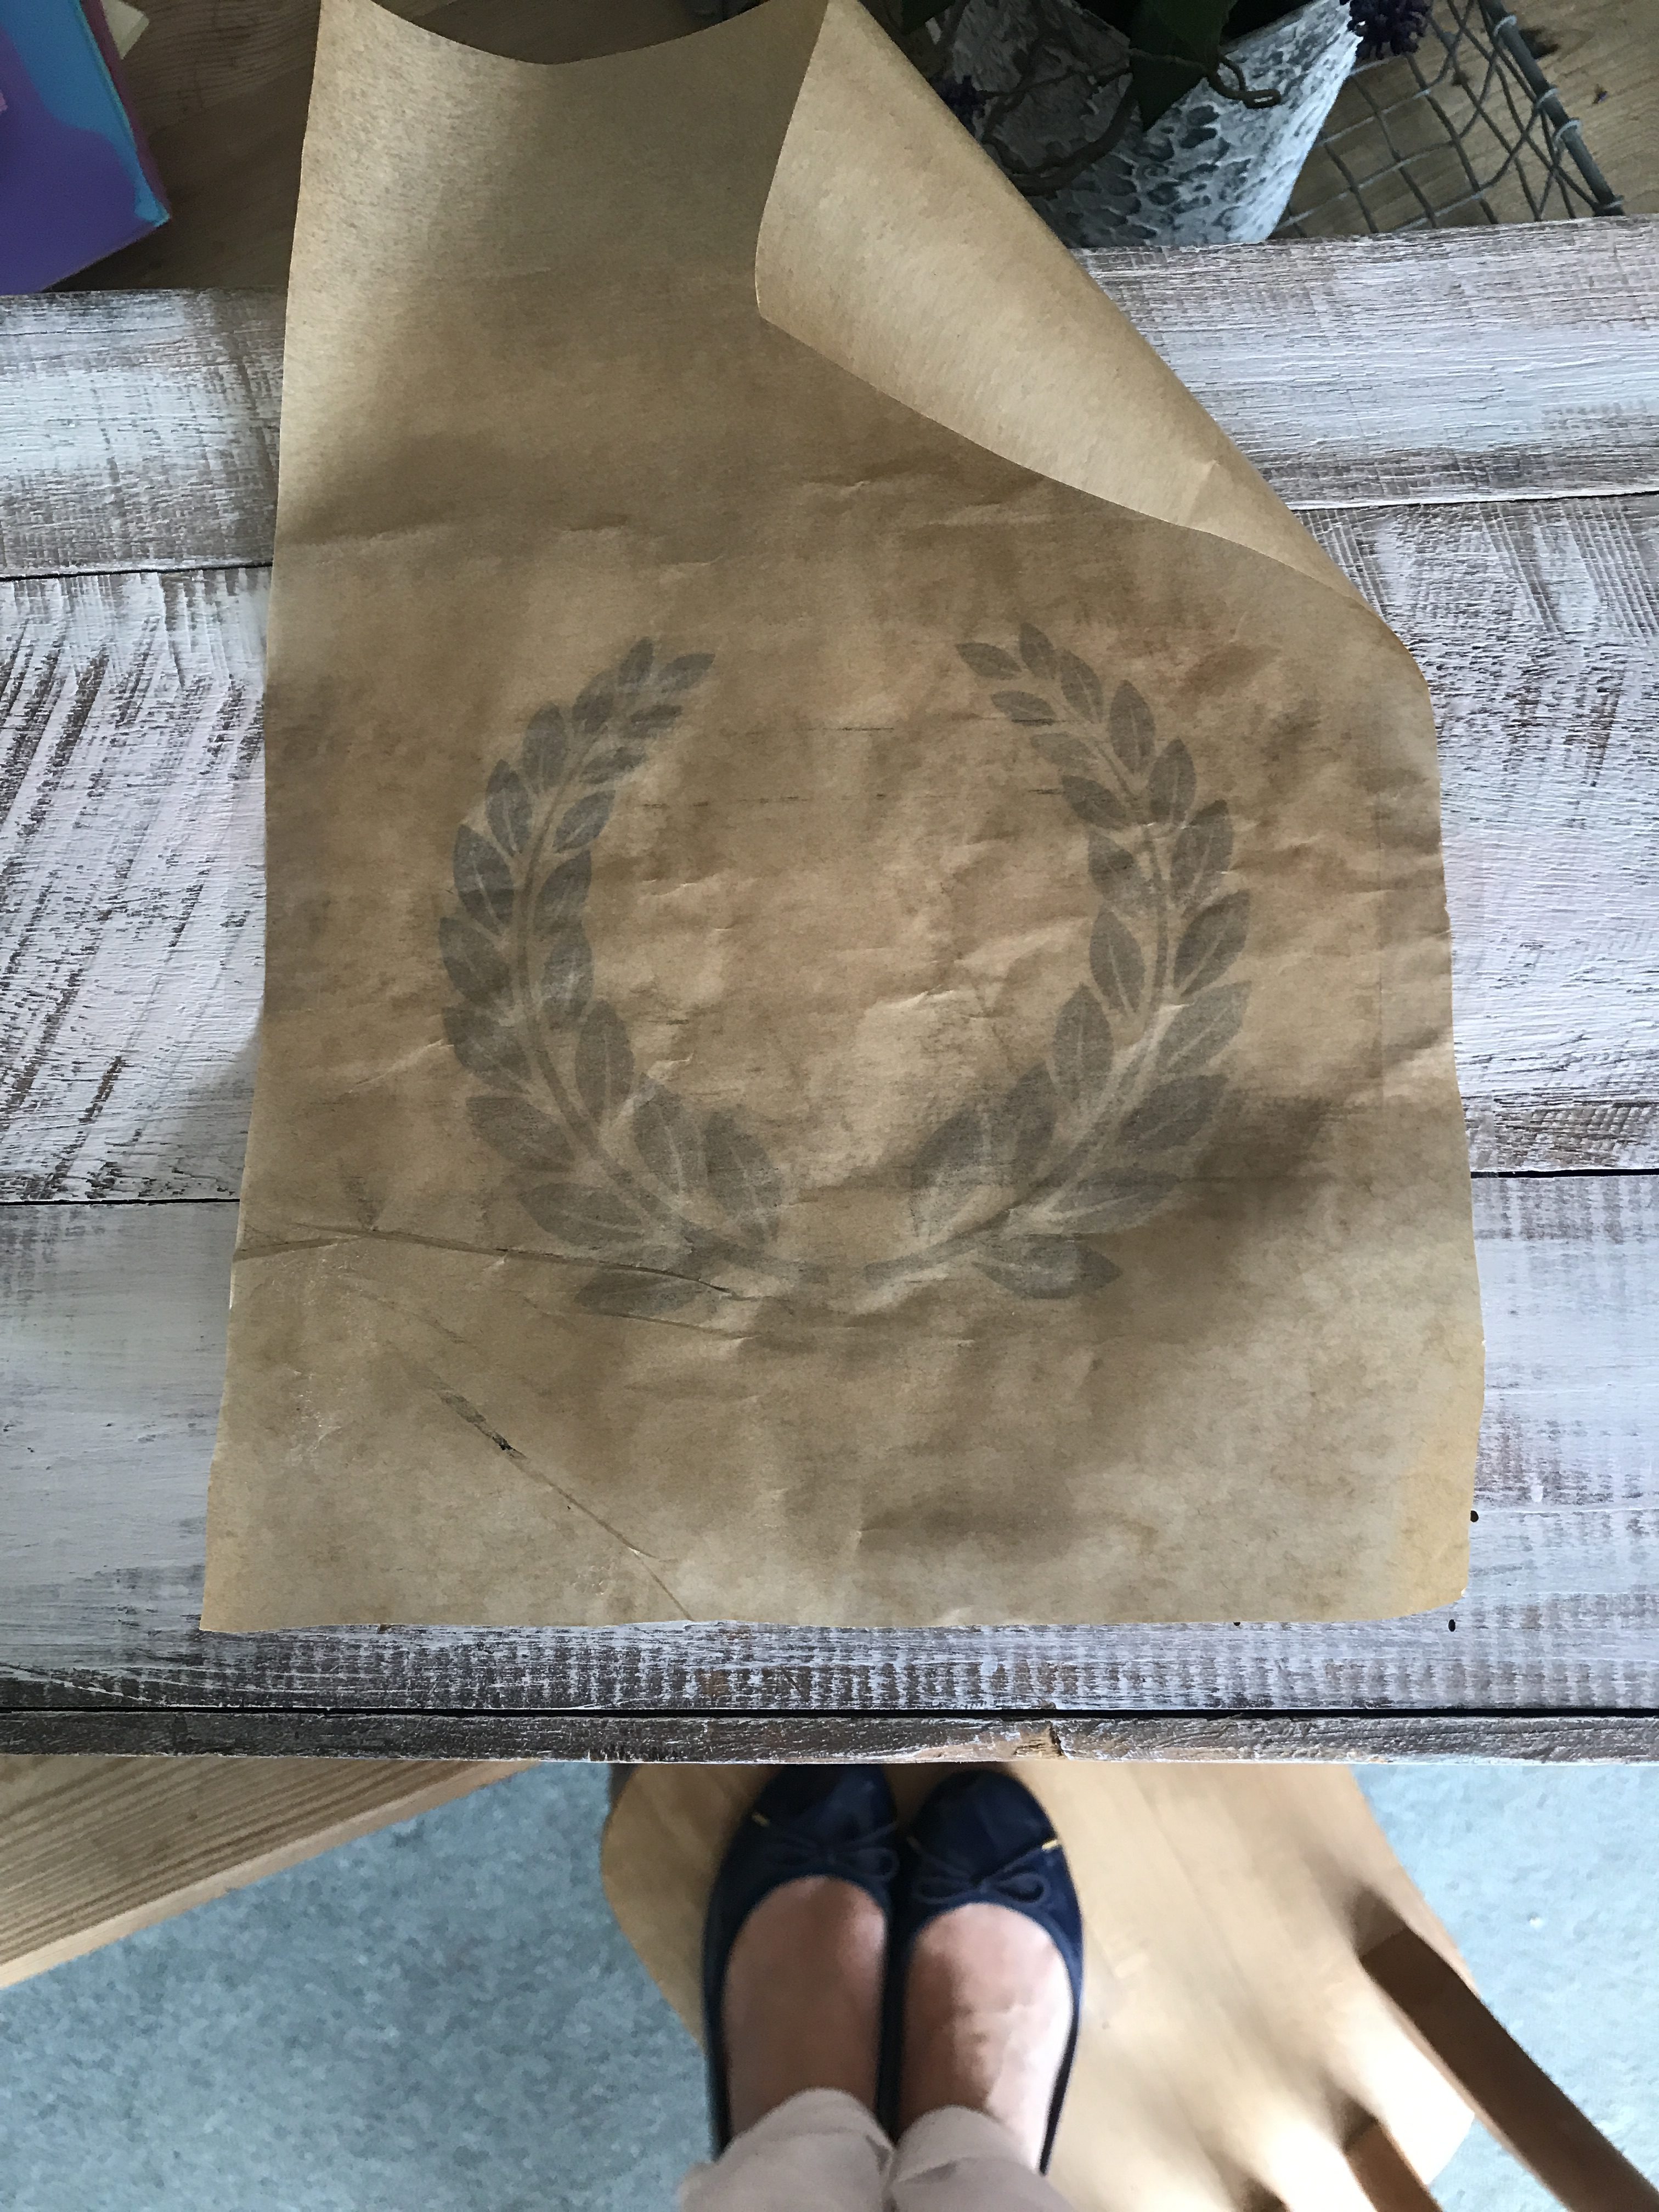
Next up was a choice of free motifs offered to us all by the wonderful world of Pinterest and available too via a quick web search. I went for this beautiful laurel wreath. There are all kinds of fancy ways to transfer your image to your item. If you are using letters you will need to reverse the image. I didn’t use letters since you will recall, I like a quick win. For this DIY I used a piece of greaseproof paper attached to an A4 sheet of photocopying paper with a glue stick. You simply pass this through an ink jet printer making sure the motif appears on the greaseproof paper.


Then I worked out the centre of the box and taped the image in place. Using a blunt tool (I do love a Sharpie, other marker pens are also available) I rubbed over the damp image until it successfully transferred to my box. Depending on how damp the transfer is when you start rubbing you will either get a darker or more faded shade. In the past I have sprayed the paper ever so lightly with water on the image side to darken the motif up. For this DIY I darkened the transferred image using a weak solution of water-colour paint. Either way will work.

Next it’s out with the electrical sander and whizz away until you get a patina you are happy with. If you don’t have an electrical sander fear not, a block and paper will do the same job with a large dollop of elbow grease.


By this stage of a DIY you would probably aim to preserve the look you achieved. Perhaps wax or a varnish might be the look you’re aiming for. I used a thin layer of clear wax and then set to buffing to seal this little gems new look.

Does everyone refer to their DIY’s as she or just me? As with many of my projects, this beauty will rest awhile in different places. She started here on Belle’s steps at the height of our summer with gorgeous, fragrant lavender…


And currently she sits here by the wood burner keeping the kindling in easy reach as autumn approaches and the nights draw in …


So if you’re feeling inspired to try your own DIY, be on the lookout for a box which might be in a charity shop or perhaps at your next vintage home decor fair. Your box may be hiding somewhere in your home or garden right now awaiting its transformation. And your box may not even be a box, it may simply be another old and tired piece. Whatever she is, I wish you happy hunting and a successful DIY.
Have you got vintage home decor ideas? Share them in the comments below…






Thank you Kenyatta! So glad you found the blog and liked the box… hope you’ll visit again!x
Cute little box. I love it.
Thank you Michelle! i wonder if we’ll find anymore hidden treasure this weekend!x
Your fellow shopper didn’t see that coming! Fab transformation – love it! Xx
Aww thank you Sara glad you liked it!x
Another winner Mrs M:) xx