“You just have to do it gently… look I’ve only being doing this section for ten minutes and no paint’s peeled off here” he said in that exasperated manner he saves only for me. I had been explaining to Mr M in an apparent whiny and loud manner that my antique armoire doors were not playing ball. “When I did it before with the homemade signs, small bits came off not great big chunks!” I exclaimed. “Look” he sighed “you just have to be a little more gentle, see? Take your time and stop rushing these things.” I do get it, of course I do. This whole, slowly and calmly thing. I regularly try to buy into it. I just don’t ever seem to crack it. If I did my life slowly and calmly, nothing would happen. I’d never get my shabby chic wall decor finished in time to show you all before I take two weeks off, to slow down and be calm would I? This week, against all odds, I did get my latest up-cycle finished in time. And I really do hope you like it as much as I do. I know I may have said something like this before… this one really is my favourite up-cycle to date, honestly it is. And I can’t stop staring at it and faffing endlessly with it. Although before the big reveal, there’s the matter of a short story first …
Seemingly I left many of you on the edge of your seats last week. You’ll recall in last weeks post, french antique armoire doors rescued from my lovely friend @chalkhill_greyinteriors firewood pile. The vintage doors received a quick wood filler and paint job and we left them awaiting their next pretty stage. Who knew this up-cycle for me was about to stretch my diy skills further than I could have imagined. This time I had decided to try my hand at a much grander decoupage on wood project than ever before. One which would occupy a big space and so must therefore look elegant. To begin, I collected together everything I needed to transform my antique armoire doors into beautiful shabby chic wall decor. The star of the show being these pretty paper napkins.


You will recall from last weeks post, each oak panel insert was left unpainted on each door. This is where the decoupage decoration was to go. You can read the how to tutorial for a successful decoupage on wood project here if you decide to have a go yourself.
This up-cycle project was at one point, not quite so successful and you might like to learn from the following. Firstly I didn’t pattern match the napkins. I didn’t give it a thought until a little too late into the project. You can judge for yourself later if infact it was a mistake or added to the overall look of the shabby chic wall decor. Secondly I didn’t cut the napkins to size before applying copious amounts of pva glue, causing me to overlap the napkins in one place and even invent a new bunching up technique in another. Both ideas designed to detract the eye from joins; both techniques failing miserably and serving to draw your eye to joins. These were heart racing moments.


I was beginning to feel a little stressed by the end of day one, so I put away my toys and decided to play again the following day. Mr M muttered something about this being one of my better ideas and how sleeping on it was a good plan and handed me a stiff drink to help the process along.
The next day, fresh as a daisy, I decided to revisit the shabby chic wall decor project. The decoupage on wood had dried solidly and all I had to do was remove the over hanging bits of napkin, distress the painted antique armoire doors in places time would normally do so and apply wax for long-lasting protection. Only as you have no doubt worked out, the day didn’t quite go like that. This happened when I tried to remove over hanging napkins. Chunks of paint fell off, distressing the beautiful french doors much more than I wished for.


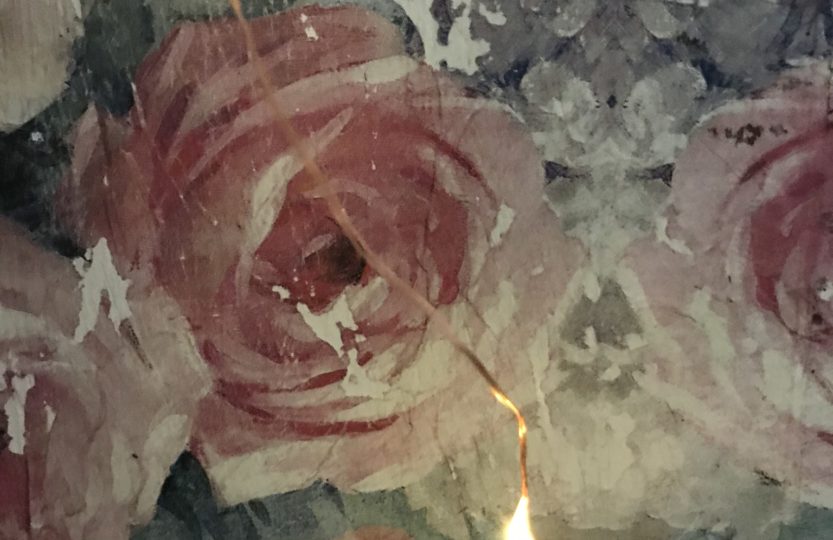
However the following was perhaps the most ridiculous mistake of all. A real rookie gaff and one I certainly should not be making at this stage in my diy development. Infact such a sense of humour bypass took place at this point, I do believe Mr M truly hoped I meant it when I screeched rather loudly “that is it… never, ever, ever again!” What did I do? I turned the electic power sander on without checking its whizzy speed was appropriate for the job and totally obliterated in part beautiful roses from the pretty decoupage on wood. And I mean obliterated. What followed next can only be described as behaviour which resembled that of a wild alley cat. I set about pulling the art cupboard to pieces locating acrylic paints and brushes and more pretty napkins to patch up the disaster. I was too distraught to take a photo of the blank space the over zealous sanding created, although I did manage a couple of photos of the patching up efforts.


By the end of day two and with more red wine administered to numb the pain, I sat in a contemplative mood deciding what I would do the next day if the paint and patching part looked like I had borrowed a small child for the job. In truth I had no idea what I would do as I pulled back the sheets for what I guessed would be a sleep deprived night.
Day three and I was up with larks leaving Mr M in a deep slumber. I looked at the amateur paint and patch job from the day before and I looked at the electic sander. I offered up a prayer and did what I hoped would be right. I turned on the electric sander, selected the appropriate speed and sanded, slowly and methodically. Working bit by bit over the child like painting, over the pretty paper napkin edges and over the entire painted antique armoire doors, until the up-cycle project resembled the shabby chic wall decor I had hoped for. That is right, I did slowly and methodically. Then I waxed the door details with this dark wax using this new (strictly speaking stencil) brush and the remainder of the doors and decoupage with clear wax. And then I was done. And I stood back to critique the end result.


And then rather excitedly, I put the completed antique armoire doors newly painted and decoupaged in situ. I placed the beautiful shabby chic wall decor in a corner of my very pretty sitting room. And I spent a quiet and peaceful hour or so faffing until I was quite sure I was happy. Very happy infact.


And then I added essential twinkling lights since the nights are drawing in. And I swapped a few chairs around until I had the look I had imagined I would have. And here are the completed antique armoire doors. What do you think? Can I be forgiven the little dramas and sense of humour failures? Does it matter I forgot to pattern match the paper napkins? And what about the acrylic painting, does it notice terribly?


After a while I heard a sleepy voice getting closer and asking what on earth I was doing up this ridiculous hour in the morning. And as I turned to where the sleepy voice was coming from, I saw a smile and heard the words “Ahh that looks lovely darling, very nice infact… do you fancy a cup of coffee?”x







Oh yes Jennie, we certainley do learn from them! I am loving the doors and enjoying faffing endlessly with them! I’m so glad you enjoyed the blog, never a dull moment around here!x
Gosh, I thought I was the only one with an episodic life! You know what they say about learning from mistakes? Having said that, these doors have so much more of you invested in them, had everything gone according to plan A. This makes them extra special I think. Ultimately you can sand them down (I suggest by hand!) and completely start again should you wish. You could alternatively sand the panels back, paint them and cut roses (or whatever you choose) from pretty wrapping (will likely be glossy), wallpaper or scrapbook paper. Then just apply three or so roses. But, you need to live with this and give it a chance. Never underestimate the value of items with a tale to tell and remember, this is a ‘bespoke’ piece. Made with love, a few tears and possibly the odd bit of Anglo Saxon! It’s beautiful. x
My favourite to date Karen. My goodness there were sleepless nights and you’re right of course… I just hope I may have finally learned?!!x
Fantastic!!! And you only learn by making mistakes – a beautiful finish to a pair of stunning doors. Well done you. Xx
Oh I am so glad you like the up-cycle lovely! I have to say I am so pleased with them and wonder what I’ll get the same amount of pleasure (and relief) from in future projects! Can’t wait for you to see in ‘real life’!x
Thank you Helen, yes that’s it… I shall look upon this as an up-cycle which evolved rather than one which was planned! Have a lovely week and thank you for joining in x
Wow wow wow !! I’m a little speechless to be honest (don’t say a word!,). They look absoloutely stunning, greatest upcycle yet ! And fabulous blog too ! Now enjoy your well deserved holiday! Xxxx
Oh I can so relate to this post and sometimes you have to change direction slightly and the end result looks even better than you’d hoped for. A lovely upcycle and one you’ll never forget!😂xx
Molly I am soooo pleased you enjoyed this post and the up-cycle too! I have to admit the thought did cross my mind as to how I trump this one…since early retirement is not on the cards, I shall have to get my thinking cap on! Have a lovely week and thank you as always for your lovely comments x
Oh Helen this is truly the most beautiful post in both content, photos and beautifully described. It was an absolute joy to read. You must be over the moon of the transformation of the firewood😆 You are such a professional at up cycling with such patience and great idea. As always a true inspiration BUT this has raised that bar!!
Congratulations, you’ve been tested to the end! Xxxx
Ahh Christine you love! Thank you. I am so pleased you like them…I am unusually pleased myself! Whilst Mr M watched tv last night I watched my doors!! Have a great week lovely x
Oh Sara thank you! I’m so glad you love them too and you had a little giggle as well… hope you’re having the best time away; so looking forward to our break now too! Lots of love xx
Oh wow darling… thank you so much! You know how critical I am of my own work ususally, I do love these though! Cannot wait for @chalkhill_greyinteriors to see the makeover!! Thank you so much sweetheart, you’re right, it’s lovely I can share all these through the blog and social media with others who love the same styles and it’s also very lovely we’re going to be together soon! Yay!!!x
Ditto all Olivia’s comments!…
What a bloody marvellous upcycle and hilarious blog! Now have a great holiday! Xxxx
What the…?!?! Where do I even begin….I am totally and completely gobsmacked. How stunning are they?! Complete showstoppers….how on earth you have the vision to even think of these projects I will never know…let alone the raw talent to actually be able to create them!! Those really are so special and they way you tell your stories makes me belly laugh!
I remember being at home when we were young and people popping round to see your up-cylces and the look of utter amazement when they saw what you had been able to do with what anyone else would see as junk. It makes me so happy to know that you can now show all of your subscribers and insta-friends who share the same love and passion for vintage up-cycles, how talented you are – and I’m sure every single one of them has the same look of utter amazement as the visitors all those years ago. You are truly, truly talented.
Now to enjoy 2 weeks off and some family time – I can’t wait although will miss these stories on a Thursday!! xxxx
Oh my Helen what challenges you faced to get to where those armoire doors now proudly stand. Good on Mr M supplying you with red wine to ease your stresses!! What an absolutely amazing transformation to those doors and how gorgeous they now look. WOW!! Well done on your perseverance and not giving up on a project that looks 100% fabulous. Xx