Today’s post, Clay Decorations for Christmas is a new craft to me and I promise you this is my first and only attempt at ever using air dry clay. I tell you that to blow my own Christmas trumpet? No, not at all. Quite simply to mention, this could be another perfect, inexpensive and last-minute gift for you to share with your special folk or take to your Christmas and New Year celebrations and see your hostess smile. Making these clay decorations for Christmas, brought about a nostalgic day for me. This craft medium is a little like grown-up Play-Doh, remember those days? Rolling endless balls in the palm of your hand to create obscure and colourful fruit, sweets, animals and so much more. Well this is just as much fun. An opportunity for grown-up play time with perhaps a little more finesse. I have quite a lot to pack in for this, the fifth and final part of my festive mini series My Handmade Gifts for Friends so if you’ve got that coffee ready, we’d best get on …
First gather together all the equipment you will need to make your clay decorations. I don’t (yet) have a craft rolling pin, so I improvised with a small glass bottle fearing my pastry would never taste the same again if I didn’t. And this craft affords the perfect opportunity to use those vintage cookie cutters that you’ve collected. And if you are using stamps which have been previously pressed in ink, I would use this before you begin and when you finish.


Take your air dry clay and pull off small chunks, a little goes a long way and get rolling it around in your hands, just like you did when you were little. Be sure to keep your big chunk of unused clay air tight. The clue is in the name. Complete each clay decoration before going onto the next, as drying starts as soon as you leave it alone. If you have ‘bits’ around the edges of your cut out shape, you can smooth them out gently with your finger whilst the clay is wet or leave until it is fully dry and gently break them off. Both ways were just as effective for me. And if you need a hanging hole, I found a bamboo skewer to be useful. No hole shown in the photo, I didn’t forget though as you shall see later.


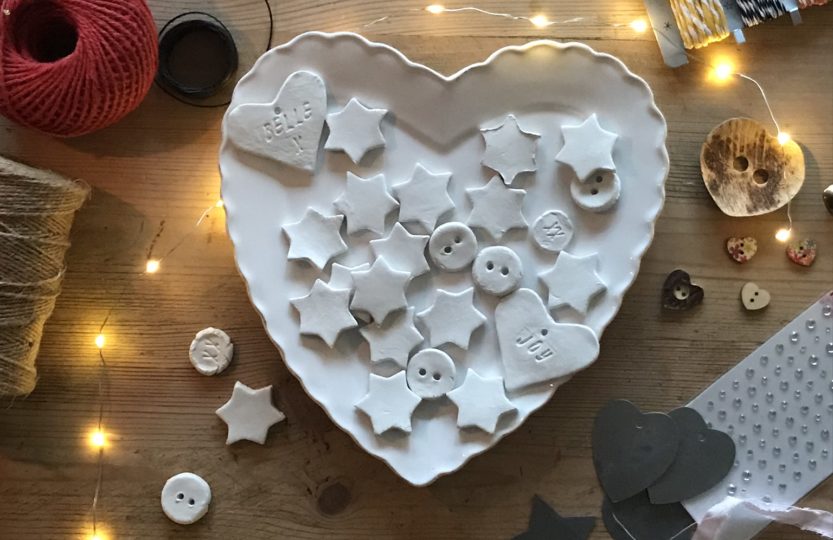
I made all manner of pretty shapes to incorporate with other bits in my craft stash, to create my own unique clay Christmas decorations. To some I added a stamped out name or message and on others I left it plain. In the second photo you can see the drying process taking place as the dull grey clay gradually turns white over a twenty-four hour period.


I found this tutorial via Pinterest and loosely used their idea for a festive star garland, adding my own spin and thus creating my personal clay Christmas decorations. I attached the star to the string with hot glue and then before the glue dried, I added a small crystal embellishment. No credit to me, that little tip is in the lovely tutorial. This probably is the closest the M’s will come to glitter decor this Christmas. One of the joys of crafting for me is not creating exactly the same as I see, merely being inspired is enough so I threaded and glued other pretties in place to create my very own clay decorations for Christmas gifts. And of course for our home too. Call me predictable, I used my avocado dyed rag ribbon for detail again.


Once this far, I was up and running and I just kept adding little pretties. Teeny knitted festive hats and christmas puddings, fairy lights and faux mistletoe. All strung and glued together making a fine start to my clay Christmas decorations. I added too, one of my easiest homemade paper garlands ever, using this tutorial. Now these paper garlands really are an easy and quick make for a Christmas gift, with the added bonus that they can be slipped into the envelope of a Christmas card and not cost you a single penny more than the cost of the card itself to send to a friend. And if you don’t have a sewing machine, out with the glue. Win win. A perfect festive decoration or gift. Another make I must learn to give away and not keep for myself. What do you think so far?


Talking of Christmas cards, the next two paragraphs may be a little controversial. You may see a side to me you are not that fussed about. Here is something else I don’t like. Christmas cards. I know, shocking. It’s not cards per se, of course not. I truly believe a well-timed and thoughtful card far outweighs a gift every time. All the M’s know the way to my heart is to stop for a minute and write me a few words inside the least expensive card they could find. And of course when they were younger, creating the card usually meant sticking and drawing and painting and colouring. My favourite kind of card. Even as recently as last year Master M made unique Christmas cards for the family with a free app, each card totally geared to the recipient. These special cards were then brimming (and I mean filled) with his own words and shared with us all. We laughed at his style, I cried (I can be a little emotional at times) we all loved our cards. Financially it cost the poor student nothing. His gift to us all? Time. Time to tell us he cared. These cards of course mean the world.
So now we have established it is not the giving and receiving of cards I dislike, what then is it? It is more about, what to do with them all. And if you are thinking “lucky her to get so many” it is not that either. Of course I am grateful we are remembered by so many especially at Christmas. I just find them hanging all over the place a little untidy. Dust gatherers. And when I go to bed, they are where they should be and when I get up in the morning, they are all over the floor. So I pick them up, put them back and this silly game continues throughout December. Maybe I just haven’t found the best way to display them. Until now.
Master M is twenty-one. My next clay decoration features his toddler pyjamas. Torn strips of pyjama fabric and tiny buttons mix with zinc hearts and stars and the occasional crystal gem, all strung together with rustic string and a few more clay stars.


Add to the garland a few mini pegs and this could just be my new Christmas card display.


Several of the hearts had names and Christmas words stamped on them. No surprise that Belle has her own clay decoration. These would make perfect personalised tags for Christmas gifts too. And after I had cleared this craft day away, I thought of another idea which could work. How about ‘red’ or ‘white’ or ‘fizz’ stamped on circles attached to pretty ribbon or twine and tied securely around the neck of a festive plonk? You can paint this clay too although I didn’t try myself. I like white.


Finally I made a few imitation wax seals to add to festive ribbon or simple string for a gift or two. Each of mine has two kisses; I imagine they would look pretty wonderful with initials on too. And perhaps gold or silver paint might be a good choice. As you know, I like white. I’m thinking these seals may work particularly well for the men in my family this year. They are not usually too enamoured by the oodles of ribbons which adorn their Christmas gifts.


And there you have it my friends, clay decorations for Christmas. The final part to my five-part mini series My Handmade Gifts for Friends. In just twenty-four hours you could have a whole string of unique clay decorations for Christmas in your home or to gift to your friends.
If you missed any of the previous four posts, click below the bottom photo for a link to each one. I do hope you enjoyed this series as much as I did making and writing it. And I am so grateful to those of you who have shared your photos showing which craft you made. There needs to be another phrase other than “you have no idea how happy seeing them makes me.” Next week is my last post until 2019. Do join me for a final Christmas story. In the meantime enjoy a crafty week x

Decorative Clothes Hangers – Part One: My Handmade Gifts for Friends
Homemade Christmas Tree Decorations – Part Two: My Handmade Gifts for Friends
Decorative Matchbox Covers – Part Three: My Handmade Gifts for Friend
Making a Fabric Book Cover – Part Four: My Handmade Gifts for Friends


Oh you will absolutely have the best time making these with The Pink One Karen! Enjoy and don’t forget to take lots of photos!x
Just ordered my clay ready for ninny Wednesday! I’ve been waiting to do this for two years 😂
Love it!!
Xx
What a wonderful message to wake up to Jean, thank you so very much for all that reading! Gosh you will have found so much to make now… I do hope we get to see some. The clay stars in particular are wonderfully easy and really do last. I have a garland still hanging at Belle’s and only last week used some smaller ones as table confetti at a dear friends party… enjoy every minute!x
Helen, some brilliant ideas here, I have just sat and read all 5 of your series. I seriously am going to try so many of your ideas out, so inspiring and not too difficult (they need to be achievable for my simple mind😁). Thank you so much for sharing
Molly I have to tell you this comment reduced me to a few emotional happy tears! To think my crafts will be occupying your little treasures minds over the holiday season is such a wonderful feeling! Thank you for everything… your kind words, your support, (your very funny sense of humour in my life with your daily Instagram posts!) and thank you for having a bit of me in your life, you are so special!x
Helen, just so many wonderful ideas here!
What excites me is I have all the tools (if the little people haven’t let the air dry clay dry out)
This is such a lovely thing to be able to do with the children. I know my girls will love to make such a pretty garland and also to put on the front of handmade cards for grandparents.
Fabulous suggestions for mums who have such busy minds at this time of year. The thought of keeping them busy for a few hours at the weekend fills me with joy!!
Love the idea of those naughty elves moving your Christmas cards😆…messing with your mind!
I am writing a list with all your ideas my lovely, the perfect ideas to film the holidays
As always beautifully written and photographed. My number one go to for pretties and such inspirations Xxx
Aah thank you darling… there may be a little stamp somewhere for you!!x
What brilliant ideas! Love the wax stamps ! You really are clever xx
Thank you darling for your lovely comments! You did indeedy spot a little something for you! I several exciting things coming in the New Year which you will have to patiently wait for…x
AHH how PRETTY!!! I love a garland and that’s so different I love it!!
Ps. I spotted my name! I love your imaginative and thoughtful gifts and am always amazed by what you can create with just a little inspiration!
I’ve enjoyed every part of the mini series and will be sad to see the end of it…what is next?!
As always, a wonderfully funny read! xxxxx