of the color of milk or fresh snow, due to the reflection of most wavelengths of visible light; the opposite of black...an interesting summary found when one Google’s the definition of ‘white’. And since our west-facing sitting room is rarely bright enough to see in certain corners, I decided a fireplace makeover would be in order. A ‘white’ fireplace makeover to be exact. And in a nod towards total transparency and honesty, I feel it only fair to say this simple little project was neither and it did not get off to the very best start. Warning, the following post contains graphic content which may offend some readers…
“And you’ll need to brush it down first and then wipe it over. And dust sheets, you’ll need plenty of dust sheets and where is your masking tape?” Sometimes I think Mr M does this, so the enormity of the task will freak me out and I’ll put the kettle on instead. Let’s start at the beginning shall we?
Researching the fireplace makeover technique
I’m big on research and considered pouring over beautiful Pinterest boards to be adequate research for this project. After all many keen DIY’ers before me have done this fireplace makeover. I decided their tips and experience would be more than enough, oh and a quick call to my dear friend who has recently carried out a beautiful fireplace makeover herself. I established some form or other of primer would be required on the bricks and also on the overly varnished mantle. And so with my research complete, I set about stage two of the project …
Preparation for the fireplace makeover
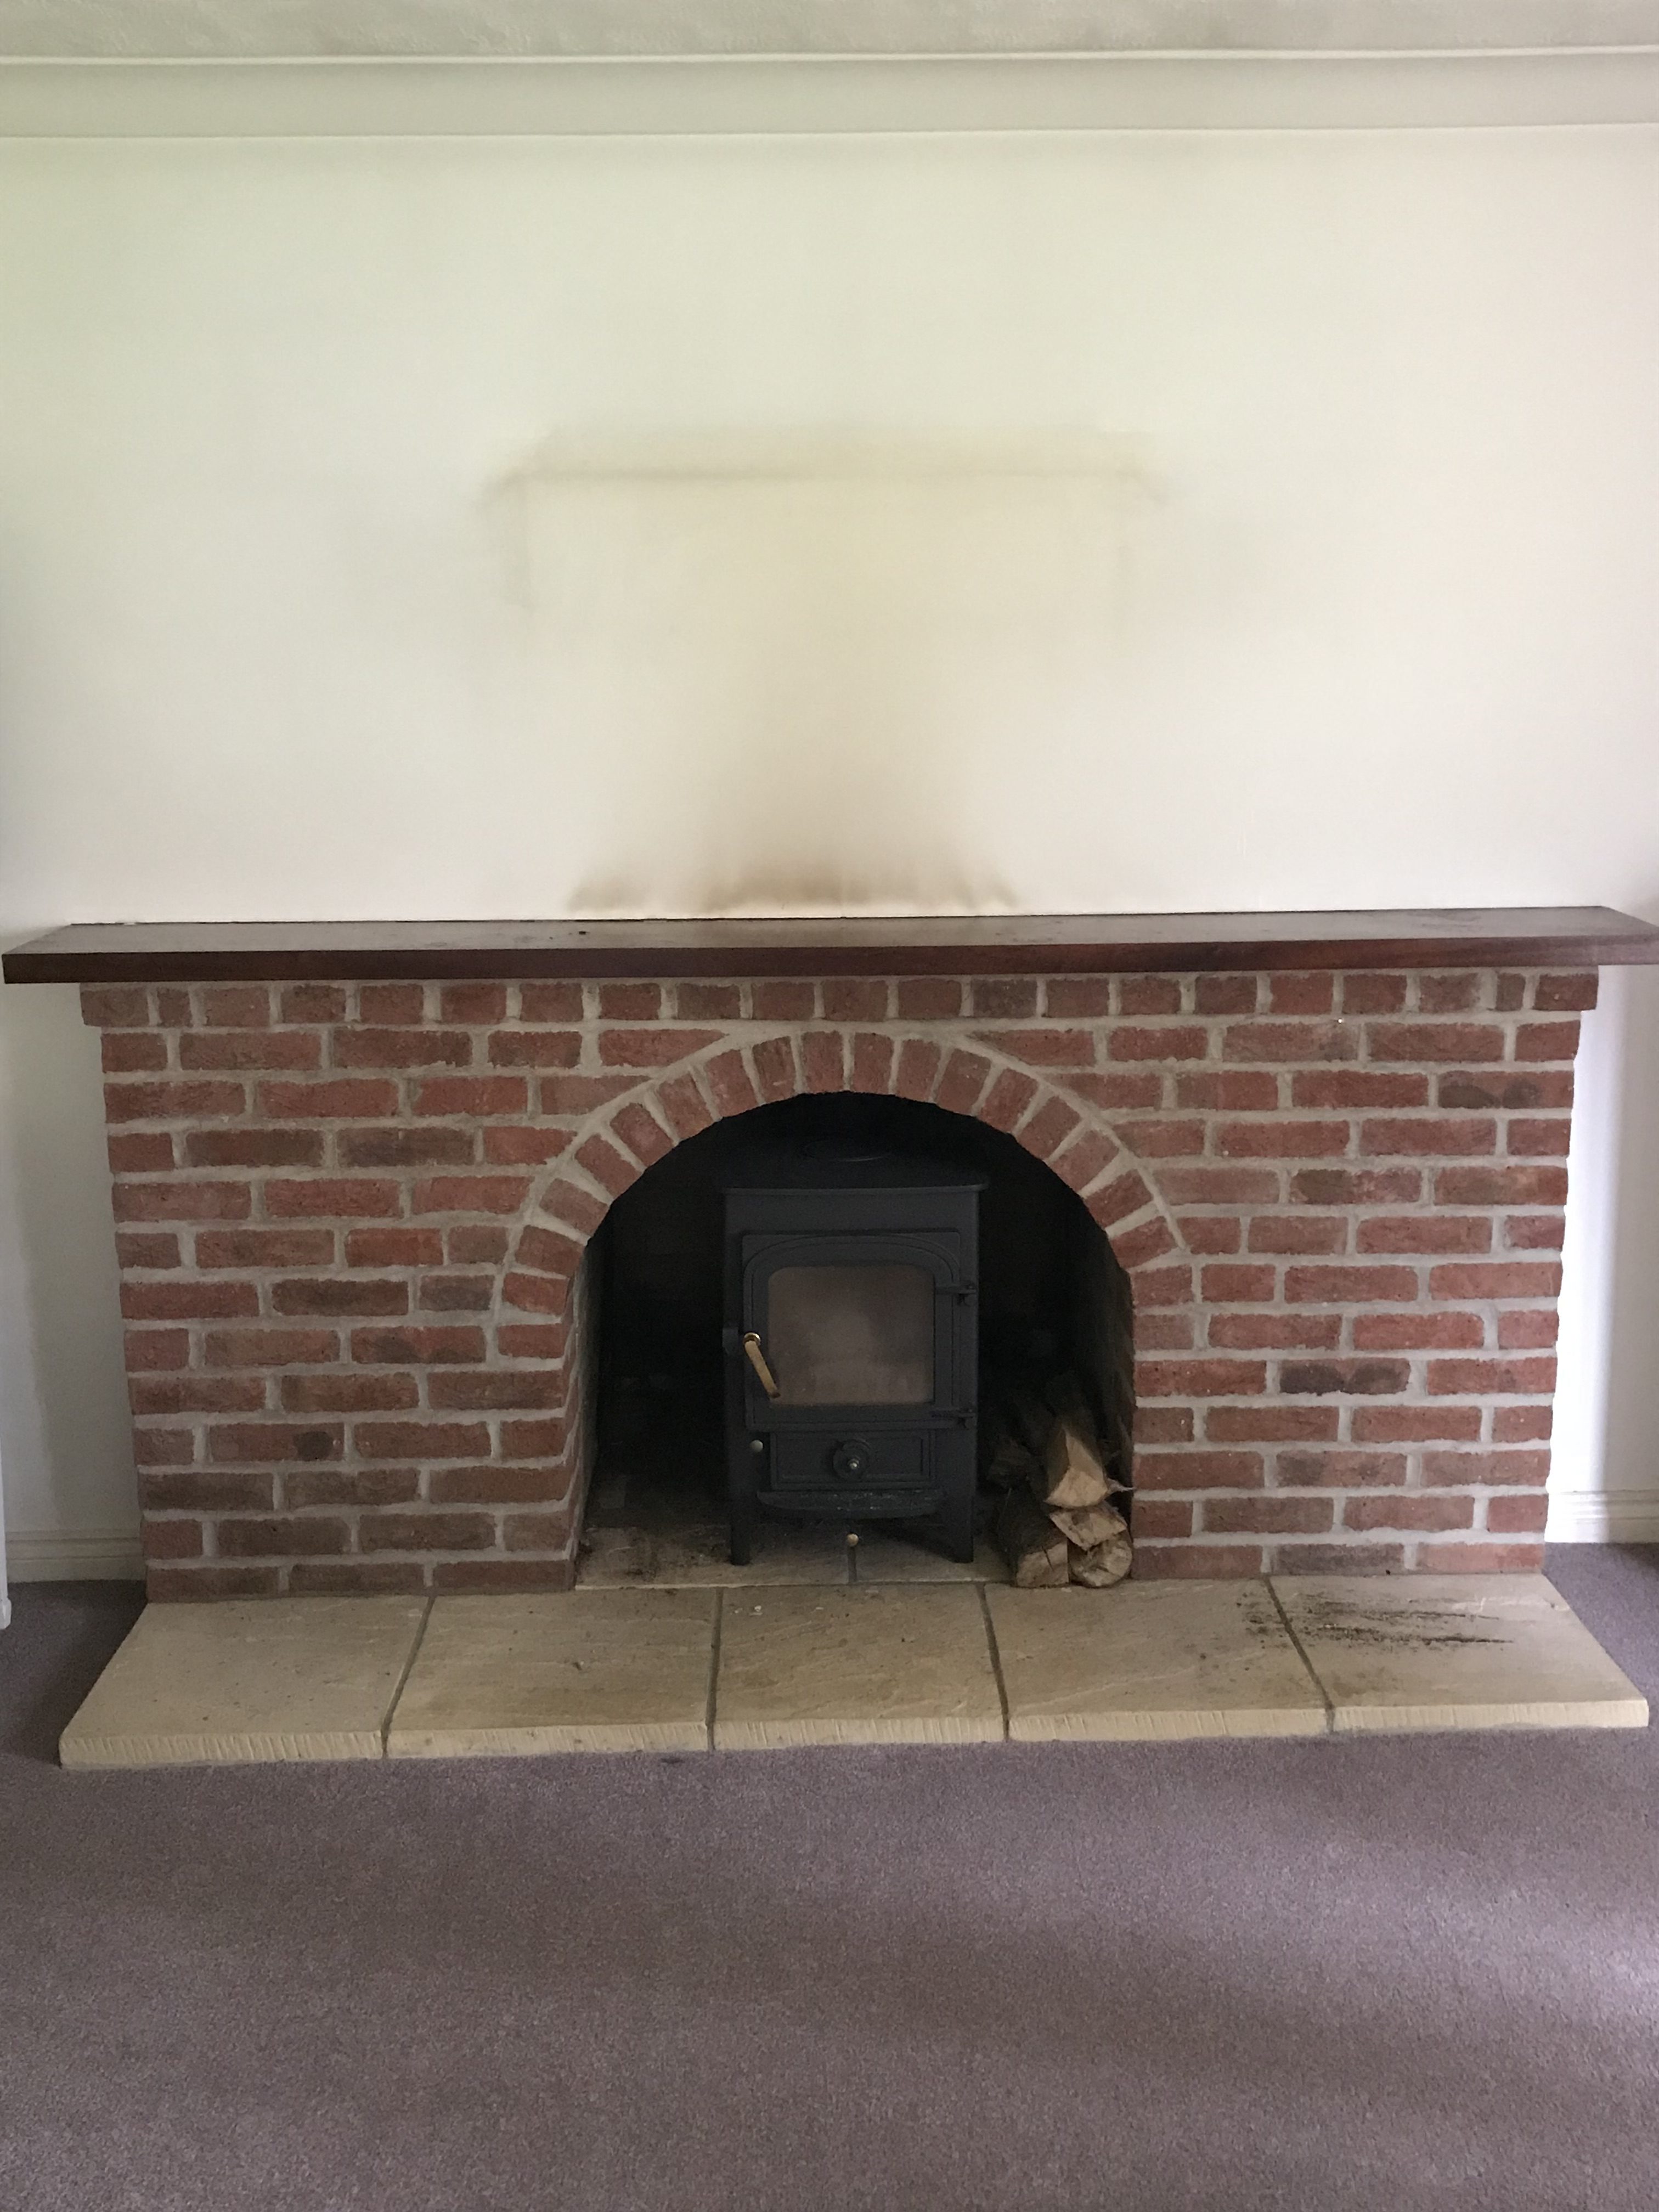
Once I had the masking tape in place and the wood burner wrapped and protected to within an inch of its life, it was time to begin my fireplace makeover. I began removing all the dripped candle wax of yesteryear from the glossy mantle.


Next out came the trusty primer you too are on first name terms with by now, read here if you are new or wish to become re-aquainted. Mistake number one: Who knew adding water to the last of the gloopy primer contents in an attempt to thin the product down, doesn’t work? In doing so, a putty like substance is created, which I didn’t take a photo of because by now I was a little miffed. Miffed because I had not washed my hair and I had no make up on; why would I when you consider the DIY project will cover you in dust and paint splatters. Yet makeup or not, I would now have to go to the nearest DIY store to replenish my supplies. Sensing my frustration, Mr M offered to go for me, as like most men I know, he can decide to go somewhere and just go. No titivating of hair or such nonsense for him. So off he went mumbling about something to do with checking your supplies before you start.
By now I had (privately) decided to ignore totally the advice I had for brick priming; time was getting on. I did however realise nothing would grip that mantle without a coat of primer and so with Mr M off on his travels for a new tin, I set about tackling the bricks first. If at any stage throughout this post you think I may have overlooked the wall above the fireplace, I haven’t. That smoke stain from the previous open fire will remain until we renovate. Painting that wall would have led to another three needing the same treatment, which would have led to the coving and doors…you see where I’m going with this. As I said at the start this is a transparent and honest DIY; the mirror will go back there and cover it up and it will remain our little secret.
The fireplace makeover
So back to the bricks. I feared primer and several coats of paint might obliterate the rustic, so I began applying trade white emulsion to bare bricks. I opted for a small roller and an angled brush, figuring this would give me the right degree of rustic. Two photos; one coat of emulsion on the left, two coats on the right and starting to look a little as I was hoping for…


Then the paint began to dry. Not at all the look I was hoping for. Rustic as far as I was concerned, did not involve brown patches. And before you ask, no, I did not pay heed to the small print of Pinterest…the bit about the porous word.


By now Mr M was home, standing in front of me and the fireplace, doing that inward deep breathing thing he does when he professes not to understand me at all. I was for a brief moment transported back in time. To many years ago, when I owned and ran a successful customer service and sales training company. My opening slide read To fail to prepare is to prepare to fail. Accurate, if not a little predictable; why oh why had I not recalled this moment in my career sooner? Mr M put the kettle on and we had a lengthy chat about decorative stars and Christmas stockings and all manner of pretty decor which would hide the ever-growing brown blotches. And we were not at all convinced.
Mr M had a solution he said. This would work…perhaps. We had infact used this on a fireplace wall in our previous home with cracking results. You just have to wait 2-3 hours for drying time (heavy sigh) and a further 10 -12 hours before painting over. Incredible. Soon we will be able to visit the moon for our annual break, yet we still have to wait an eternity for paint to dry.


I quietly made a start priming the mantle. And then coating it twice in white acrylic satin paint. The right preparation with the correct paint equals much success…


And so for this week, I shall leave it there whilst we wait for paint to dry and I am left with a sad-looking fireplace. A frustrated home maker desperate to dress a finished mantle and at this point, a long way off pretties and candles. I have always said to my children, it is alright to make mistakes, as long as you learn from them. So what have I learnt? Most definitely, preparation is key to any DIY project and more specifically, it is always advisable to use a primer. Do join me next week to see if we managed to turn this DIY around and of course to view the final result of my fireplace makeover…x








Ooooh you sound just like your father! Thanks for reading x
You really should check your supply’s before you start… Brilliant blog yet again!
Oh Karen if I only get to be half as good as you by the time I’ve fininshed I’ll be happy! Thanks so much for reading x
Oh I feel your pain. I’ve been in a pickle many a time, because I think I know best. Brilliantly funny to read, and very entertaining in the wrong kind of way!! Looking forward to the sequel. Love it!! (this blog that is!) Xx
Ahh thank you lovely…I think you may have said that!x
Oh my….did I say no primer needed??!! Brilliant blogging Hels ! I am so looking forward to seeing the end result! Xxx
I know Little Miss, I really must try harder!x
Hahaha oh Mum…if only you could practice what you preach! Brilliant blog xxx
Thank you and so lovely to know it made you laugh Jane, such a good way to start the day don’t you think? When the Times calls, I shall be ready and waiting!x
tears Helen….the tears are rolling – a great blog – so well written, the Times will be snapping you up so soon!!
Possibly your best one yet. xx