And all at once Summer collapsed into Fall – Oscar Wilde. Possibly one of my favourite summers end quotes. Words which encapsulate a desire to hold onto those last precious days of summer knowing all too soon our mature sunshine will draw to a close and as sure as the sun will again rise, we will embrace the cosiest season of them all. I try to preserve a little of those balmy memories each year through the many blooms I gather from the summer garden and treasures snuffled on my many walks with The Spotty One. Wreaths always feature heavily in flower preservation and this year I wanted to try my hand at mixing two mediums, flora and fabric in something akin to a wreath. This is a much shorter post than usual and I do believe, a craft anyone of us can make, even if we are time poor. And as I always hope for, most of these treasures will be ever present in your own homes and gardens. For those of you with school aged children this could be the perfect art project and the smaller ones will enjoy a creative afternoon alongside you, making their own take on this craft. And of course, if like me you just want a little quiet time all to yourself, you can while away a cosy afternoon creating this mini dried flower hoop, do join me…
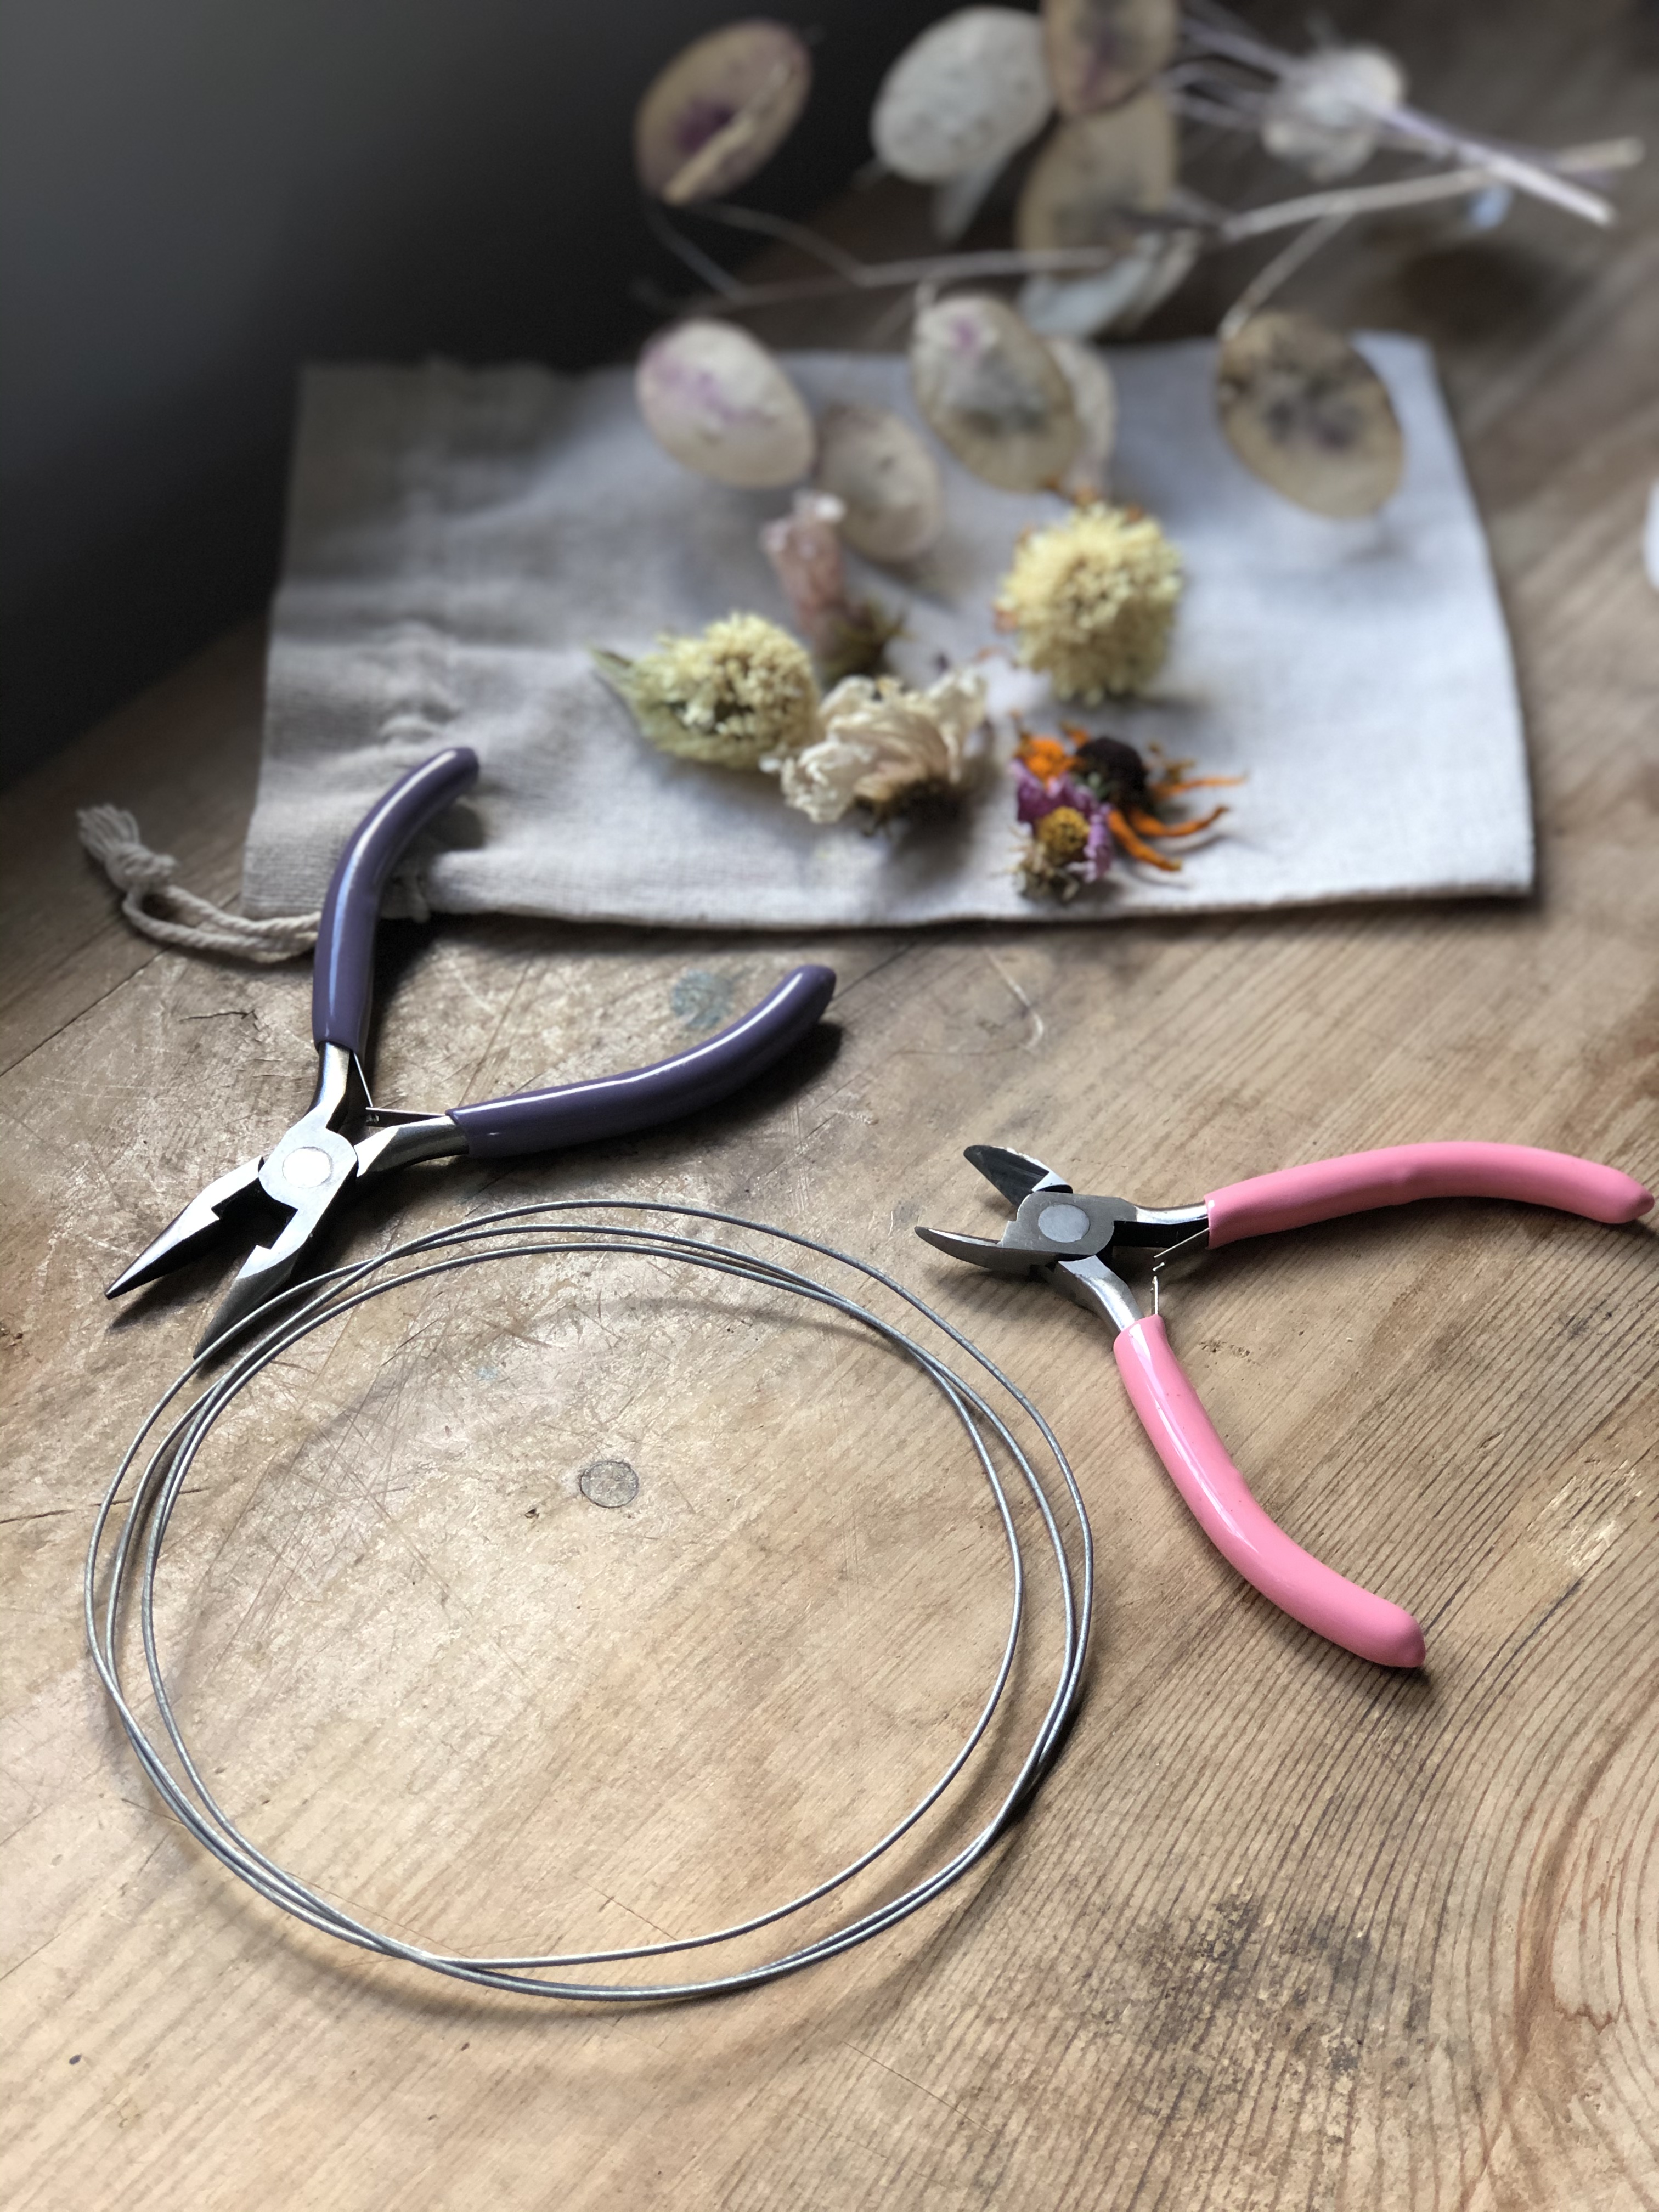
For this craft you will need:
- Thin (ish) wire – craft, gardening or something lurking in the shed or garage will work
- Pliers or snips if your wire needs trimming
- Selection of rag ribbons – or torn strips of your favourite material or something pretty sitting in the charity shop pile
- Glue – a glue gun will work best although other strong glues will suffice
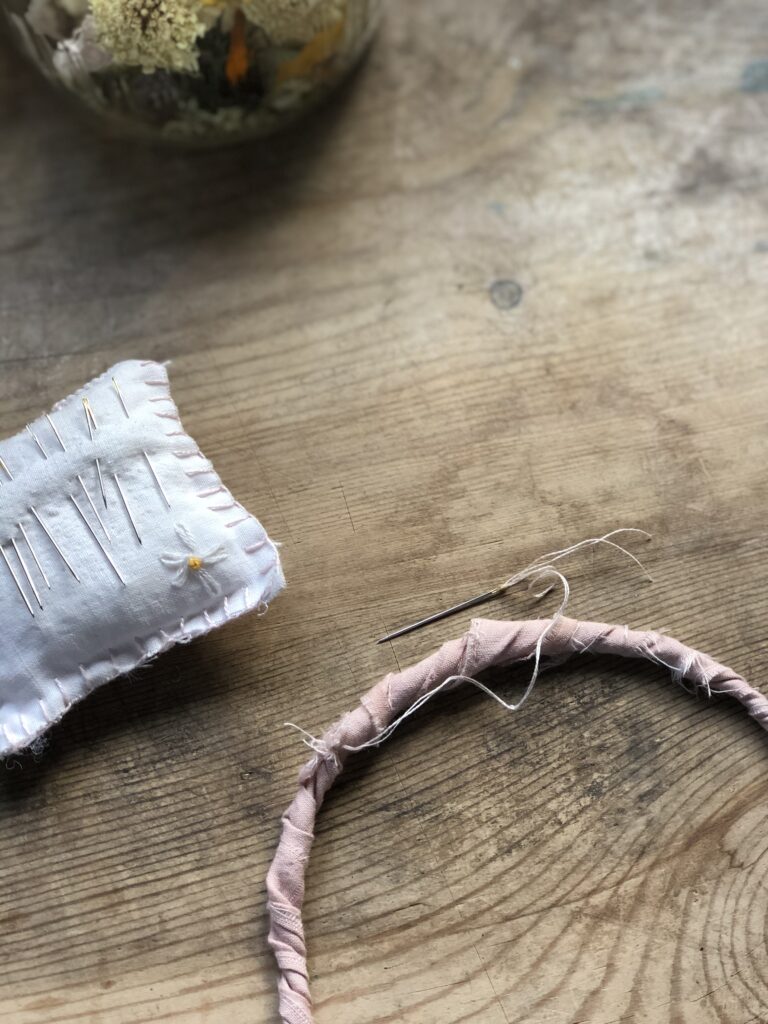
- Needle and thread – I’ve used my avocado dyed thread
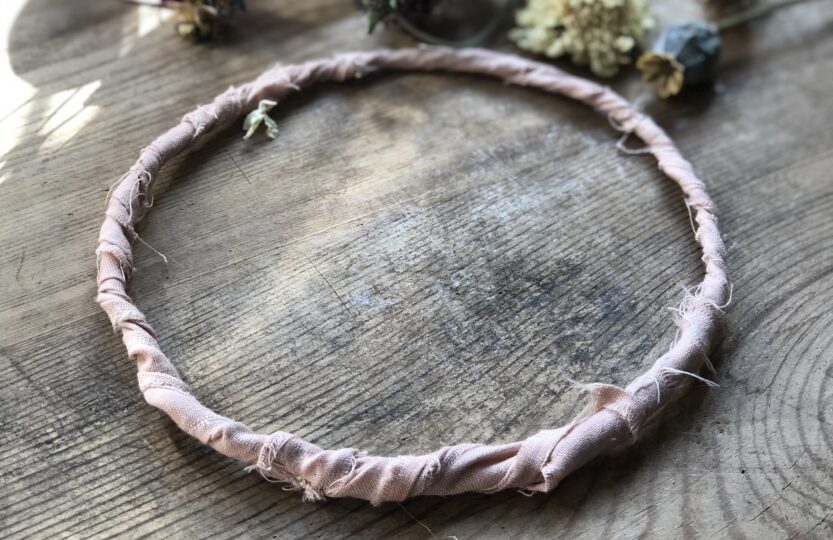
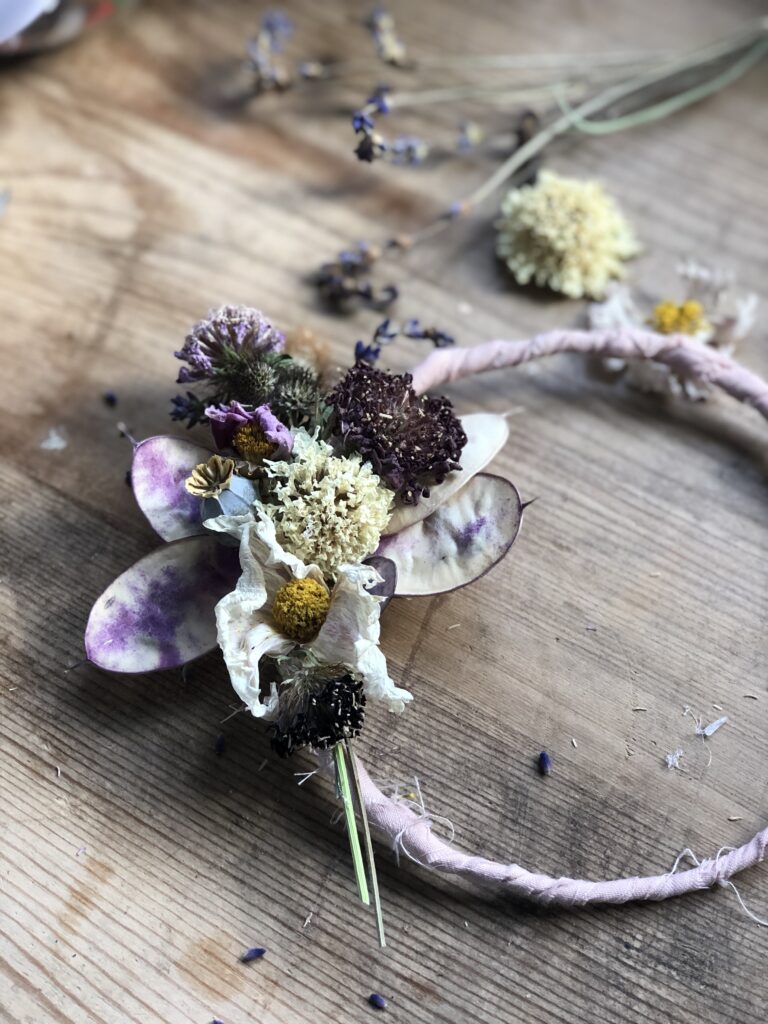
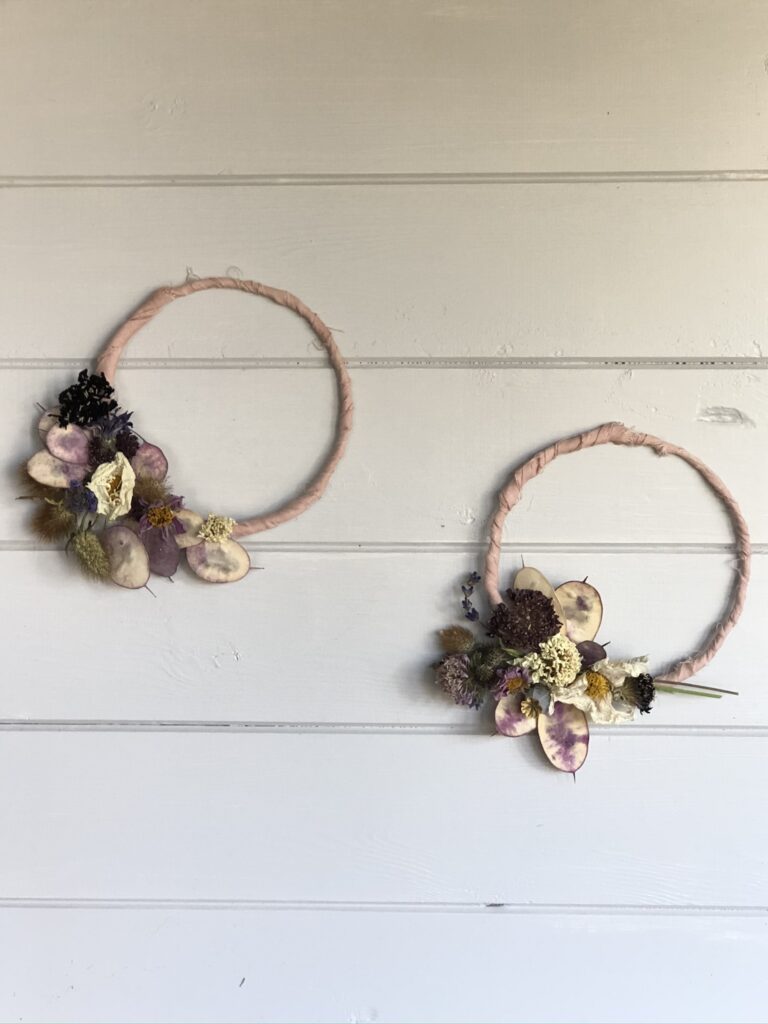
Traditionally a dried flower hoop would make use of a wooden or bamboo hoop and I found this selection should you be a traditionalist. If however you are making use of wire you might have already, begin by determining the size of your circle and carefully bend and twirl the ends of the wire to secure. You could use a circular dish or bowl as a mould if needs be.
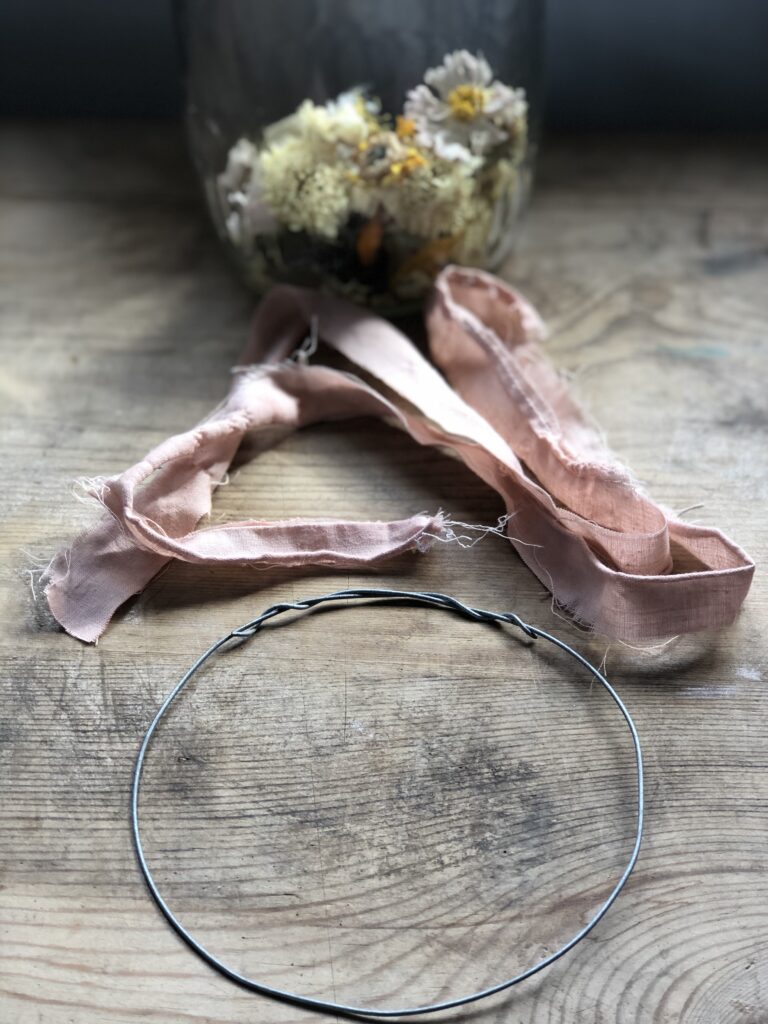
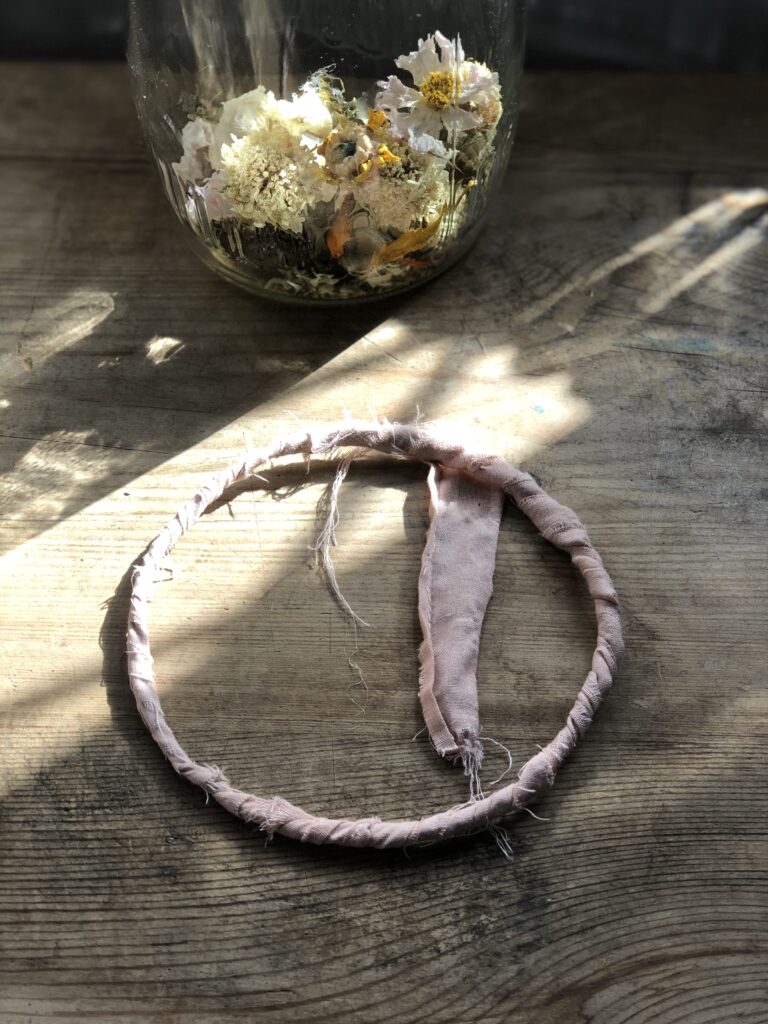
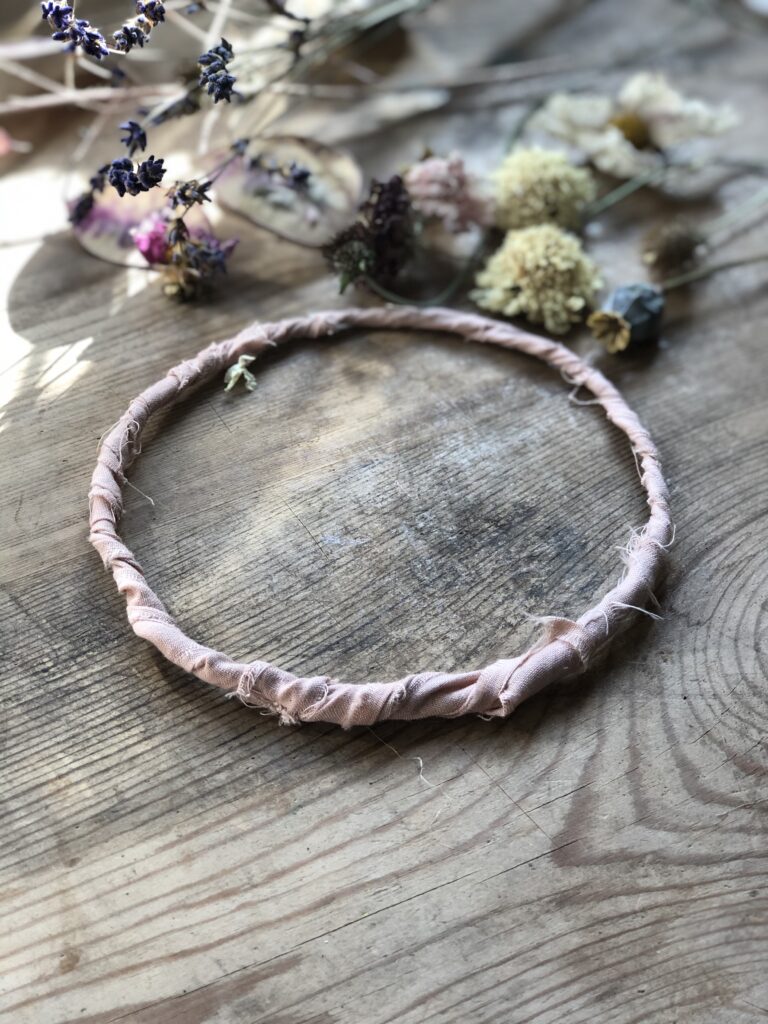
Then take your strips of material or (avocado dyed) rag ribbon and swaddle your wire hoop completely. A couple of stitches where your fabric has ended, should hold the cover firmly in place.
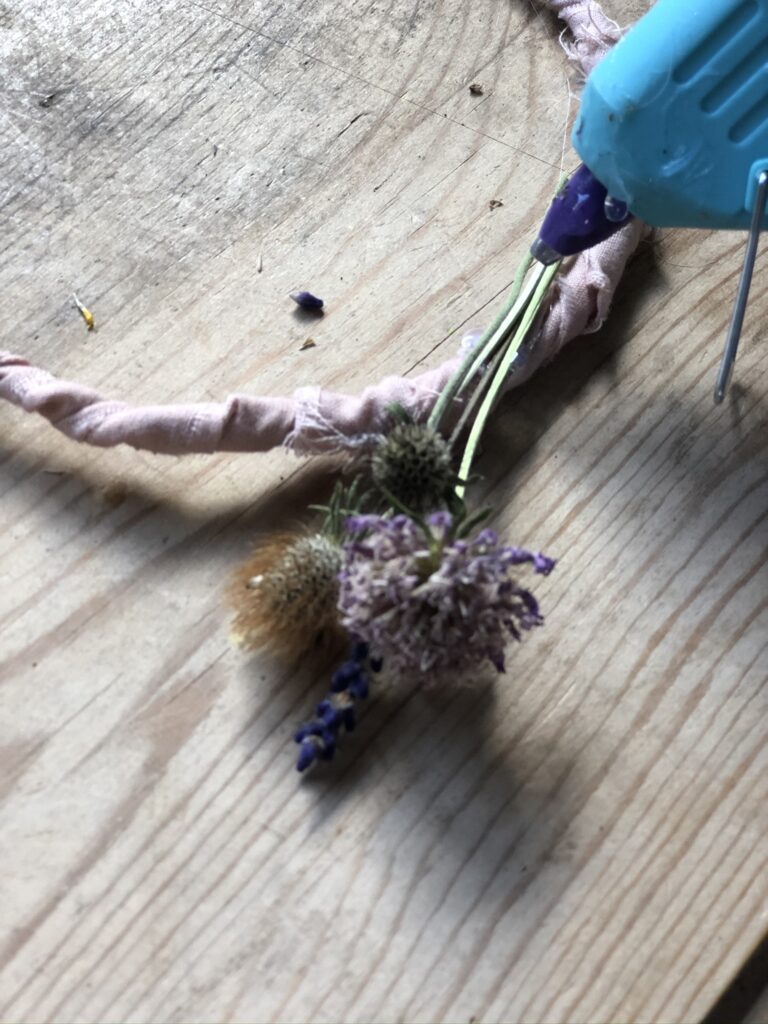
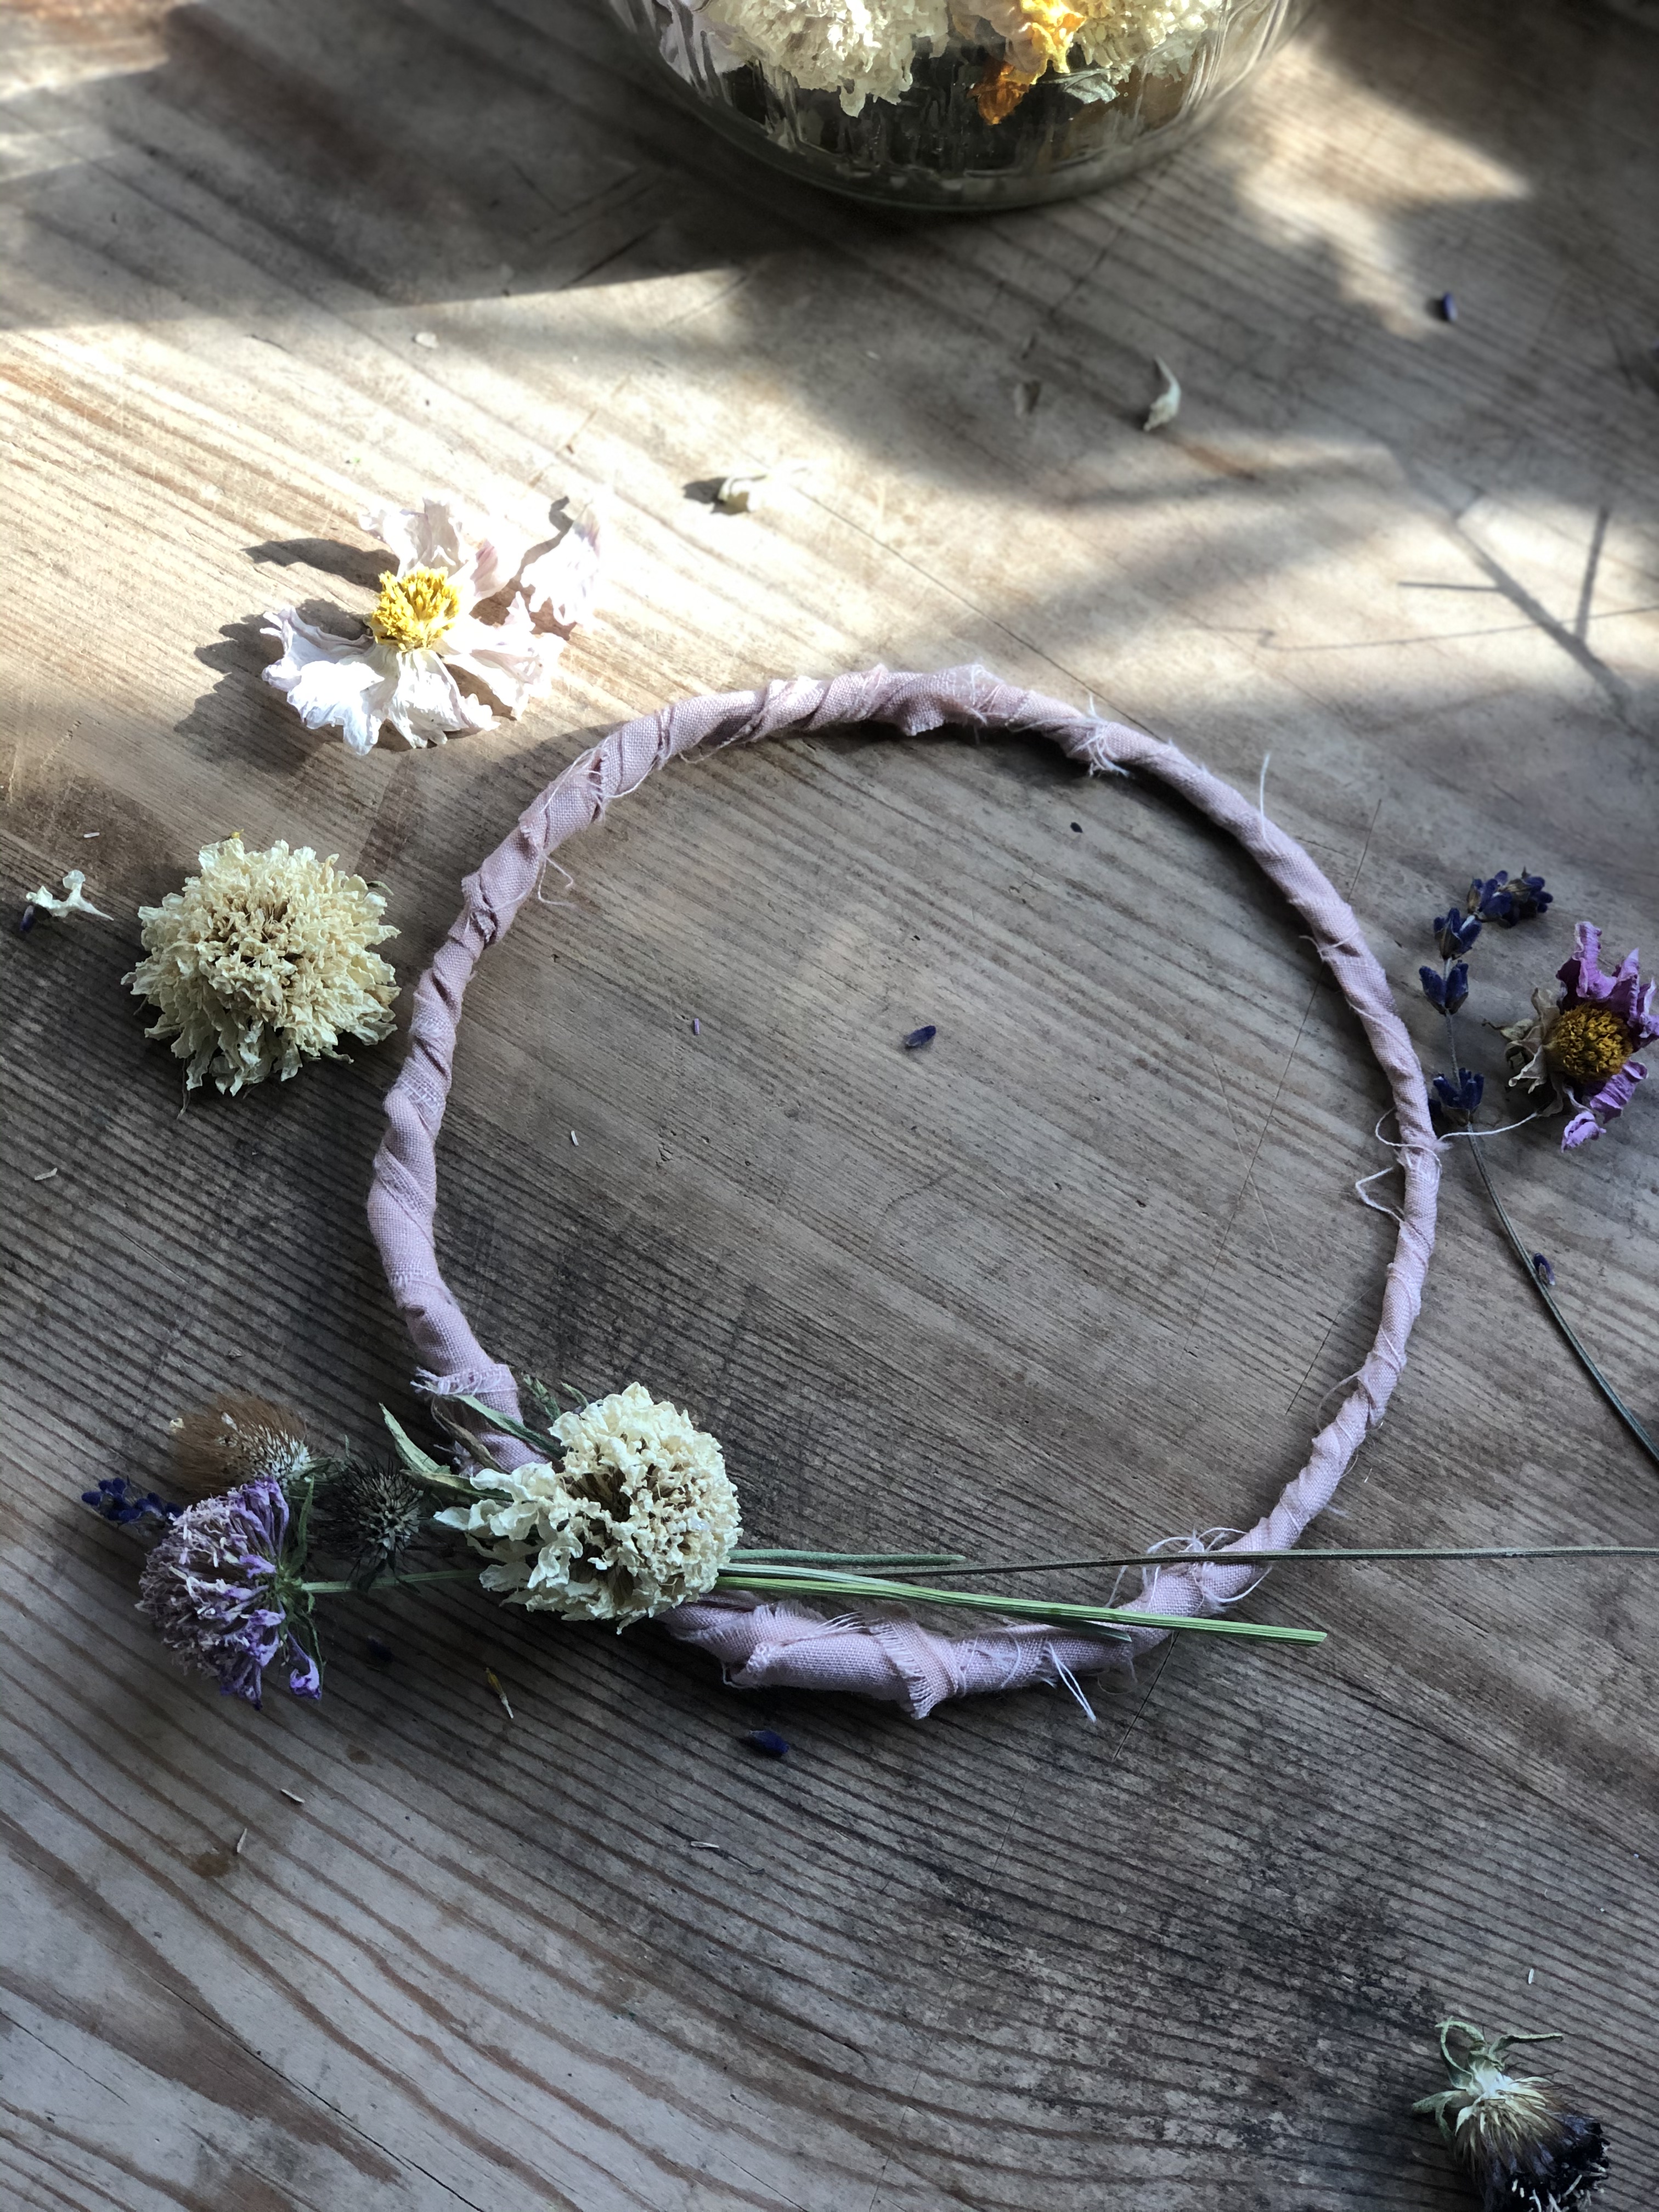
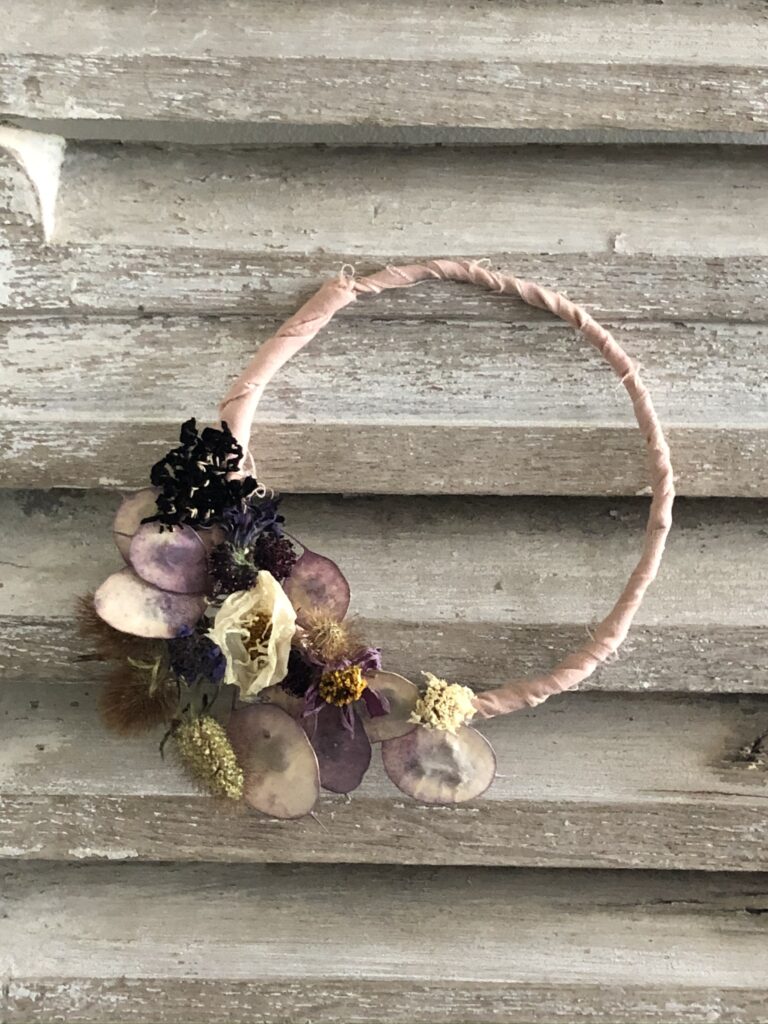
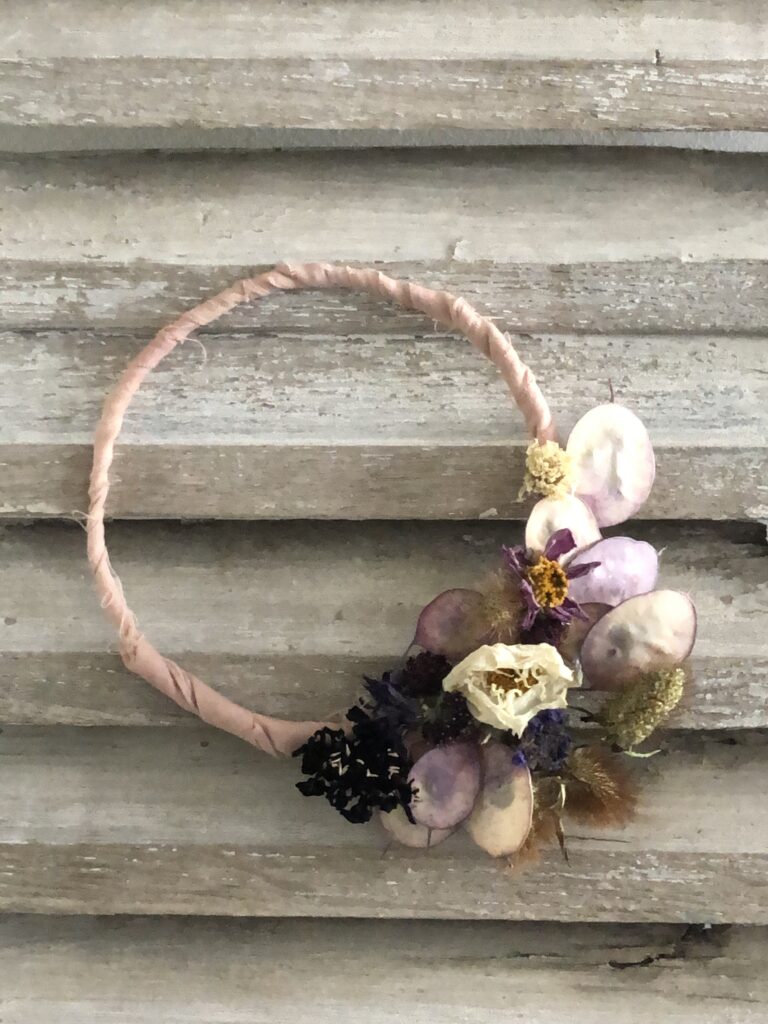
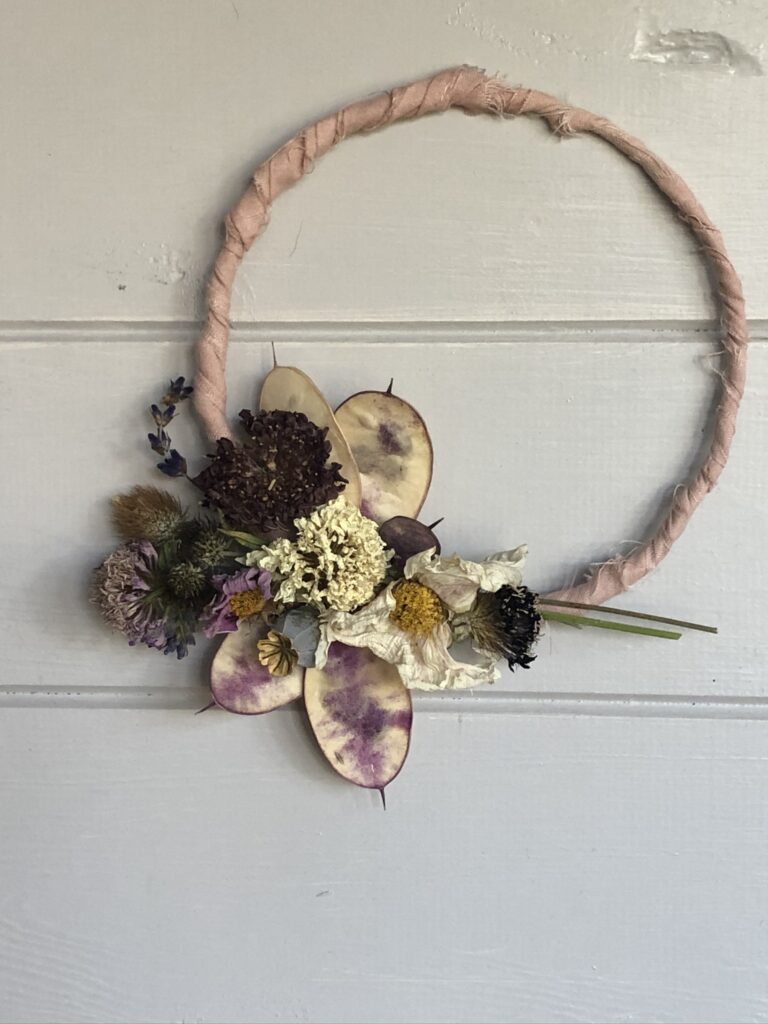
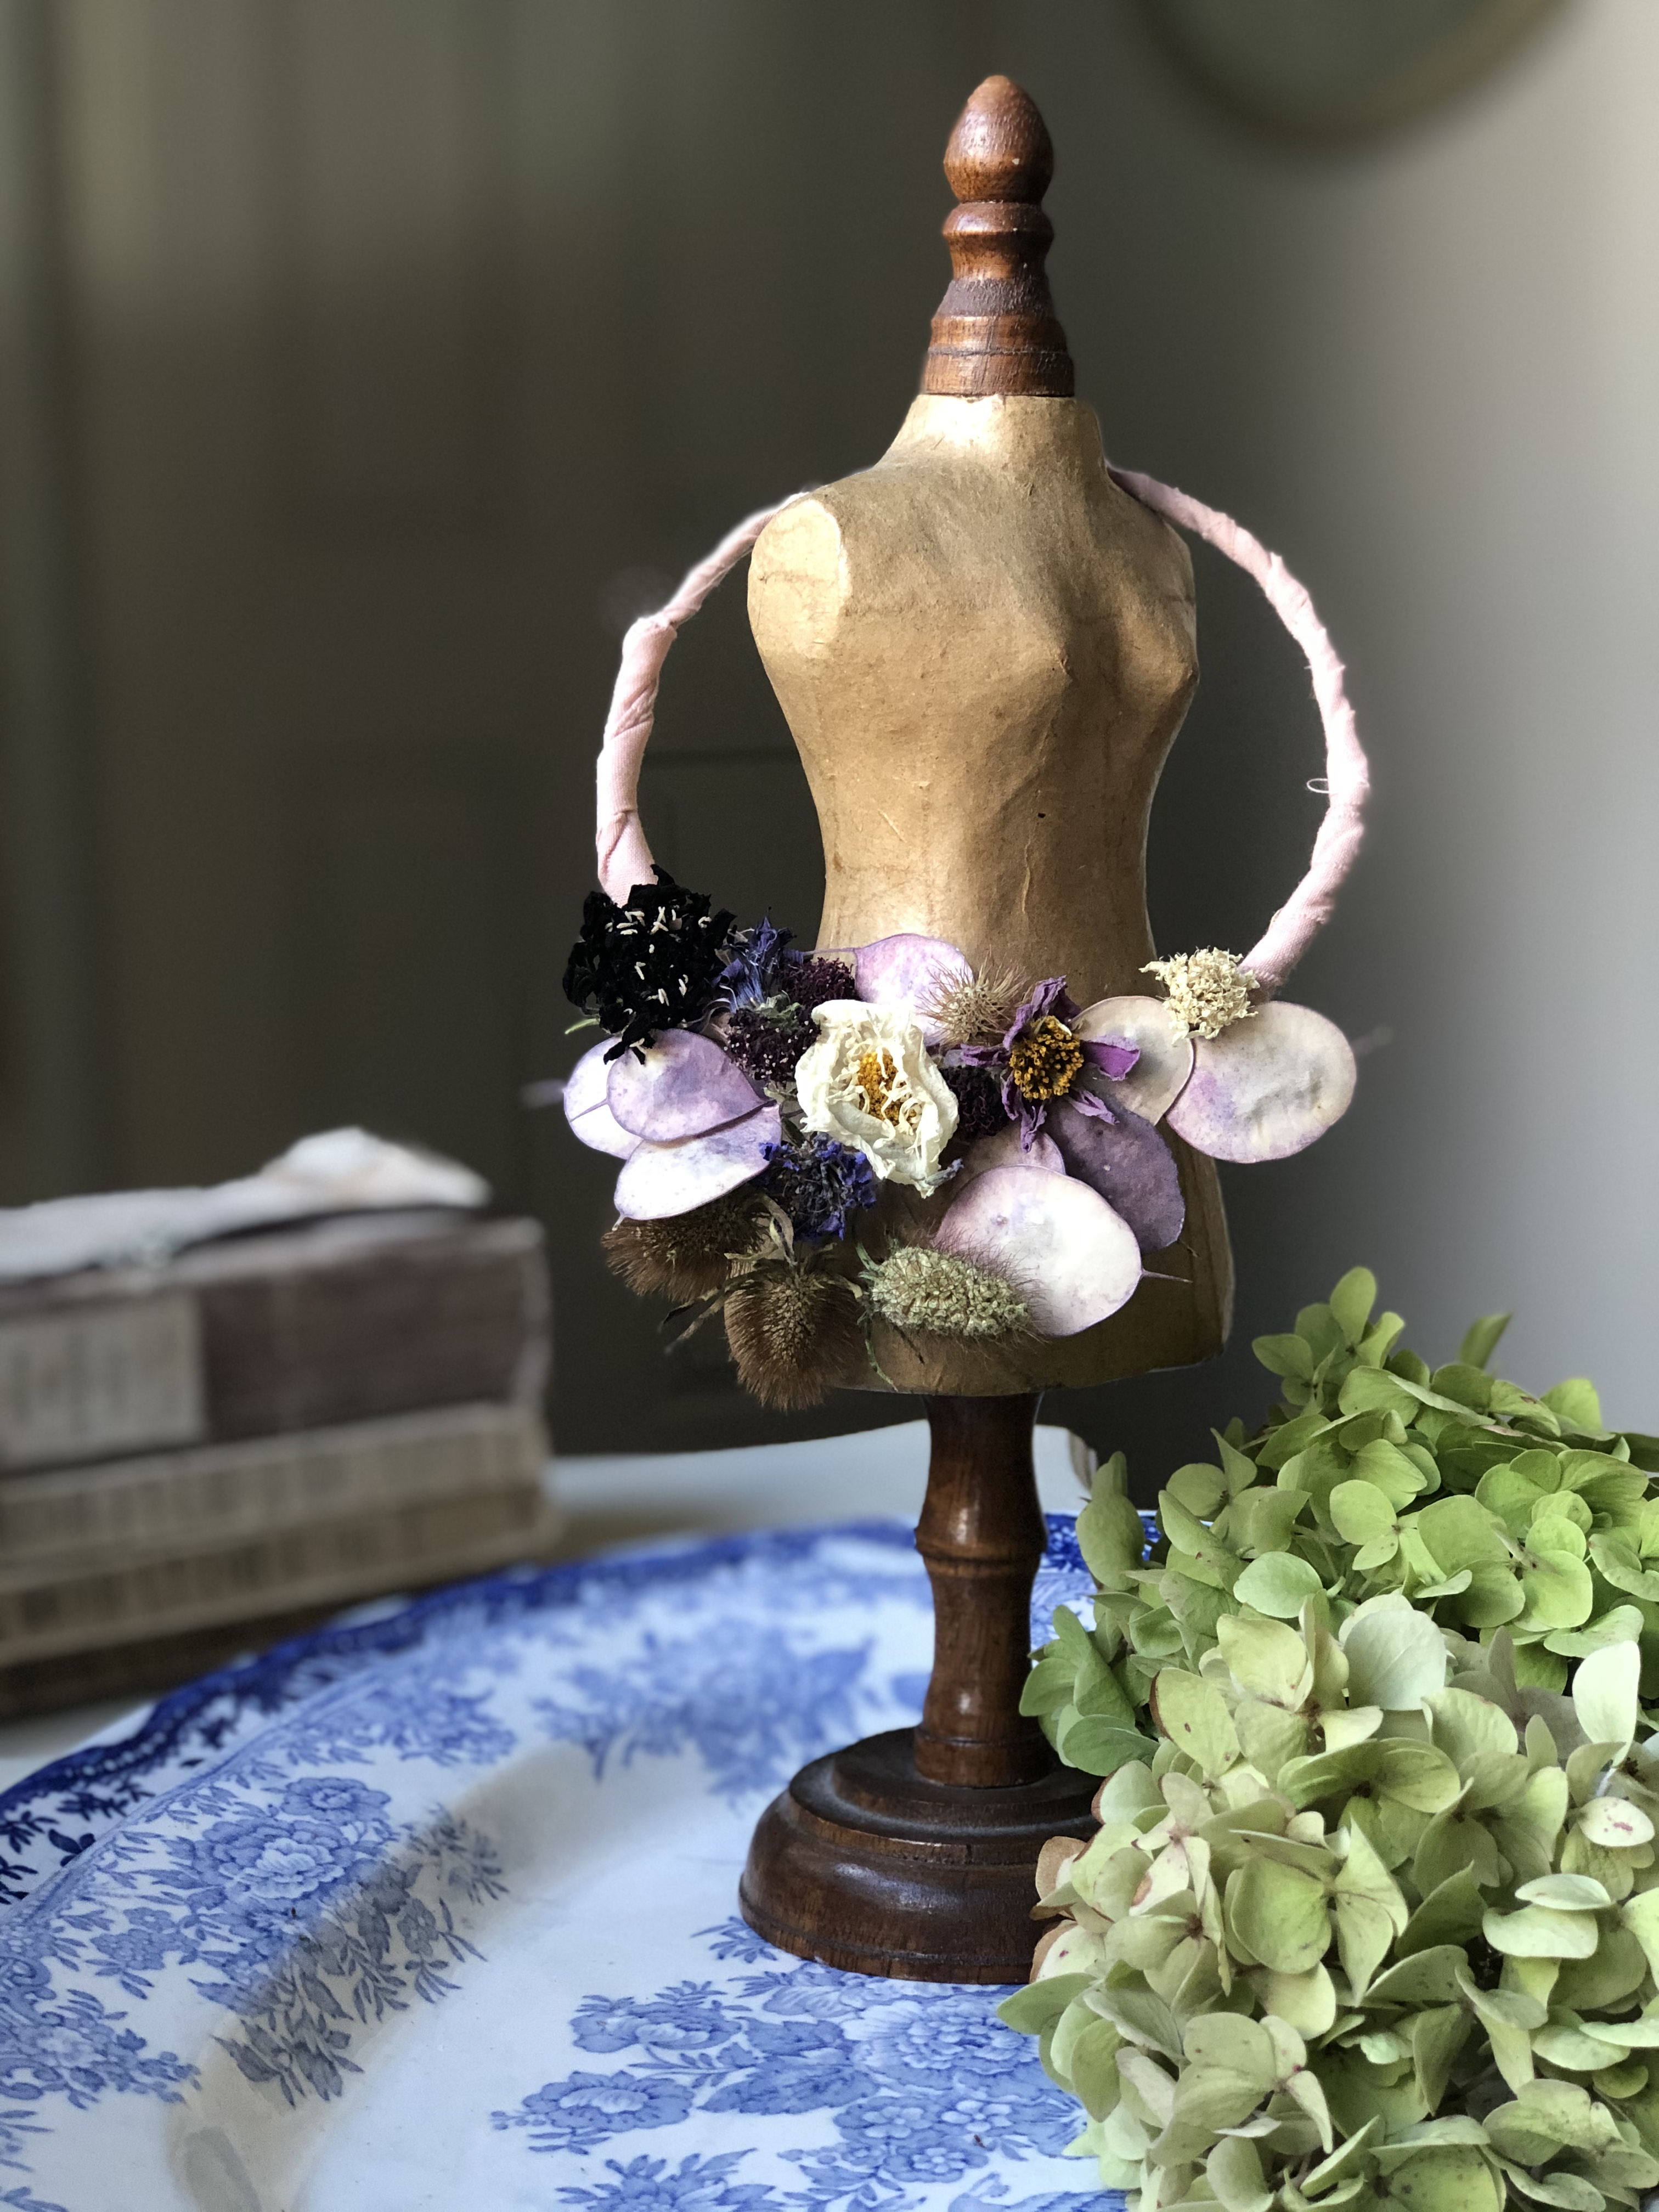
I selected a few dried flowers, petals and seed heads and keeping to a dusky pink and autumnal purple theme, applied glue to the flora and positioned onto the fabric taking care not to damage the delicate pretties. Cosmos, Scabious, Lavender and Honesty all played their role, some with crisp petals intact whilst others showed off their elegance in a final subtle seed head. You can add one at a time or hold a few stems together and fasten. You may notice I only add them to less than one third of the ring. I find this the most forgiving way to dress a wreath. No symmetry required. On this hoop I left a few stems to add to the decoration although on the second shown below, I snipped them off. You’ll develop your own style as you go.
And that is as difficult as it gets. The most beautiful dried flower hoop, at virtually no cost, thoughtfully recycling our way through our gardens and parks and quite the perfect craft for improvisation. You could try acorns and hazelnuts foraged on an autumn walk, dried flowers, seed heads and petals from your garden or maybe a friends. Use ribbons or even a torn up pretty linen tea towel too delightful to dry dishes with to disguise your hoop. I may even add another ribbon to hang mine once I decide on a suitable home.
It seems Mini Doris is rather taken with her floral hoop too…
And finally for today, here is another take on a simple mini dried flower wreath you might like to try. And if dried flower hoops and wreaths aren’t your thing how about a delicate dried flower garland like this one or maybe a dainty dried flower posy like here. There are lots of ideas in this blog – and on my Instagram account – for creating with and displaying dried flora and foraged finds. Simply type ‘dried flowers’ or ‘autumn’ into the search bar located at the bottom of this post if you’re viewing on your phone or to the right of the screen if you’re reading on an iPad or computer. All these ideas make beautiful gifts as well as decorations for your own homes.
I hope there’s a seasonal craft in there for you and that you will join me again next week for a thoughtful paper craft; it’s an idea I have been playing around with for a while now, until then…


So glad you liked them Julie, yes the avocado dyed material is being used well I discovered the beauty of dried cosmos simply by forgetting to throw them out before they shrivelled up. Serendipity I think they call that! Thanks for reading and stopping by x
How lovely Helen! It looks like you used some of your avocado dyed cloth as well? I had no idea that cosmos could be dried. I love those – tried to grow some this year, but sadly they got stamped in the continuing house renovations… Anyway, love this idea!
Ha ha this is so funny! I haven’t got three will two do? Coming right your way Little Miss, love you and thank you x
I KNOW A SUITABLE HOME!!! I know I say it every time but, this is my FAVOURITE post?! It is absolutely STUNNING how do you come up with these ideas which always look so beautiful! Pretty PLEASE may I have one?! (or 3) xxxxxx
Thank you so much Christa for your lovely message. I’m so pleased you enjoyed the craft and read. This really is a quick win… I’ll bet some of your beautiful flowers will dry perfectly for this! Have a wonderful weekend x
So beautiful Helen…I will have to give this a go at some point.
Your photos are so lovely too x
I just knew when you showed me your dried flower heads they would look absolutely delightful on a hoop! I’m so pleased you enjoyed the read and the craft, thank you for letting me know, lots of love xx
Oh Helen, what a lovely inspiring blog and craft to read while having my breakfast! Now I know what i’ll be doing with my dried garden flowers!… …now to find some wire and my glue gun! xxxx