And just like that another summer ends here in my part of the world and I am delighted to be back with more stories to share with you. Hello, how are you, how was your break? It’s been a while and there are lots of new readers joining us too, so welcome to you all, I hope you enjoy what you read here. A long break affords one the luxury of recharging their creative batteries and I have so much to share with you all. My hope is that you will try a few ideas for yourself and perhaps feel comfortable enough to join in our chat by leaving a comment or two in the box below each new post, each week. So, between now and Christmas I have a great many new and exciting crafts to share. I will be using a variety of crafting medium; paper, gorgeous dried flowers, of course lots of fabric and I have one or two more wire projects I’ve been practicing too using easy to come by thin floristry wire. All are delightfully simple projects and wherever I can, I shall be making good use of treasured stash you are bound to already have. The recycling and reusing message will remain as important as it has always been around here and I have the odd furniture upcycle too which is in fact where we begin this week. Today we are upcycling a sad and sorry looking bookcase. What was once an uninspiring dark piece of furniture is set to be transformed before your very eyes into a gem of pretty storage with the help of chalk paint and a fabulous new tool I recently won in an Instagram competition. Intrigued? Then do join me…
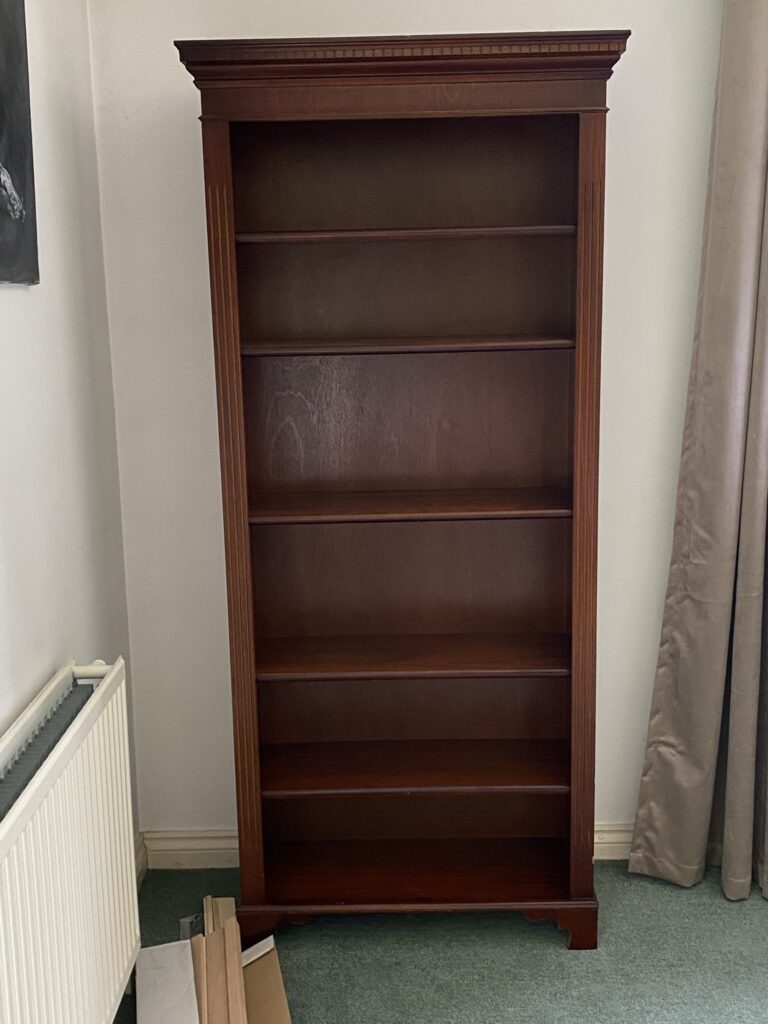
I wonder if you recall The Little House. Once a grotty garage and since transformed into a wonderful craft studio for me to create to my hearts content. For more years than I care to remember, crafts have been created on my dining table. These days I am spoiled with a whole room of my own to play in. For most of lockdown I shared the space with Master M. Once he and his desk had gone, it became noticeable the room lacked storage. I imagined old preloved shelves full of dents and chipped paint work and so when I found an advert for a solid old bookcase and saw a photograph of a dark dreary unit, by chance near Mr M’s place of work, I was hopeful. Upcycling a bookcase like this one I thought, might create the perfect home for my growing collection of vintage linens.
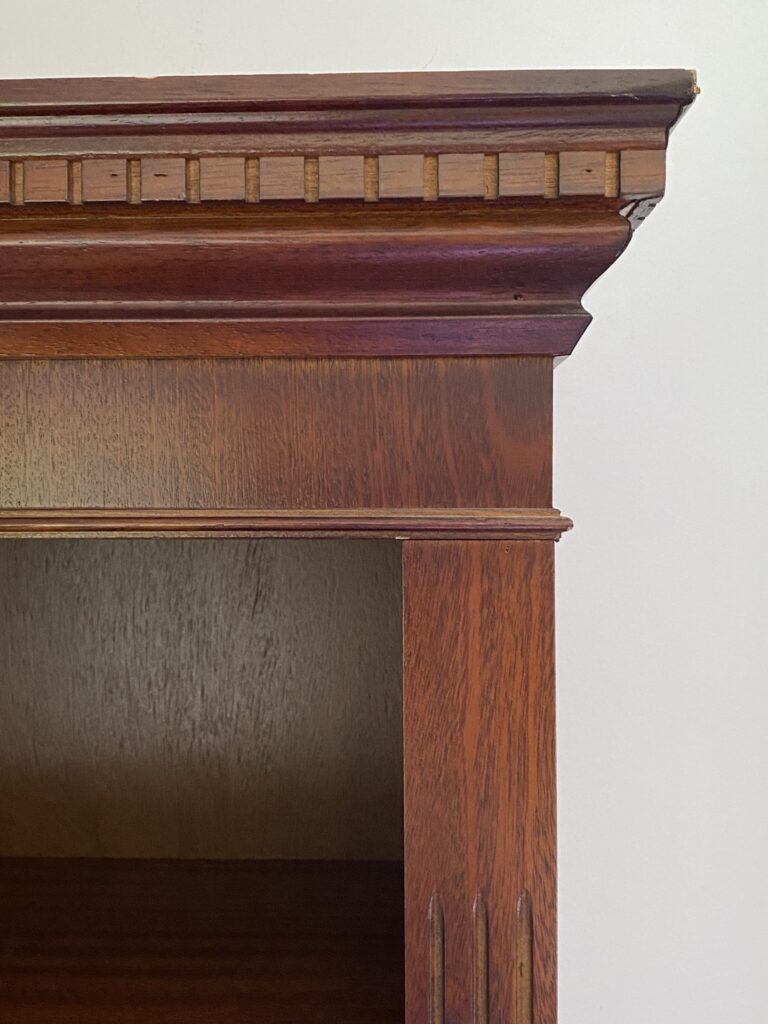
“Can you pick up this bookcase for me please darling? It’s a fabulous solid bit of furniture just very dark and gloomy that’s all. A fresh coat of paint and a little faff with some treasures and it’ll fit in at The Little House just perfectly” I jabbered on rather excitedly one evening in summer. My excitement soon turned to disappointment that evening however as Mr M manoeuvred a heavy MDF bookcase in through the front door mumbling he was pretty sure we were supposed to be get rid of tat, not adding to it.
After deciding I would sell the newly purchased bookcase and trawling the internet and charity shops again in search of light and chippy to no avail, I sulkily shared my plight with Mr M one evening who rather matter-of-factly said “well go work your magic on what you do have then.” Worryingly, he is beginning to sound a lot like me and so, I gathered together all I might need.
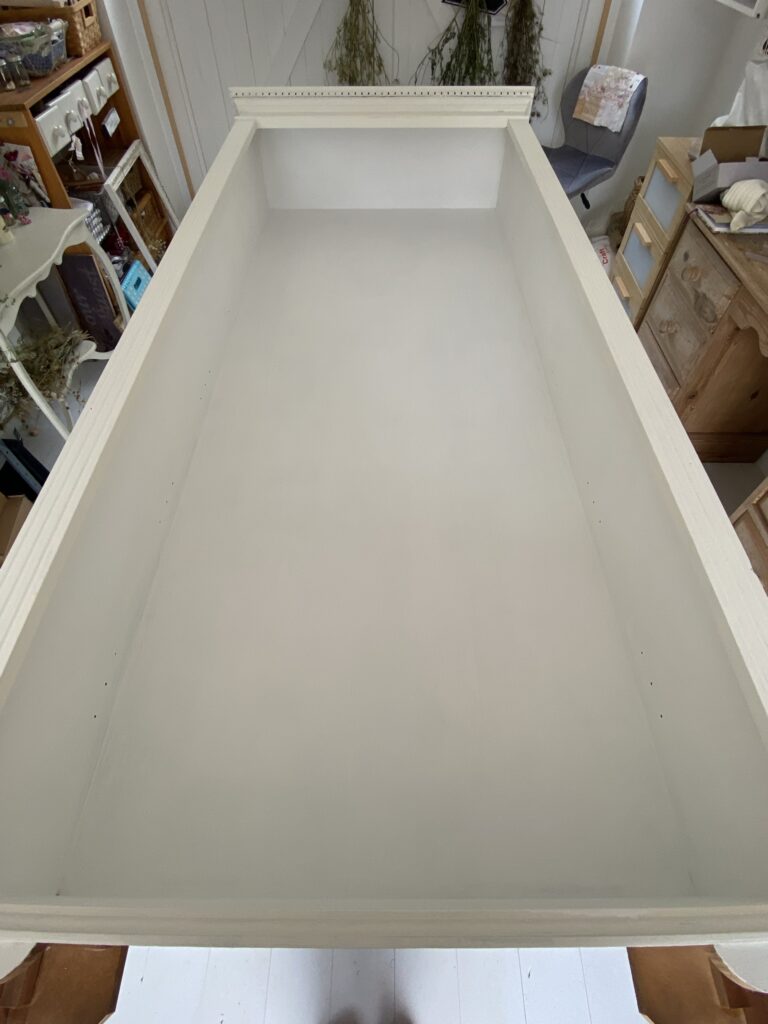
Rustoleum’s Antique White Chalk paint suggests no primer is needed with this product and I may have fallen into this trap once before. Maybe no primer is needed; three coats of chalk paint are needed however which to my mind is a little excessive and expensive. Too late for another option for the shelves, I stuck with it…
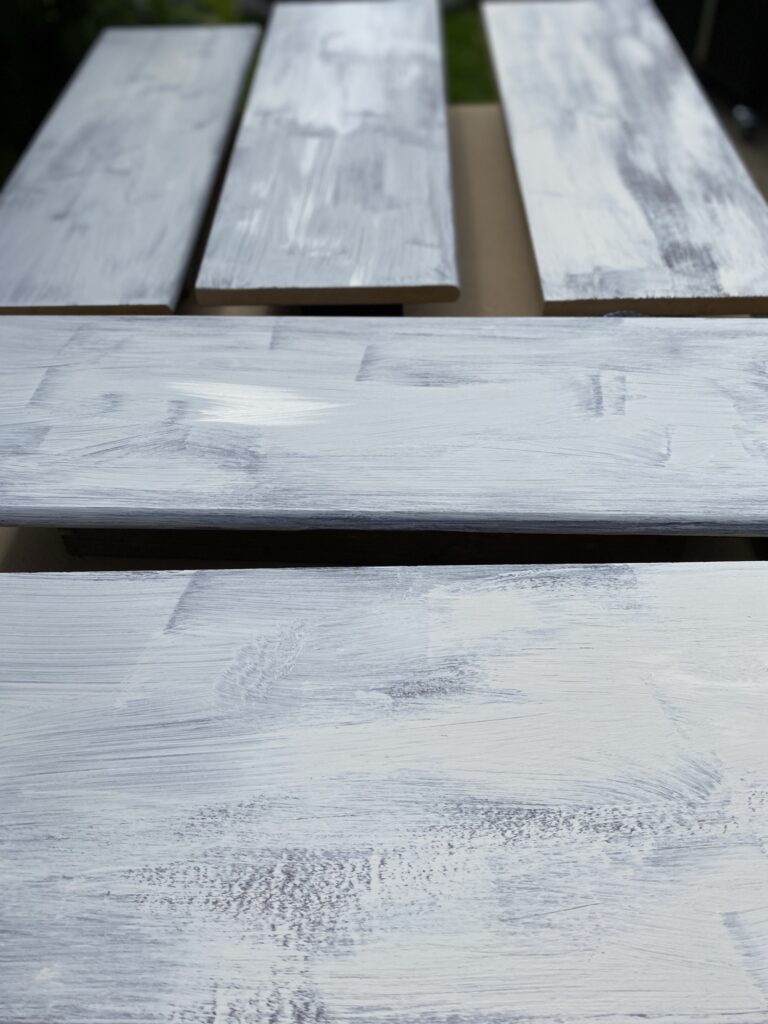

For the outer casing of the bookcase, I primed first using this and applied two coats of the chalk paint and then, the chalk paint ran out. So, ever the thrifty up-cycler, for the inner casing, I used two coats of white matt emulsion left over from one of the rooms in the home we are currently renovating. I’ll be in trouble when the decorators come back. Look too closely and you’ll see the difference in paint. So don’t look too closely and hopefully you are a brighter button than I and you’ll learn from my mistake.
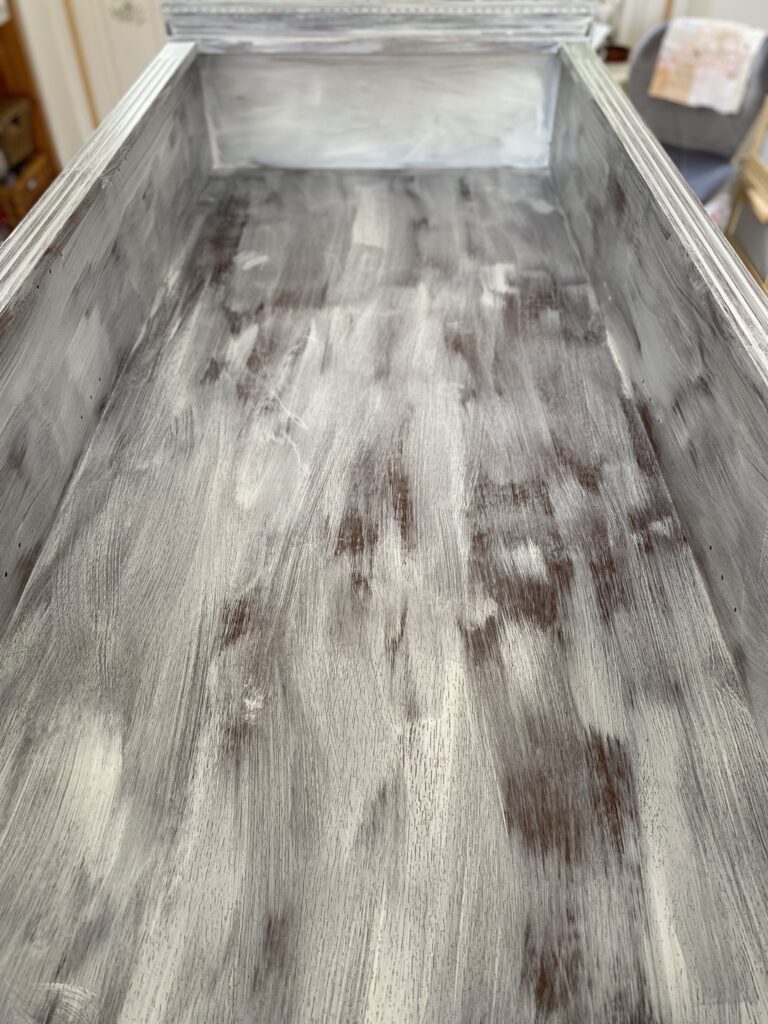
Once everything was bone dry, I used a 60-grit sandpaper to simply wipe off paint where time might naturally rub it away. On the corners of the bookcase and at the edge of the shelves. I chose not to wax or protect this bookcase in any other way; you might wish to wax yours and if so, this tutorial offers the help you will need.
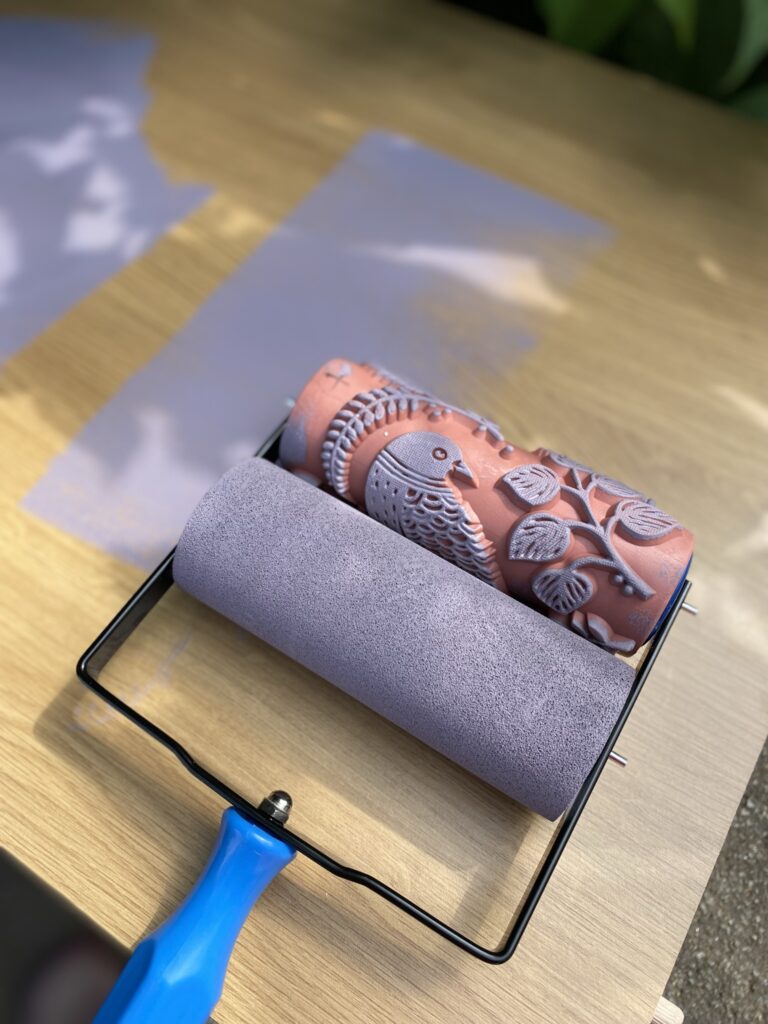
The next stage of my project was just too exciting. The Instagram win I mentioned at the beginning of this story. The very lovely Sandy @behind_the_pink_doors ran a competition to win an embossed paint roller. I had seen one of these put to good use on a telly box show and I crossed every last thing that I might be lucky enough to win the competition not expecting for a second, I would. And when I did, I could not believe my luck.
This time I decided I should practice what I preach and research thoroughly how to use the tool before I began. I read instructions, watched a YouTube tutorial and then I suggested Mr M might like to watch it with me too “since I might need your help.” He set me up a station to mix the paint, passed me some lining paper to practice on and left me to it well aware that should this stage of upcycling a bookcase go wrong, it might well end up being his fault. I turned all alchemist and enjoyed a few slow minutes combining two tester pots of Farrow and Ball’s Brassica and Calluna left over from painting the new en-suite.

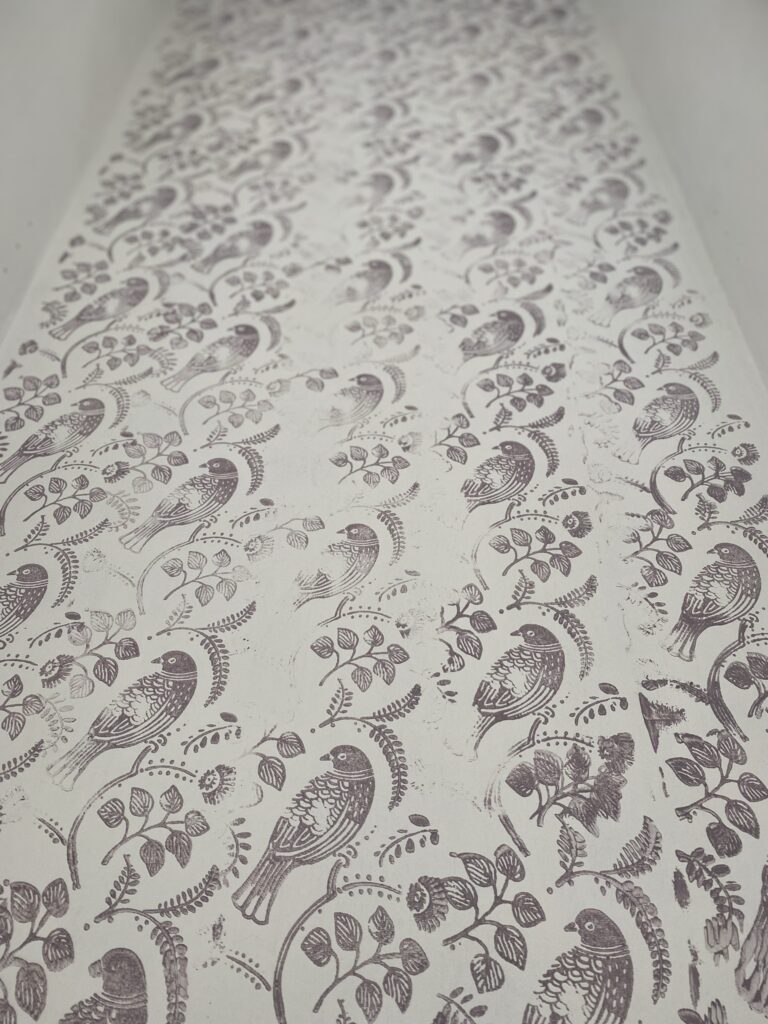
I practiced for a while on the lining paper – fabulous way to create your very own bespoke gift wrap – and stood gawping at the back of the bookcase for the longest while before I took the plunge.
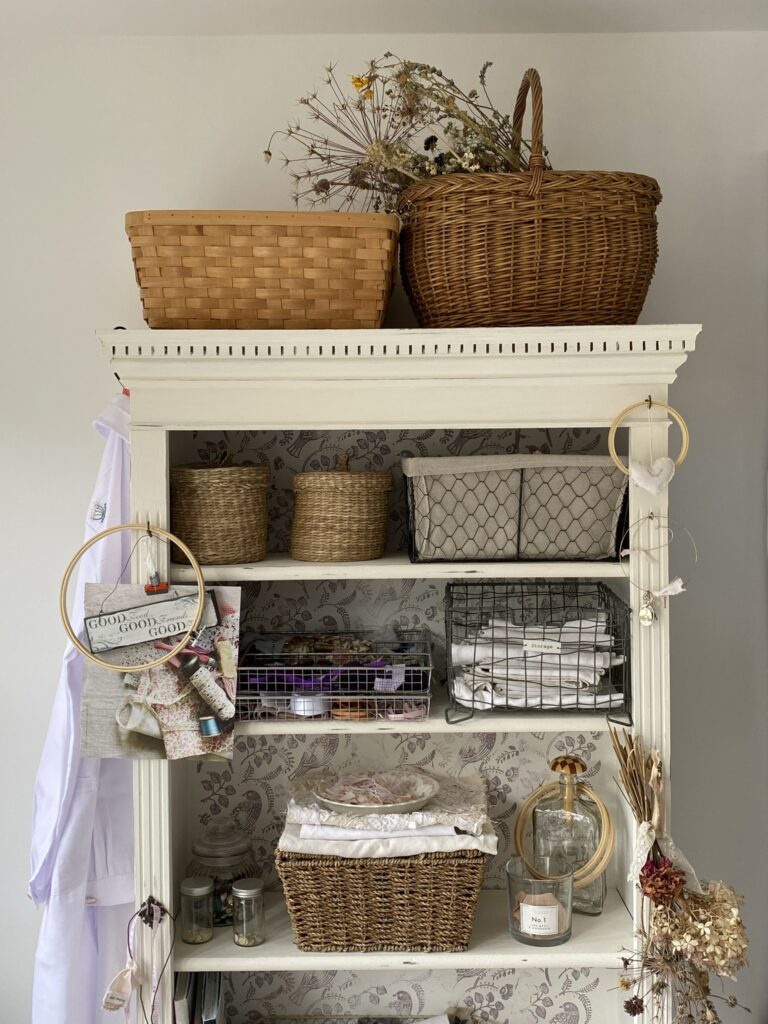
I had a couple of placement issues with the roller and I didn’t apply quite enough pressure right in the middle of the bookcase which is a little annoying since this is where your eye is drawn to first.

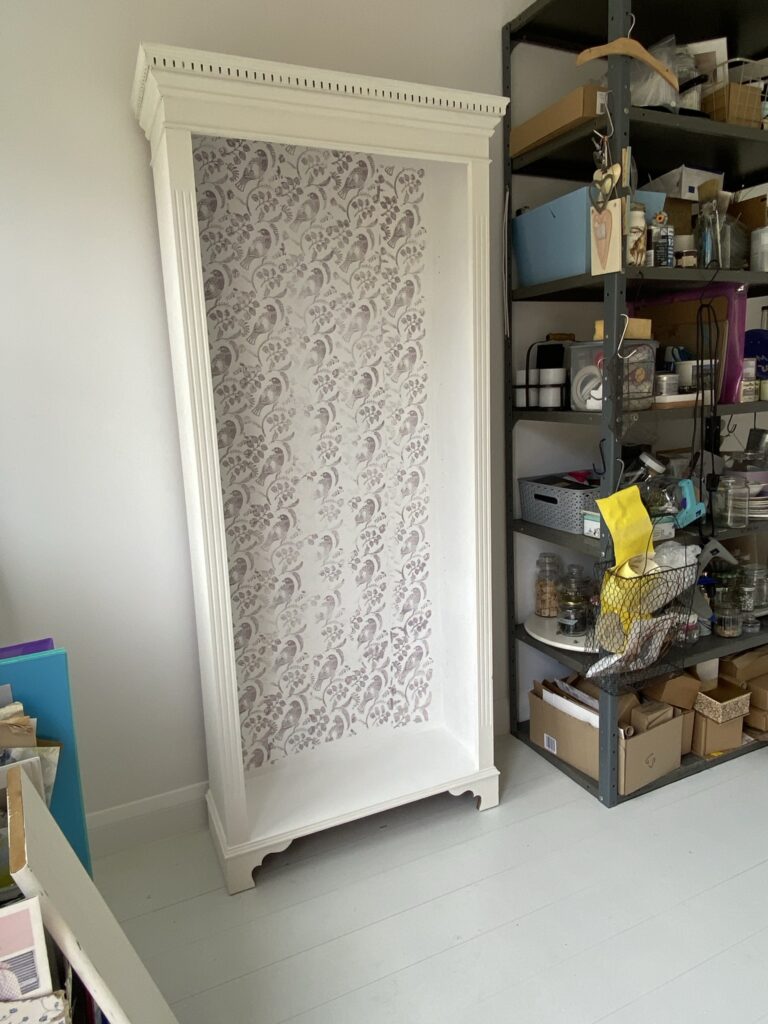
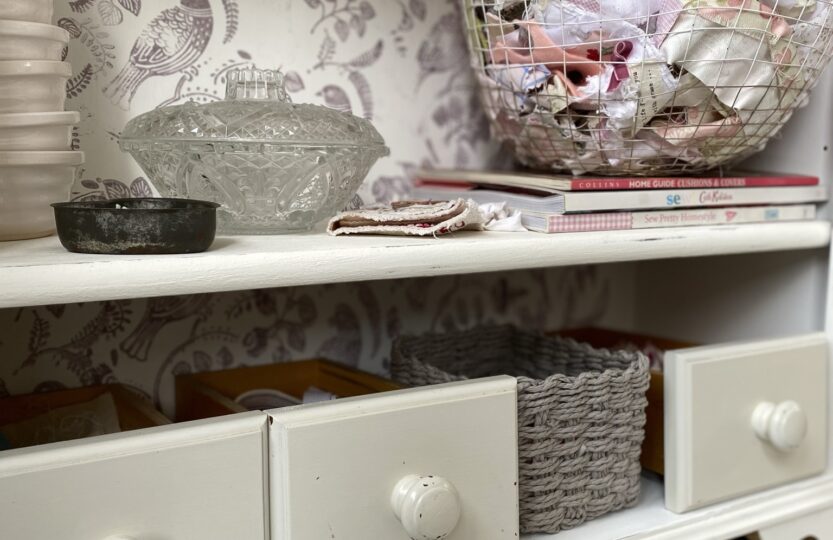
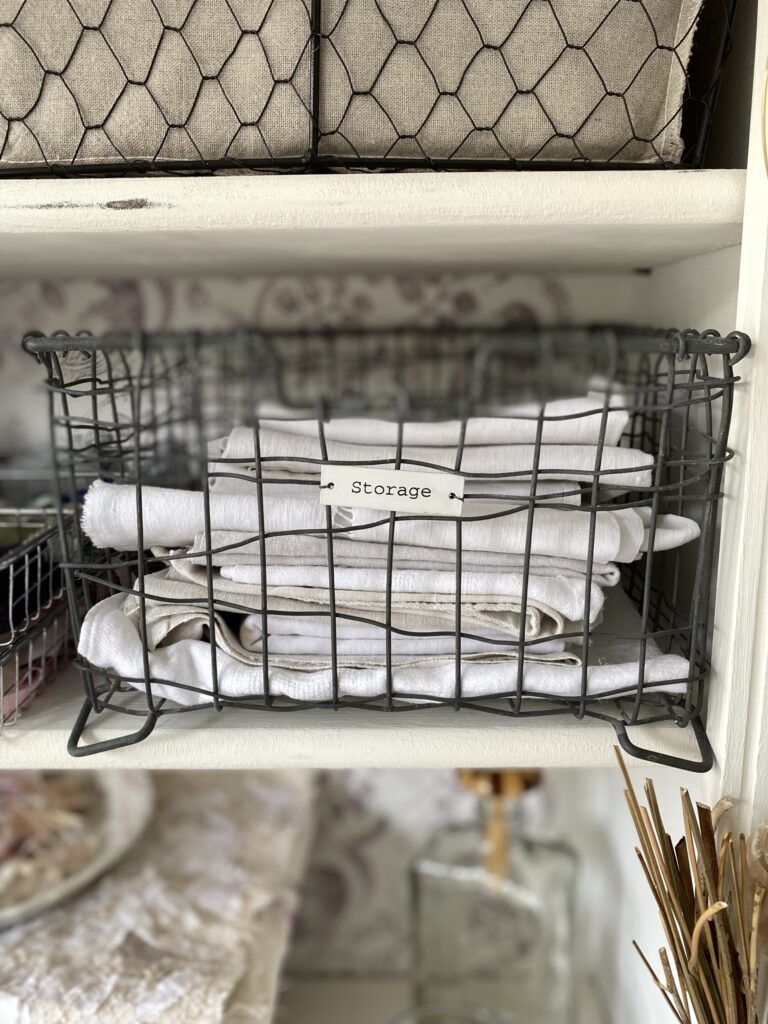
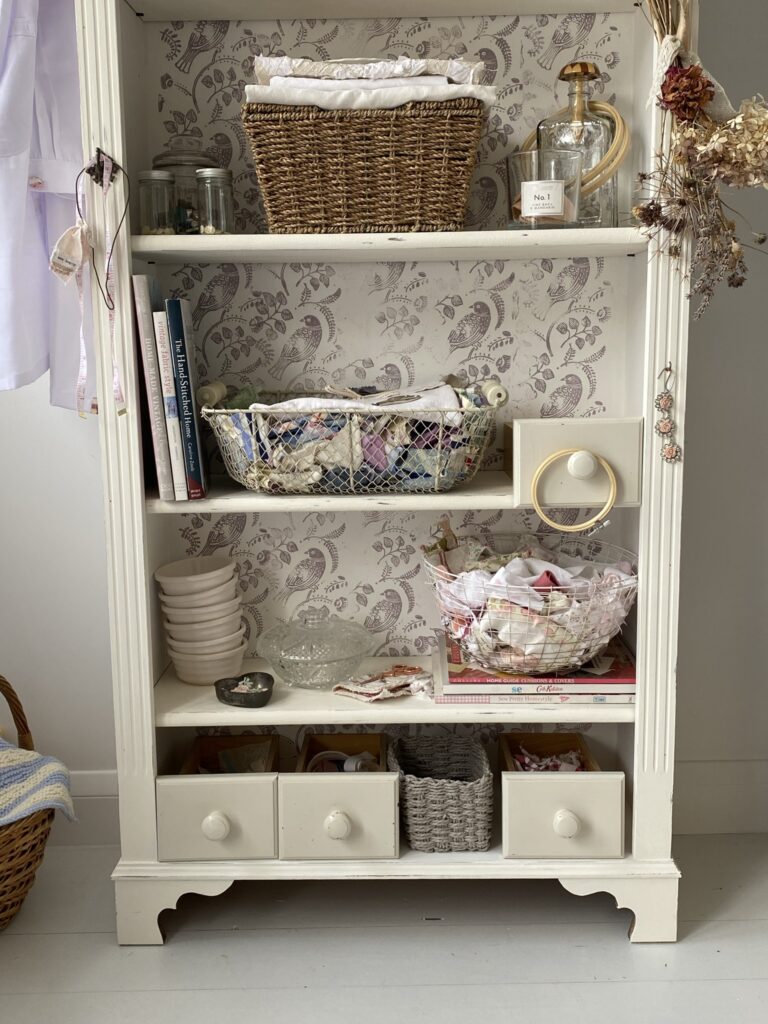
Yet I reminded myself, the finished item doesn’t stand empty against a wall with one’s eye drawn to its centre. It is more likely when you are upcycling a bookcase like this, those glitches will be hidden by your beautiful books, baskets and treasures. In my case my upcycled bookcase is now appropriate storage for many beautiful trinkets and treasures which until now, lived their lives tucked out of sight in desk drawers. And do you remember the sweet drawers in the first photo below? Have a look here for how these have been reused and reinvented over time…
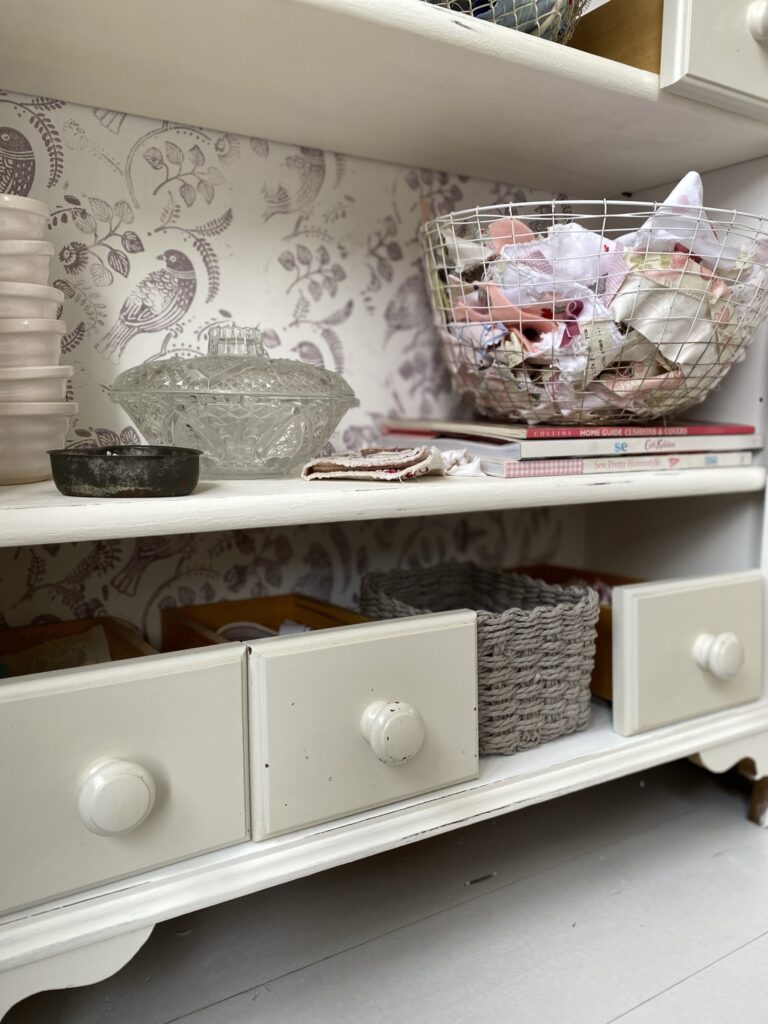

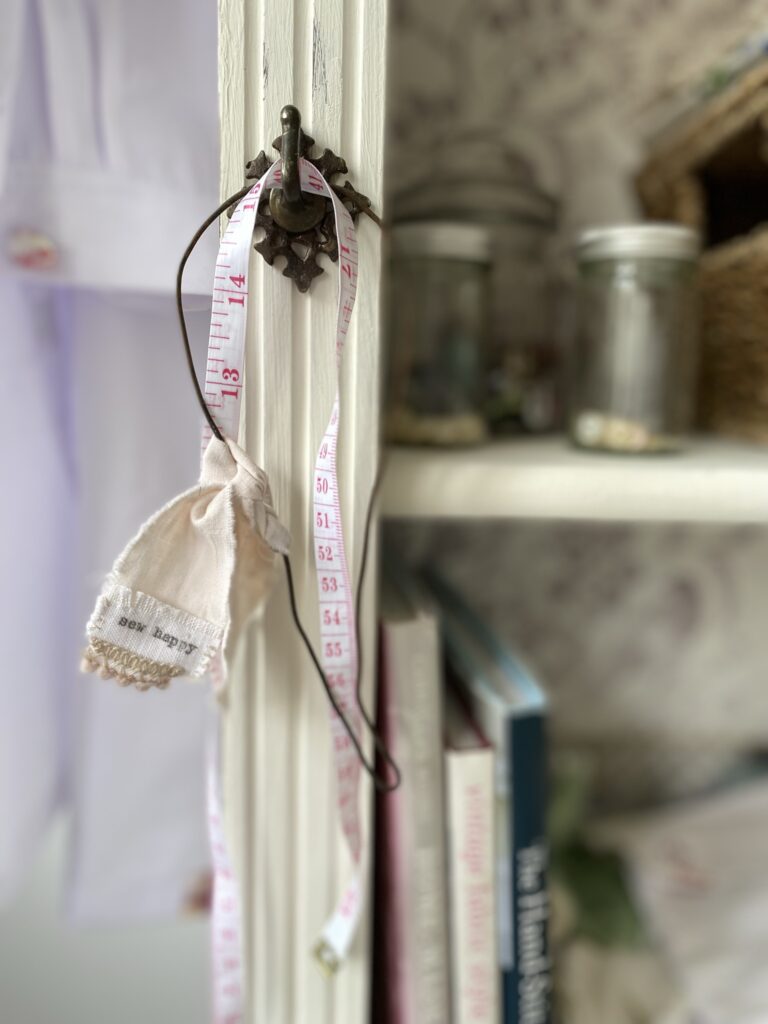
I screwed a couple of brass hooks here and there and added a few trimmings, a heart or two, a dried flower bouquet and more of my favourite fancies.
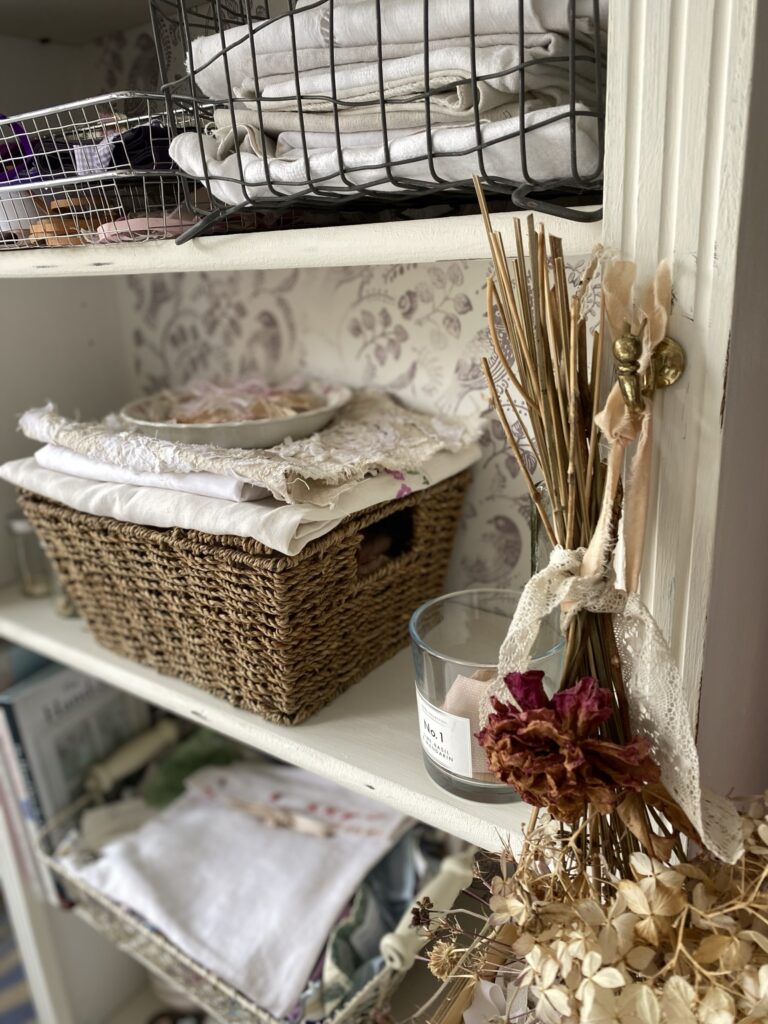
My upcycled bookcase is now everything I had first dreamed it might be. It is chippy and worn in places and is home to my vintage linens and scraps. All kinds of delightful ephemera are dotted amongst its chalk painted shelves and I could not be happier with how this project turned out.
I have another moment for the embossed roller coming soon. More practice is required however since I cannot afford another placement issue.
So now do you have the bug to go upcycling a bookcase or perhaps another similar piece of furniture and reinvent its purpose? I’d love to see if you do.
Next week, sees the return of Whitewood and Linen’s monthly newsletter In Real Life and you will recall, you must be a subscriber to the blog in order to receive this newsletter directly to your inbox. So, if you are not already subscribed and you would like to take a closer look at what has been going on behind the scenes here over the summer, do fill in the form directly under this post. I do hope you enjoyed this furniture upcycle and I shall be back the first Thursday in October with a beautiful seasonal craft you will not want to miss. Until then…x
Upcycling a bookcase for my treasures was great fun and there are plenty more upcycled pieces on this blog which might inspire you too. Here’s what I did with an old box and a stencil, here are two stools reinvented and here is an old drawer given a new lease of life


I have JUST the very craft coming soon!x
Wire stuff please!!
I am so pleased to read you love the makeover too my lovely friend and thank you for your kind words. The birds are a little addictive and I have two more crafts in mind for this little roller; first though, more practice x
Thank you darling, I’m so pleased you love it too. Looks better than when it was first plonked in your bedroom doesn’t it?!x
Thank you so much Linda, so lovely to read you like the upcycled look too! It’s the perfect place to store my trinkets and treasures now!x
The bookcase came out beautiful! Love it! And all the things you put on the shelves. 🙂
Truly brilliant! You are clever Hels, looks brilliant in your little house xx
So pleased to have your funny and clever blogs back! And such a transformation Mrs M. I would feel like going around spreading birdies everywhere! A great start to the season. xxx
Ha Ha Jessica that made me giggle, the grottier the better! Mr M was ready to take this straight to the tip, wouldn’t you think he’d know me better by now?! Thank you for reading and for being inspired and for leaving me a note to say so x
Oh it is totally beautiful Helen! It makes me want to rush off and buy a grotty bookcase desperately!
Ha Ha it was pretty grim wasn’t it? Your father wanted to send it off to landfill there and then! I’m so pleased you like it and I love being back and penning my stories, thank you darling for always being here x
Oh you lovely person you! I hope you are having a fab time and you shall have to tell me what ‘simples’ you would like so that I may oblige. Sewing, painting, paper, wire, stencilling?? Take your pick and let me know!x
Omg! I did NOT know it looked like that before !! 😮😮😂 wow that is one incredible transformation! You’re unbelievably clever and it’s SOOOOOO NICE to have you back! Xxxxx
As always totally stunning. My aim this season is to do one of your crafts…so please can we have a “simples” one!! Xx
Drab to fab, love it Tania! Thank you for your lovely comment, I’m so pleased you like the transformation too x
Thank you so much Helen! I’m so pleased you like it. It does require a bit of practice but I have a few more ideas planned for it yet, thank you for your lovely message x
Wow Helen, what a transformation! From drab to fab. An absolute triumph! And styled so beautifully too. Love it! 💗 Tania xxx
Oh wow Helen, I’ve always fancied having a go with one of those rollers. What a great use of it this is. Your unit is transformed beyond recognition! Love love love❤️
Isn’t it a beautiful colour Hilary? Our new bath and radiator are in this paint; a bold choice for me really. So pleased you like the upcycle I now have somewhere beautiful for my fast growing collection of pretty linens. Thank you so much for leaving me a comment and for being here x
I couldn’t wait for coffee break time so indulged myself over breakfast! It looks fabulous Helen! I started to get excited when you mentioned Brassica as its one of my favourite F&B colours 💜 I used to use emulsion paint on furniture years ago – before the advent of chalk paint! I only ever tried chalk paint once – on a boiling hot day – and it was a disaster!