I mentioned last week I am one of those odd balls who enjoys the bleak mid winter. Strange since I actually dislike being cold yet invariably am and odd since I find dormant vegetable patches unsightly and appear to have a fair few of those myself. I suspect my enjoyment of the long grey and darker days comes from flickering candles, twinkling fairy lights and all things comfortable and cosy plus knowing that as always, this time will pass. Winter for me carries with it hope and promise of what we know is surely yet to come. A garden full of shoots, a sky bursting with sunshine, hotter days when outdoor eating and entertaining shall surely be what we plan for once again. For today’s craft though, we are sticking with hope and whilst there are still few signs of life in my garden itself, I enjoy filling its corners with messages of a hopeful future. Join me today as I share with you a simple DIY wooden garden sign made for Belle’s Cottage Garden during one grey winters afternoon which might look equally at home in a corner of your own garden…
For this DIY wooden garden sign project you will need:
An image for transferring to your wood. This might be a photo or favourite graphic
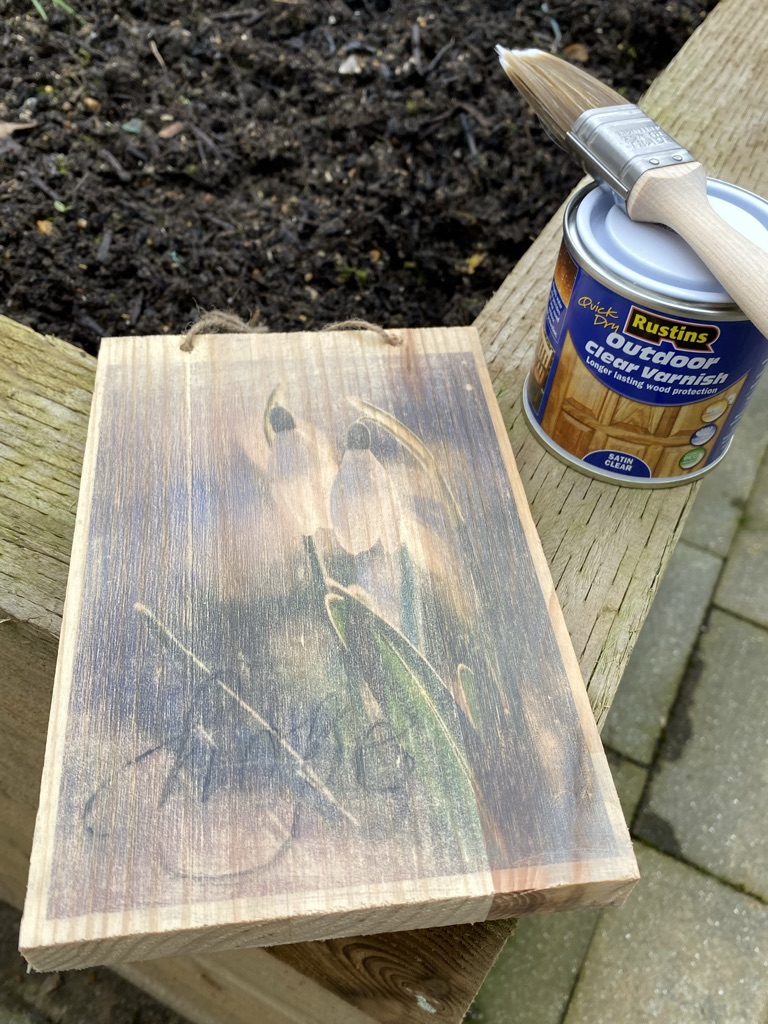
Wood – I used a well sanded off-cut of pine
Ink jet printer
Charcoal/watercolour pencil/other
Clean cloth/sponge
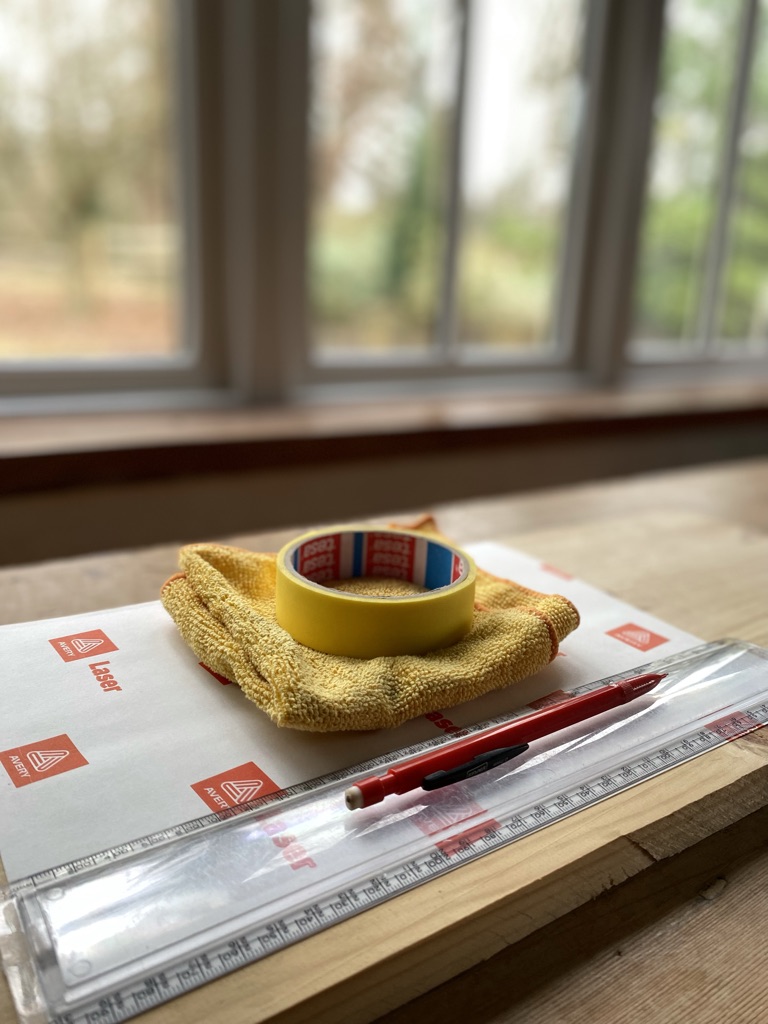
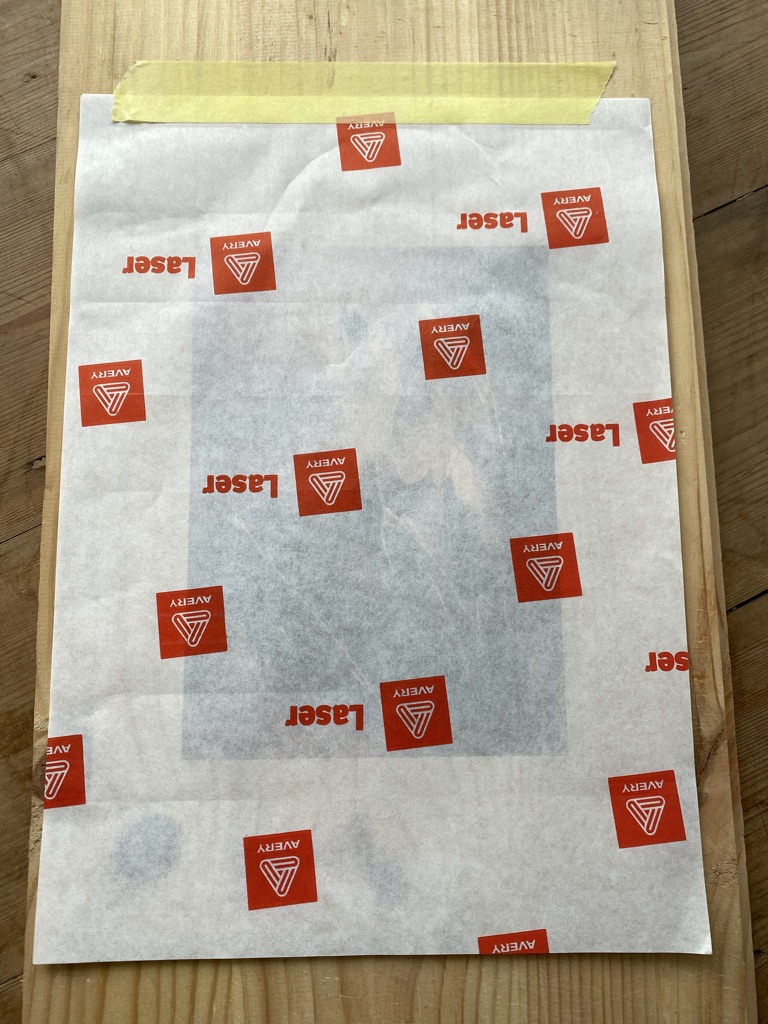
Sheet of adhesive backed labels – I used an old and unsticky sheet of Avery address labels
Masking tape
Ruler and pencil
Drill – optional
Garden twine – optional

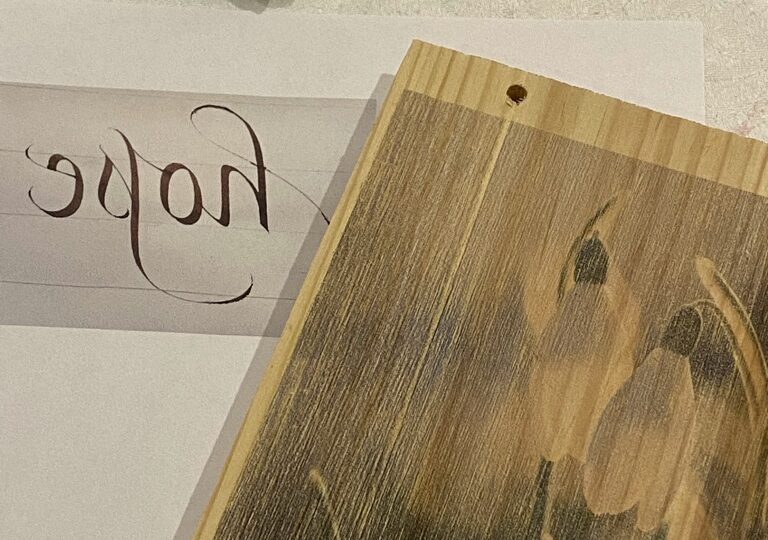
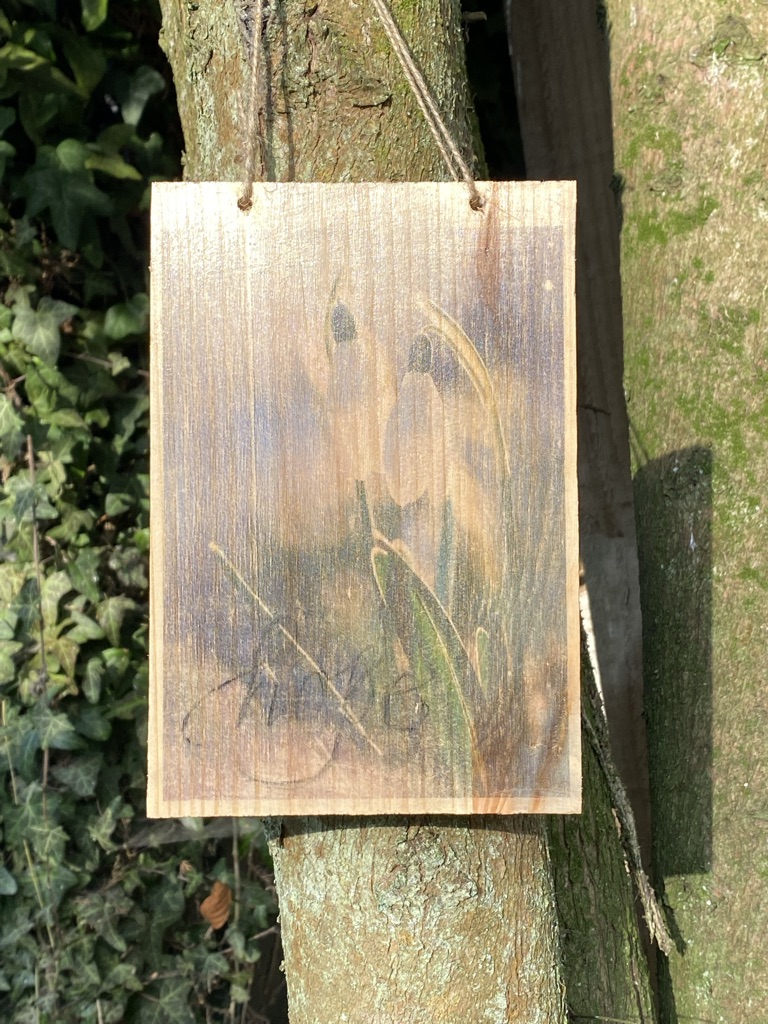
I went with snowdrops, for me always a sign of hope in the garden and I particularly wanted a muted look; if you wish for a brighter finish with more depth and pop, you should play around with your printer colour and saturation settings.
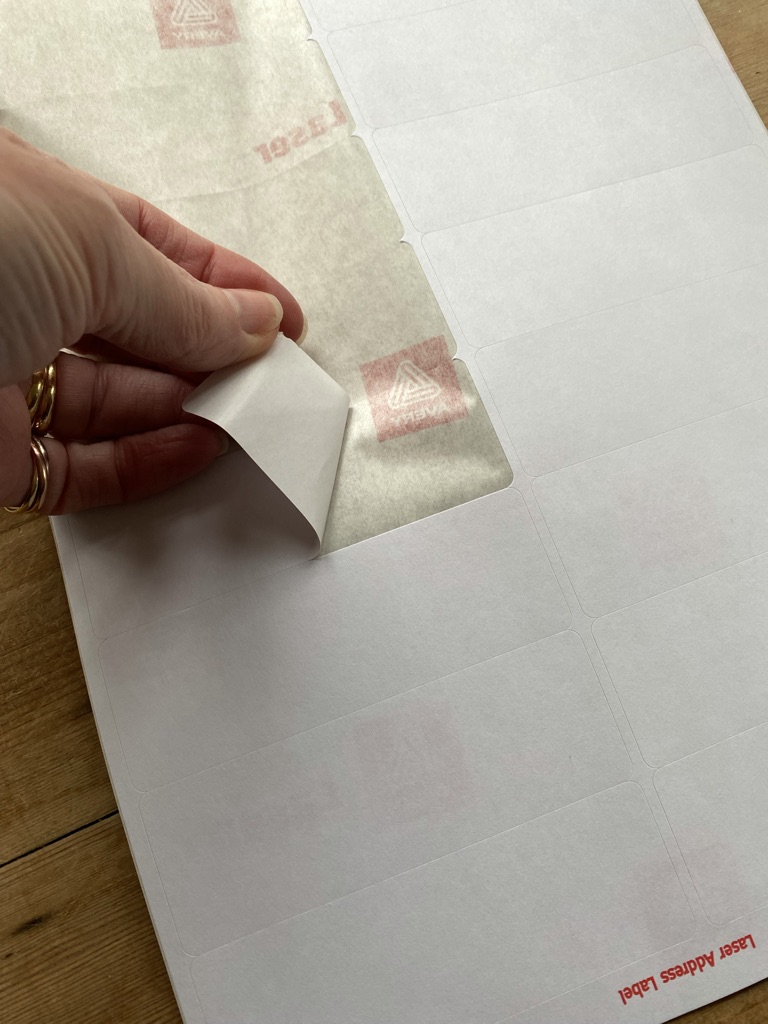
Please note the following process was carried out using an ink jet printer however there are countless tutorials on Pinterest for transferring images onto wood in other ways and using alternative printers. I can claim no credit for the following idea, I found several tutorials on YouTube showing the process. You simply need to peel off and discard unstitcky sticky labels and feed the now empty sheet through your printer ensuring the image is printed onto the waxy side, that is the side the labels were originally stuck to.
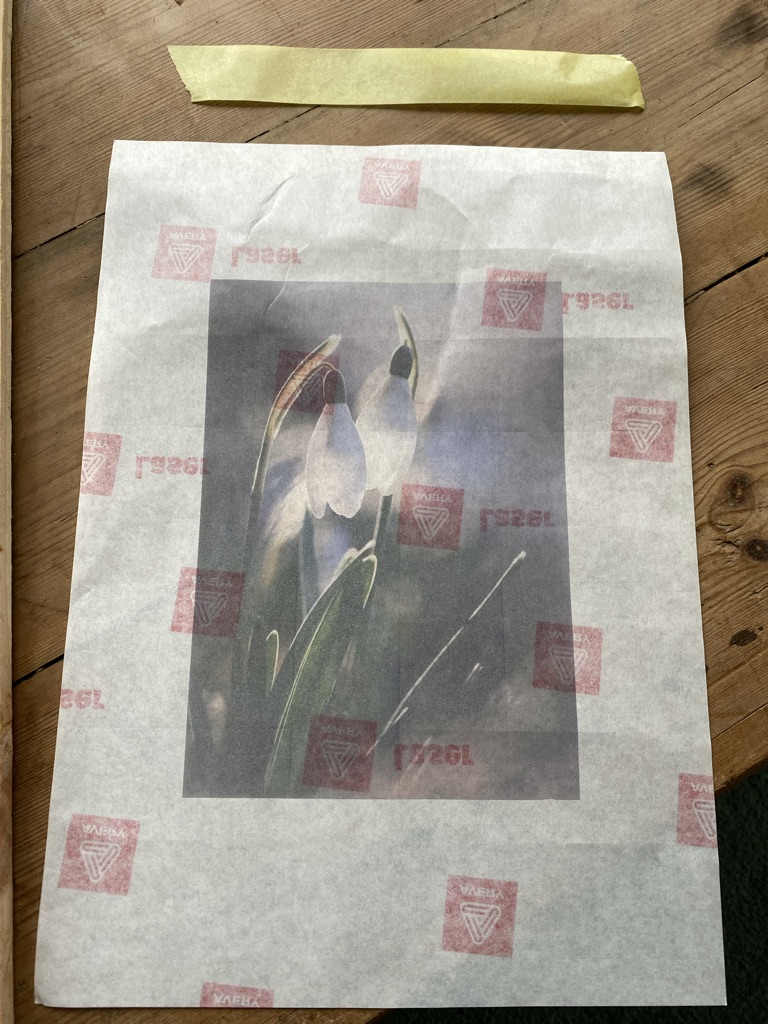
Be very careful not to touch your printed image since it is quite simply ink sitting on top of the shiny sheet. It will remain wet for sometime to come, so no need to rush as you carefully position atop your wood and hold in place with masking tape. I actually added my tape before I positioned the graphic; you don’t want to risk moving the graphic once in place or you may smudge your image.
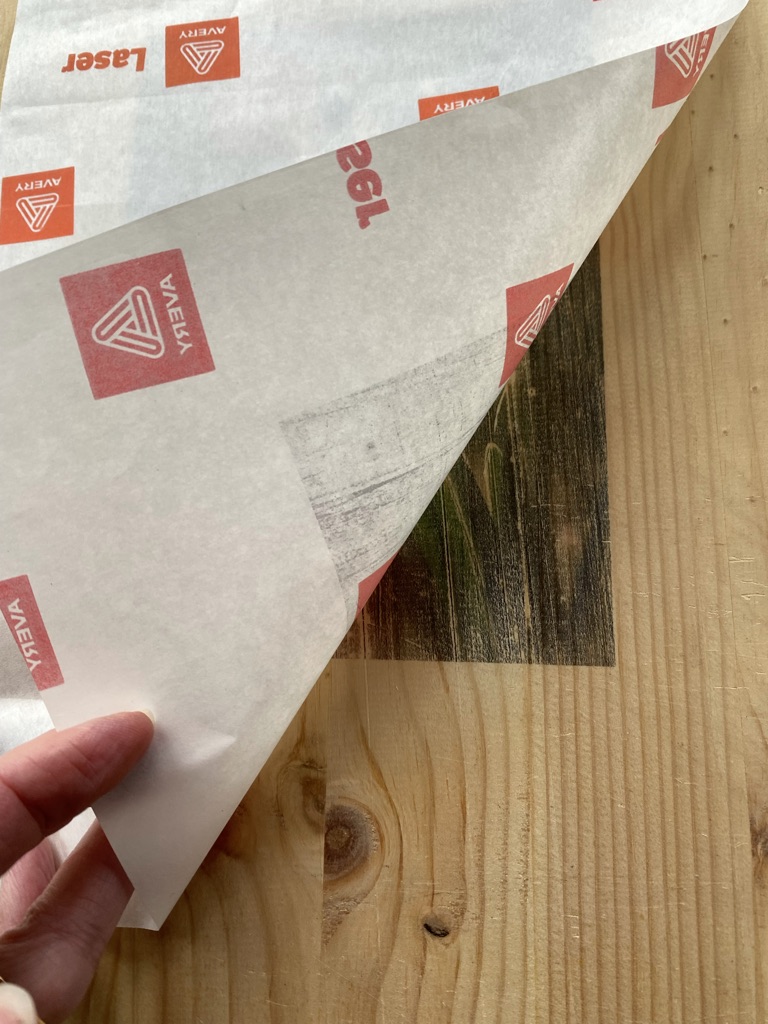
Now with your graphic taped in position, hold it firmly in place with one hand and take your cloth or sponge in your dominant hand and with courage and conviction firmly press on and wipe over your sheet. You are effectively pushing the ink into the grain of the wood. “Can’t you do this bit for me?” I nervously asked of Mr M as he sat on my shoulder watching the entire process unfold. “I could but if I do everything for you, you’ll never learn will you?” he replied, whilst unhelpfully directing me through the entire process.
Continue until you or your helpful onlooker is quite satisfied the ink has been successfully transferred and absorbed into your wood – a little peek never hurts – and when you are happy with the result, go ahead and carefully remove the waxy paper and discard.
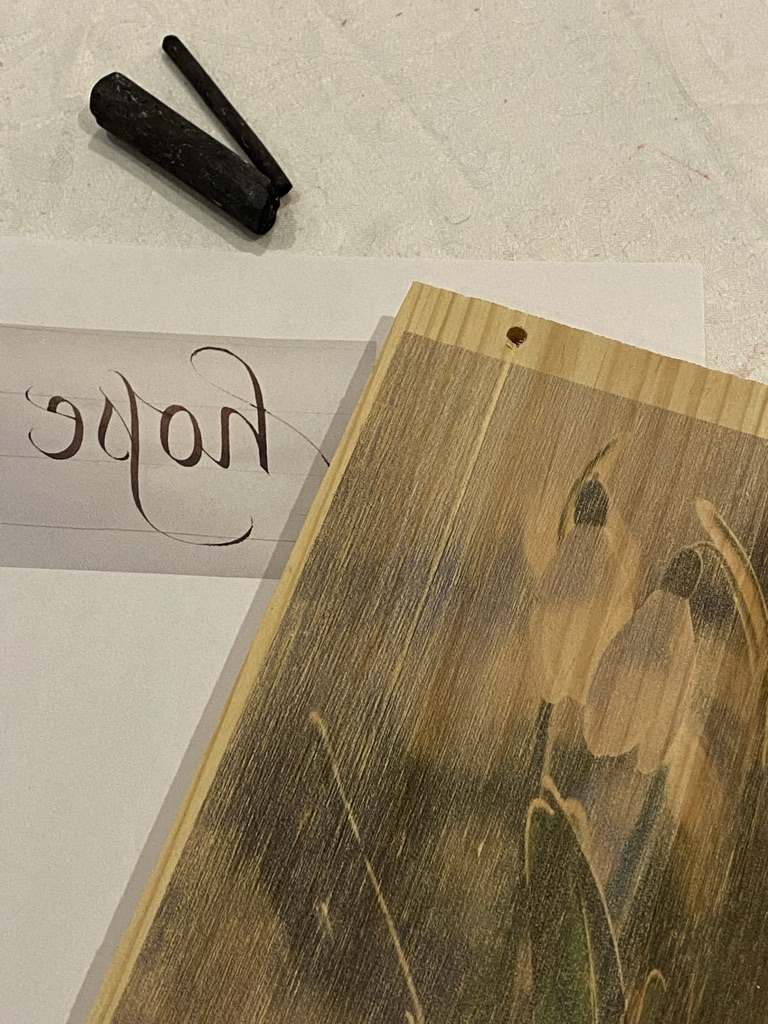
Mr M used an editing tool on his computer to write the word hope in calligraphy style since I lost my patience trying and together we managed to flip the word over so it appeared back to front allowing me to use a simple tracing and charcoal method to add the word to my garden sign. That bit I could manage alone.
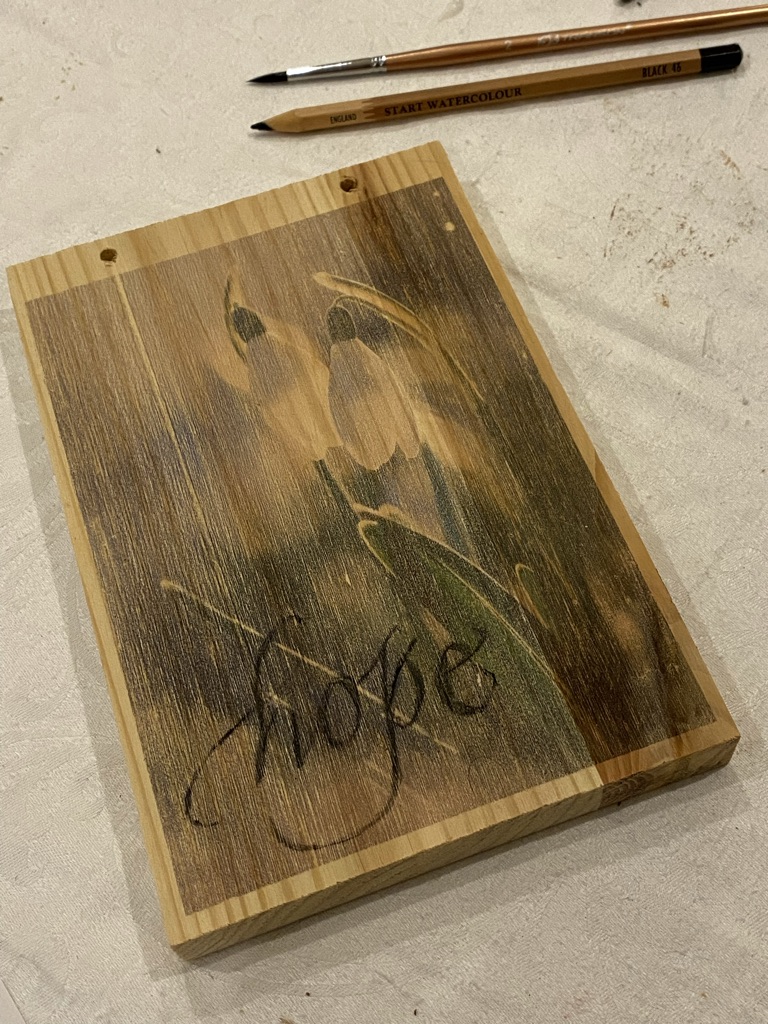
The result was a little too bold for my taste so out came a piece of sandpaper and after a light distressing, I was happy with my look. I drilled holes and added garden twine for hanging. In a similar fashion you could tack or screw your garden sign in place or maybe you could layer and lean yours on a shelf with other garden goodies for a seasonal look.
Finally, two coats of this product and we are good to go in all weathers apparently which is just as well since the bleak mid winter was still all that was on offer for my final photo shoot.

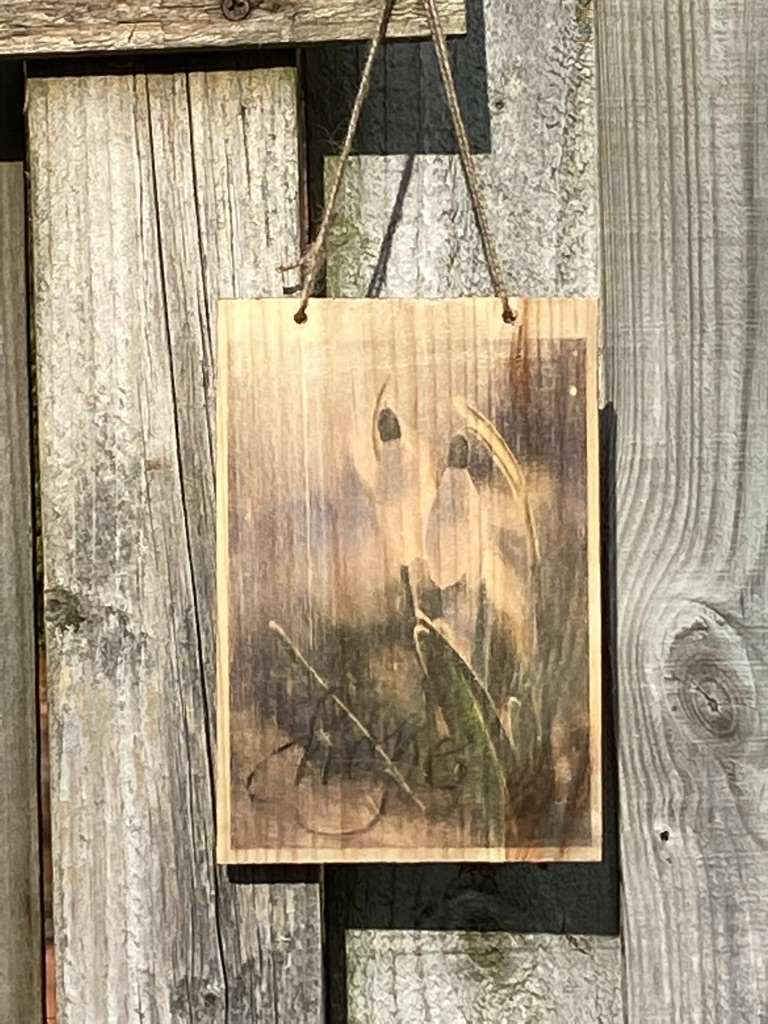
And so in one afternoon, a vision of hope for Belle’s Cottage Garden and if I have positioned the garden sign well, out of sight come summer when hollyhocks and foxgloves will grow strong and tall in front of my happy place, heralding the height of summer has indeed arrived.
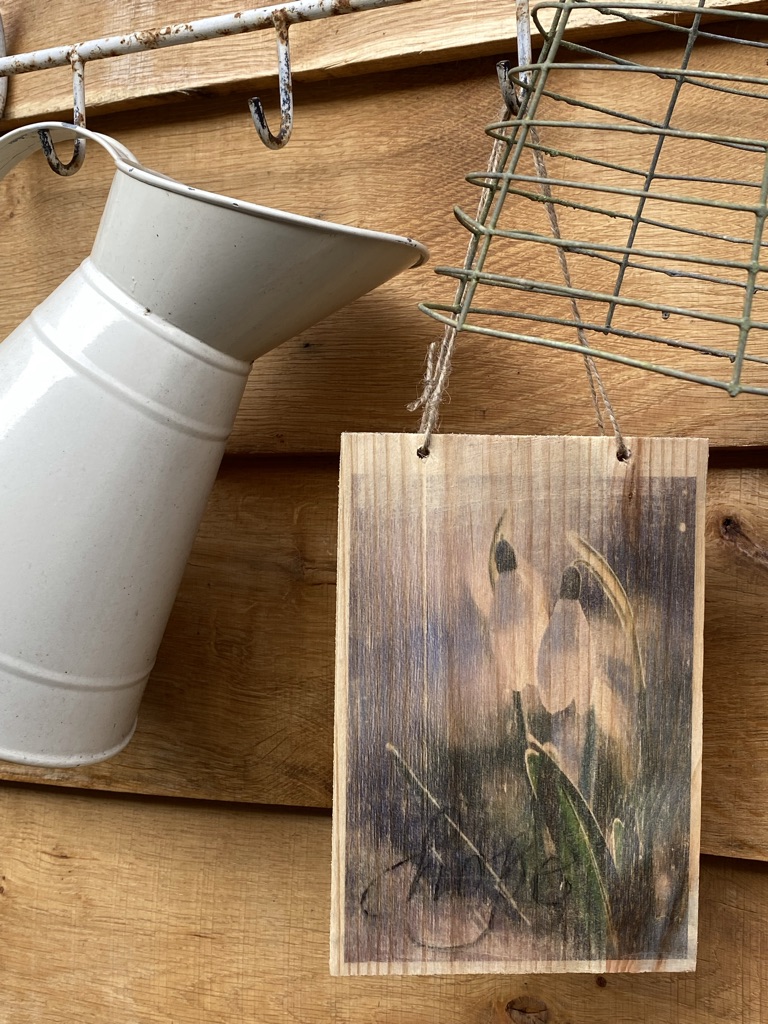
I am guessing you too have the perfect spot for a similar diy wooden garden sign? Or perhaps a window box or maybe your hopeful sign will hang in your garden shed or even your home, keeping your imagination firmly fixed on the idea of brighter days to come. I do love a garden sign as regular readers to this blog will know and if your preference is for painting or drawing instead, you might like this garden signs post which is full of wonderful ideas. And this quick garden project was equally fun to carry out too. Just remember to improvise the materials I use where necessary and if the look I achieve isn’t quite the way your imagination would take you, change it up. It wouldn’t do at all for all our garden signs to read the same would it?
Next week I shall be sharing with you my latest mixed media piece which was the most fun to create and which is one of those crafts both a novice and a seasoned hand will get a huge amount of enjoyment from. Until then…x


Can you believe him Sara? I mean as if I needed his help?! Thank you for reading lovely x
I LOVE it Helen! Fancy Mr M hovering over your shoulder….checking you were doing it right!😂😘
You are too kind Karen, I am sure yours are just as lovely and now with another skill under your belt, yet more possibilities… Enjoy creating!x
What a lovely message to read tonight Eunice, thank you! I am so pleased you enjoyed the craft too x
How lovely to see you in my message box Jo, thank you! Like you I see the potential for this craft as endless and have a few more tricks up my sleeve yet x
I am so pleased you like this craft too Beth, thank you for your lovely message. I love that corners of our gardens need not be dull in the grey months x
I have a funny feeling this will become quite addictive too darling! I’ve thought of THE perfect gift although for now it shall remain a secret!x
I love making wooden signs for my garden but they are never as unique as yours!Will challenge myself to make one.I have signs of Spring popping up in my English garden.Daffodils and tulips waiting to say ‘Hello’!🌷🤸♀️🌼
Love this Helen! You have brought a ray of sunshine into “the bleak midwinter!!” Xx
Oh wow, this is such a beautiful sign Helen! Thank you so much for sharing this technique, which has so much potential for each season! Jo xx
Beautiful craft idea with such a lovely finish. Ill definitely being giving this a go for new garden signs.
Thank you x
This is so clever!!! I love the look and can just imagine how creative you can be with this!!
Love the story too, I think it would be difficult to not love all seasons when you make them all look so pretty with your faffing!! Love love love it all – can’t wait to see what’s next!! xxxxx