Mr M bought me a new toy recently. It’s a glass bottle cutter and I may have lost another day of my life down that warren of wonder and inspiration we call Pinterest, viewing a great many glass bottle recycling ideas to put my own spin on. Excited by my discoveries, I set about soaking labels off the few empty tonic bottles we may have inadvertently collected during lockdown – no judging please – in order to make this week’s craft. And before you start thinking this week’s make can only be achieved with an expensive piece of kit, rest assured that is not the case. There are in fact several ways to cut glass bottles including a method which uses household items you will already have. Join me this week as I show you my take on a DIY glass bottle candle centrepiece to adorn an alfresco supper table. First though, this happened…
“Well just how broken is broken?” I screeched perhaps a little too dramatically as Mr M announced today’s problem to be a defective kettle. “Just about as broken as you can get really” he sighed putting on a pan of water to boil. “But I need it for my craft, you have to pour boiling water over the scored glass for it to work” I cried. “I see” he continued patiently “well that’s as may be however right now, I am attempting to make a cup of tea without a kettle, would you like one? You might find a cup of peppermint quite calming” he finished, just a little too sarcastically for my liking.
If you don’t have this kit and you’d prefer to spend less money having a try at this week’s craft, take a look at my Pinterest board for a few alternative ways to cut a glass bottle including a fairly inexpensive hand glass cutter or acetone and a naked flame. Should you choose the later, do be careful. I may be getting a little risk adverse in my old age, that method looks scary to me.
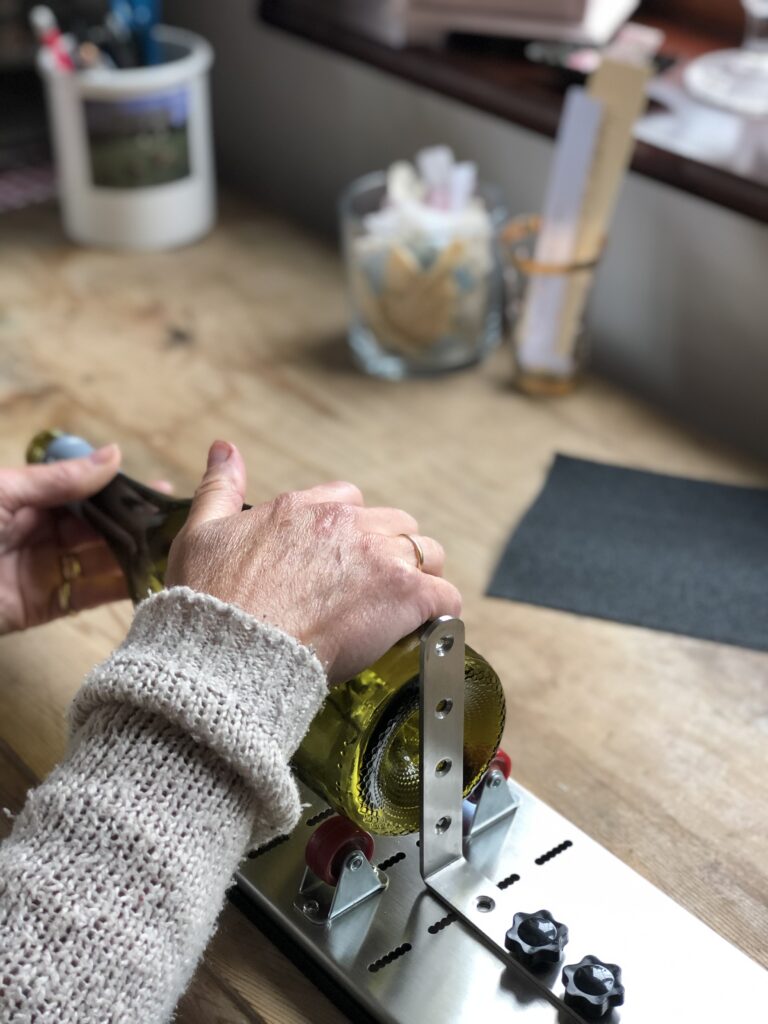
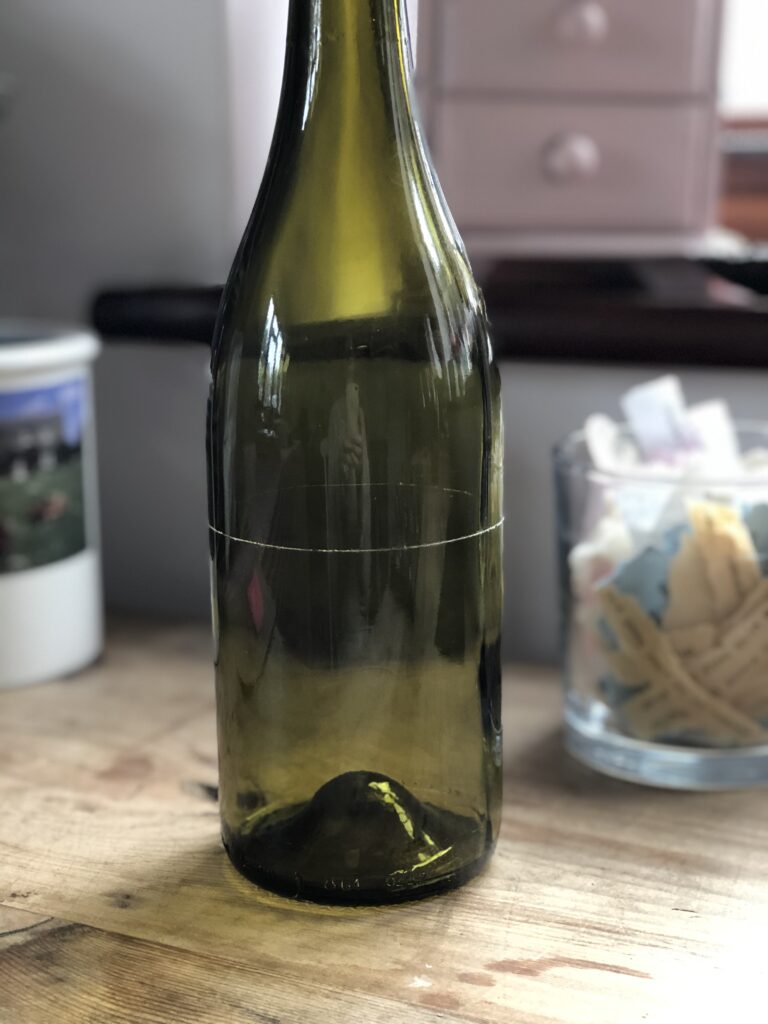
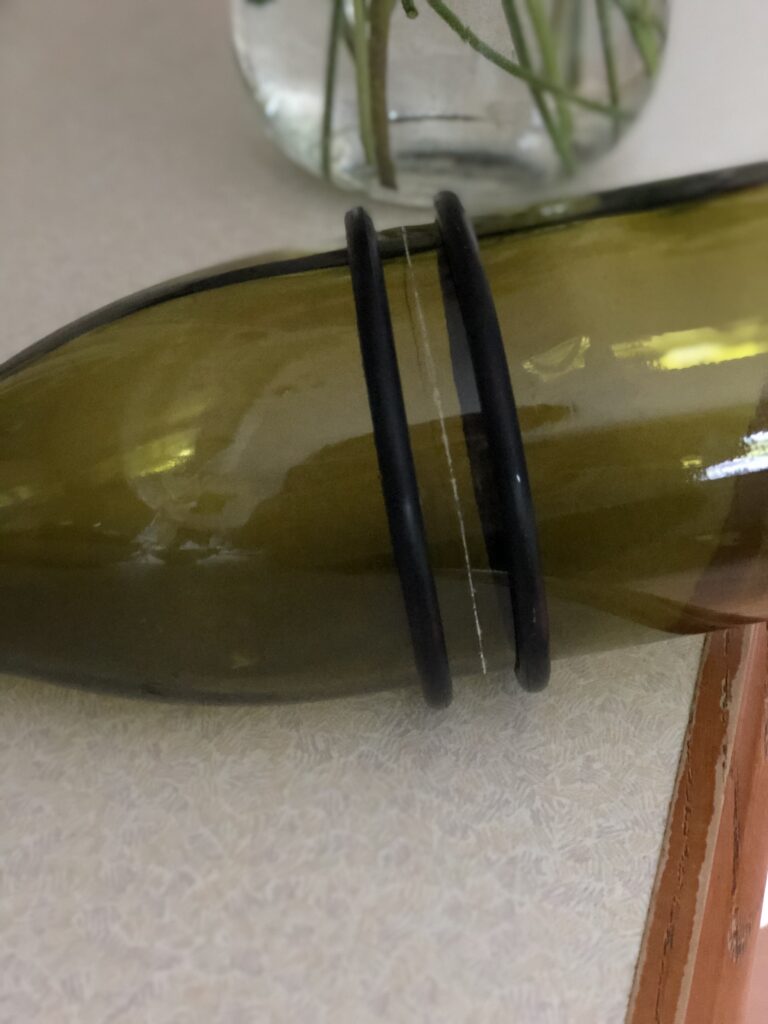
After Mr M had read the instructions, we set about practicing with a few green wine bottles first, to get the hang of it. My kit allows you to measure and move the glass cutter around depending on the bottle size and your project. Once ready, you need to push fairly firmly on the bottle and rotate simultaneously to get a deep enough score.
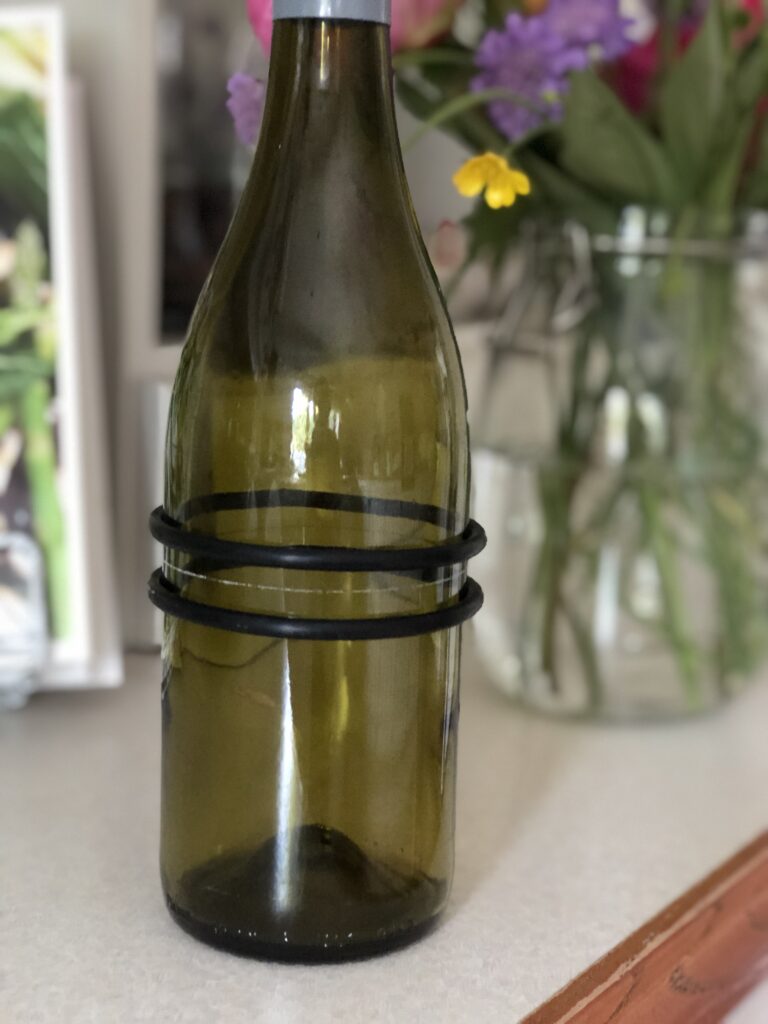
And then once scored, rubber bands provided in my kit were positioned each one approximately one centimetre either side of the scored line.
Next you pour boiling water slowly and carefully over the scored line, rotating the bottle as you go. Sorry no photo here since adding a camera and a pan of boiling water – no kettle you will recall – into the mix, seemed somewhat irresponsible and almost impossible. After about twenty seconds of running boiling water, the bottle is then rotated under running cold water.
With luck you will hear a pop and the bottle will break in two. Perfectly and neatly. If you are attempting this trick without a Mr M, I would suggest an old towel or tea towel in the base of your sink. I fear it would be hugely disappointing to get so far with your craft, to then break the bottle further still should it fall onto a hard area. This is what you should end up with…

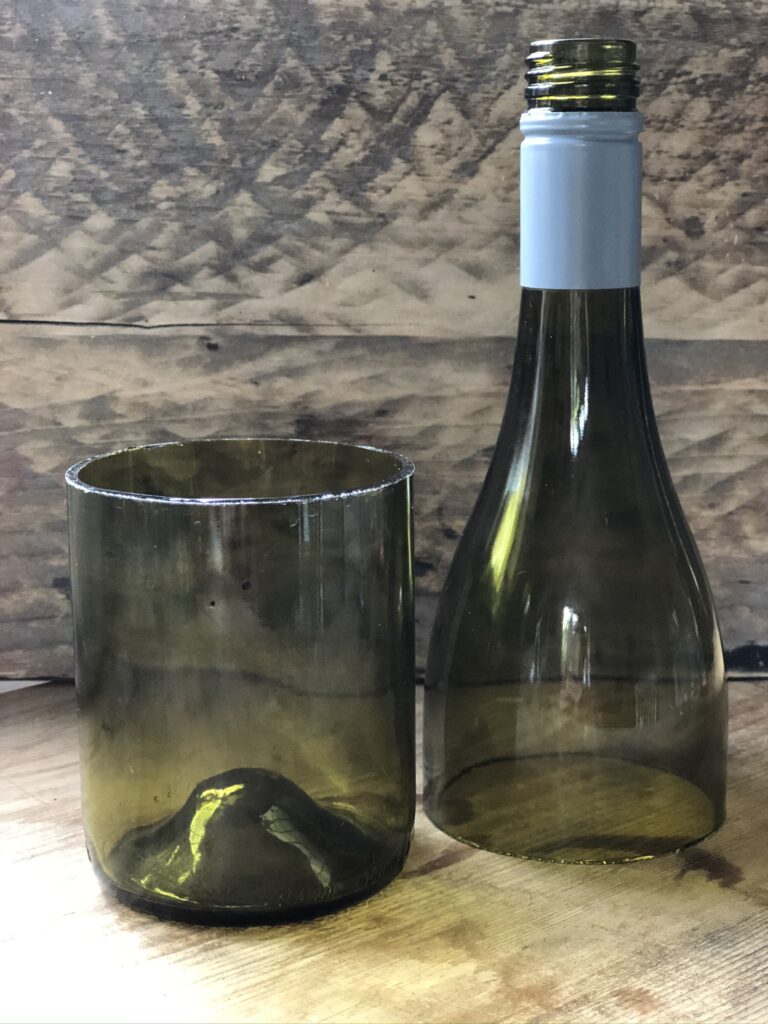
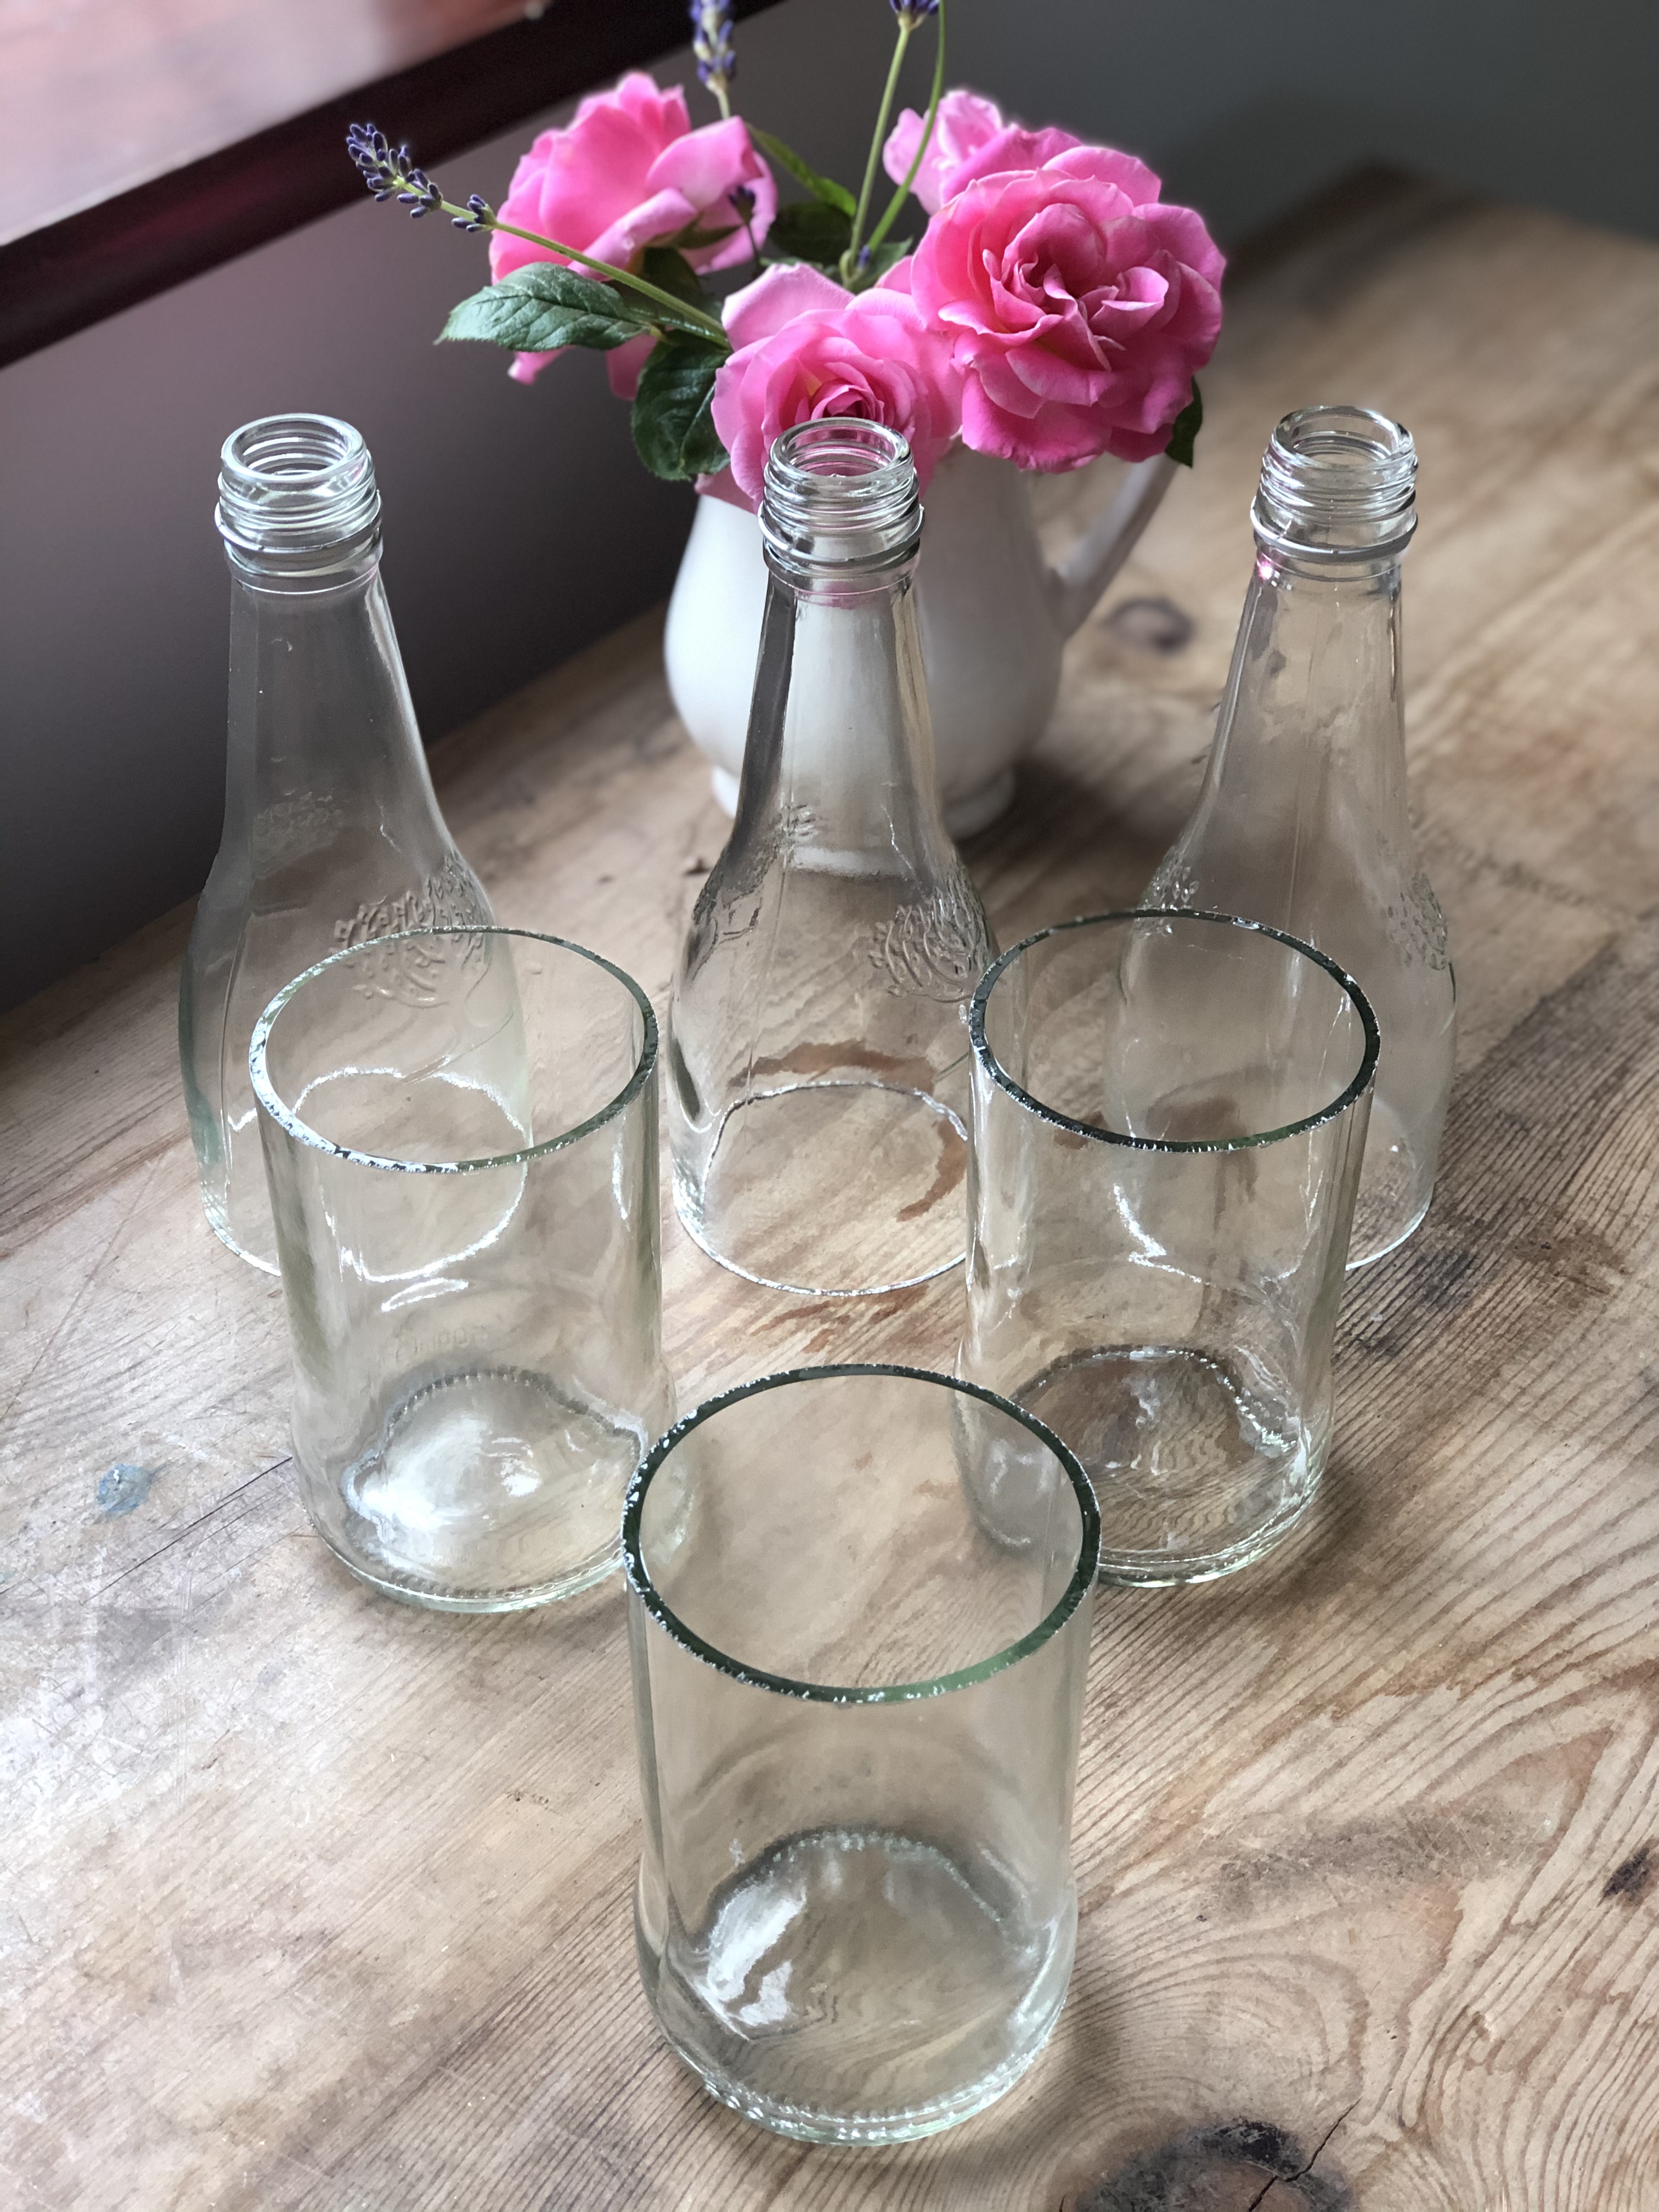
Mr M was itching for a go, only fair to share, and so he cut three tonic water bottles carefully and cleanly in half …

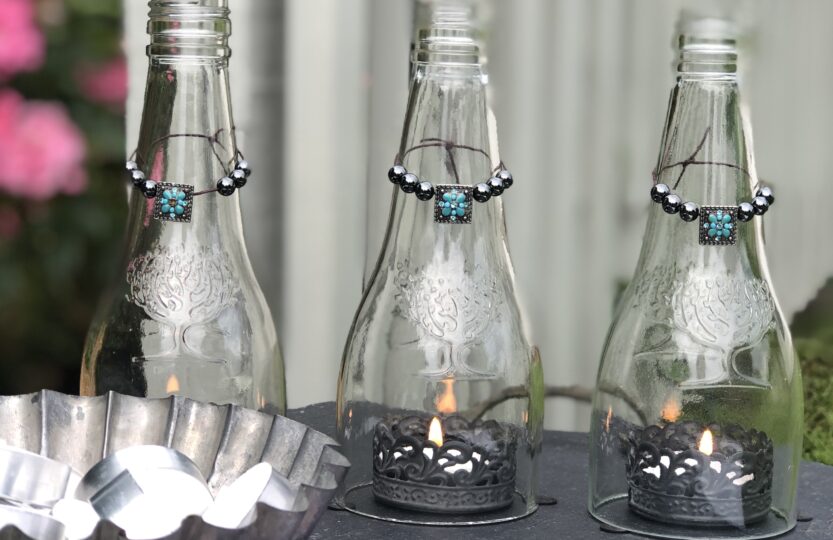
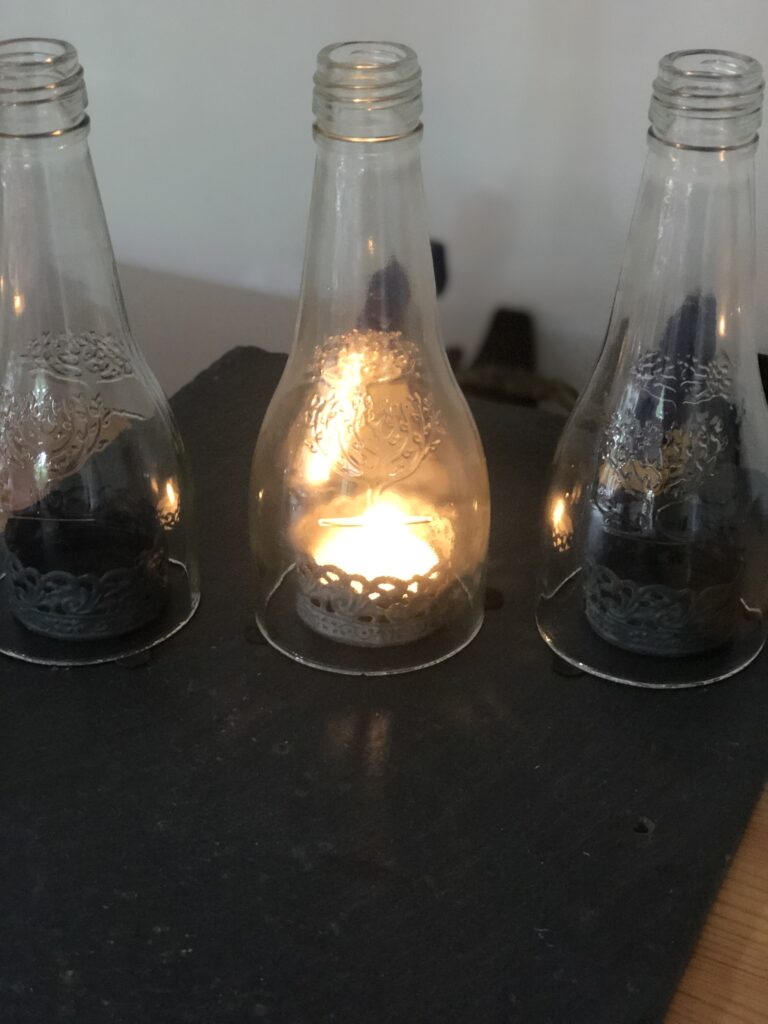
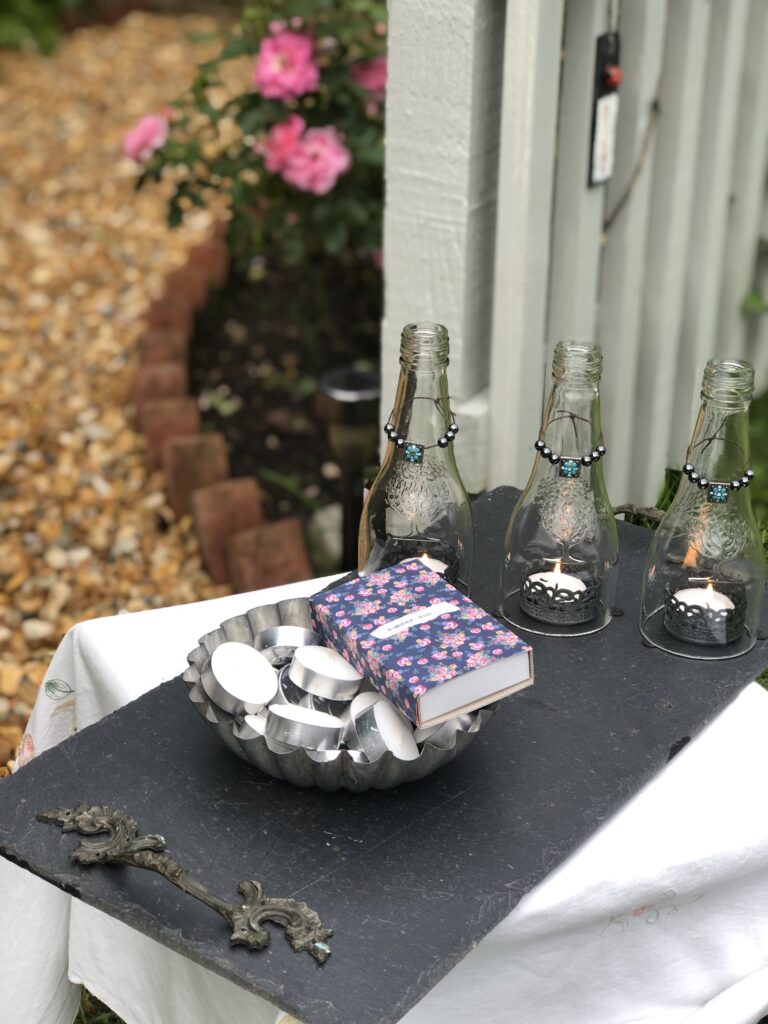
whilst I gathered together a variety of bases and tealight holders for my DIY glass bottle candle centrepiece. I played around with a great many ideas involving wood and slate and enjoyed creating dingle dangles for my finished piece.


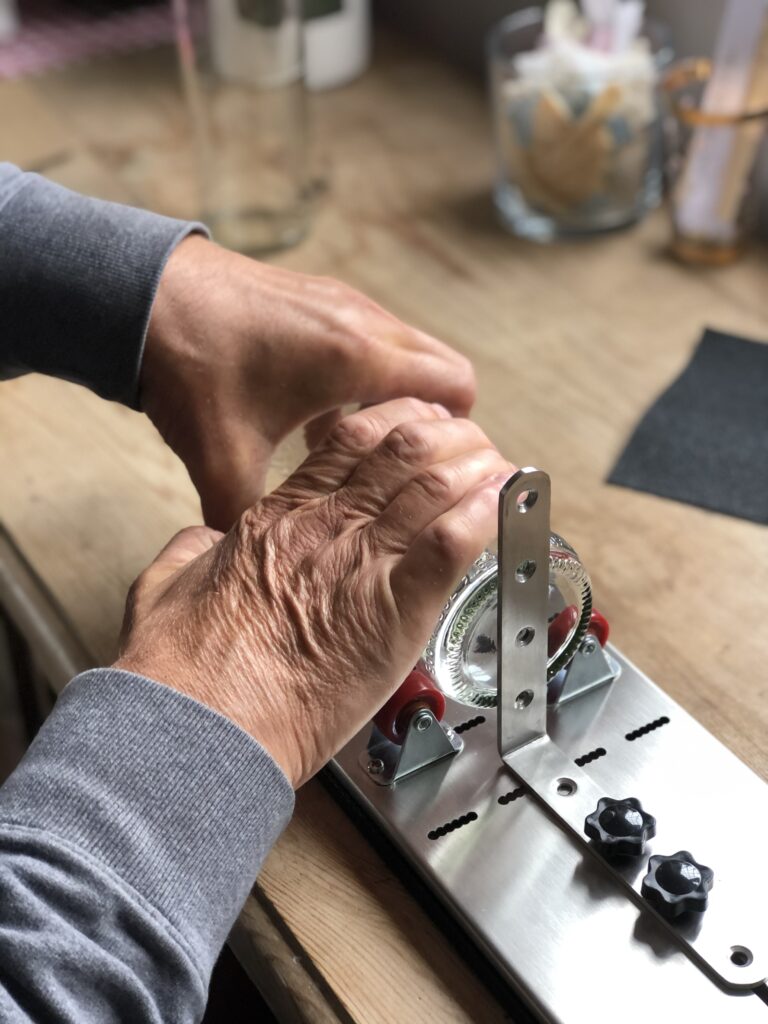
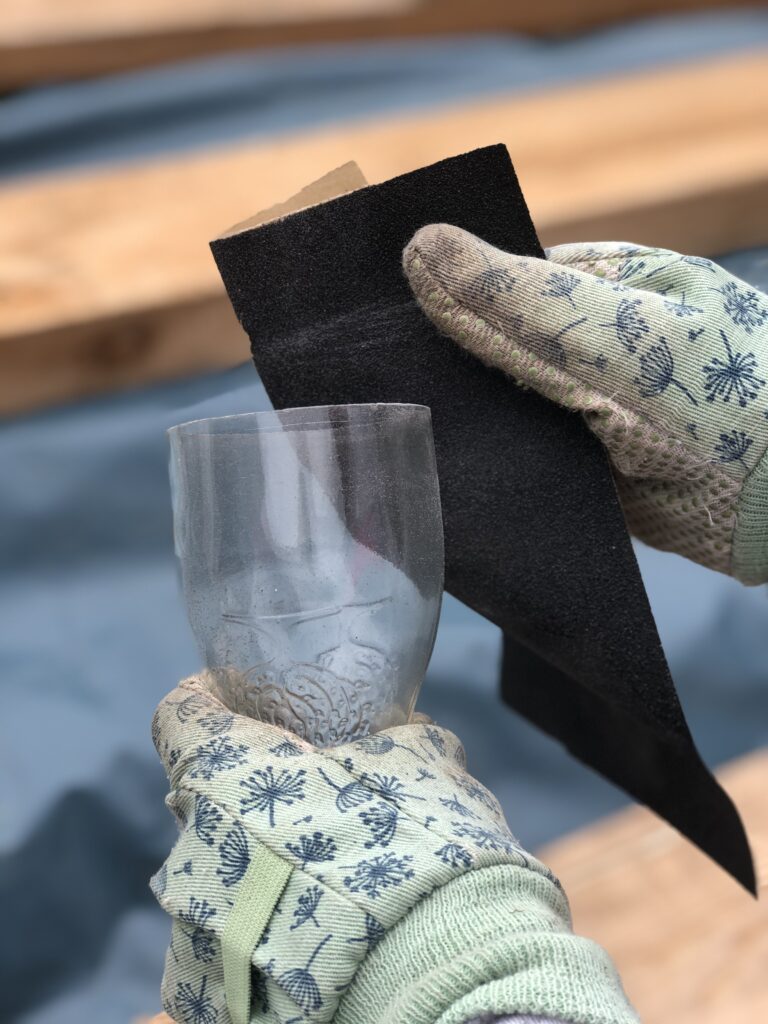
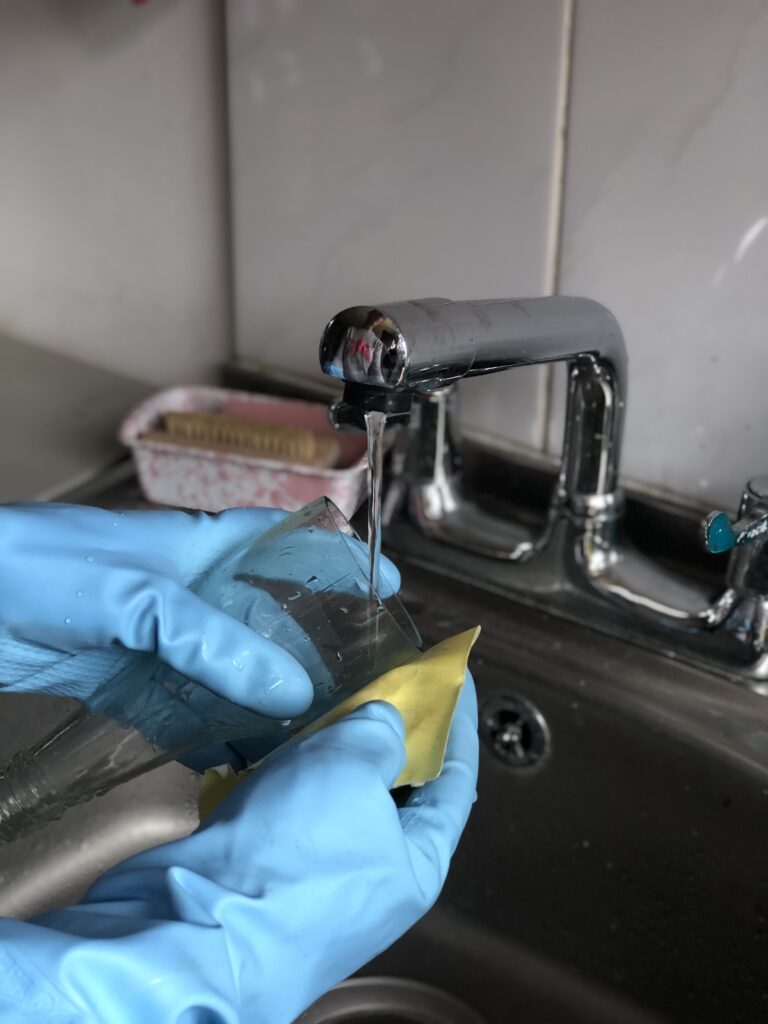
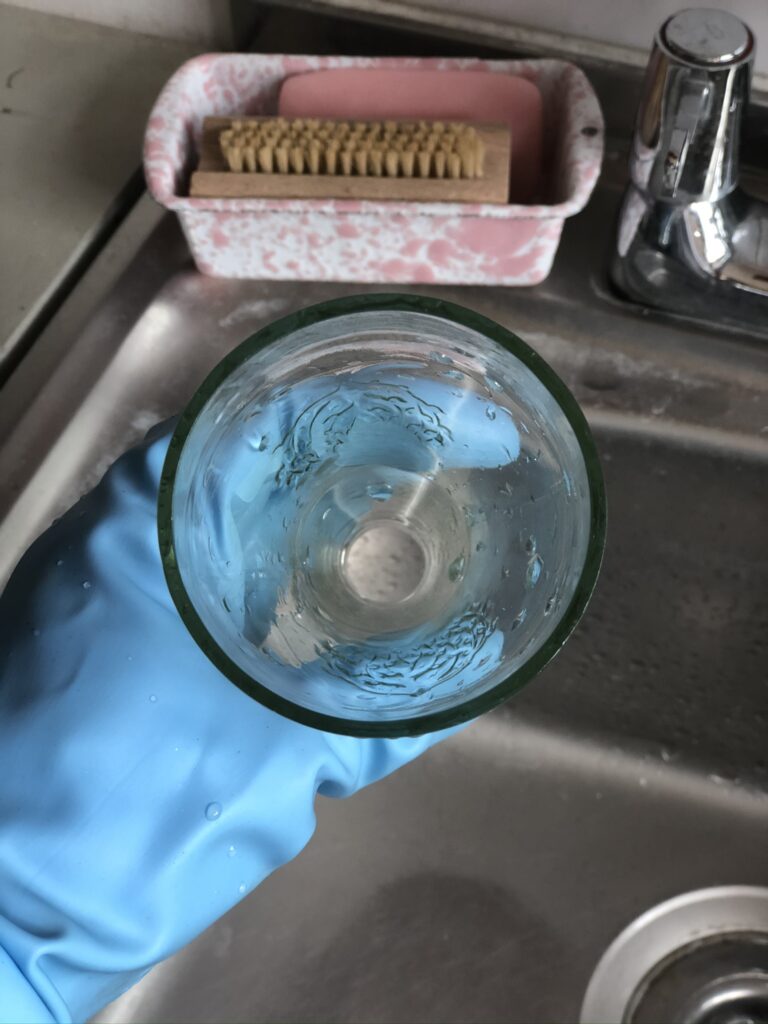
Sanding the glass is fairly simple too and protective gloves and a mask are recommended for this stage. I used a dry medium grit (80) sandpaper which was provided in my kit, to gently smooth the cut rim of the bottle. Once smooth I then finished off with a wet fine grit (240) sandpaper and was pleasantly surprised with the overall finish.
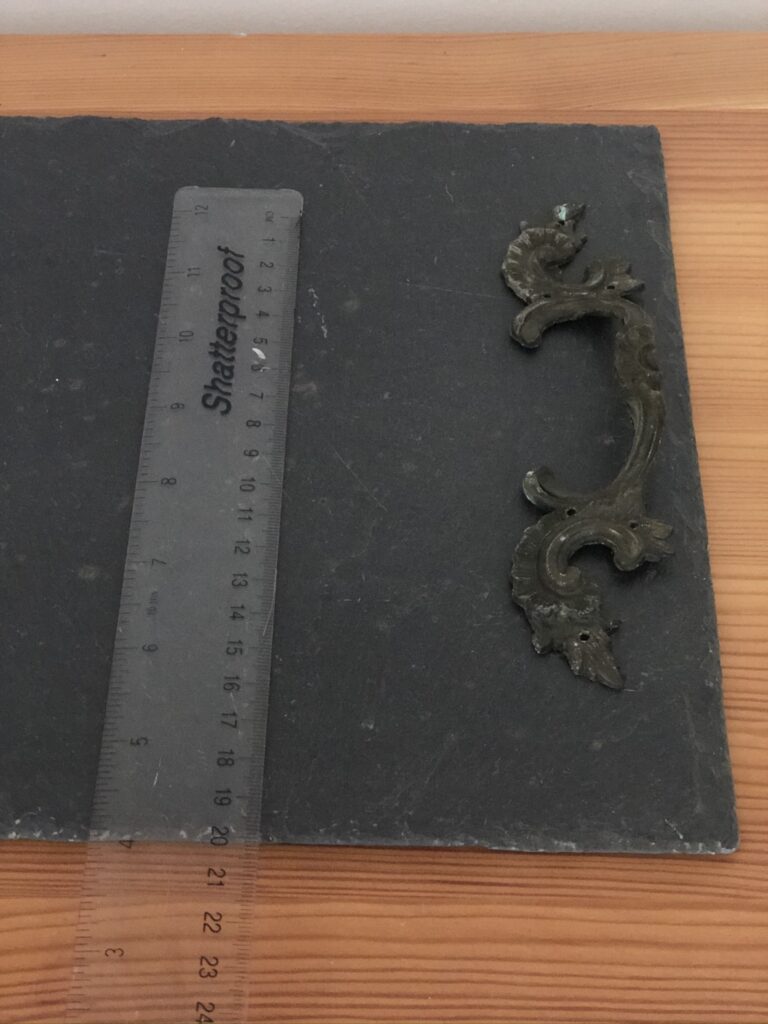
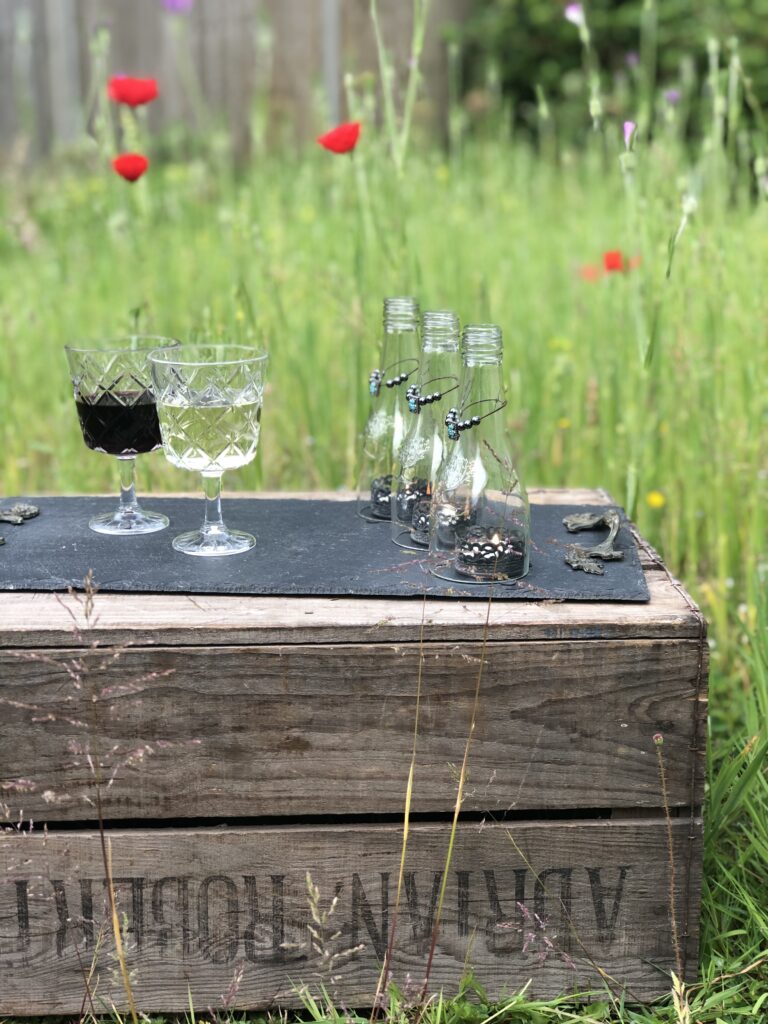
My favoured design is made up of a piece of slate I had left over from this project to form a sturdy base and two handles I salvaged from discarded drawers from this up-cycle. You could use wood as your base if you prefer or maybe even a recycled tray. Or you may have an old shallow box like this one which could work too.
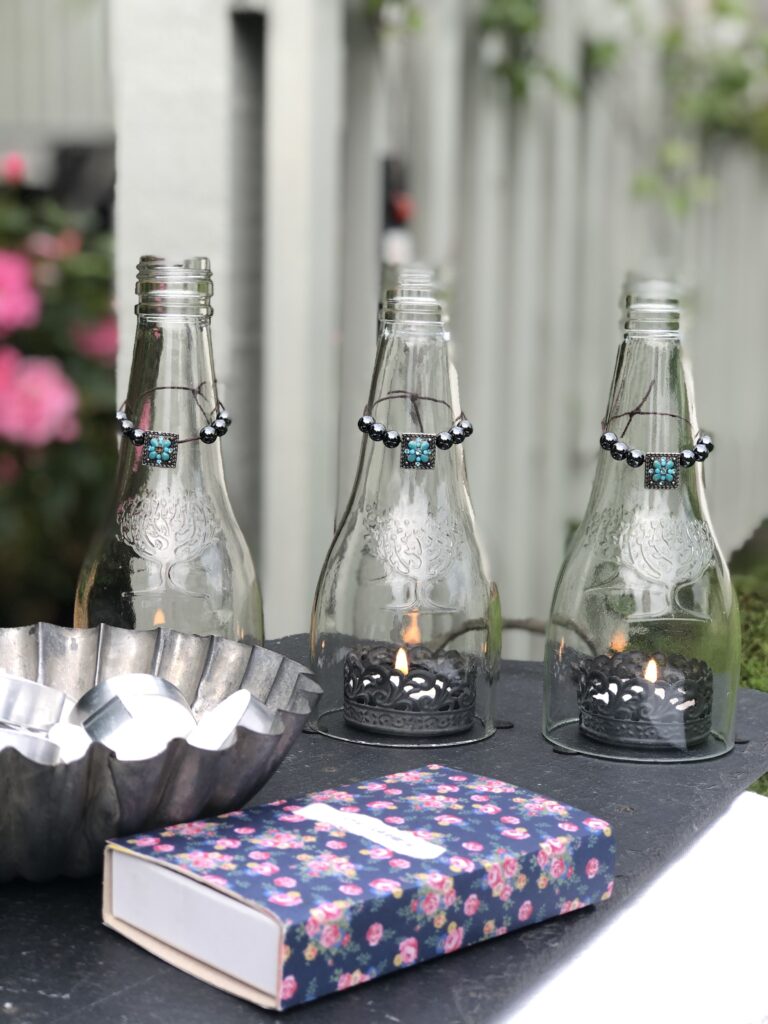
I used this nifty glue located in Mr M’s cave to hold the handles firmly in place and clamped each one tight for the night. I also secured three decorative tea light holders firmly in place making sure there was enough room in between each one to sit the cut glass bottles next to yet not touching, one another.
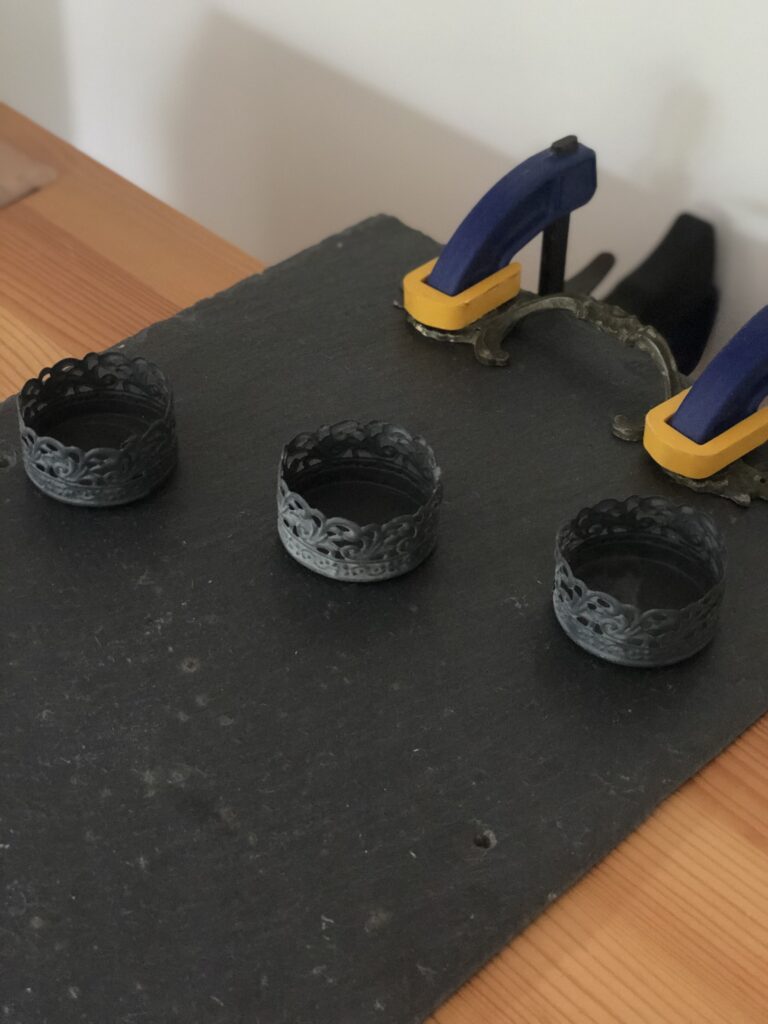
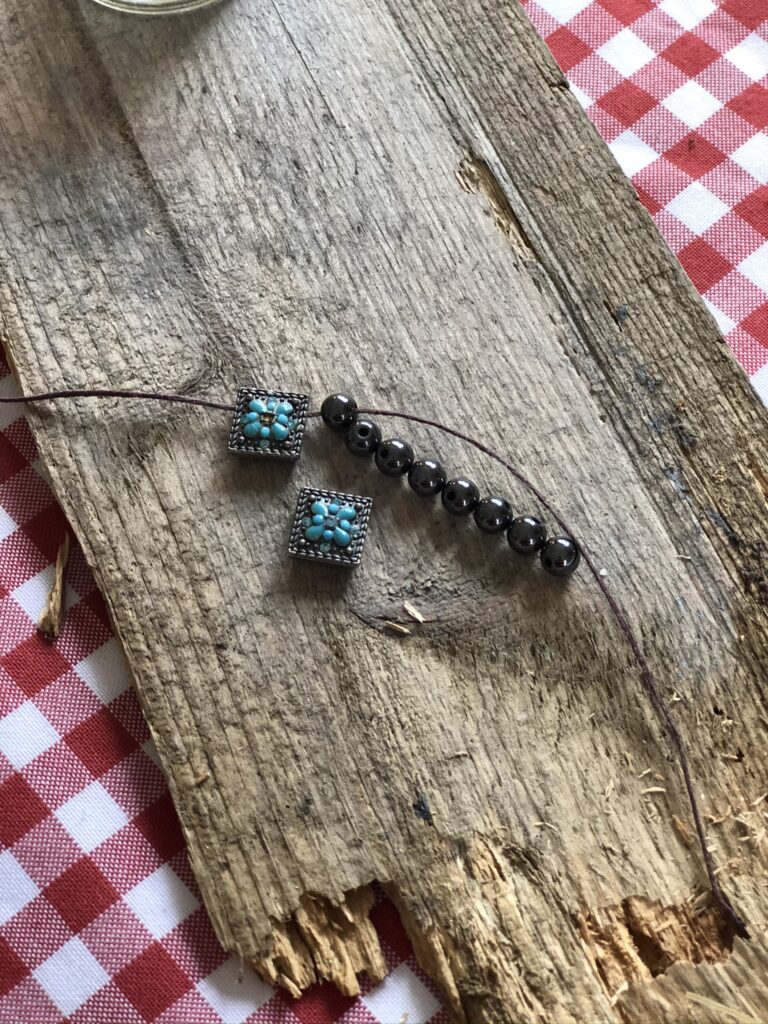
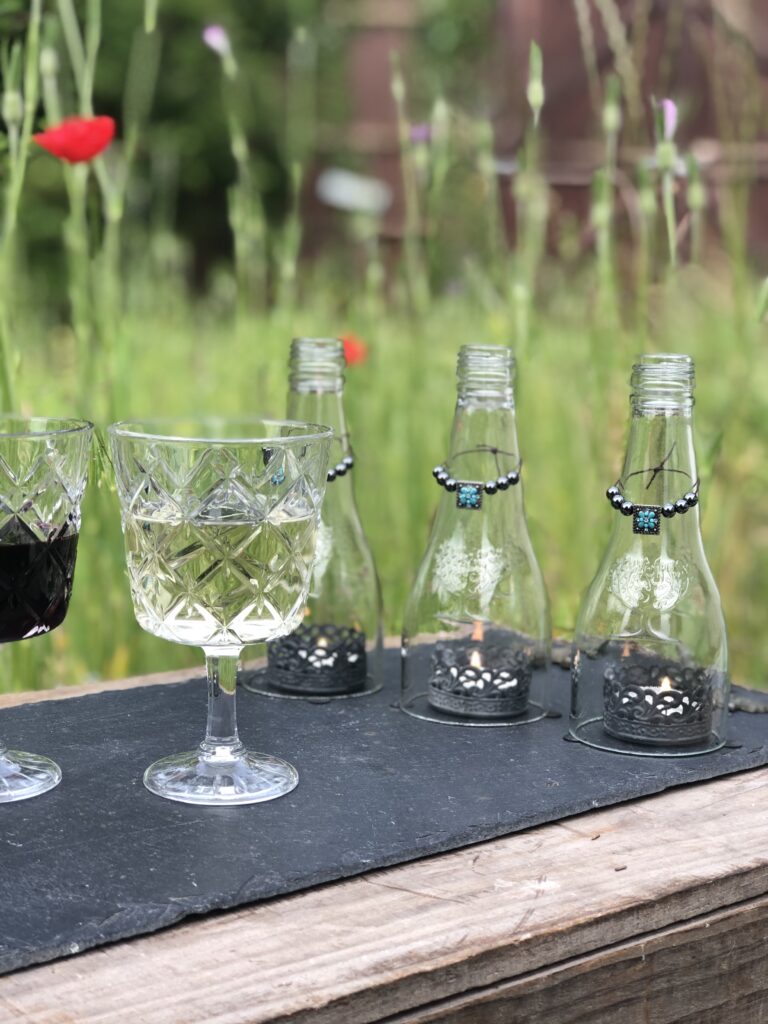
Now comes the science. Your tea light will not stay alight when you place the cut glass bottle over it, if there is no air flow. I used these from my stash to ever so slightly raise the glass bottle away from the slate thus allowing enough air to circulate. A few beads and pretties from an old broken bracelet were threaded through some thin leather twine to add sparkle to the bottle necks. Choose décor wisely; wooden beads could be hazardous. A quick road test ensured the pads served their purpose.
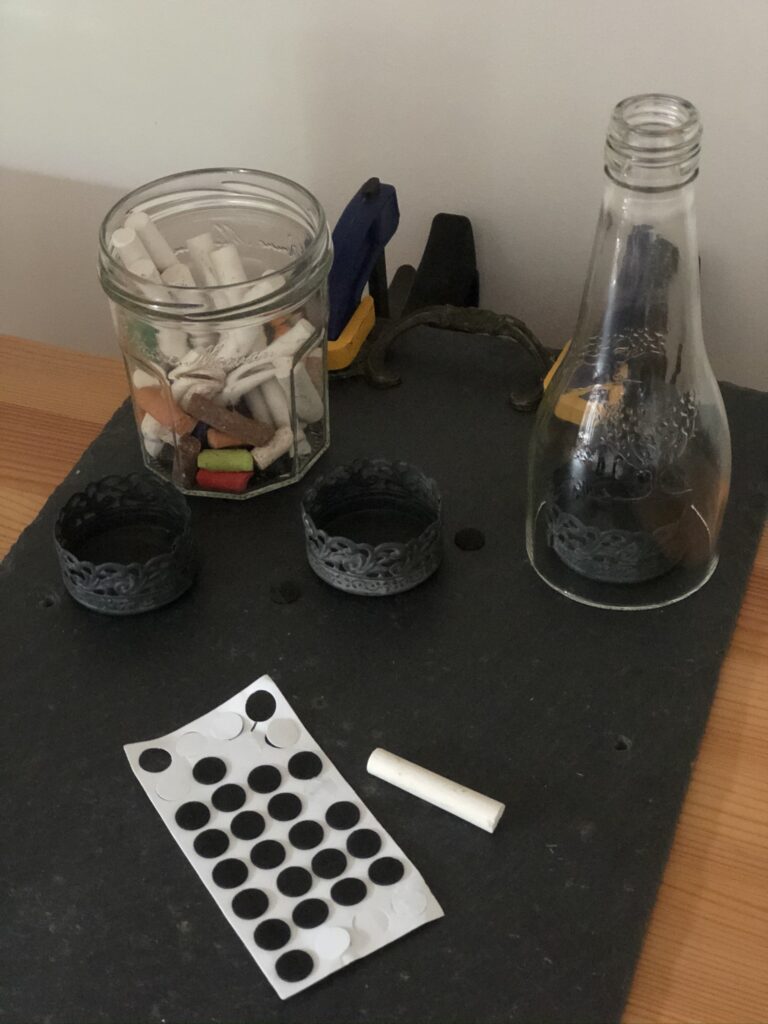
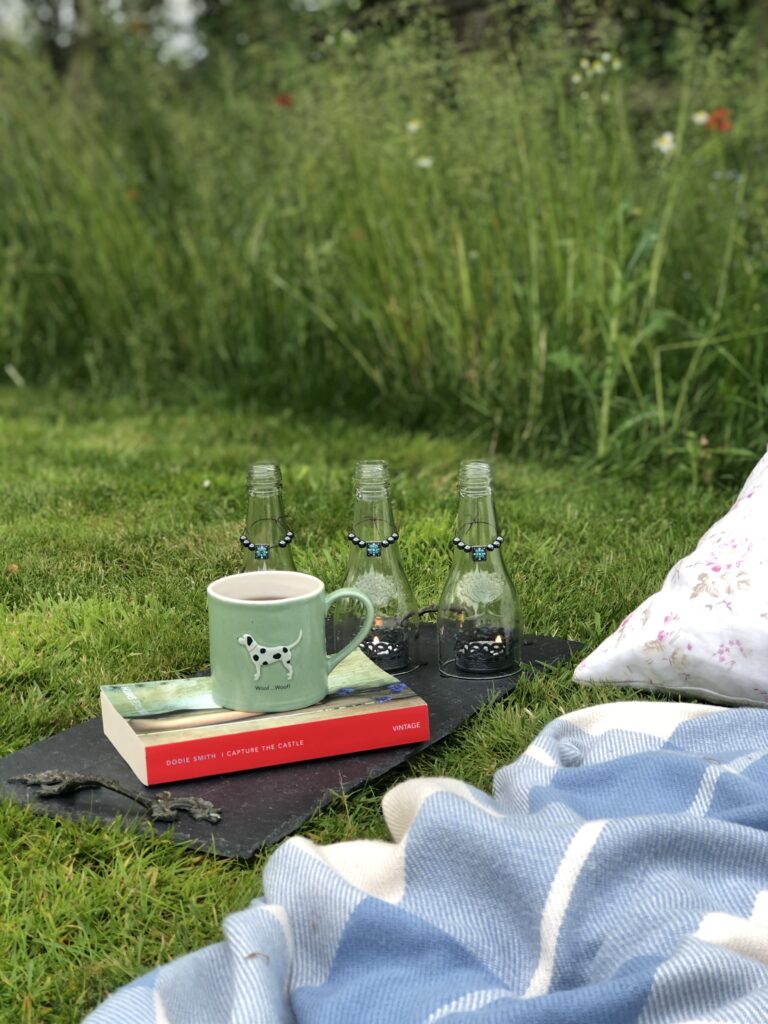
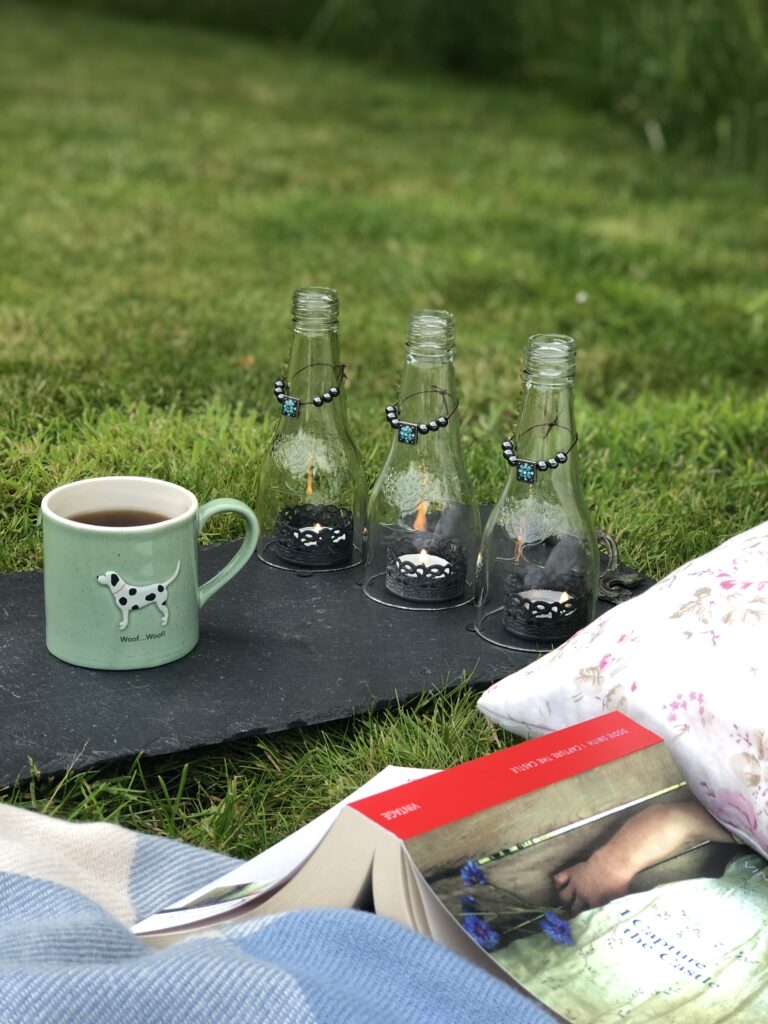
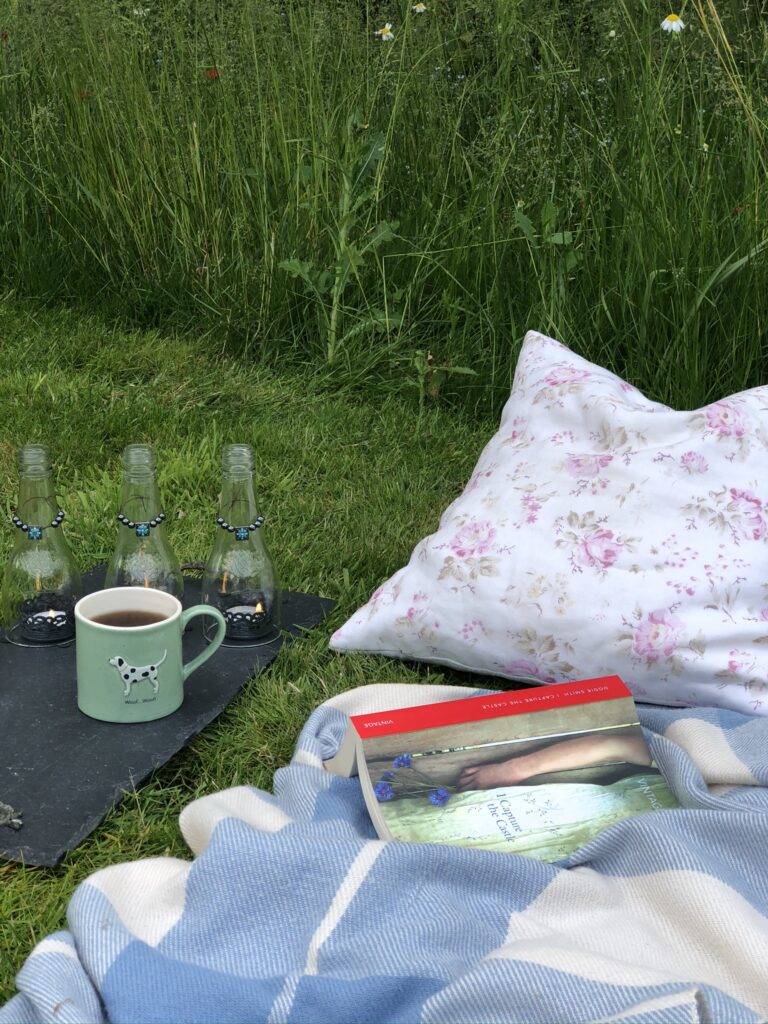
The useful gaping space on the slate is ideal for transporting additional tealights and pretty covered matchboxes to your destination.
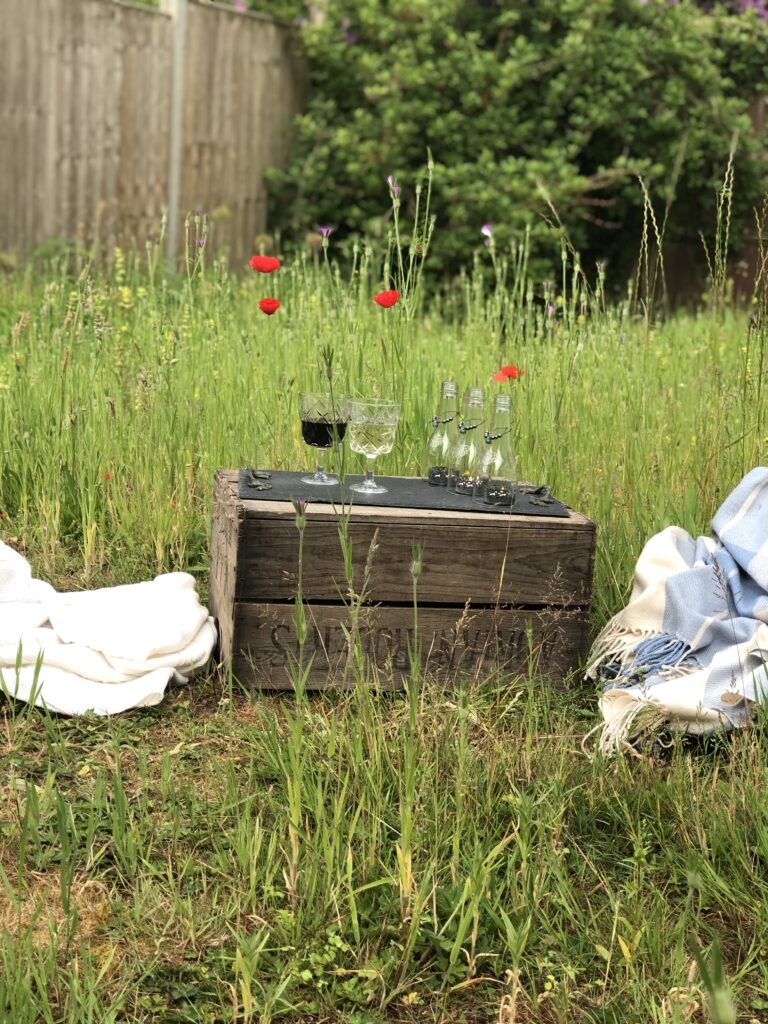
Or the same space will suffice for a favourite tipple when you are destined for a spot like here.
Or indeed the gap is quite perfect for a comforting cuppa and your favourite book if you’re off to somewhere cosy like here for a quiet read.
So, what do you think to my glass bottle candle centrepiece then? It would make a fabulous gift wouldn’t it? Not this one though. This one is most definitely destined for The Gin Pallet.
And in the interests of zero waste and yet more delightful and simple crafts, I will show you next week what happened to the bottom half of each glass bottle together with a further inexpensive glass bottle craft I just know you will love. Until then…x


You’ve no idea how happy that makes me to read that comment Master M, cannot wait to see what you’ve come up with and CANNOT wait to see you!x
Wow what a fantastic idea ! Look forward to having a craft day when I’m home I’ve got some ideas of my own!!
Ha ha I had a feeling the tea might be spluttered after this one Jane, thank you for your lovely comment x
Oooh I did not know this Elizabeth, a glass engraver would indeed be a useful tool in my craft arsenal; now where is Mr M… x
Aah I am full of surprises! I’m glad you enjoyed the newest craft, there is more to come!x
Now I didn’t expect a glass cutting blog!!…. what fun and a great result! brilliant! xx
Well the bin men have literally just taken away my recycling full of empty bottles from a major kitchen clear out! I will have to see what else I can empty haha.. I believe next week Aldi are selling glass engravers, which may come in useful for cut bottle decoration 😊
Another winner , Mrs M…too clever for words and well done Mr M for finding a marvellous new toy. And a brilliant funny read….spluttered tea and tears.xx
Oh what lovely memories Jane, I remember Macrame now come to think of it… I’m sure we had some wrapped around a green glass ball or something like that too! Glad you like The Gin Pallet too…we have had so much fun there during lockdown, I’m hoping once we can move about a bit more, friends can enjoy it too! Thanks for your lovely comment and have a lovely week ahead x
I remember my parents cutting bottles to make drinking glasses and such in the late 1960s. It was fun! We did all kinda crafts, macrame, sand candles, beading too!
Thanks for reminding me! Love your gin pallet!
I thought you’d like this week’s craft Little Miss; I KNOW you will love next week’s for sure!! Thanks for the lovely comment darling x
Ha ha draining the contents is of course a necessary part of the job Amanda! Thanks for reading and leaving me a message!x
Oh I’m so pleased you like them, that’s your birthday sorted then! Thanks for your lovely message too x
Happy to drink the bottles’ contents and admire your work. Amandax
OMG, OMG, OMG!! I absolutely love your glass bottle creation Hels. What a fabulous idea and how pretty they look too. Wow! You never cease to amaze me with your wonderful creations. Clever lady! xxx
Oh I LOVE this glass craft! So so pretty and what a nifty bit of kit! Really looking forward to seeing what you get up to next week.
You’ve opened up a whole new world of crafts and I hope we get to read all about it!!!
Fantastic blog post xxxxx
My heart was pounding for my first attempt Julie and it was much easier than I thought it would be. If you have a go at this, do let me know how you get on. It was a very rewarding craft. Thanks for leaving me a comment, makes writing so worthwhile!x
Fabulous Helen! And very brave!! I’m a bit terrified of glass if I’m honest, my track record with mirrors isn’t good😂. It’s a good job I’m not superstitious! I really love this idea. 💕💕💕