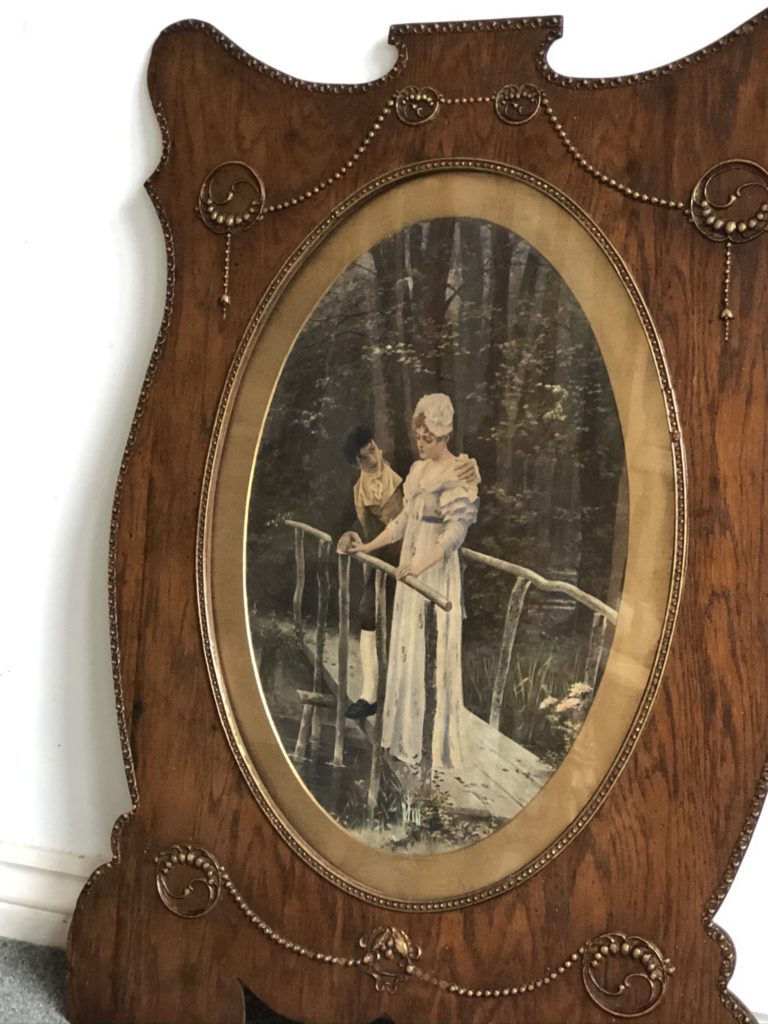
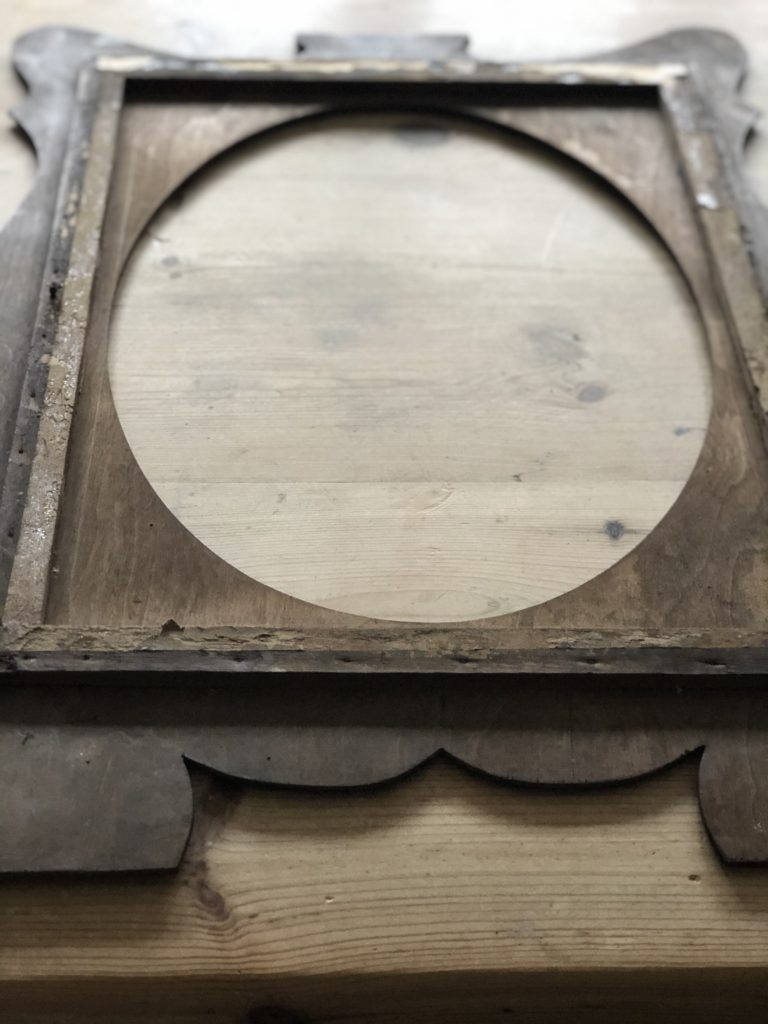
“So Mum, the couple in the crazy outfits in that grotty picture frame over there, are we related to them or something?” asked Master M with more than a hint of mischief in his eyes. He was directing his gaze at my latest up-cycle a rather battered old frame complete with interesting print, which was awaiting it’s make over in a corner of his bedroom. Apparently the couple had spooked him out when he’d opened his eyes that morning. Once we had established they were indeed not ancestral cousins, Master M had more to say. “I mean I’m not trying to be difficult or anything but why are they in my room? Can’t they live in the garage until you do something with them?” he continued “they’re very unsettling.” Today I shall be showing you a new to me up-cycling technique; wet distressing painted furniture, designed to give an aged and weathered look to my grotty picture frame …
Since I had selected this piece for its frame shape and gilt beading detail and not its print, I wasn’t too disappointed to discover the rest of the M’s were of the same opinion as Master M. “And you know of course that frame’s had woodworm in the past” added Mr M thinking I may indeed have over looked it.
Wet distressing painted furniture had been popping up on my Pinterest feed frequently enough for me to become more than a little interested and I was looking forward to trying out a new up-cycling technique. I began by snipping and stripping the old wire, glass and print and hoovering and wiping down the dusty frame with white spirit.
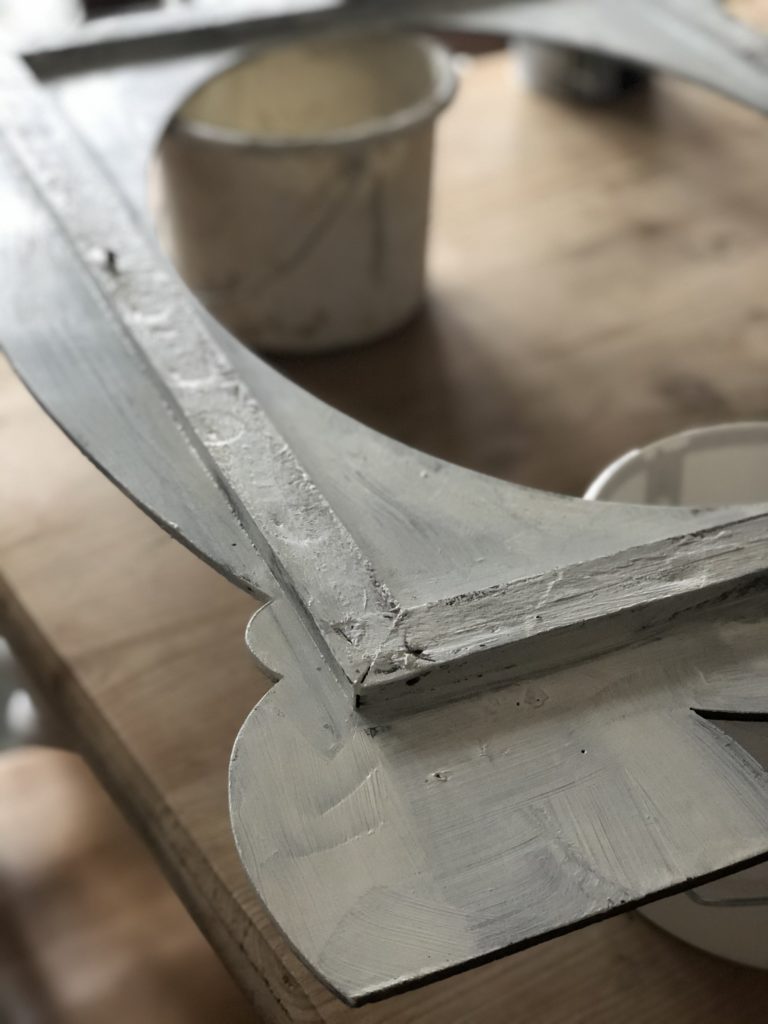
And then, although every tutorial I found on line suggested you didn’t need to prime, I chose to since the frame had a smell suggesting it may have once lived in a smokers house-hold. This primer is great at sealing in smells which don’t naturally dispel: I used it here several years ago on this extremely smelly piece and to this day, there is no sign of its original nicotine whiff.
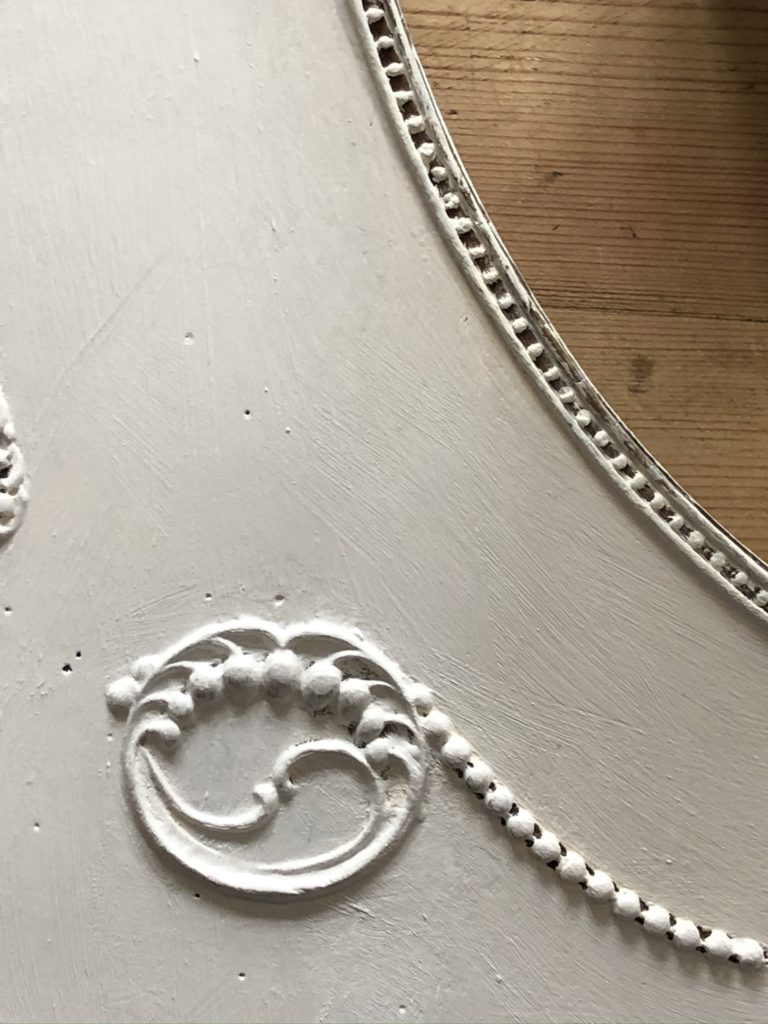
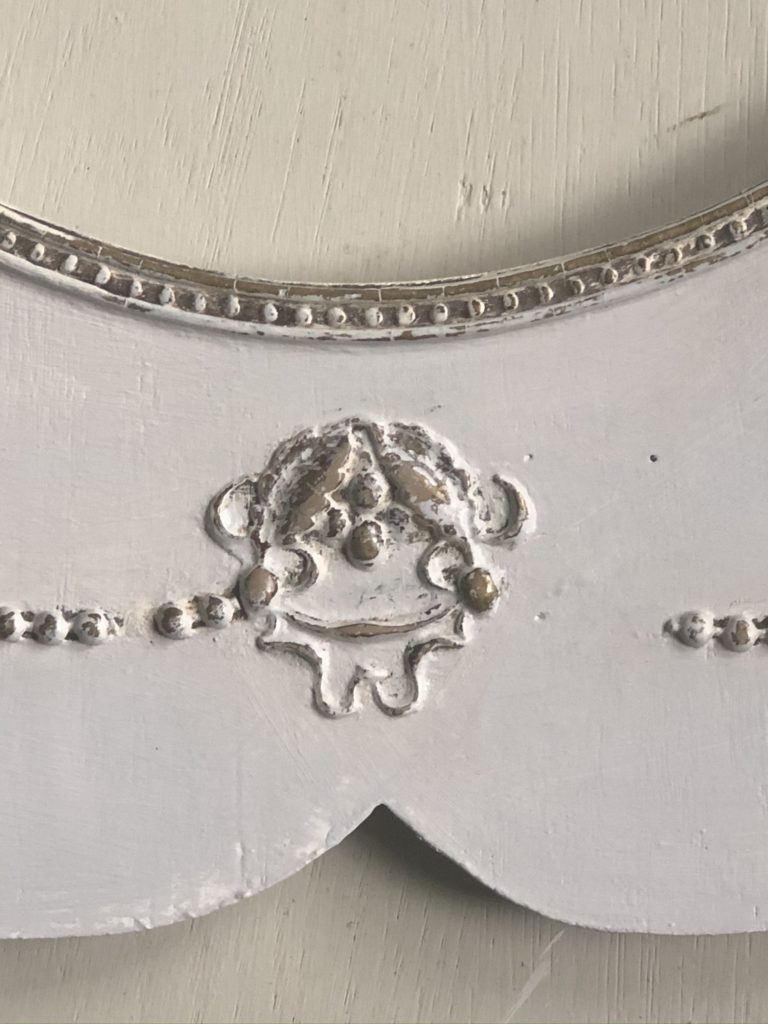
I primed the front of the frame in quarter sections each time using a damp rag (a torn cotton sheet worked well) to swiftly wipe over the raised detail revealing once again, the original gilt beading, since this is the part which would naturally become knocked and worn over time.
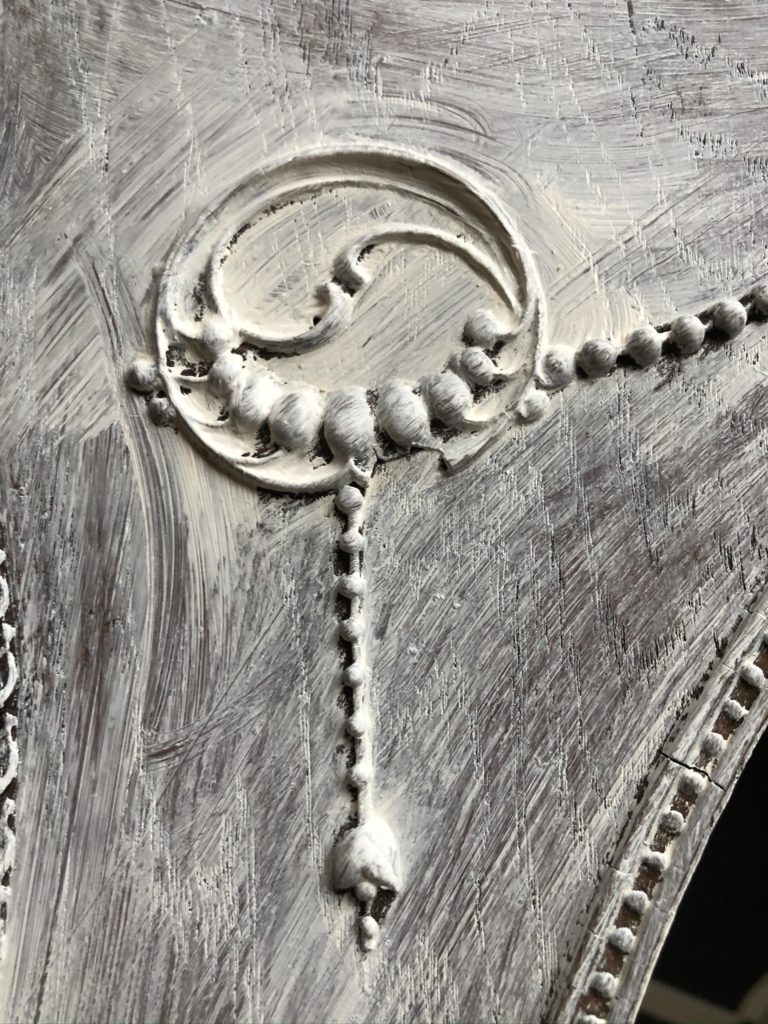
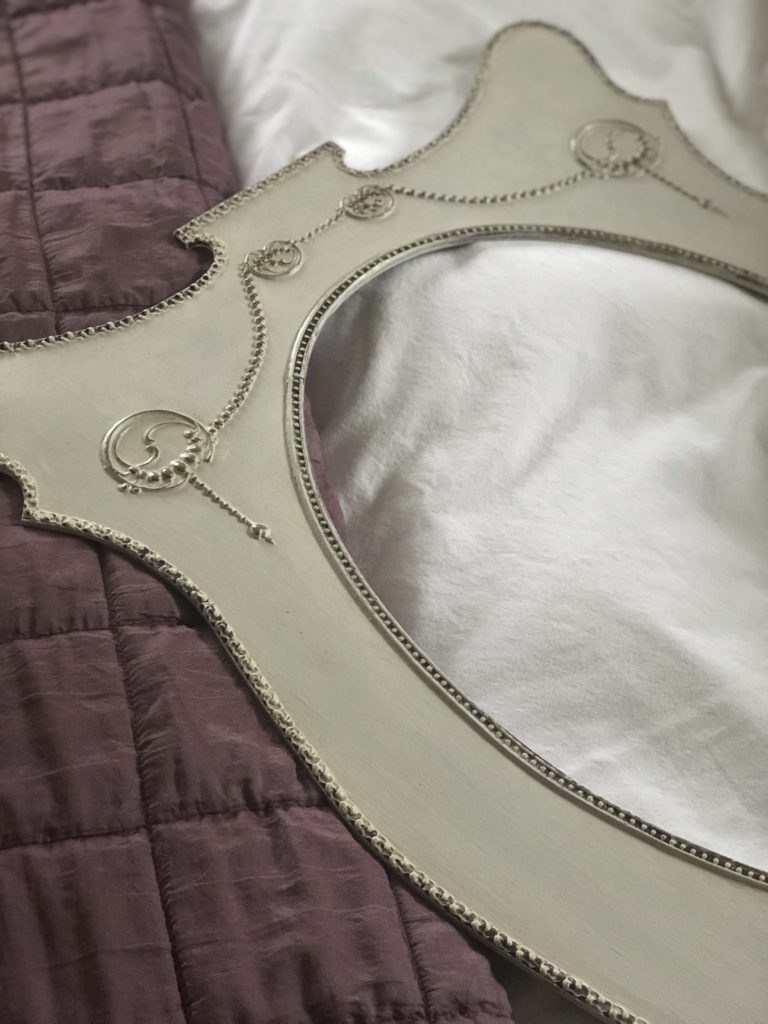
Once both primed sides were dry, I used this chalk paint and applied one coat to both sides of the frame, again working in quarters and again repeating the wet distressing technique. Perhaps because this paint has sat around a while in the garage, it felt particularly gloopy so for my second coat, I applied a thin watered-down layer. You know by now my creative style is not an exact science; it was simply a thin watery coat applied to the frame and removed from the gilt detail, in the same manner as before.
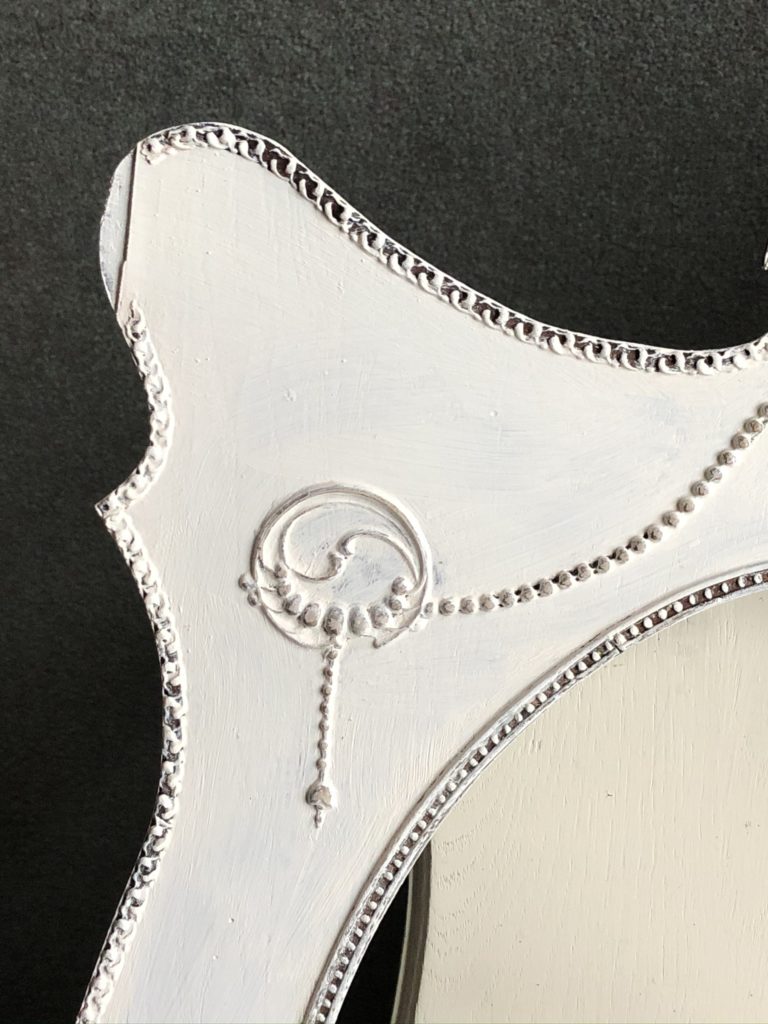
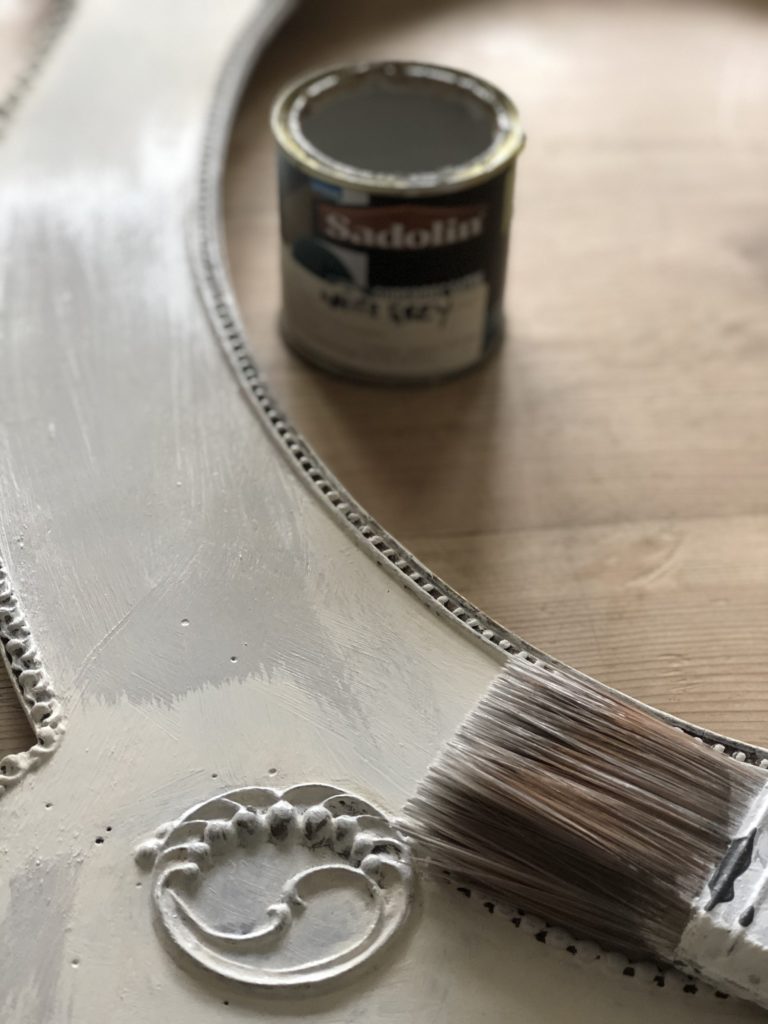
When the frame dried however I was rather disappointed. The finish was a little yellow and flat. I have used this chalk paint before on a blanket box which didn’t make the blog and I was and remain now, happy with the result. Perhaps it doesn’t store too well. No offensive smell though (which you can read about in this story should you fancy a giggle) just flat and lifeless. So, in an attempt to add oomph, I chose a leftover grey paint (not chalk paint) from the garage and applied a thin coat over the chalk white. Again I wiped away the grey from the gilt detail and continued wet distressing ever so lightly in a few areas on the wooden frame itself. Spot the woodworm…
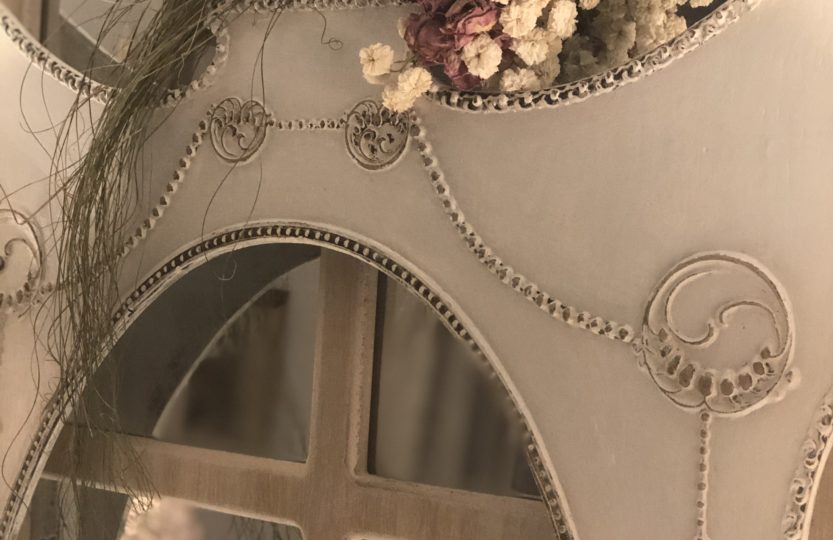
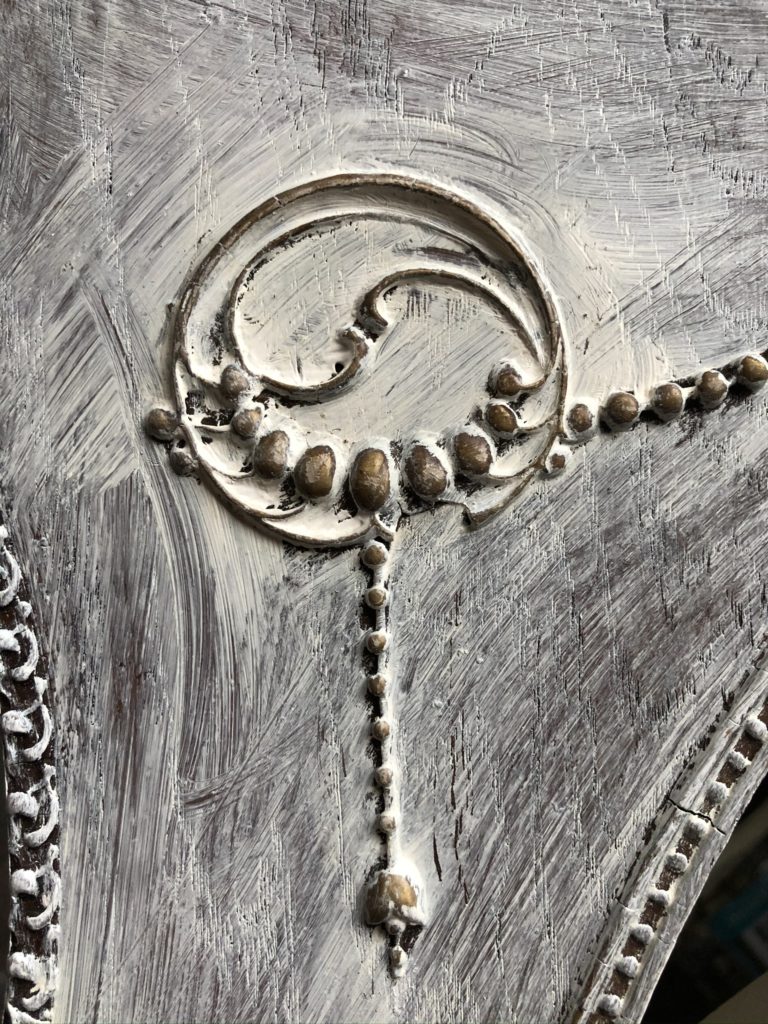
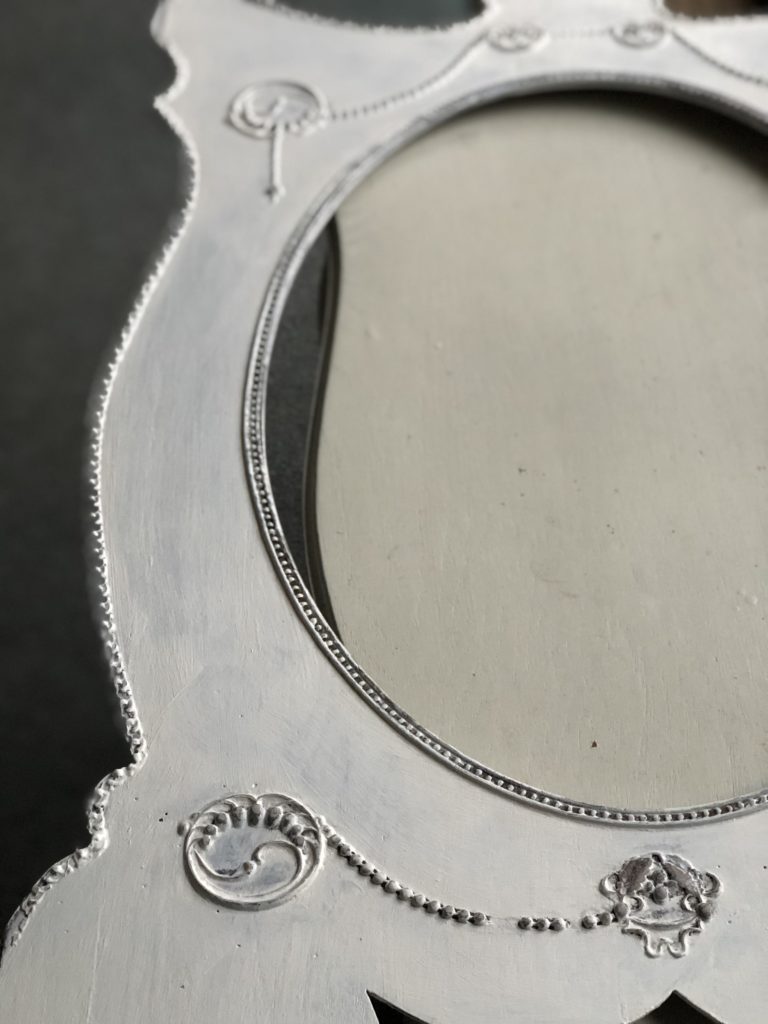
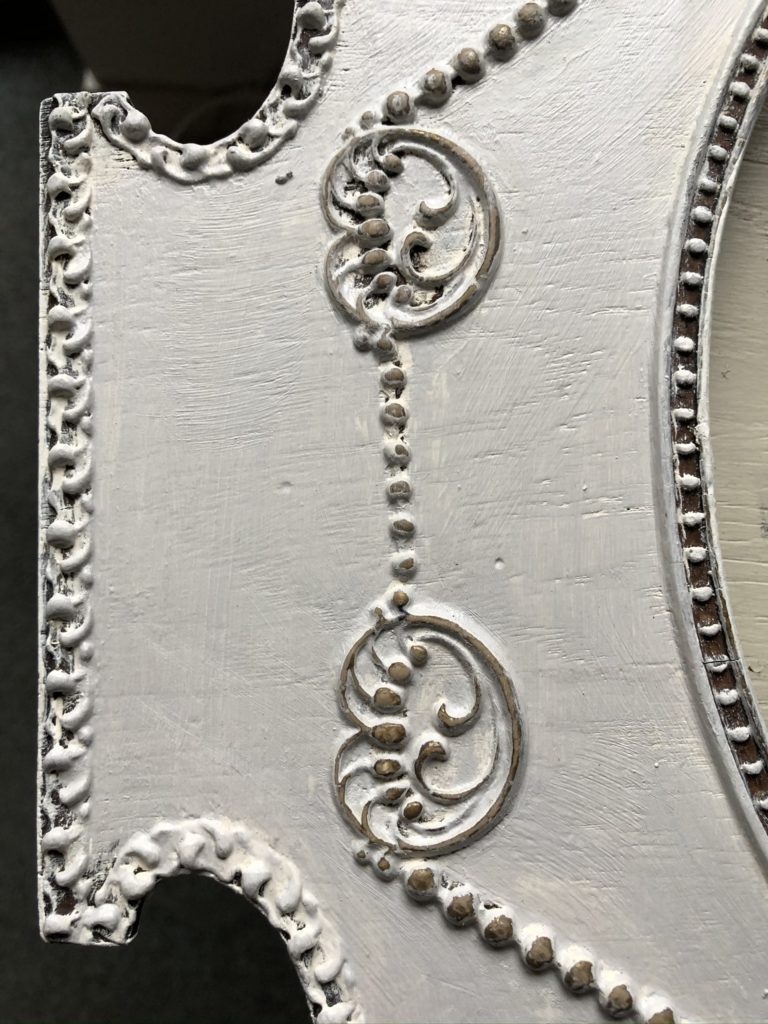
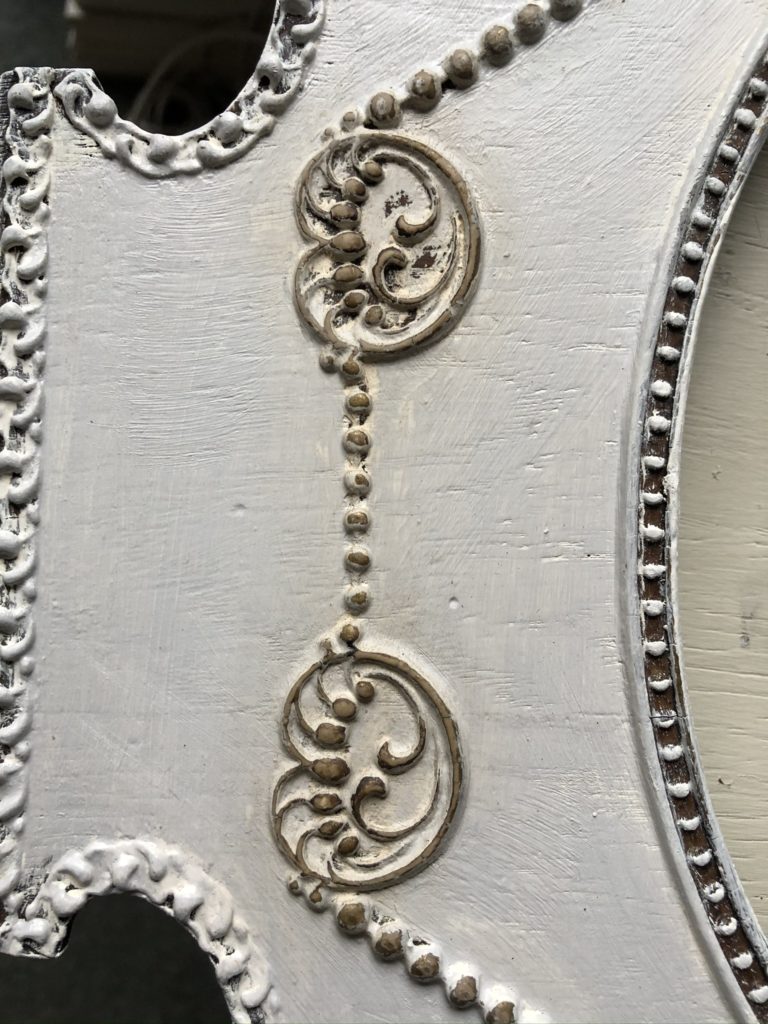
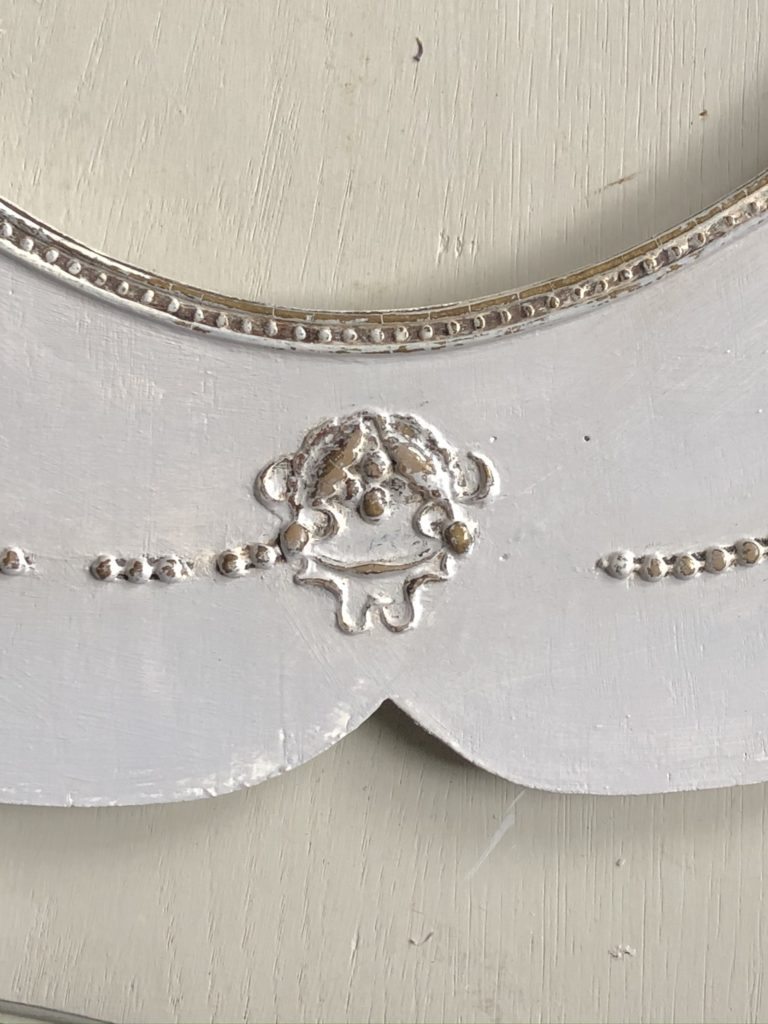
Happy with this result and once the frame was fully dry, it was time to highlight still further those pretty gilt details. To do this I simply dabbed this brush lightly in this dark wax and worked the wax in and around the raised detail repeating if I thought any areas needed to pop a little more. I used the dark wax only on the gilt detail. To protect the rest of the frame I used this wax and buffed the entire piece to a wonderful sheen. Top Tip: I have read about, although not yet tried this trick. If you use too much dark wax on your project, you can remove it with clear wax. An interesting idea as in the past I may have been a little heavy handed with the dark wax myself. These four photos show how the gilt details are enhanced further still by the dark wax…
I have a funny feeling this is about to become my new favourite way to up-cycle junk shop finds. Wet distressing painted furniture, ticked all the boxes for me: So fabulously simple, quick and easy was it, I felt sure I must have done something wrong. Not a scrap of sandpaper was needed, making the entire project totally doable in the home. Perfect for wet and grey days when your painting mojo is present, yet without the need to have to take yourself off to a cold damp garage or shed.
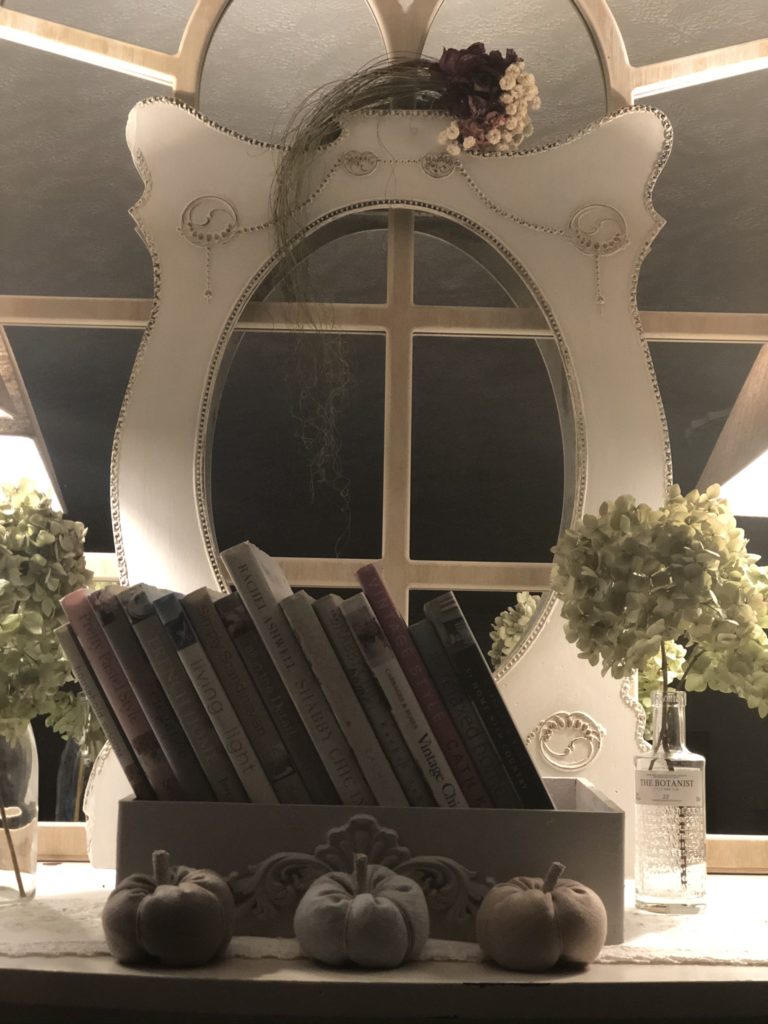
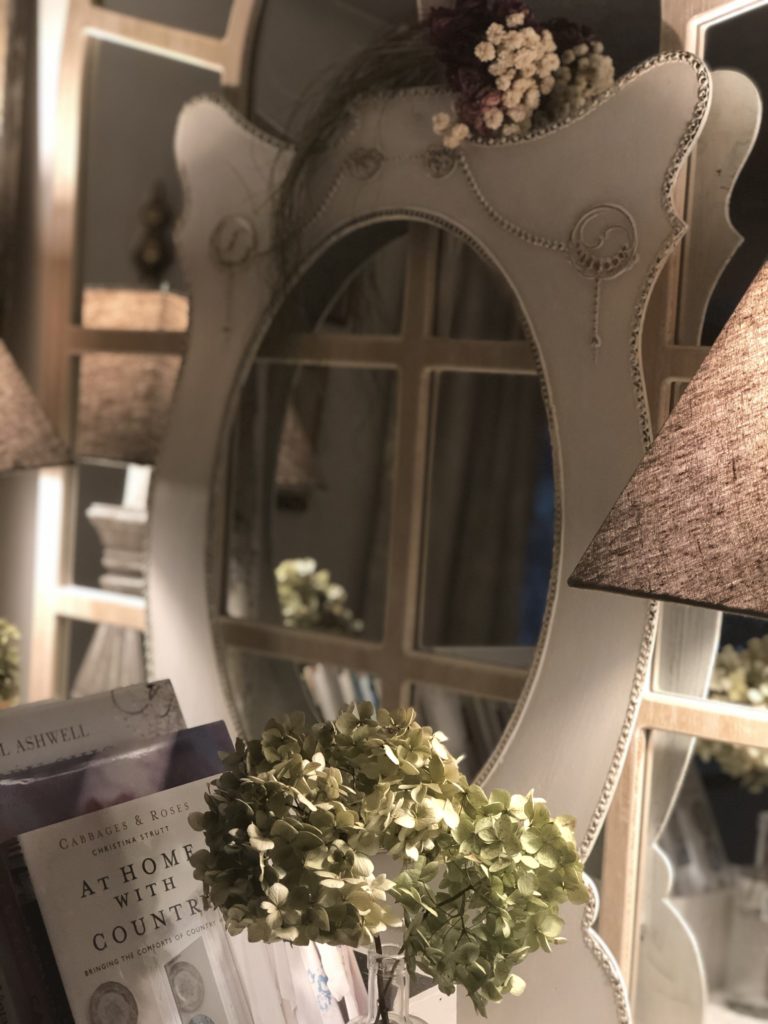
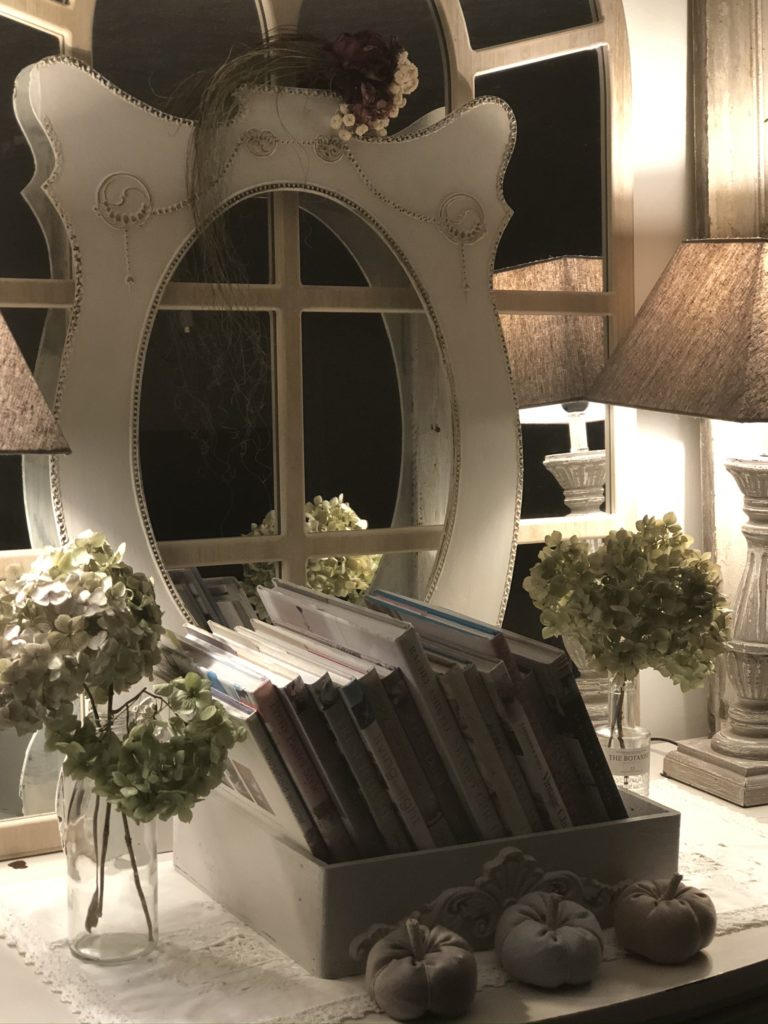
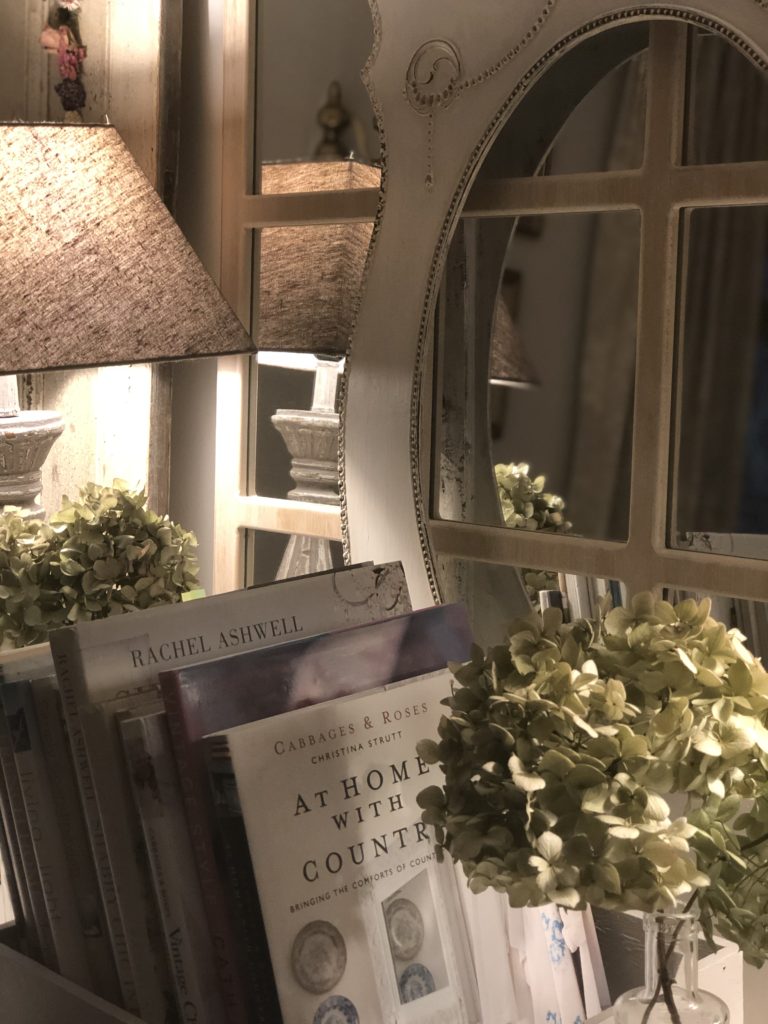
And here is my not-so-grotty frame in its new home. You’ll recall I am fast running out of space and layering is my answer. I couldn’t be happier and I hope Master M will be now the frame is minus the couple and not in his bedroom. What do you think?
Is wet distressing painted furniture something you could give a try? Any furniture, frames or even shelves in need of a spruce up in your home? There is perhaps just enough time before the festive season is upon us. Talking of which, next week begins a new seasonal mini-series, Four Fantastic Weeks of Festive Fun packed with plenty of ideas to help you prepare for your Christmas holiday. Doesn’t seem possible does it? Surely it was only yesterday I was sharing with you stories and photos from Belle and The Cottage Garden. Until next week…

One of my most read posts is a two part story where I show up-cycling and decoupage in the same furniture craft and tell how the project very nearly had a different ending… you can read about it here and here if you like


I could not believe how quick this project was. To be honest, with the heating on or on a warm sunny day, this could be achieved in a day on a piece this size. A real win in my book!x
Quick, simple and effective. It looks so pretty in your home. Lovely to catch up with you and your projects again. Xx
Ha ha very funny darling! I’m glad to see you’re thinking ahead like your mother!x
Another brilliant up-cycle! I’m very glad that you decided to remove the terrifying photo! May be worth saving for next years Halloween blog??
Hello Christine how lovely to see you in my comments box! It’s termed wet distressing since for this process, you are using a ‘wet’ medium (damp cloth in my case) to remove the paint from the desired spot whilst the paint is still wet too. Traditionally you would wait until your piece was thoroughly dry and then distress with sandpaper on your detail. The ‘dry’ method is much messier. I hope that helps, have a lovely week ahead!x
Will let you know😉… x
Oh I do wish you luck Alison and I would love to know how it goes. I truly found this to be the simplest method by far and less scary; if you wipe too much off you simply paint it back on. I love Helen’s work, I’ve been following her on Instagram for a while now, she’s far more experimental with her colours than me… good luck Alison and have a wonderful weekend!x
✨♥️… Love it Helen and this certainly won’t ‘spook’ master M now ( if it does then the frame will have to come and live with me😆) Helen @teamwatton67 gave me the clear wax tip when I had gone a little heavy handed with dark wax on a kitchen chair.. worked a treat although I’m still self critical of my painting ( confidence issue I think) Thank you once again for the ‘wet paint distressing’ tips, I plan to give it a go today on a window pelmet.. which has some detail… wish me luck 💫 ✨x
Hi dear Helen loved the finished frame and the layering but forgive me if I’m not getting but why is it called ‘wet distressing’ ?
I have been using a tinted wax for that effect for quite some years now. And even a tiny tube of gold paint rubbed on the edges or highlighted parts with my finger very sparsely of course xxx❤️
Ha Ha Mary Katherine that made me giggle, we’ve all got a few atrocities haven’t we? Out with the paint, that’s what I say! Thanks for stopping by and have a fabulous week x
Aww thanks Rach… I love the shape too and would definitely say you have the layering look off to a tee! Have a wonderful week ahead lovely!x
So pretty, what a luverly shape frame. And it’s a big yes from me for the layering look, I use it frequently!
How GORGEOUS did this turn out?!?!? Impressed indeed. May consider it to save some of my more horrible family heirlooms….
Absolutely perfect for us impatient souls… no more mucking around with sandpaper, why didn’t we know about this before? Lovely to see you in my comments box again Molly, hope all is well with you and yours x
Vile… did make me giggle Little Miss! I do love a good story as you know, wonderful I get to share them on here…x
Love it Helen, this is perfect for those of us that are a little impatient 😉 Xx
How rude is Master M?!? 😉
Love how you can make something quite vile into a unique beauty! You’re so talented Mum and the way you write is so authentic and real, it’s like I’ve picked up the phone and listened to you tell a story xxxx
I quite liked it originally too… just a little too dark for my dark sitting room! Cannot wait for tomorrow and am also excited to read you may indeed have a go yourself! Lots of love x
My memory of our lovely day out is now firmly placed in my sitting room Helen! This is a definite win for up-cycling in my book, glad you think so too! Have a lovely week ahead and thanks for being here!x
Well I quite liked the mirror in its original state! BUT I LOVE what you’ve done and it looks like something I might have to have a go at! Simple transformation! I’m sure we’ll get lots of ideas tomorrow too! 😉😘
Ooh I recognise that frame from our lovely afternoon of charity shop hunting. I’ve been using this method for a while with wet wipes ( I know they are not environmentally friendly I will use your method now😬) I cant believe how easy it is either, much less dust. It’s lovely to see the end result and in its ‘layered’ position .Another magnificent upcycle. X
Dear Chris, Thank you and I send a huge one back… xxxx I’m so happy you enjoyed the read, this is a ‘back to my roots’ type of project which I really enjoyed… have a lovely day today, which I just know you will!x
Inspiring as ever Helen!!! Love the result!!! Sending you a Christmas hug right now….🎄❤️🎄